
Remodeling your basement to include a bathroom is one of the smartest upgrades you can make to your home. It’s about more than just convenience; it's a game-changer that turns an often-forgotten area into a genuinely livable, functional part of your house. Suddenly, that basement can become a proper guest suite, the ultimate family rec room, or even a home gym.
Is a Basement Bathroom Remodel Really a Smart Move?
Absolutely. Adding a bathroom to your basement is a decision that pays off in both daily life and long-term property value. It fundamentally changes how your family uses that lower level, transforming a space that might just hold storage boxes and a washer/dryer into a true destination.
Think about it. Instead of a dim, unfinished area, you’re creating a self-contained living zone. This is perfect for so many scenarios:
- Hosting Overnight Guests: A basement with its own bathroom provides genuine privacy and comfort, making it feel like a real guest suite.
- Creating a Teen Hangout: Give your kids a space to call their own, complete with facilities so they’re not constantly running upstairs.
- Building a Home Office or Gym: Having a bathroom right there adds a huge layer of convenience that makes these spaces infinitely more practical.
Turning Potential into Real Value
Beyond the day-to-day perks, a basement bathroom remodel delivers a solid return on investment (ROI). A finished basement is already a great selling point, but adding a full or half bath pushes its appeal to a whole new level. It's a simple fact: homes with more bathrooms command higher prices and attract a bigger pool of buyers.
When it comes time to sell, a basement remodel that includes a bathroom can recoup over 60% of its cost. You're not just adding a bathroom; you're adding valuable, marketable living space to your home's total footprint.
Planning for a Smooth Transformation
While the benefits are huge, basement projects have their own set of rules. A successful renovation depends on getting a few key things right from the very beginning. You’ll need to tackle potential challenges like plumbing logistics, moisture proofing, and lighting to create a space that’s safe, comfortable, and built to last. A great first step is thinking about maximizing your basement's current space to see how a new bathroom can fit into the bigger picture.
This guide is designed to walk you through every critical decision. We’ll break down the complexities of basement plumbing, show you how to waterproof effectively, and help you design a layout that feels bright and airy—even when you're below ground. By facing these challenges with a clear plan, you can turn your basement into one of the best rooms in the house.
Solving Basement Plumbing and Ventilation Challenges
A successful basement bathroom remodel all comes down to solving two critical, below-grade challenges: plumbing and ventilation. Upstairs, gravity is your best friend, pulling water and waste down and away. But in a basement, you have to get creative to move everything up and out.
Getting these technical details right from the very beginning is the absolute foundation for a safe, healthy, and long-lasting space.
Defying Gravity With Modern Plumbing
Think of your home’s plumbing like a downhill slide. Water flows effortlessly from a higher point to a lower one, eventually reaching the main sewer line. The problem? Your new basement bathroom fixtures are almost always below that line. This is where conventional, gravity-fed plumbing hits a literal wall.
So, how do you get waste to flow uphill? The answer is a specialized pump system that essentially works like a water elevator. Instead of taking on the massive, costly job of jackhammering your concrete floor to create a new gravity drain, these modern systems manage the waste right where it’s created.
To give you a better idea of what your options are, let's compare the main solutions.
Basement Plumbing Options at a Glance
| Plumbing Solution | How It Works | Best For | Average Cost Impact |
|---|---|---|---|
| Up-Flushing (Macerating) Toilet | A pump and grinder are housed inside or behind the toilet. Waste is pulverized into a slurry and pumped up to the main drain line through a small-diameter pipe. | Adding a simple half-bath or when breaking up concrete is not an option. | Moderate |
| Sewage Ejector Pump | A sealed basin is installed below the floor level. Waste from a full bathroom (toilet, sink, shower) collects in the basin. When it's full, a pump kicks on and ejects the waste up to the sewer line. | Full bathrooms with a shower/tub. A more robust, permanent solution. | Higher |
| Conventional Gravity Plumbing | The concrete floor is excavated to create a trench. New drain pipes are laid with a proper downward slope to connect directly to the main sewer line. | New construction or when the main sewer line is already below the basement floor. | Highest (due to labor/demolition) |
Choosing the right system is a crucial first step that impacts your budget and construction timeline, so it's a key conversation to have with your contractor early on.
This decision tree can help you visualize whether a basement bathroom is the right move for your home based on value, function, and the space you have.
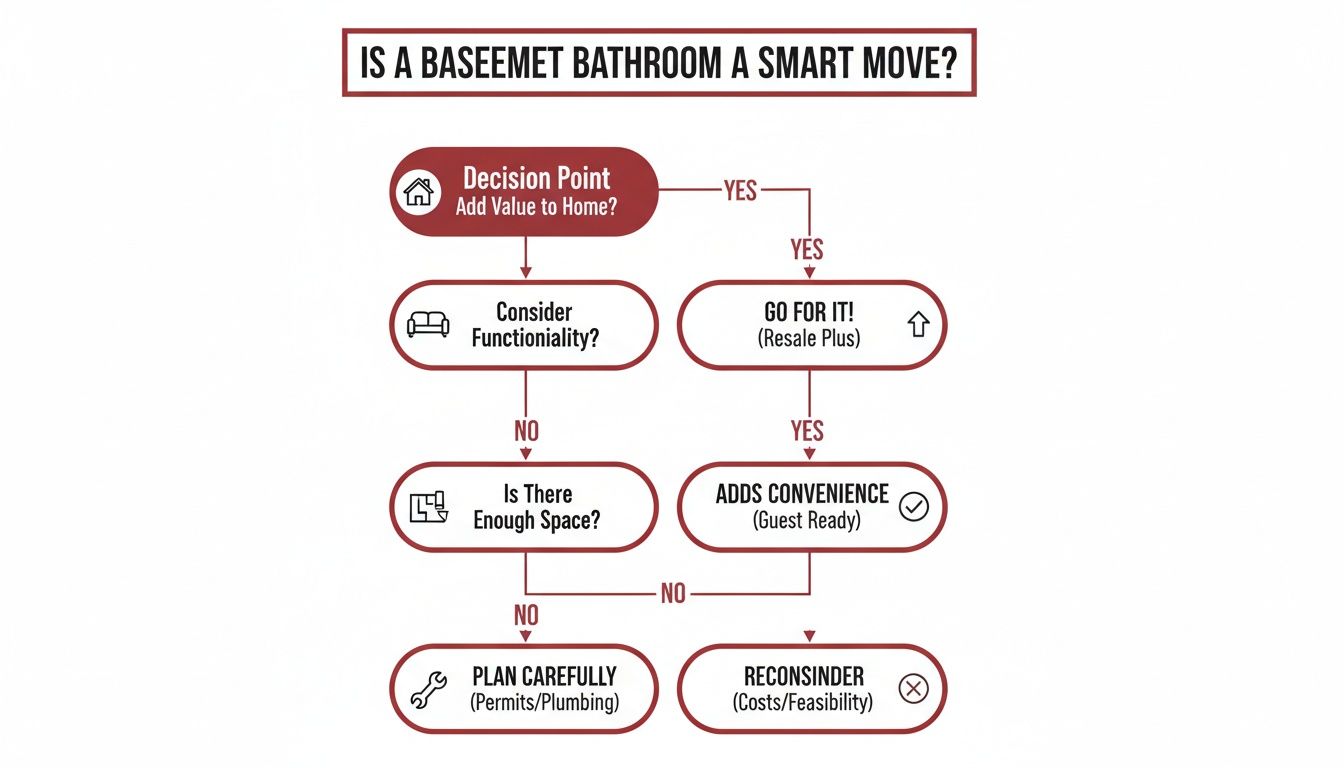
As you can see, the project makes the most sense when it fills a clear need for your family and adds measurable value to your home.
The Critical Importance of Airflow
Just as important as getting water out is getting moisture-laden air out. Basements are naturally prone to dampness, and adding a steamy shower into the mix without proper ventilation is a recipe for mold and mildew.
A simple, non-ducted fan from a big box store just won't cut it here. You need a high-powered exhaust fan that is properly ducted all the way to the outside of your home. This physically removes the humid air, preventing it from lingering and condensing on your new walls and ceiling. Investing in a properly sized fan isn't just a good idea—it's one of the most important things you can do for the long-term health of the space.
Building a Waterproof Barrier
Finally, you have to protect your new bathroom from moisture trying to get in from the outside. The best way to think about professional waterproofing is like giving your foundation a permanent, high-tech raincoat.
Before any framing or drywall goes up, a specialized waterproof membrane or coating is meticulously applied to the concrete walls and floor. This barrier stops groundwater and soil moisture from ever seeping into your finished bathroom. It’s an absolutely essential step that protects your entire investment from water damage and that chronic "basement smell."
Keeping your new space healthy is an ongoing priority. Should you ever face issues, knowing some effective tips for basement mold removal can be a lifesaver. By taking these steps, you ensure your beautiful new bathroom remains a comfortable retreat for years to come.
Let's Talk Money: Budgeting for Your Basement Bathroom
Alright, let's get right to the most important part of any remodel: the budget. Talking about money isn't always fun, but getting a handle on the numbers upfront is what separates a dream project from a stressful one. Think of your budget less as a set of handcuffs and more as a roadmap that guides every decision you’ll make.
It's easy to get caught up in the exciting stuff—the cool tile, the perfect vanity, the sleek faucet. But here's a secret from the pros: a huge chunk of your budget gets eaten up by the work that happens behind the walls. Plumbing, electrical, and labor are the real heavy hitters that make everything else possible.
So, what are we looking at? A typical basement bathroom addition can run anywhere from $15,000 to $35,000, and sometimes even more. That’s a pretty wide range, and it’s because the final price tag is a direct result of the scope of your project and the choices you make.
Where Does All the Money Go? A Cost Breakdown
To build a budget you can actually stick to, you have to know where your money is going. While every job has its own quirks, we can generally slice the pie into a few key categories. This is the stuff that will shape your total investment.
Here's a pretty standard breakdown of where the funds are allocated:
- Plumbing (20-30%): This is often the biggest wildcard. If you're lucky enough to tie into existing drain lines easily, you'll save a bundle. But if you need to break up concrete for a sewage ejector pump or install an up-flushing system, this line item will climb fast.
- Labor (20-25%): This is for the team of skilled pros—the plumbers, electricians, carpenters, and tile setters who bring it all to life. Don't skimp here. Quality craftsmanship is your best insurance policy for a bathroom that lasts.
- Fixtures (15-20%): This is your toilet, sink, vanity, shower, and all the faucets. A simple, pre-fabricated shower stall, for instance, is going to be worlds cheaper than a custom-tiled, curbless wet room.
- Finishes (15-20%): Think flooring, wall tile, lighting, paint, and all the little accessories that add personality. Your material choices here can swing the budget from modest to high-end in a hurry.
- Framing & Drywall (10-15%): This covers the cost of building the actual room—the walls, ceiling, and any little nooks or closets you have planned.
- Contingency Fund (10-15%): This one isn't optional. Always, always set aside an extra 10-15% of your total budget for surprises. Basements are notorious for them, whether it's an old pipe hiding in a wall or a hidden crack in the foundation.
It's Not Just a Cost, It's an Investment
It helps to stop thinking of this as just spending money. You're making a smart investment in your home by adding valuable, functional square footage and serious market appeal.
And the numbers back this up. According to the 2025 Cost vs. Value Report, a general basement remodel offers a fantastic 63.4% return on investment (ROI), making it one of the best home improvement projects you can take on. Adding a bathroom to that mix only sweetens the deal, turning what was once storage space into a feature that future buyers will love. You can dig into the numbers yourself by checking out the full report on remodeling ROI.
Key Takeaway: If you want to manage your budget smartly, put your money into the things that prevent future headaches. Spend what's necessary on solid waterproofing, good ventilation, and professional plumbing. You can always upgrade a faucet later, but you can't easily fix a leaky foundation.
Smart Ways to Keep Costs in Check
Sticking to a budget doesn't mean settling for a boring bathroom. It's all about making strategic choices that give you a high-end feel without the shocking price tag.
1. Keep the Layout Simple: The most budget-friendly design is one that lines up all your plumbing fixtures—toilet, sink, and shower—along a single "wet wall." This dramatically reduces the amount of complex and expensive pipework needed.
2. Get Close to Existing Plumbing: The shorter the distance your new pipes have to travel, the better. Try to position the new bathroom as close as you can to your home's main plumbing stacks and drain lines to cut down on both labor and material costs.
3. Opt for a Stock Vanity: A custom-built vanity is a beautiful luxury, but it comes with a hefty price. You can find amazing, high-quality stock vanities that will save you hundreds. Plus, you can easily give it a custom look with unique hardware or a new countertop down the line.
By focusing on these key areas, you can craft a realistic budget that works for you, and finally turn that basement bathroom dream into a reality.
Designing a Smart and Stylish Basement Bathroom
Now we get to the fun part: bringing your vision to life. Designing a basement bathroom is a unique opportunity. Sure, you might be dealing with lower ceilings, a lack of windows, or a stray support column, but these challenges often spark the most creative and impressive solutions.
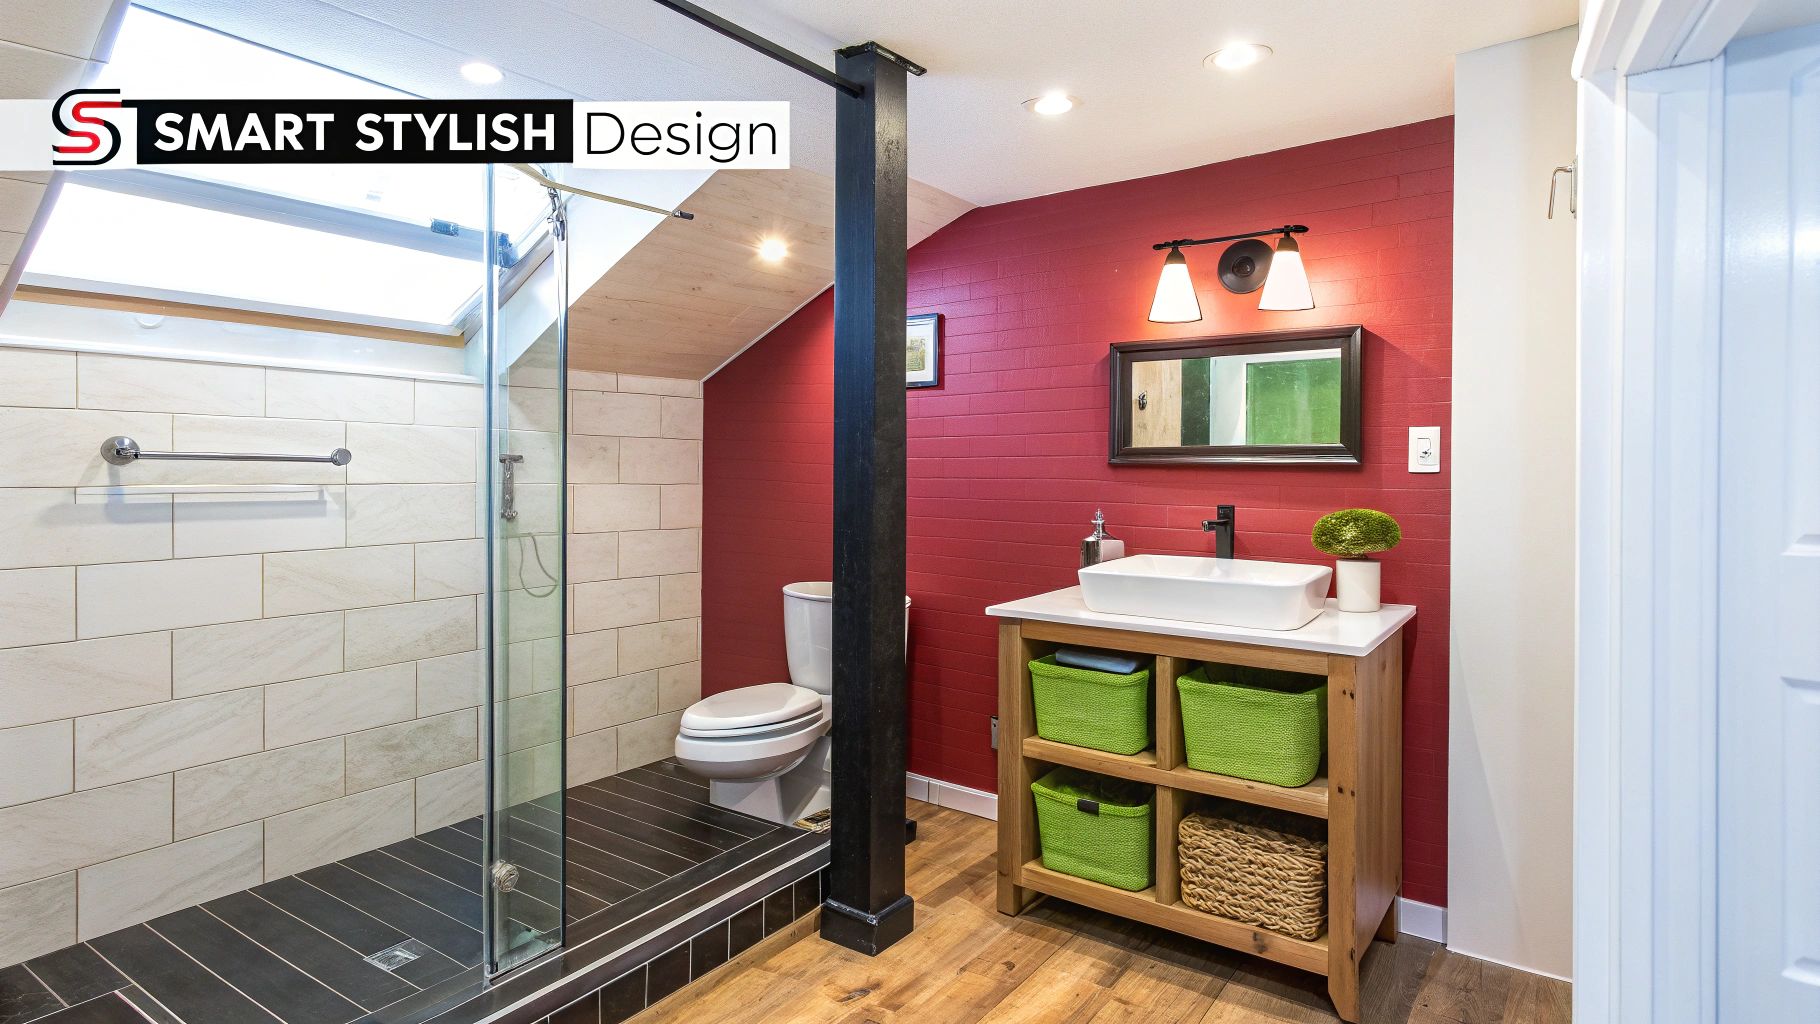
The real goal here is to craft a space that feels just as welcoming and thoughtfully designed as any other bathroom in your home. It’s all about smart planning. With a great layout, the right lighting, and a few clever visual tricks, you can turn a forgotten corner of your basement into a beautiful and functional oasis.
Maximizing Space with Smart Layouts
Downstairs, every single inch matters. Your layout is the absolute bedrock of a good design, so you need to be thinking about efficiency and flow right from the get-go. This isn't the place for sprawling, open-concept designs; basement bathrooms shine when they're built on smart, compact arrangements.
Here are a few layout strategies that really work in a basement setting:
- Linear Three-Piece: This is a classic for a good reason. By lining up the toilet, sink, and shower along a single "wet wall," you dramatically simplify the plumbing work. That means lower labor costs and fewer installation headaches.
- Corner Shower: A bulky rectangular shower can eat up your floor plan. A corner unit, especially one with a curved or neo-angle glass door, instantly opens up the room and makes it feel less cramped.
- Pocket or Barn Doors: Think about how a standard door swings open—it can claim nearly 10 square feet of usable space. A pocket door that disappears into the wall or a stylish barn door that slides alongside it are game-changers for tight quarters.
This focus on smart space is a major trend. With 26% of all renovations targeting bathrooms and 11% focusing on finishing basements, homeowners are looking for savvy ways to tackle both. Many are also choosing to remodel instead of move, with spa-like designs—including space-saving wet rooms—now appearing in 16% of bathroom renovations. You can explore more of these emerging remodeling trends for 2025 to get inspired.
Overcoming Darkness with Layered Lighting
Let's be honest: the biggest design hurdle in any basement is the lack of natural light. The secret to making the space feel bright and airy isn't a single, powerful light bulb. It's a layered lighting approach, using different types of fixtures to wash the room in light from multiple angles.
Think of it like you're painting with light. One lonely fixture in the middle of the ceiling will just cast harsh shadows and make the room feel squat. To create depth and warmth, you need a plan.
Pro Tip: Put every single light on a dimmer switch. This is a non-negotiable. It gives you the power to go from bright and energizing for your morning routine to soft and relaxing for an evening soak. You get total control over the atmosphere.
A great layered lighting plan always includes these three elements:
- Ambient Lighting: This is your main, all-over light source. Recessed "can" lights are your best friend in a basement because they sit flush with the ceiling and don't eat up any of that precious vertical space.
- Task Lighting: This is for getting things done. The most critical spot for task lighting is at the vanity mirror. Sconces placed on either side of the mirror will give you even, shadow-free light for shaving or putting on makeup.
- Accent Lighting: You absolutely need a waterproof recessed light inside the shower. It's a huge safety booster, and it makes the shower feel like an intentional part of the design instead of a dark, forgotten cave.
Design Tricks to Create an Illusion of Space
With your layout and lighting sorted, you can start using visual magic to make the bathroom feel even bigger than it is. The right colors, materials, and fixtures can absolutely fool the eye into seeing a more open, expansive space.
One of the most powerful tools in your design kit is a floating vanity. By mounting the cabinet directly to the wall, you leave the floor visible underneath. This simple trick instantly makes the room feel larger and, as a bonus, makes it a breeze to clean.
Here are a few more tried-and-true strategies:
- Go Big with Mirrors: A large, unframed mirror is a classic for a reason. It visually doubles the size of the room by reflecting both light and space.
- Stick to Light Colors: Painting the walls and ceiling in a single, light color—like a soft white, pale gray, or even a light sky blue—makes the space feel cohesive and boundless.
- Use Glass Shower Enclosures: Ditch the shower curtain. A clear, frameless glass door allows your line of sight to travel all the way to the back wall of the shower, making the entire bathroom feel deeper and more spacious.
- Embrace Glossy Finishes: Choose glossy or polished tiles for the walls or a semi-gloss paint. These reflective surfaces bounce light around the room, which helps brighten things up and create a sense of depth.
Your Step-by-Step Remodeling Roadmap
A basement bathroom remodeling project can feel like a huge undertaking, but it’s a lot less intimidating when you break it down into a logical sequence. Knowing the roadmap from start to finish clears up the mystery, cuts down on stress, and keeps you in the driver's seat. Think of it as a well-planned journey—every task gets done in the right order, paving the way for a smooth, successful finish.
The real work starts long before the first hammer swings. The first phase is all about careful planning and prep, which lays a solid foundation for everything that follows.
Phase 1: Pre-Construction and Preparation
Honestly, the success of your remodel is pretty much decided right here. This is where your vision gets translated into a real plan, all the necessary permits are secured, and the site is prepped for the transformation. Rushing this stage is a classic mistake that almost always leads to costly errors and delays.
This crucial phase includes a few key steps:
- Design and Consultation: You'll work closely with your contractor to lock in the layout and select every last finish—from the vanity and tile right down to the grout color. You'll sign off on a detailed scope of work so everyone is on the same page.
- Securing Permits: Your contractor handles submitting the plans to your local municipality to get the required building permits. This isn't optional; it’s what ensures your new bathroom is safe and built to code.
- Ordering Materials: Once designs are set, all the long-lead items are ordered. Things like custom vanities, special-order tile, or unique fixtures need to be ordered now to make sure they arrive when needed.
Phase 2: Demolition and Rough-Ins
With permits in hand, the physical work can finally begin. This stage can look a bit chaotic, but it’s where the bones of your new bathroom start to take shape behind the walls.
First, the crew will demolish any existing structures to create a blank slate. If you’re starting from scratch, this involves cutting into the concrete slab for the new plumbing drains. Next up are the “rough-ins,” which is the trade term for installing all the new infrastructure before the walls are closed.
This means running new plumbing lines for the toilet, sink, and shower. It also includes installing all the electrical wiring for lights, outlets, and that all-important exhaust fan.
A professional contractor will always schedule a "rough-in inspection" at this point. A city inspector has to come out and approve the new plumbing and electrical work before any drywall goes up. This is a critical checkpoint for the safety of your home.
Phase 3: Closing Walls and Waterproofing
Once the vital systems are inspected and approved, the space starts to look less like a construction site and more like an actual room. This is a big visual step where the structure really comes together.
The process follows a specific order for good reason:
- Insulation and Drywall: First, insulation goes into exterior walls and between studs (great for soundproofing). Then, moisture-resistant drywall—often called "green board"—is hung.
- Waterproofing: This is one of the most important steps in the entire project. A liquid-applied waterproof membrane is meticulously painted onto the shower walls and floor, creating a seamless, watertight barrier that will prevent leaks and mold for years to come.
Phase 4: Finishes and Fixture Installation
And now for the fun part! This is where all your design choices come to life and the bathroom’s personality finally emerges. The focus shifts from heavy construction to fine craftsmanship as all the visible elements are installed with precision.
The finishing sequence is carefully planned to avoid damaging anything. It usually starts with tile installation for the floor and shower walls, followed by grouting and sealing. After that, the crew will paint the walls and ceiling.
With the main surfaces done, the big fixtures are brought in. The vanity and countertop are set, the toilet is installed, and the shower fixtures and glass doors are fitted. The last touches—lighting, mirrors, and faucets—go in at the very end, completing the transformation of your basement into a beautiful, functional new space.
How to Hire the Right Contractor for the Job
Choosing your contractor is easily the most critical decision you'll make for your basement bathroom remodeling project. This isn't just about finding someone who can hang drywall and install a vanity. You’re looking for a partner who truly understands the specific challenges that come with working below ground, from tricky plumbing solutions to preventing moisture problems down the road.
A great contractor is more than just a builder; they're your project manager, your guide through the maze of permits, and your quality control specialist, all rolled into one. The right pro is the difference between a project that runs smoothly and a nightmare of unexpected costs and delays. Your goal is to find someone with a proven track record in basements who can bring your vision to life safely and correctly.
Your Contractor Vetting Checklist
Before you start talking about tile patterns or paint colors, you need to do some essential homework on any contractor you're considering. This vetting process is your first line of defense against unqualified or uninsured operators. A true professional will expect these questions and have the answers ready.
- Proper Licensing: Verify they hold all the required state and local licenses. This is your proof that they’ve met the minimum standards for knowledge and ethical practice in your area.
- Comprehensive Insurance: Ask to see current certificates for both liability insurance and workers' compensation. Liability protects your home in case of damage, and workers' comp protects you from being financially responsible if one of their crew members gets hurt on your property.
- A Portfolio of Similar Work: You don't want your basement to be their practice run. Ask to see a portfolio with clear examples of below-grade bathrooms they’ve completed. This shows they've successfully navigated the unique challenges before.
A detailed, itemized quote is the sign of a true professional. Vague, one-page estimates are a major red flag, as they can easily hide future "surprise" costs. Insist on a breakdown of labor, materials, and fixtures.
Key Questions to Ask Potential Hires
Once you have a shortlist of a few contractors who check all the boxes, it's time to have a real conversation. How they answer these questions will tell you everything you need to know about their experience, communication style, and how they run their business.
- How do you handle unforeseen issues? Basements are famous for uncovering surprises, like a hidden pipe where the shower should go or an unexpected crack in the foundation. A seasoned pro will have a clear system for documenting the problem, explaining your options, and getting your written approval through a change order before proceeding.
- Who will be my main point of contact? Knowing who to call when you have a question is crucial. Will you be talking directly to the owner, a dedicated project manager, or the on-site foreman? A clear line of communication prevents misunderstandings.
- What is your projected timeline and payment schedule? A professional should be able to give you a realistic start and end date in writing. The payment schedule should also be clearly laid out and tied to completed project milestones—never agree to pay large sums of money upfront.
Got Questions About Basement Bathrooms? We've Got Answers.
When you start thinking about adding a bathroom to your basement, a lot of questions pop up. It’s a smart move to get these sorted out early, so you can plan your project with confidence and avoid any surprises down the road.
How Much Value Does a Basement Bathroom Really Add?
A basement bathroom is a huge plus for your home's value. It transforms a basic basement into truly functional living space. While the exact return on investment can fluctuate, you can generally expect to see a return of over 60% on your remodeling costs.
Even more importantly, a home with an extra bathroom—especially one that supports a guest suite or entertainment area—is a much easier sell. It can make all the difference to potential buyers, often leading to a quicker sale and a better price.
Can I Put a Bathroom Anywhere I Want in the Basement?
Technically, you can, but it's not always practical or cost-effective. The smartest place is almost always near your home's existing plumbing and drain lines. Tapping into what's already there saves a ton of money and labor.
The ideal spot is often right below an existing upstairs bathroom. Your contractor will also need to check the ceiling height, figure out the best path for ventilation, and make sure the location meets all local building codes.
Do I Need a Special Kind of Toilet for a Basement?
It's very likely. If your basement floor sits lower than your main sewer line—which is common—a standard toilet just won't work without tearing up your concrete floor. The go-to solution here is an up-flushing toilet, sometimes called a macerating toilet. It uses a grinder and a pump to move waste up to the main drain line, saving you from a major, messy, and expensive excavation project.
How Do I Keep Mold and Moisture Out of My New Bathroom?
This is one of the most critical parts of a basement project, and it comes down to two things: proper ventilation and solid waterproofing. These aren't areas where you want to cut corners.
You'll need a powerful exhaust fan that vents directly outside to pull all that humid air from showers out of the space. Before any framing even begins, your contractor should waterproof the foundation walls and floor to create a bulletproof barrier against moisture seeping in. This protects your investment and keeps your new bathroom healthy and damage-free for years to come.
Ready to turn your basement into a beautiful and functional space? The team at Trademaster Construction has the expertise to guide you through every step of your remodeling journey in Southwest Michigan. Explore our Inspiration Gallery and use our Pricing Tool to get started today.

