
That unfinished basement represents a significant, untapped asset in your home, a blank canvas with the potential to become functional, comfortable living space. For many homeowners in Southwest Michigan, from Kalamazoo to Portage, the primary obstacle isn't a lack of vision but a concern for the cost. The good news is that a stunning basement transformation doesn't require a six-figure budget. With strategic planning and clever material choices, you can achieve a high-impact renovation without overspending. This guide is designed to provide practical, actionable basement finishing ideas on a budget, moving beyond generic advice to offer specific, cost-effective solutions.
We'll explore ten distinct strategies that deliver maximum value, from industrial-chic painted concrete walls to versatile drop ceilings and affordable yet stylish laminate flooring. You will learn how to define separate living zones using area rugs, create functional storage with pegboard walls, and build a unique basement bar from repurposed materials. We will cover the essentials of moisture control for our region's specific climate, the pros and cons of DIY versus professional installation, and how smart lighting can completely alter the feel of your subterranean space.
This comprehensive list breaks down each idea, providing implementation tips and insight into how you can add square footage and value to your home. Whether you're dreaming of a cozy family room, a dedicated home office, or a functional playroom for the kids, these budget-friendly approaches will help you unlock your home's hidden potential. Let's get started.
1. Paint and Primer Combo on Concrete Walls
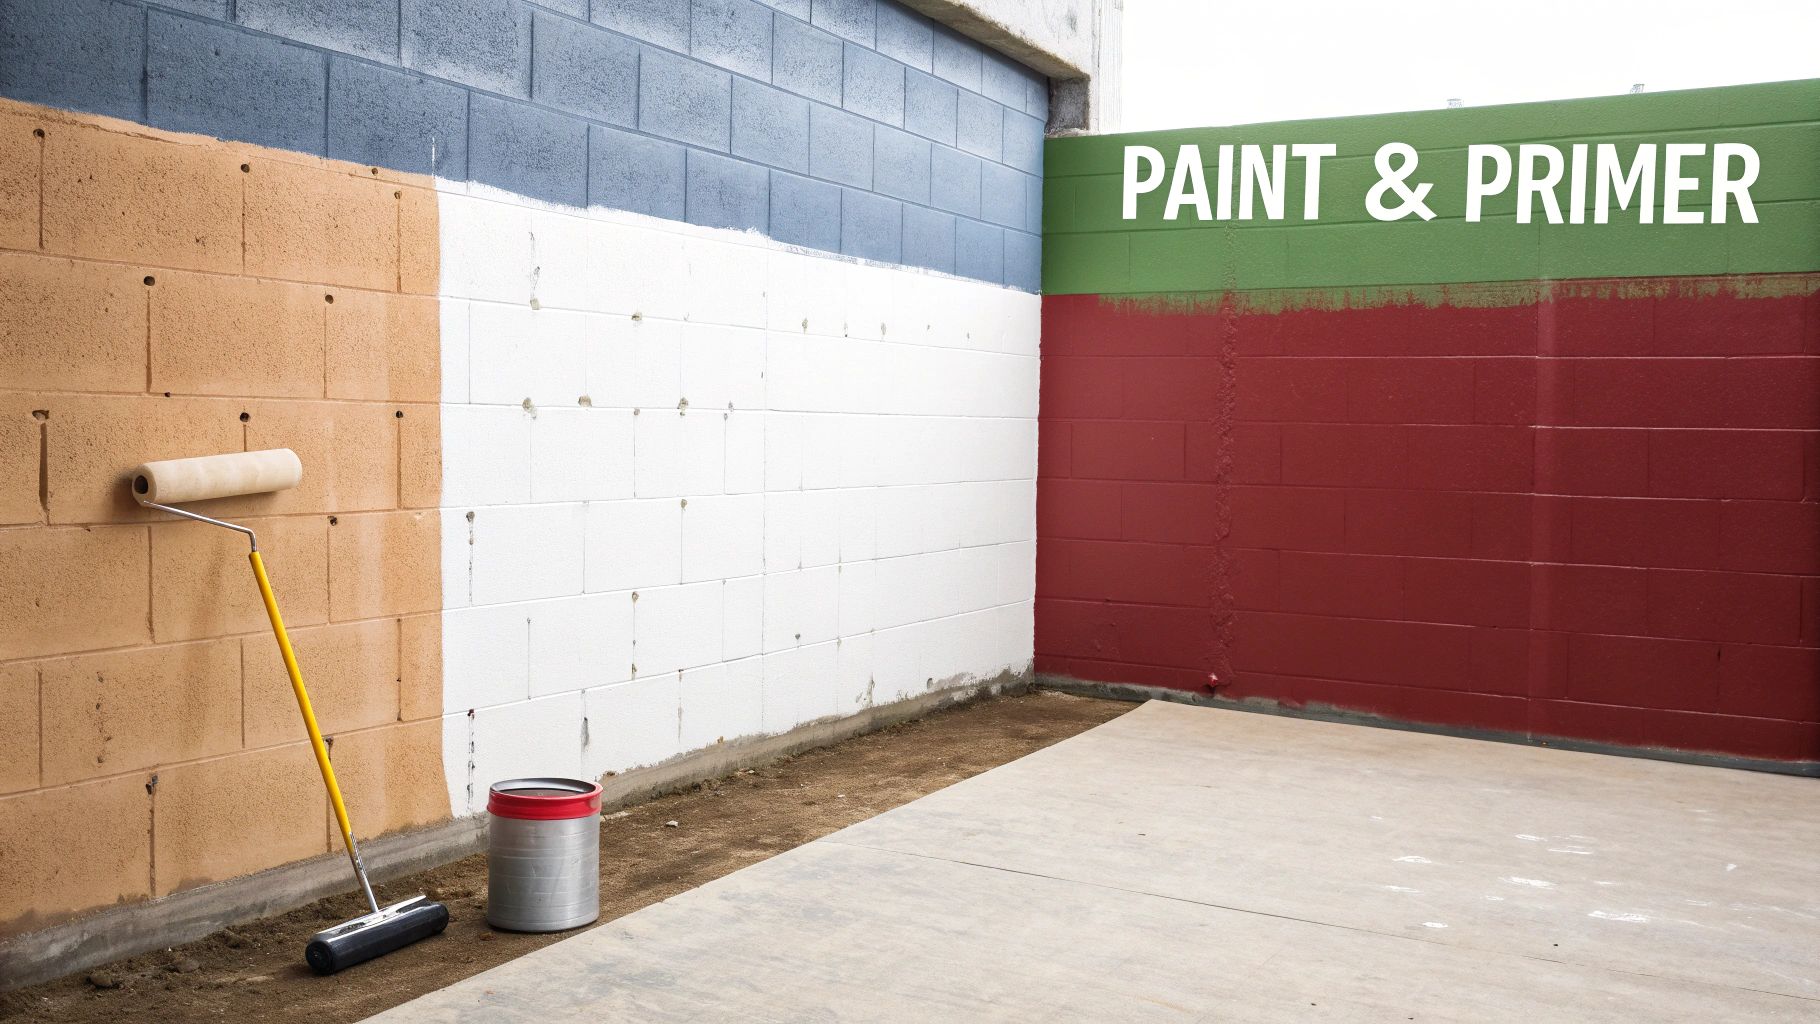
One of the most effective basement finishing ideas on a budget involves skipping the drywall altogether and applying a high-quality paint and primer combo directly to the concrete walls. This industrial-chic approach not only saves thousands on materials and labor but also creates a clean, bright, and moisture-resistant surface perfect for a functional living space. Instead of framing, insulating, and hanging drywall, you work with the existing structure for a minimalist yet polished look.
This method seals the porous concrete, helping to prevent minor moisture seepage and musty smells common in Southwest Michigan basements. The result is a durable, easy-to-clean finish that feels intentional and modern, similar to the aesthetic seen in commercial loft conversions or popular home renovation shows.
Why It's a Top Budget-Friendly Choice
The primary benefit is cost-effectiveness. By eliminating drywall, you cut out expenses for lumber, insulation, drywall sheets, tape, mud, and the specialized labor required for installation and finishing. This can reduce your wall finishing budget by 70% or more, allowing you to allocate funds to other areas like flooring or lighting. It's an ideal solution for homeowners seeking a quick transformation or a foundational first step in a phased basement remodel.
Actionable Steps for Success
For a professional-looking and long-lasting finish, proper preparation is key. Follow these steps for the best results:
- Thorough Cleaning: Begin by scrubbing the concrete walls with a wire brush and a concrete-safe degreaser or a simple solution of trisodium phosphate (TSP) and water. This removes efflorescence (white, powdery salt deposits), dirt, and oils that prevent paint from adhering properly.
- Moisture Check: Before painting, tape a 1×1 foot square of plastic sheeting to the wall, sealing all four sides. If condensation forms under the plastic after 24 hours, you may have a more significant moisture issue that requires a dedicated waterproofing sealant before priming.
- Choose the Right Product: Use a paint specifically formulated for masonry and concrete, such as Benjamin Moore Basement & Masonry Paint. These products are designed to bond with the concrete and offer superior resistance to moisture and alkali.
- Apply Multiple Thin Coats: For even coverage and maximum durability, apply one coat of a quality concrete primer followed by at least two thin coats of your chosen paint, allowing ample drying time between each application.
2. Drop Ceiling Installation with Recessed Lighting
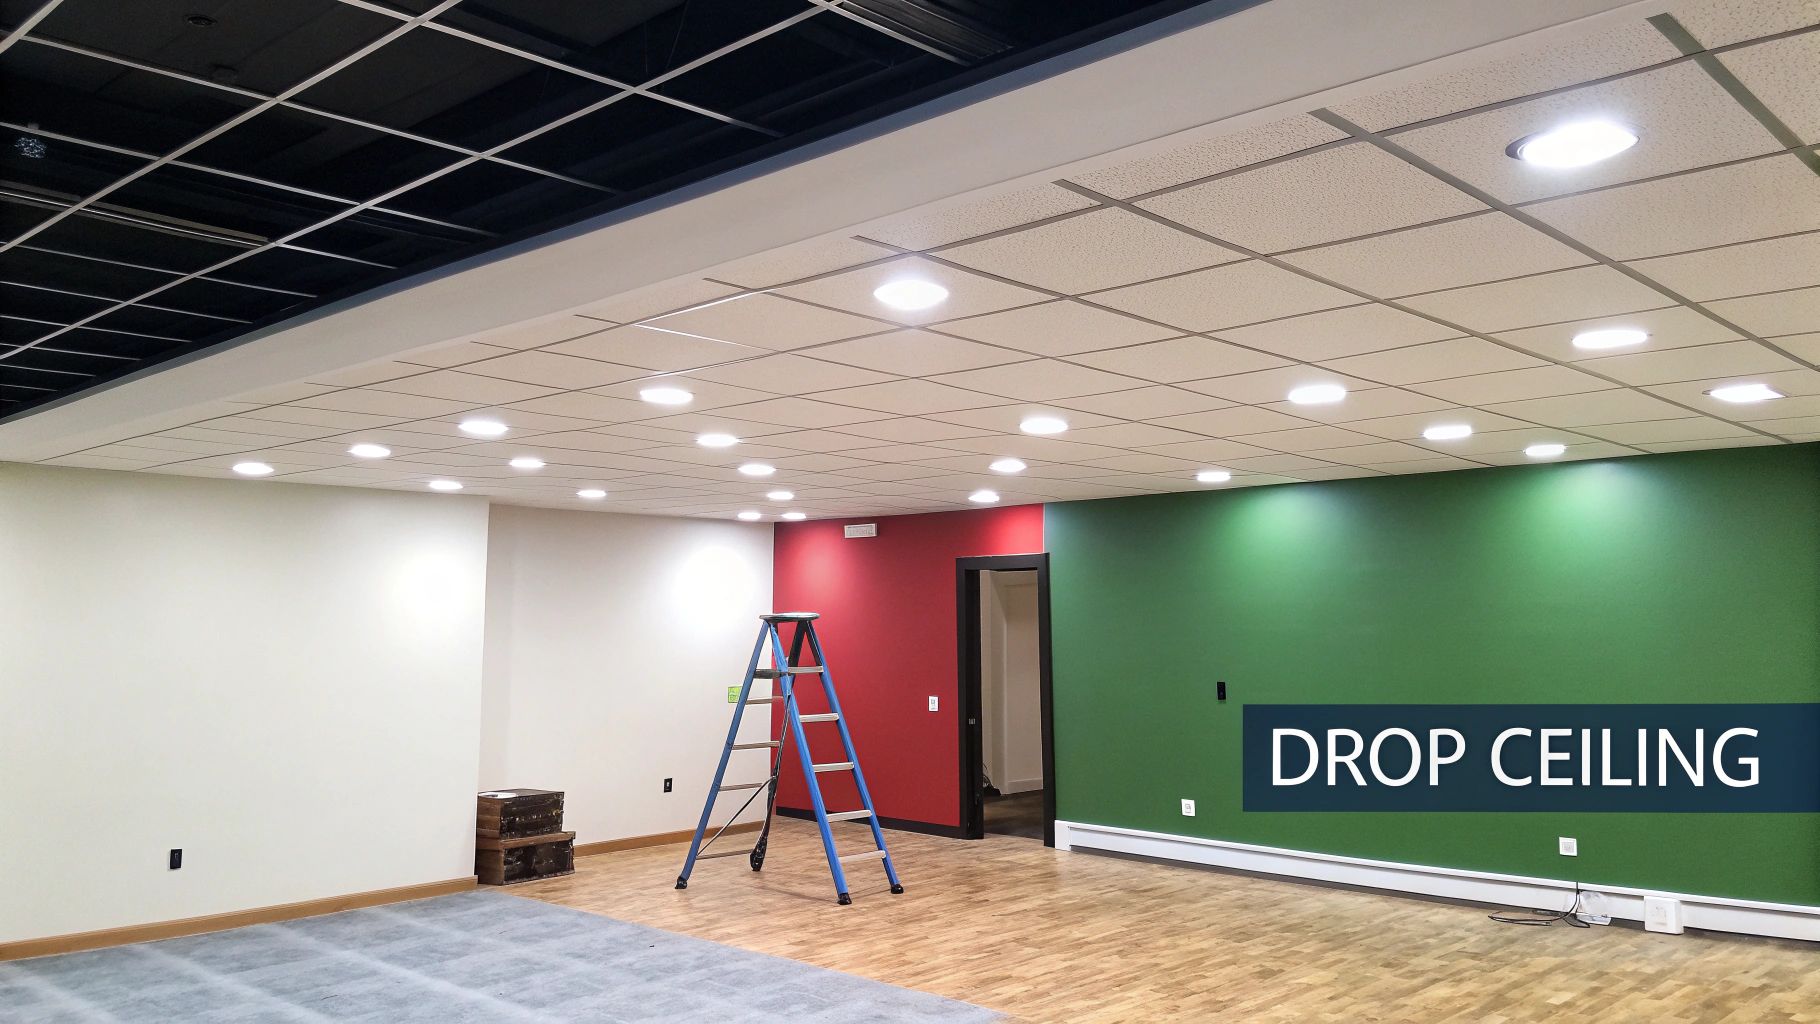
A suspended or "drop" ceiling is a classic, cost-effective solution for finishing a basement ceiling. This system uses a lightweight metal grid to support acoustic tiles, cleverly concealing unattractive pipes, ductwork, and wiring while providing easy access for future maintenance or repairs. Combining this with modern, energy-efficient recessed LED lighting creates a bright, clean, and finished look without the high cost and labor of framing and drywalling a ceiling.
This approach offers a practical and aesthetically pleasing finish that can significantly elevate a basement's feel, moving it from a utility area to a genuine living space. The variety of available tile styles, from simple flat panels to more decorative coffered looks, allows for customization to match your desired decor, making it a versatile choice for any basement finishing ideas on a budget.
Why It's a Top Budget-Friendly Choice
The primary advantage of a drop ceiling is its affordability compared to a traditional drywall ceiling. The materials, including the grid system and tiles from brands like Armstrong, are significantly less expensive than lumber and drywall sheets. Furthermore, installation is a highly achievable DIY project for a handy homeowner, eliminating the need to hire professionals for framing, hanging, taping, and mudding, which saves thousands in labor costs. The ability to easily replace a single damaged or stained tile also makes long-term maintenance cheaper and simpler.
Actionable Steps for Success
Proper planning and installation are crucial for a professional and level ceiling. Follow these steps for the best outcome:
- Measure Ceiling Height: Before you begin, ensure you have adequate height. A finished basement ceiling should be at least 7 feet high to meet building codes and feel comfortable. A drop ceiling typically lowers the height by 3-6 inches.
- Choose Moisture-Resistant Tiles: For basements in Southwest Michigan, which can be prone to dampness, opt for tiles specifically rated for high-humidity environments. This helps prevent sagging and mold growth over time.
- Plan Your Lighting Layout: Integrate lightweight recessed LED lights designed for drop ceilings. Map out their placement on your grid plan before installation to ensure even, effective lighting throughout the space.
- Paint the Grid: For a more seamless and modern look, consider spray painting the metal grid system to match the tiles or your wall color before you install it. A matte black or white finish can dramatically improve the final appearance.
3. Laminate Flooring Over Concrete
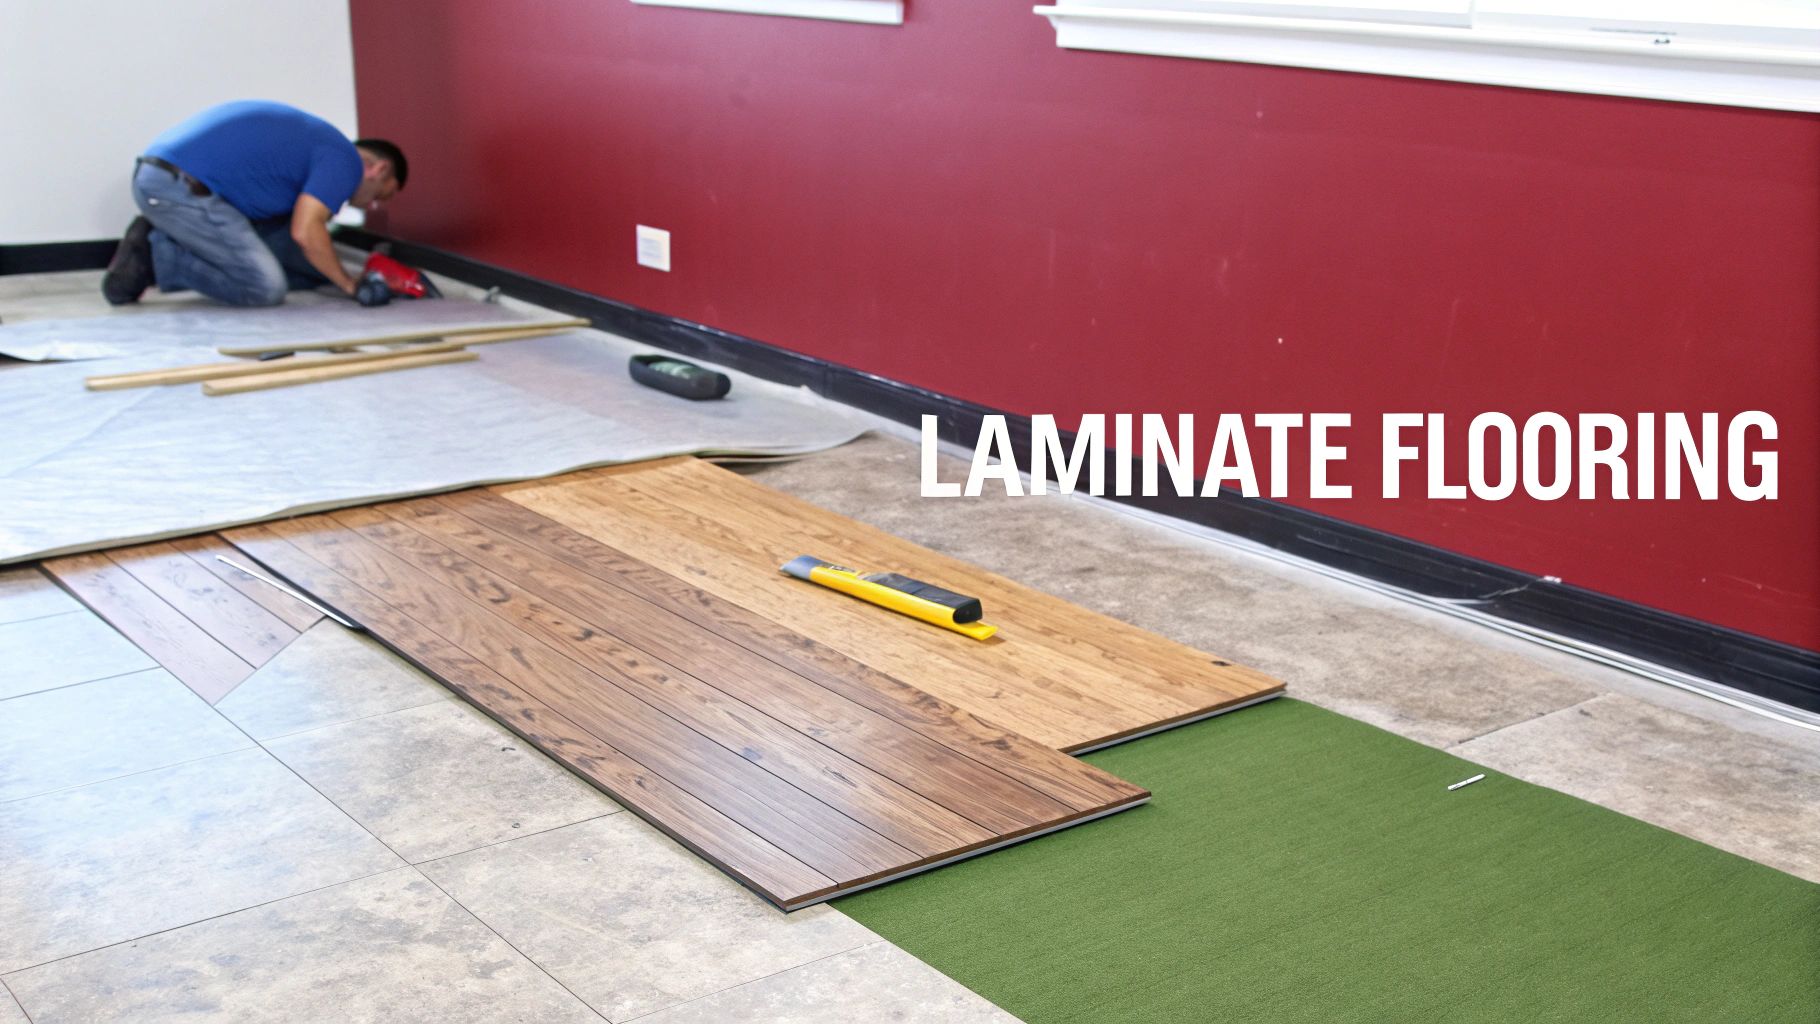
Another transformative yet budget-conscious upgrade for your basement is installing laminate flooring directly over the concrete slab. This popular choice delivers the warm, inviting look of real hardwood without the associated high cost and moisture sensitivity. Laminate provides a durable, finished surface that is relatively easy to install, making it an excellent DIY project for a weekend.
This flooring solution instantly elevates the space from a cold, utilitarian basement to a comfortable living area. When paired with a quality underlayment and moisture barrier, it effectively insulates against the cold concrete, creating a cozier environment. It’s a common strategy seen in countless DIY home transformations and even on shows like 'The Property Brothers' for maximizing impact on a tight budget.
Why It's a Top Budget-Friendly Choice
Laminate flooring is significantly less expensive than hardwood, engineered wood, or high-end tile, often costing just a few dollars per square foot. The "click-lock" installation system eliminates the need for adhesives, nails, and specialized labor, saving you hundreds or even thousands in professional installation fees. This makes it one of the best basement finishing ideas on a budget for homeowners who want a high-end look without the corresponding price tag.
Actionable Steps for Success
Proper installation is crucial for the longevity of laminate flooring in a basement environment. Follow these professional tips:
- Install a Moisture Barrier: Before anything else, lay down a 6-mil polyethylene vapor barrier over the entire concrete floor, overlapping seams by at least 8 inches. This is non-negotiable in a below-grade space like a Southwest Michigan basement.
- Use Quality Underlayment: A good underlayment provides thermal insulation, sound dampening, and a slight cushion underfoot. Many modern underlayments come with an integrated moisture barrier for an all-in-one solution.
- Acclimate the Planks: Let the unopened boxes of laminate sit in the basement for at least 48 hours. This allows the material to adjust to the room's temperature and humidity, preventing buckling or gapping after installation.
- Leave an Expansion Gap: Use spacers to maintain a 1/4-inch gap between the flooring and all walls and permanent fixtures. This space allows the floor to expand and contract naturally with temperature changes.
4. Peel-and-Stick Wall Tiles and Backsplash
For homeowners looking to add texture and a high-end look without the cost or complexity of traditional tiling, peel-and-stick wall tiles are a game-changing solution. This innovative product bypasses the need for messy mortar, grout, and professional installers, offering a sophisticated finish with a simple, self-adhesive backing. It's an excellent way to create a stylish accent wall, a functional kitchenette backsplash, or a decorative wainscoting effect in your basement.
This approach delivers the visual impact of ceramic, stone, or subway tile at a fraction of the price and effort. Brands like Smart Tiles and Aspect Tile have popularized this DIY-friendly method, making it a go-to for renter-friendly updates and Pinterest-inspired renovations. The result is a clean, modern aesthetic that instantly elevates the space from a basic basement to a thoughtfully designed living area.
Why It's a Top Budget-Friendly Choice
Peel-and-stick tiles offer a huge cost advantage by eliminating labor expenses, which often account for more than half the cost of a traditional tile job. You also save on materials like thin-set mortar, grout, sealant, and specialized tools. This makes it an ideal option for creating a focal point, like behind a dry bar or entertainment center, allowing you to achieve a "wow" factor without a significant financial investment.
Actionable Steps for Success
Proper application is crucial for ensuring your peel-and-stick tiles look great and stay put. Follow these best practices for a durable, professional finish:
- Prepare the Surface: The wall must be completely clean, dry, and smooth. Wipe it down with a degreasing cleaner to remove any residue that could interfere with the adhesive. Freshly painted walls should be allowed to cure for at least three weeks.
- Create a Guideline: Use a level and a pencil to draw a straight horizontal line to guide your first row of tiles. This ensures your entire installation remains level, even if your floor or ceiling is not.
- Test a Small Area: Before committing to a large section, apply one or two tiles to an inconspicuous area to check for adhesion and ease of removal.
- Apply Firm, Even Pressure: Once a tile is in position, press firmly across its entire surface, paying special attention to the edges. This activates the adhesive and creates a strong, lasting bond with the wall.
- Overlap as Directed: Most peel-and-stick tiles are designed with a small overlapping edge to create a seamless, grout-like line. Follow the manufacturer's instructions precisely for a flawless look.
5. Pegboard Accent Walls with Storage
One of the most practical and stylish basement finishing ideas on a budget is creating accent walls with pegboard. This approach moves beyond simple storage, transforming an entire wall into a functional, organized, and visually interesting feature. Instead of a blank, drywalled surface, a pegboard wall offers limitless customization for workshops, craft areas, home gyms, or playrooms, keeping clutter off the floor and tools or supplies within easy reach.
This method provides an industrial-chic or Scandinavian-minimalist aesthetic, popularized by brands like IKEA and countless DIY influencers. It’s an affordable way to add texture and purpose to a basement wall, turning a purely utilitarian space into a well-designed and highly efficient zone. It works exceptionally well in multi-purpose basements where one area needs to serve a specific, hands-on function.
Why It's a Top Budget-Friendly Choice
Pegboard is significantly cheaper than traditional finished walls, especially when considering its built-in utility. A standard 4×8 foot sheet of pegboard is very affordable, and the installation is a straightforward DIY project, eliminating labor costs. By integrating storage directly into the wall, you save money on separate shelving units, cabinets, or tool chests, making it a dual-purpose investment that maximizes both your space and your budget.
Actionable Steps for Success
To create a sturdy and attractive pegboard wall, careful installation is crucial. Follow these steps for a professional result:
- Create a Framework: Pegboard cannot be mounted directly to a concrete or drywall surface; it needs a gap behind it for the hooks to be inserted. Attach 1×2 or 1×3 inch furring strips vertically to the wall studs first. This framework will support the pegboard and create the necessary space.
- Plan Your Layout: Before mounting the pegboard, lay it on the floor and arrange your largest tools or items. This helps you visualize the most efficient layout and ensure everything will fit.
- Secure the Board Properly: Mount the pegboard sheets to the furring strips using screws and washers. The washers prevent the screw heads from pulling through the pegboard holes, ensuring a secure and long-lasting installation.
- Customize for Your Style: Paint the pegboard before you hang it to match your basement's color scheme. You can even create patterns or use a contrasting color to make the wall a true design feature.
6. Inexpensive Area Rugs to Define Spaces
One of the most strategic basement finishing ideas on a budget is using inexpensive area rugs to define distinct functional zones without building walls. This approach adds warmth, texture, and color to a large, open space, instantly making it feel more intentional and livable. Instead of committing to permanent, costly flooring like wall-to-wall carpet or luxury vinyl, area rugs offer a flexible and affordable way to create a cozy living room, a dedicated play area, or a comfortable home office nook.
This method is particularly effective over a simple sealed concrete or epoxy floor, as it provides softness underfoot and significantly improves acoustics by dampening echoes. The result is a layered, well-designed space that can be easily updated by simply swapping out a rug, a technique frequently used in budget home makeovers on HGTV to maximize style and function without major construction.
Why It's a Top Budget-Friendly Choice
The primary advantage is its low cost and high impact. A few well-placed rugs from retailers like Target Home or Wayfair can achieve the same spatial definition as permanent flooring or partition walls for a fraction of the price. This approach avoids installation costs and allows homeowners in Southwest Michigan to adapt the space as their needs change. A play area can become a teen lounge simply by changing the rug and furniture, offering unmatched versatility.
Actionable Steps for Success
To effectively use area rugs to define your basement, focus on strategic selection and placement. Follow these steps for the best results:
- Map Your Zones: Before buying, sketch a floor plan and decide where each functional area will be (e.g., TV zone, workout corner). Measure these spaces to determine the right rug size; a rug should be large enough that at least the front legs of all main furniture pieces in a grouping sit on it.
- Prioritize Material and Maintenance: Basements can be prone to dampness, so choose rugs made from synthetic, moisture-resistant fibers like polypropylene or nylon. For high-traffic or kid-focused areas, consider the growing popularity of affordable, machine-washable rugs for easy cleanup.
- Use a Quality Rug Pad: Always place a non-slip rug pad underneath each rug. This prevents dangerous shifting on a smooth concrete floor, adds an extra layer of cushioning, and helps protect the rug from any potential moisture from the slab.
- Layer for Visual Interest: For a more sophisticated look, try layering a smaller, patterned rug over a larger, neutral jute or sisal rug. This adds depth and character while still being an incredibly budget-conscious design choice.
7. DIY Drywall Installation and Finishing
For homeowners willing to invest some sweat equity, tackling the drywall installation and finishing yourself is one of the most impactful basement finishing ideas on a budget. This approach can slash labor costs by 50-60%, turning a major project expense into a manageable material purchase. With careful planning, the right tools, and a healthy dose of patience, you can achieve a professional-quality finish that completely transforms your basement from a concrete shell into a traditional living space.
Learning this skill empowers you to control the project timeline and budget directly. The process involves hanging drywall sheets onto the framed walls, taping the seams, and applying multiple thin layers of joint compound (mud) to create a smooth, seamless surface ready for paint. It’s a popular route for budget-conscious renovators, heavily documented on home improvement shows and DIY channels.
Why It's a Top Budget-Friendly Choice
The primary savings come from eliminating labor, which often costs more than the materials themselves. By taking on this task, you redirect thousands of dollars that would have gone to a contractor, freeing up funds for other essential elements like flooring, electrical work, or furniture. This method is perfect for homeowners who enjoy hands-on projects and are looking for a significant cost-cutting strategy without compromising on a traditional finished look.
Actionable Steps for Success
Finishing drywall is an art form, but one that can be learned with practice. Follow these key steps for a smooth, professional-grade result:
- Educate Yourself First: Before you start, watch multiple in-depth tutorial videos from reputable sources like 'Home RenoVision DIY' or This Old House. Each professional has slightly different techniques, and seeing a few variations helps you understand the core principles.
- Invest in Quality Tools: Don't skimp on your taping knives. Purchase a set including 6-inch, 8-inch, and 10- or 12-inch knives. Wider knives make it significantly easier to feather the edges of your joint compound for a flat, invisible seam.
- Practice on a Small Area: Designate a small, less-visible wall or a closet as your practice zone. This allows you to get a feel for applying mud and tape without the pressure of getting a main wall perfect on the first try.
- Apply Multiple Thin Coats: The secret to a smooth finish is not one thick coat, but three to four very thin coats. Each layer fills imperfections and gets progressively wider. Be sure to sand lightly with a fine-grit sanding sponge between coats after the compound is completely dry.
- Be Patient and Meticulous: Rushing is the enemy of good drywall finishing. Allow ample drying time between coats and carefully inspect your work for tape bubbles, high spots, or tool marks before applying the next layer.
8. Basement Bar Using Repurposed Materials
Building a basement bar from reclaimed wood, salvaged materials, and repurposed furniture creates a custom entertainment hub without the high cost of new cabinetry. This resourceful approach combines affordability with a unique, personalized design, turning what could be a major expense into a standout feature. Instead of ordering a pre-fabricated bar or hiring a custom cabinet maker, you can assemble a one-of-a-kind piece with character and history.
This method allows you to infuse your personality into the space, whether you're aiming for a rustic farmhouse aesthetic, a craft brewery-inspired man cave, or an industrial-chic lounge. Sourcing materials creatively transforms the project from a simple installation into a rewarding DIY adventure, making it one of the most engaging basement finishing ideas on a budget.
Why It's a Top Budget-Friendly Choice
The primary advantage is the massive cost savings on materials. Custom bars can cost thousands, but by using salvaged wood, an old dresser, or reclaimed pallets, you can build a sturdy and stylish bar for a fraction of the price. This frees up significant funds for other basement features like comfortable seating, a quality sound system, or better lighting, maximizing your overall renovation budget. It's a perfect strategy for homeowners who want a high-impact entertainment feature without the high-end price tag.
Actionable Steps for Success
A successful repurposed bar depends on a solid plan and creative sourcing. Follow these steps to build a functional and safe centerpiece:
- Source Materials Smartly: Regularly check local resources like Habitat for Humanity ReStore, Facebook Marketplace, and architectural salvage yards. Look for old kitchen cabinets, solid wood doors, bowling alley lanes, or shipping pallets that can form the base or countertop of your bar.
- Design Before You Build: Sketch out your bar's dimensions, including height (standard is 42 inches), width, and depth. Plan for seating arrangements and any built-in features like a mini-fridge or sink. This ensures the final piece fits your space and your needs perfectly.
- Prioritize Structural Integrity: While reclaimed materials add character, they must be structurally sound. Reinforce the frame with new lumber if necessary to ensure it can safely support the countertop, drinks, and people leaning against it.
- Incorporate Smart Features: Elevate your design with thoughtful additions. Install simple open shelving for glassware, add under-counter LED strip lighting for ambiance, and consider a durable, easy-to-clean top surface like sealed butcher block or a laminate remnant.
9. String Lights and LED Ambient Lighting
One of the most transformative basement finishing ideas on a budget is leveraging the power of ambient lighting. By strategically placing inexpensive string lights and energy-efficient LED fixtures, you can overcome the lack of natural light and create a warm, inviting atmosphere without the high cost of a complete rewiring project. This approach adds layers of light that make the space feel intentionally designed and cozy, perfect for a lounge, home theater, or playroom.
This method allows you to craft a specific mood and highlight architectural features or decor elements. Unlike harsh, single-source overhead lights, a mix of string lights and LEDs provides soft, distributed illumination that dramatically enhances the comfort and usability of a basement, making it feel less like a subterranean space and more like an integral part of your home.
Why It's a Top Budget-Friendly Choice
The primary advantage is the minimal investment required. High-quality LED string lights and standalone fixtures are widely available and affordable, often costing less than a single traditional light fixture. Many options are plug-in, completely eliminating the need for an electrician, which saves hundreds of dollars in labor costs. This makes it an ideal DIY project for homeowners looking for instant impact with minimal expense and technical skill.
Actionable Steps for Success
Proper placement and layering are essential for achieving a professional and functional lighting design. Follow these steps for the best results:
- Layer Your Lighting: Don't rely on one type of light. Use string lights for general ambiance, and supplement with LED puck lights under shelves, floor lamps in corners, or table lamps on side tables to create depth and functional task lighting.
- Choose the Right Color Temperature: For a cozy and inviting feel, select lights with a warm white color temperature (around 2700K). Cooler, daylight-toned bulbs can make a basement feel sterile and uninviting.
- Install a Dimmer: Many modern LED string lights are compatible with plug-in dimmer switches. This simple addition gives you complete control over the mood, allowing you to brighten the space for activities or dim it for relaxing.
- Manage Cords Professionally: To avoid a messy look, use clear adhesive clips or cord covers to neatly run wires along beams, walls, or baseboards. This small step makes the installation look permanent and intentional.
10. Basement Wall Paneling (Vinyl or Tongue-and-Groove)
A fantastic alternative to drywall, affordable paneling options like vinyl or tongue-and-groove wood provide a finished wall appearance without the multi-step process of taping, mudding, and sanding. This method offers a faster installation timeline and delivers a specific aesthetic, from rustic and cozy to clean and modern, instantly adding character and warmth to the space. It's a standout among basement finishing ideas on a budget for its ability to create a polished look with less mess and labor.
These materials are often more durable and moisture-resistant than standard drywall, making them an excellent choice for Southwest Michigan basements where humidity can be a concern. The result is a charming, low-maintenance wall finish that feels intentional, reminiscent of a cottage-style retreat or a rustic cabin-inspired family room.
Why It's a Top Budget-Friendly Choice
Wall paneling streamlines the finishing process significantly. It attaches directly to the wall framing (or even furring strips on a concrete wall), eliminating the need for costly and time-consuming drywall finishing labor. The material cost can be comparable to or even less than a fully finished drywall job, especially when considering the reduced labor hours. It’s an ideal solution for DIY enthusiasts looking for a manageable project or homeowners wanting to achieve a specific design style quickly.
Actionable Steps for Success
Proper installation is crucial for a professional and lasting appearance. Follow these guidelines for the best outcome:
- Choose Moisture-Resistant Materials: Opt for vinyl, MDF, or engineered wood panels specifically rated for below-grade or high-humidity areas. Avoid using untreated natural wood that could warp or rot.
- Plan Your Layout: Before you begin, map out your electrical outlet and switch locations. Cut the openings in the panels before you install them for a clean, precise fit.
- Acclimate the Panels: Let the paneling sit in the basement for at least 48-72 hours before installation. This allows the material to adjust to the room's temperature and humidity, preventing future shrinking or expanding.
- Ensure a Solid Backing: Install panels over properly spaced wall framing or furring strips. Use a quality paneling adhesive in addition to nails or staples to ensure a secure, long-lasting bond and prevent rattling.
Budget Basement Finishing: 10 Ideas Compared
| Option | Complexity 🔄 | Resources & Cost ⚡ | Expected Outcome ⭐ / 📊 | Ideal Use Cases 📊 | Key Advantages 💡 |
|---|---|---|---|---|---|
| Paint and Primer Combo on Concrete Walls | Low — minimal prep, roll-on application | Low ($200–400); primer, paint, rollers | Moderate quality ⭐⭐ — sealed, moisture-resistant finish; low insulation | Budget basements, quick DIY finishes | Very cost-effective; fast; easy touch-ups |
| Drop Ceiling Installation with Recessed Lighting | Moderate — grid layout and tile fitting | Moderate ($400–800); grid, tiles, recessed LEDs | High quality ⭐⭐⭐ — conceals utilities; improved aesthetics & access | Commercial basements, rental rec areas | Hides ductwork/pipes; maintainable; integrates lighting |
| Laminate Flooring Over Concrete | Moderate — moisture prep, underlayment, floating install | Moderate–High ($800–1,500); underlayment, moisture barrier | High quality ⭐⭐⭐ — wood-like look, durable; moisture-sensitive if barrier fails | DIY basement upgrades, rental units | Affordable hardwood appearance; DIY-friendly; durable |
| Peel-and-Stick Wall Tiles and Backsplash | Very Low — peel & apply, no grout | Very Low ($50–200 per accent wall); adhesive tiles | Low–Moderate ⭐⭐ — quick modern accent; removable; less durable | Renters, accent walls, kitchenette areas | Fast install; no special tools; removable |
| Pegboard Accent Walls with Storage | Low — mount panels and accessories | Low ($100–300 w/ accessories) | Moderate ⭐⭐ — functional, visible storage; organizes tools | Workshops, hobby basements, garages | Highly customizable storage; maximizes vertical space |
| Inexpensive Area Rugs to Define Spaces | Very Low — place rugs and pads | Very Low ($100–300 for multiple rugs) | Moderate ⭐⭐ — defines zones, adds warmth & sound absorption | Open rec areas, lounge/entertainment zones | Instant visual change; inexpensive; comfortable |
| DIY Drywall Installation and Finishing | High — skill/time intensive finishing | Moderate ($500–1,200 materials) + tool/time investment | High quality ⭐⭐⭐ — smooth, insulated, professional finish if well done | Permanent renovations, full basement finishes | Best finished look and insulation; flexible design |
| Basement Bar Using Repurposed Materials | Moderate — carpentry and custom fit | Low ($200–600) if reclaimed materials used | Moderate ⭐⭐ — unique focal point; functional entertainment area | Man caves, entertainment basements | Low cost; personalized aesthetic; sustainable materials |
| String Lights and LED Ambient Lighting | Very Low — hang and plug in | Very Low ($30–100) | Low–Moderate ⭐⭐ — improves ambiance; not a primary light source | Lounge areas, renters, accent lighting | Cheap, easy, energy-efficient, removable |
| Basement Wall Paneling (Vinyl or Tongue-and-Groove) | Moderate — panel fitting and sealing | Moderate ($300–600) | Moderate ⭐⭐ — finished, moisture-resistant surface; visible joints | Cottage/rustic basements, quick renovations | Faster than drywall; moisture options; hides imperfections |
Bringing Your Budget-Friendly Basement Vision to Life
Transforming an unfinished basement from a cold, concrete cavern into a warm, functional living space is one of the most rewarding home improvement projects you can undertake. It’s a direct investment in your family’s quality of life and your home's overall value. Throughout this guide, we've explored a wealth of basement finishing ideas on a budget, proving that you don’t need an astronomical budget to create a beautiful, practical, and inviting lower level. The key isn't just about spending less; it's about spending smarter.
By focusing on high-impact, low-cost strategies, you can achieve a stunning result without financial strain. From the foundational step of using a paint and primer combo on concrete walls to the finishing touch of ambient string lighting, each idea presented offers a path to significant savings. We've seen how simple material choices, like laminate flooring over luxury tile or vinyl wall paneling instead of full-scale framing and drywall, can drastically reduce costs while still delivering a polished look.
Recapping Your Path to a Budget-Friendly Basement
Let's distill the most critical takeaways from our exploration. These are the core principles that will guide your project from a simple idea to a finished reality:
- Prioritize the Foundation: Before any cosmetic work begins, your primary focus must be on creating a dry, well-insulated, and safe environment. This means addressing any moisture issues specific to our Southwest Michigan climate, ensuring proper insulation, and meeting all local building codes, especially for egress windows. Skipping these steps will only lead to more expensive problems later.
- Embrace Strategic DIY: You can save thousands by tackling tasks like painting, installing laminate flooring, or assembling a bar from repurposed materials yourself. However, it's equally important to recognize when to call a professional. Electrical work, complex plumbing, and structural changes are best left to licensed experts to ensure safety and compliance.
- Think in Layers: A successful budget basement design uses layers to create warmth and define zones. Area rugs over concrete or laminate, varied lighting sources (task, ambient, accent), and textural elements like pegboard walls or peel-and-stick tiles add depth and character without the cost of major construction.
Key Insight: Your greatest tool in a budget remodel is creativity. A reclaimed barn door, a bar built from leftover pallets, or a clever arrangement of inexpensive area rugs can have a more significant design impact than the most expensive materials.
Your Action Plan for Moving Forward
Feeling inspired is the first step, but taking action is what turns that inspiration into an extra bedroom, a cozy family room, or a productive home office. The journey from a concrete slab to a comfortable living space is a marathon, not a sprint. By breaking it down into manageable phases, you can maintain momentum and control your budget effectively.
The crucial next step is to move from a general wish list to a concrete plan. Start by meticulously measuring your space. Draft a simple floor plan, even if it's just on graph paper, to visualize how you'll lay out the different zones. Then, assign a realistic budget to each component of your project, from flooring and lighting to furniture and decor. This detailed plan will become your roadmap, helping you make informed decisions and track your spending every step of the way. These basement finishing ideas on a budget are your toolkit; now it's time to build the blueprint.
Ready to move from planning to action with a team that understands the unique needs of Southwest Michigan homes? The experts at Trademaster Construction specialize in transforming basements into beautiful, functional spaces while respecting your budget and vision. Explore our idea book for local inspiration or contact us today for a consultation to see how we can bring your dream basement to life.

