
If you're tired of your kitchen floor being an afterthought, you're not alone. What if your floor could be the thing that ties the whole room together, adding instant character and a touch of classic cool? That's exactly what a checkerboard kitchen floor does. It’s a design move that can single-handedly take your space from just okay to truly unforgettable.
Why a Checkerboard Floor Is More Than Just a Trend
A checkerboard kitchen floor has this amazing ability to feel both timeless and totally fresh. It's a bold choice, no doubt, but one that brings a unique blend of nostalgia and sophistication. You're not just installing a floor; you're creating a piece of art that anchors the entire room.
This isn't some fleeting fad. We've seen this pattern for generations—from grand European estates to the cheerful diners of the 1950s and right into some of the most stunning modern homes today. For homeowners right here in Kalamazoo and Portage, it's a smart investment in a look that simply won't feel dated in five years. It’s a versatile foundation you can build almost any style around.
The Lasting Impact of This Design
So, what’s the secret? It all comes down to its simple yet powerful geometry. The rhythm of the alternating light and dark tiles creates a visual energy that makes a room feel more alive. It commands attention without being overbearing, serving as the perfect backdrop for your cabinetry, countertops, and appliances.
Think of this guide as your complete roadmap. We’ll walk through everything you need to know to get this look right in your own home.
- Durable Materials: We'll dig into the best options, like tough-as-nails porcelain and luxury vinyl, that can handle everything from Michigan's changing seasons to the chaos of a busy family kitchen.
- Styling a Cohesive Look: You’ll get practical tips on how to pair your new floor with cabinets, backsplashes, and paint colors to create a space that feels balanced and welcoming.
- Expert Craftsmanship: We’ll explain why professional installation is the key to getting that flawless, high-end finish that will last for decades.
By the end of this guide, you'll see your floor not just as a surface to walk on, but as the cornerstone of your kitchen's entire design.
Why This Classic Pattern Never Goes Out of Style
A checkerboard floor in a kitchen isn't just a design choice; it's a piece of living history right under your feet. It has this incredible ability to feel both nostalgic and totally fresh at the same time—a rare quality that explains why it's never really left the design world.
You might think of a 1950s diner, but this pattern's story started thousands of years earlier as a symbol of cosmic order and luxury. That simple, graphic nature is a blank canvas, allowing it to be reimagined by countless cultures and design movements. When you understand its journey, you're not just picking a floor; you're connecting with a long, grand tradition of style.
From Ancient Temples to Royal Palaces
Believe it or not, the roots of the checkerboard pattern are incredibly deep. It showed up as a symbol of grandeur long before it landed in American homes. As far back as 3,000 BC, ancient Egyptians were laying contrasting stone tiles in temples to represent balance and duality. The Romans ran with the idea, using black and white mosaics to create stunning optical illusions in their lavish villas.
Flash forward to the Renaissance, from the 15th to 17th centuries, and checkerboard floors became shorthand for serious wealth. You’d see them gracing the opulent floors of European palaces like Versailles in France and the summer homes of the Russian tsars. In 1677, even England’s Westminster Abbey got a new floor of black and white marble squares, cementing the pattern's prestigious status for good. You can read more about its journey from royalty to residential homes.
It was the Victorian era that really brought this look from palaces to parlors. Thanks to the Industrial Revolution, tile production costs plummeted by as much as 70%, making ceramic and linoleum affordable. Suddenly, a design once reserved for the elite was within reach for the growing middle class, who eagerly installed it in their entryways and kitchens all across Europe and America.
The American Love Affair with Checkerboard
The 20th century is when the checkerboard pattern truly found its home, right here in the United States. Its first major surge came during the Art Deco boom of the 1920s. Think about it: the U.S. GDP skyrocketed by 42% during that decade, and the bold, geometric look of a checkerboard floor was the perfect match for the high-octane energy and optimism of the Jazz Age.
The post-World War II housing boom cemented the checkerboard floor as an American icon. By the 1950s, over 60% of new suburban kitchens featured some form of checkered tiling, blending vibrant style with the practical need for hygienic, easy-to-clean surfaces.
This was a time of massive growth, when 13 million new homes shot up across the country. The checkerboard floor became a cheerful, optimistic symbol of a prosperous, modern future—the perfect backdrop for the American dream. That deep cultural connection is a huge part of why the pattern still feels so right to us today.
Why It Still Works in Modern Kitchens
So, why has this pattern survived for millennia? Because it’s built on principles of good design that are just as true for a Portage homeowner today as they were for a Roman villa owner two thousand years ago.
Key Elements of Its Lasting Appeal:
- Visual Order and Rhythm: The repeating squares just feel right. They create a sense of structure and harmony that’s calming to the eye, providing a stable foundation that lets your cabinets, countertops, and backsplash really shine.
- Dynamic Contrast: That classic play between light and dark creates a subtle energy and movement. It keeps the floor from feeling flat or boring and makes the whole room feel more alive.
- Unmatched Versatility: A checkerboard floor is a style chameleon. It can feel traditional and cozy in a farmhouse kitchen, retro and fun in a mid-century space, or impossibly chic in a minimalist, modern home.
For our clients here in Southwest Michigan, this rich history provides a lot of confidence. When you choose a checkerboard kitchen floor, you’re investing in a design that has proven its staying power time and time again. At Trademaster, we love bringing this timeless look back to life with durable, modern materials like porcelain—so your kitchen can have the elegance of Versailles and still stand up to the chaos of everyday family life.
Choosing the Right Materials for Your Floor
The look of a checkerboard floor is timeless, but its staying power comes down to one thing: the material you choose. Think of it like picking the right countertop—it needs to look great, but it also has to stand up to the daily chaos of a real kitchen. For homeowners here in Southwest Michigan, that means a floor that can handle everything from spilled coffee and muddy paws to the region's distinct humidity.
Finding the perfect material is a balancing act between durability, looks, comfort, and of course, your budget. Let's walk through the top contenders so you can feel confident in your decision.
H3: Porcelain Tile: The Heavy-Duty Champion
If you want a floor that’s practically bulletproof, porcelain tile is your answer. This stuff is made under incredible heat and pressure, which makes it denser, harder, and far less porous than its ceramic cousin. With a water absorption rate of less than 0.5%, it's about as close to waterproof as you can get.
That’s a huge plus for kitchens in places like Kalamazoo or Portage, where seasonal humidity shifts can test building materials. Porcelain won’t swell or warp, and its tough-as-nails surface resists scratches, stains, and dings from dropped pots and pans. It's the go-to choice for high-traffic homes, especially those with kids and pets.
- Pros: Exceptionally tough, nearly impervious to water and stains, a breeze to clean, and available in countless finishes.
- Cons: It's often a bit pricier, and its hardness means a dropped glass is a goner. Because it's so dense and hard to cut, professional installation is almost always the best route.
H3: Ceramic Tile: The Classic, Versatile Choice
Ceramic tile has been a kitchen staple for generations, and for good reason. It hits that sweet spot of beauty, durability, and value that makes it a fantastic option for a checkerboard design. While it isn't quite as dense as porcelain, a quality modern ceramic tile is more than tough enough for the average kitchen. It's also a bit easier to cut and handle, which can help keep installation costs down.
The real beauty of ceramic is its incredible design flexibility. You'll find it in every color, size, and finish imaginable, giving you total freedom to create the exact pattern you envision. Just remember that the protective layer is the glaze on top; a deep chip could expose the more porous clay underneath to moisture.
Our Take: Think of it this way: porcelain is like a cast-iron skillet—incredibly durable and built for heavy use. Ceramic is more like a high-quality stainless steel pan—a fantastic all-around performer that’s a bit more approachable.
H3: Luxury Vinyl Tile (LVT): The Comfortable, Modern Innovator
Don't confuse this with the peel-and-stick vinyl of the past. Today's Luxury Vinyl Tile (LVT) is an engineering marvel. It’s a multi-layered product that does a stunningly realistic job of mimicking stone or tile but feels much softer and warmer under your feet. That little bit of give can be a lifesaver for your back and knees after a long day of cooking.
For a checkerboard pattern, LVT is a brilliant choice. It’s 100% waterproof, stands up beautifully to scratches and scuffs, and is ridiculously easy to clean. LVT often comes in at a lower price point than tile, both for the material itself and the installation. Plus, its forgiving surface gives dropped dishes a fighting chance of survival.
If you're looking for a material that comes with the pattern built-in, you might also draw inspiration from options like these cement checkered tiles, which offer a unique, matte texture.
Comparing Materials for a Checkerboard Kitchen Floor
To make the decision a little easier, here's a side-by-side look at how these popular materials stack up for a Southwest Michigan home.
| Material | Durability | Water Resistance | Average Cost (Per Sq. Ft.) | Best For |
|---|---|---|---|---|
| Porcelain Tile | Exceptional | Nearly Waterproof | $10 – $25 | High-traffic kitchens, homes with pets, ultimate longevity. |
| Ceramic Tile | Very Good | Excellent (when glazed) | $8 – $20 | Classic looks, design versatility, and balanced performance. |
| Luxury Vinyl Tile | Good | 100% Waterproof | $6 – $15 | Comfort underfoot, budget-conscious projects, and DIY installs. |
In the end, it all comes down to what you value most. If bombproof durability is your top priority, porcelain is the undisputed winner. If you’re after a comfortable, budget-friendly floor, LVT is tough to beat. And for that perfect blend of classic style and solid performance, ceramic tile is always a reliable choice.
Mastering the Details of Your Layout and Design
Once you’ve landed on the right material for your checkerboard floor, the real fun begins. This is where we get into the details—the small but powerful choices that will give your kitchen its unique personality. The magic isn’t just in the pattern itself, but in how you execute it.
Think of it as setting the stage. You’ve chosen your actors (the tiles), but how you place them (the layout), the color of the lines between them (the grout), and their overall size completely changes the final performance. Getting these elements right is what turns a simple floor into a showstopper.
The Power of Scale: Tile Size
The size of the tiles you choose can dramatically change the feel of your kitchen. It's one of the easiest ways to influence how big or cozy the space feels.
- Large Format Tiles (12×12 inches and up): Bigger tiles mean fewer grout lines, which gives the floor a clean, seamless look. This is a fantastic trick for smaller kitchens, as the uninterrupted pattern makes the room feel more open and spacious. Large tiles read as bold, modern, and undeniably sophisticated.
- Small Format Tiles (6×6 inches or smaller): On the other hand, smaller tiles create a more detailed, intricate pattern. This look leans into a vintage, cottage, or traditional aesthetic. In a large kitchen, it can add a wonderful texture and charm, making the space feel more grounded and intimate.
This diagram helps visualize how your material choice plays into the final design, whether you're prioritizing durability, versatility, or a specific aesthetic.
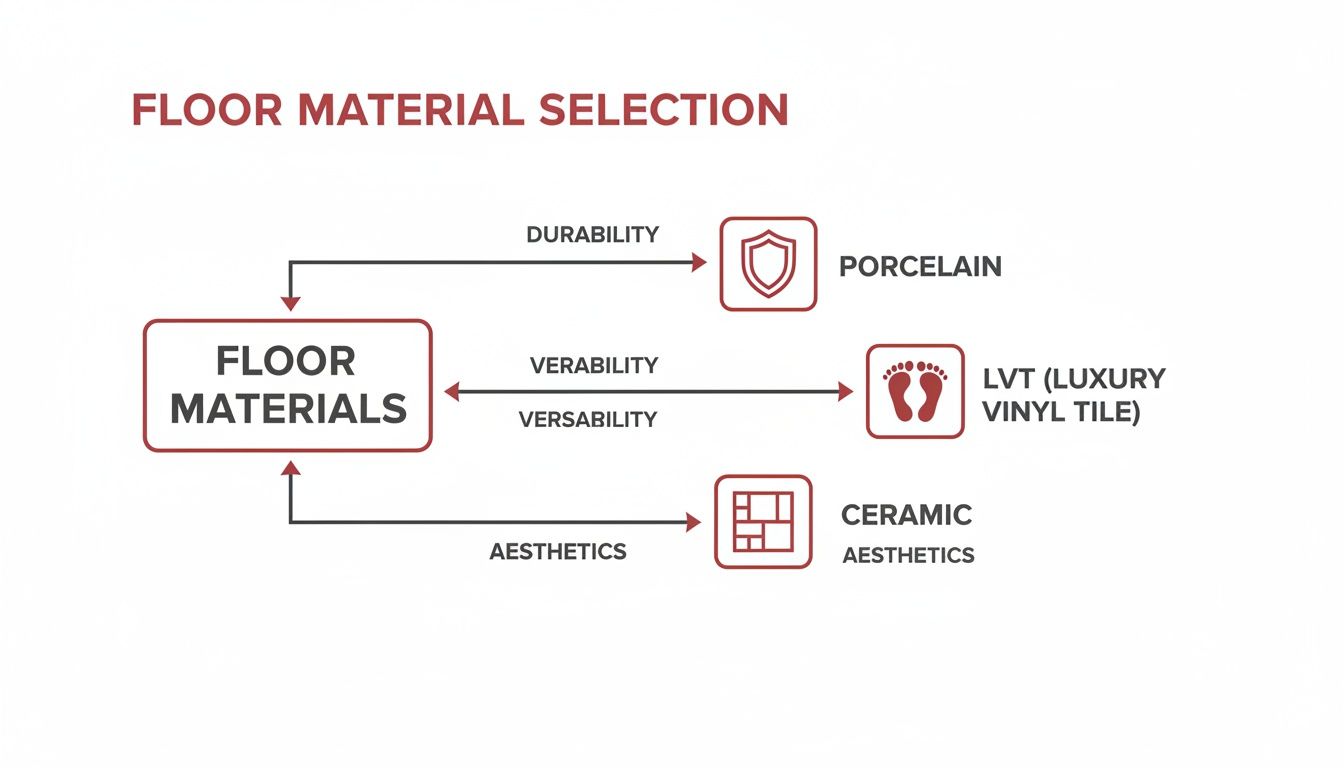
As you can see, the ruggedness of porcelain, the adaptability of LVT, and the classic beauty of ceramic are all part of the big picture.
Directing the Eye: Pattern Orientation
How you angle the pattern itself can completely alter the room's energy. You really have two main choices, and each one tells a different story.
1. The Classic Grid Layout
This is the straightforward, traditional approach where tiles are laid parallel to your walls and cabinets. It creates a very stable, orderly look that grounds the room. The straight lines feel balanced and calm, making this a go-to for classic, farmhouse, or transitional kitchens where you want the floor to be a timeless anchor.
2. The Dynamic Diagonal Layout (Harlequin)
By turning the entire pattern 45 degrees, you get a diagonal or "harlequin" layout. Suddenly, the lines are moving from corner to corner, creating a sense of energy and flow. It’s a brilliant way to make a narrow kitchen feel wider or to add a touch of unexpected drama. The diagonal lines pull your eye across the floor, making the whole room feel more expansive.
Pro Tip: A diagonal layout requires more complex cuts where the tiles meet the walls, which can mean a bit more material waste and installation time. But for that custom, high-end feel, the visual payoff is often more than worth it.
A checkerboard floor is a statement. Learning how to balance it within the rest of your decor is key to making it work. For some great tips on this, check out this guide on working with patterns in your room design.
The Unsung Hero: Grout Color
Grout is so much more than just filler. Think of it as the frame for each tile—it can either make the pattern pop or help it blend in.
- High-Contrast Grout (e.g., Dark Gray or Black): Pairing classic black and white tiles with a dark grout makes every single square stand out. This approach emphasizes the sharp, geometric nature of the pattern for a bold and graphic look. It's a perfect fit for modern or Art Deco-inspired spaces.
- Low-Contrast Grout (e.g., Light Gray or White): Choosing a lighter grout that’s closer in color to your white tiles softens the whole effect. The pattern reads as a more unified, textured surface rather than a grid of individual tiles. This is the way to go if you're aiming for a gentler, more serene, or traditional vibe.
In the end, it’s this attention to detail—the tile size, the pattern’s direction, and the grout color—that elevates a checkerboard kitchen floor from just a choice to a true design statement.
How to Style Your Kitchen Around the Floor
A bold checkerboard floor isn't a design problem to solve—it's a fantastic anchor that gives you a clear direction for the entire room. Don't try to compete with it. The real secret is to build a cohesive look around this strong foundation, letting it be the star of the show. Your cabinets, counters, and backsplash can then play beautiful supporting roles.
Think of it like buying a stunning piece of art for your living room. You wouldn't immediately pair it with a wildly patterned sofa, would you? Of course not. You'd pull colors and textures from the artwork to create a space that feels intentional and balanced. Your new floor works exactly the same way, guiding your hand to make sure everything comes together harmoniously.
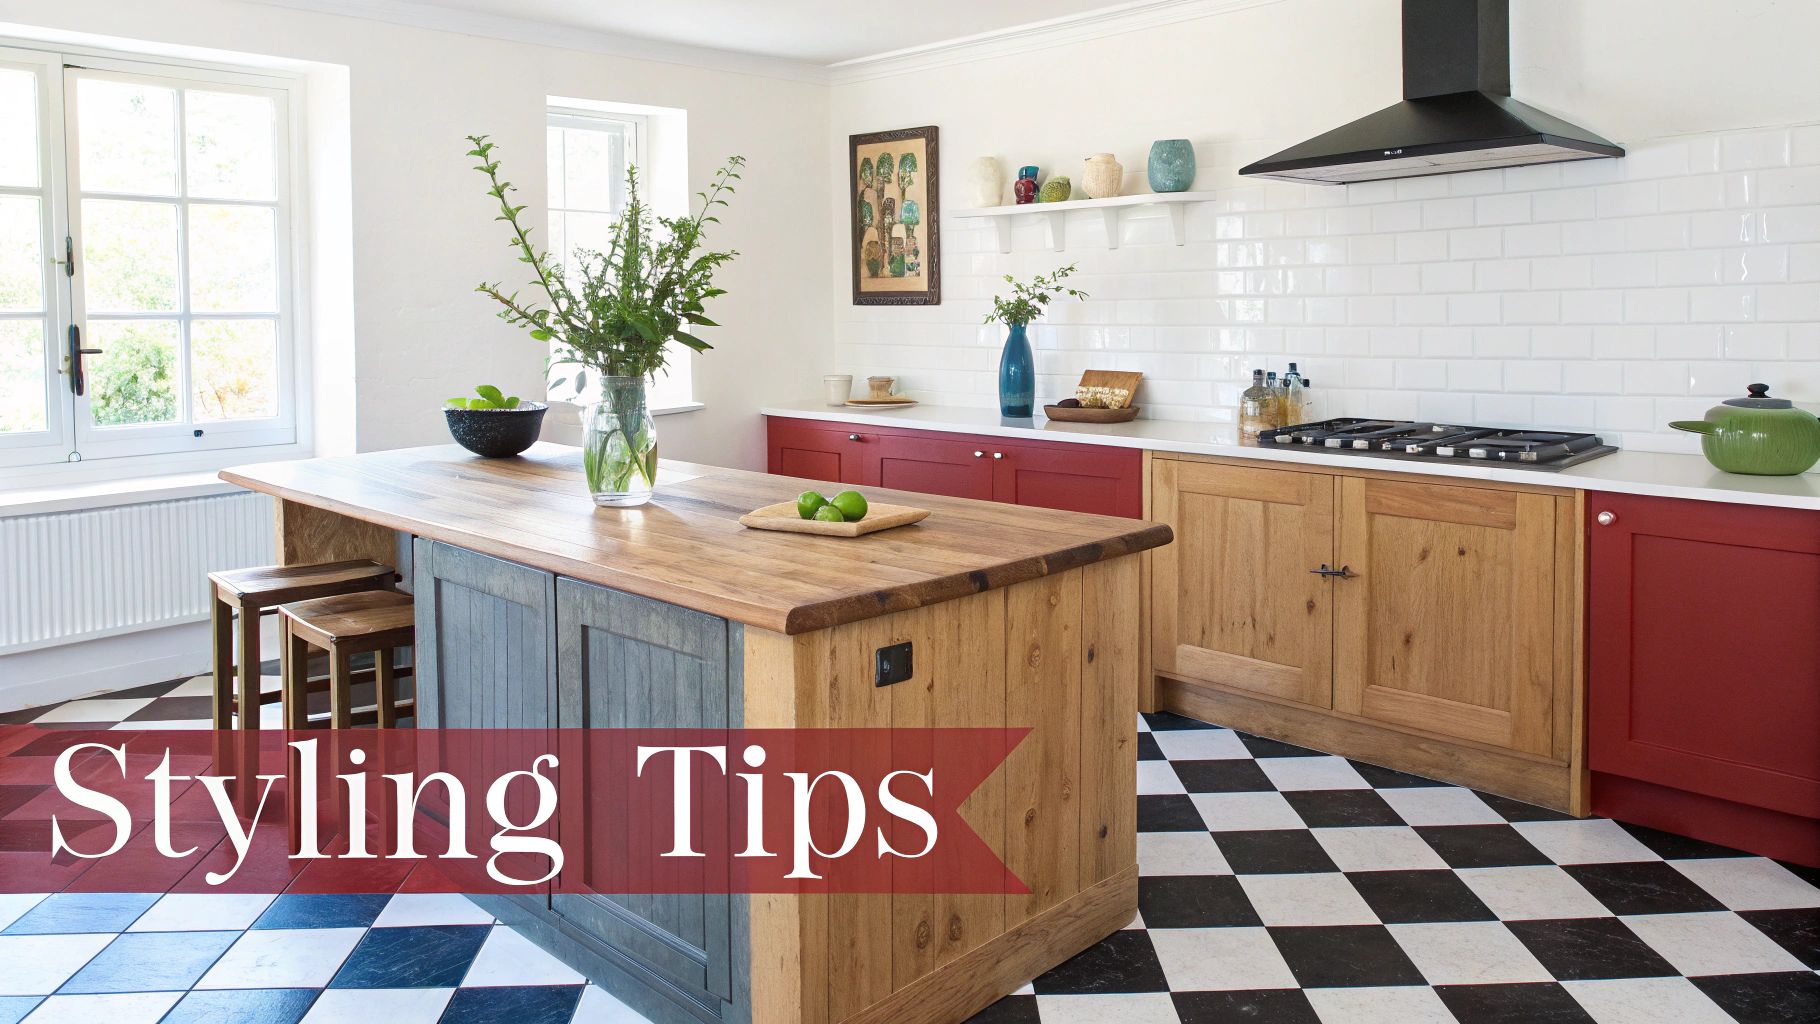
This approach helps you avoid that "too much of a good thing" feeling, where multiple bold patterns just end up clashing and creating visual noise.
Complementary Cabinet Choices
After the floor, your cabinets are the next biggest visual element in the room, so getting the color and style right is critical. You’re looking for a partnership where the cabinets either lean into the floor's classic feel or offer a gentle, modern contrast.
- Crisp White or Off-White Cabinets: You simply can't go wrong with this timeless combination. White cabinets, particularly a Shaker style, create a clean, bright backdrop that lets that checkerboard pattern truly pop without being overwhelming. The whole look feels fresh and airy.
- Warm Wood Tones: For a more grounded, organic feel, think about pairing your floor with natural wood cabinets. Lighter woods like oak or maple will keep the space feeling bright and modern. On the other hand, richer tones like walnut can create a sophisticated, mid-century vibe that's incredibly warm and inviting.
- Soft Grays or Earthy Greens: If you're craving a bit of color, muted tones are your best friend. A soft sage green or a light greige on the cabinets provides a subtle, calming contrast to the graphic floor, adding a splash of personality without making the room feel chaotic.
Selecting Countertops and Backsplashes
With such a statement floor already in place, the smartest move for your countertops and backsplash is to keep it simple. You want materials that bring in texture and function without throwing another competing pattern into the mix.
Think of your countertops and backsplash as the quiet friends at a party where the floor is the lively host. They add to the atmosphere without trying to steal the spotlight. A simple design here ensures the whole room feels balanced, not busy.
Countertop Materials That Work Well:
- Simple Quartz: A solid white, soft gray, or even black quartz with minimal veining is a durable, elegant surface. Its uniform look gives your eyes a calm place to rest.
- Butcher Block: To bring in a touch of warmth that ties in beautifully with wood cabinets or just adds an organic element, butcher block is a fantastic choice. It really softens the graphic punch of the floor.
- Honed Black Granite: If you want to lean into a dramatic, high-contrast look, a honed (matte) black granite or soapstone creates a sophisticated, seamless connection to the black tiles underfoot.
The same logic applies to the backsplash. Classic choices are your safest bet. A simple white subway tile, a textured Zellige tile in a neutral shade, or even a solid slab of the same quartz from your countertop will finish the look perfectly.
Tying It All Together with Accents
The final layer is all in the details—the hardware, lighting, and accessories. These smaller pieces are your chance to really steer the kitchen’s overall style in a specific direction.
For instance, matte black hardware and fixtures will lean into the modern, graphic quality of a checkerboard kitchen floor. On the flip side, brushed brass or polished nickel can introduce a bit of warmth and classic elegance, preventing a simple black-and-white scheme from feeling too stark. By carefully choosing these final touches, you ensure every part of your kitchen is working together, creating a space that feels both stylish and perfectly unified.
Partnering with Local Experts for a Flawless Finish
Bringing your vision for a stunning checkerboard kitchen floor to life takes more than just picking out the right tiles. The real magic is in the installation. A flawless finish hinges on getting the details right: meticulous subfloor prep, a perfectly planned layout, and expert tile setting. These are the things that separate a good idea from a great, long-lasting floor.
Working with a trusted local contractor here in the Kalamazoo area means your project is in good hands. We know the ins and outs of homes in Southwest Michigan, from dealing with the subfloors in older houses to choosing materials that can handle our seasonal humidity swings. That kind of local knowledge helps sidestep common problems that can shorten the life of your floor.
Our Proven Installation Process
We believe in a clear, collaborative process that keeps you in the loop and confident from day one. Our approach is straightforward and designed to make sure every detail is covered and your vision is executed perfectly.
Here’s what you can expect when you work with Trademaster:
- Initial Design Consultation: We start by listening. We’ll talk through your design goals, how you use your kitchen, and your budget to nail down the best materials, tile size, and layout.
- Meticulous Preparation: Our crew gets the subfloor perfectly level and clean. This is the unseen foundation of a beautiful floor, and it’s critical for preventing cracks and ensuring your floor lasts for decades.
- Expert Tile Setting: We use professional techniques and top-shelf materials to lay each tile with precision. This is how we get those crisp, straight grout lines that make the checkerboard pattern pop.
- Finishing and Final Walkthrough: Once the grouting and sealing are done, we’ll do a final walkthrough with you. We want to make sure every last detail meets our high standards—and leaves you completely satisfied.
This dedication to craft taps into a long American tradition. The checkerboard floor became an icon during the Art Deco boom of the 1920s and the suburban revolution of the 1950s, where it was featured in roughly 55% of diner floors and countless kitchens. Discover more about how this timeless pattern became a staple in American homes.
Today, we get to blend that classic 1950s nostalgia with modern performance. For our Kalamazoo clients, that means using durable porcelain that's 50% more slip-resistant than the old linoleum. Your new checkerboard kitchen will not only look incredible but will also be a safe, low-maintenance hub for your family.
Ready to move from inspiration to action? Let’s talk about your project.
Got Questions About Checkerboard Floors? We've Got Answers.
When homeowners around Southwest Michigan start thinking about a checkerboard kitchen floor, a few key questions always come up. You want to know you're making a smart investment that's not just stylish, but practical for the long haul. Let's walk through some of the most common things we get asked, so you can move forward with total confidence.
Are Checkerboard Floors Just a Trend, or Are They Timeless?
I get this one a lot, and I love answering it. Checkerboard floors are absolutely a timeless choice. This isn't some flash-in-the-pan trend; it's a true design classic that has proven its staying power for centuries. It’s been at home in everything from grand historical homes to funky retro diners and sleek, modern spaces.
What gives it that staying power? It's the simple, balanced geometry. The pattern is striking without being overly ornate or specific to one particular era. That means your floor won't look dated in five or ten years. It's an investment in a look that genuinely lasts.
How on Earth Do I Keep the Grout Clean?
Grout is always a big concern, especially with a light-and-dark pattern where it’s more visible. But here's the good news: modern materials have made this so much easier than it used to be. The trick is to start smart from day one by using a high-performance, stain-resistant grout.
We often steer our clients toward a darker grout, like a charcoal or medium gray. It's a game-changer. Not only does it create a sharp, sophisticated frame for each tile, but it does a fantastic job of hiding the minor dust and crumbs of everyday life. It seriously cuts down on the cleaning stress.
Pair that with a quality grout sealant and a simple cleaning routine (just a pH-neutral cleaner), and your grout lines will stay looking crisp with very little fuss.
Won't a Checkerboard Pattern Make My Small Kitchen Look Too Busy?
This is probably the biggest myth we have to bust. People worry that a bold pattern will shrink a small room, but a checkerboard floor can actually make a compact kitchen feel larger and more put-together—if you get the scale right.
The secret is almost always in the tile size. We find that using larger tiles, say 12×12 inches or even bigger, creates fewer lines and a less cluttered look. That simple change helps the floor feel much more expansive.
We also play with the layout to trick the eye:
- A Classic Grid: Laying the tiles square to the walls feels calm and orderly, which can ground a smaller space beautifully.
- A Diagonal Layout: Turning the pattern 45 degrees is my favorite trick. It forces your eye to follow the longest line across the room, creating a powerful illusion of more width and depth.
Our design team can map out the perfect tile size and orientation to make sure your new floor opens up your kitchen, turning it into a standout feature that enhances the feeling of space.
Ready to see how a timeless checkerboard floor could look in your home? The team at Trademaster Construction is here to help you nail down the design and deliver a flawless installation.

