
Adding a bathroom to your basement is a fantastic way to boost your home’s value and functionality, but it’s not as simple as picking out a vanity and some tile. A successful project hinges on smart, upfront planning that accounts for plumbing, ventilation, and the unique challenges of a below-grade space.
The whole process starts with a careful assessment of the best location—usually, this means looking directly below an existing bathroom to make plumbing tie-ins easier. From there, you'll need to figure out the best way to handle drainage, which might involve a sewage ejector pump or an up-flushing system if a simple gravity-fed setup isn't in the cards.
Your Basement Bathroom Blueprint
Before you even think about fixtures or paint colors, you have to play detective. A detailed assessment of your existing space is where a successful project truly begins. This initial blueprinting phase is your best defense against the common, and often costly, mistakes that can derail a basement renovation.
Here in Southwest Michigan, where basements can be notoriously damp, this step is absolutely non-negotiable. A little due diligence right now will save you from a world of headaches later, ensuring your new bathroom is a durable, long-lasting addition to your home.
Finding the Ideal Location
If there's a golden rule for adding a basement bathroom, it's this: try to place it directly below an existing bathroom on the main floor. This one strategic move can be a massive cost-saver. It allows you to tap into the existing water supply, drain, and vent lines with much shorter—and cheaper—pipe runs.
Your first move should be to map out your current plumbing stacks. Look for the large-diameter pipes running vertically through your basement; those are your main drains and vents. The closer you can get your new bathroom to these, the less concrete you'll have to break and the simpler the whole installation will be.
Critical Measurements and Observations
Once you've zeroed in on a potential spot, grab your tape measure and a notepad. You need to gather some hard data to confirm the location is actually viable.
- Ceiling Height: Measure from the concrete floor to the bottom of the joists above. Most Michigan building codes mandate a minimum finished ceiling height of 7 feet. Don't forget to factor in the thickness of your flooring, drywall, and any framing needed to hide pipes or ductwork.
- Existing Infrastructure: Take stock of everything around your proposed location. Where are the electrical circuits, HVAC ducts, and support posts? You’ll have to plan your layout around these obstacles, as moving them can send your budget skyrocketing.
- Moisture Check: This is huge. Look for any signs of water intrusion—efflorescence (that chalky white powder on concrete), dark stains, a musty smell, or visible dampness. You must address moisture problems before you build.
A damp basement will destroy your new bathroom before you even get to enjoy it. Proper waterproofing isn't just an optional upgrade; it's the absolute foundation of a successful project.
When scoping out the space, especially in older homes, be aware of potential hazards like old asbestos flooring tiles or pipe insulation. Getting familiar with the basics of safe asbestos removal for homeowners is a smart move during this initial assessment.
Before you finalize any plans, it's wise to run through a quick checklist to make sure you've covered all your bases.
Initial Basement Bathroom Planning Checklist
This table breaks down the key factors to evaluate in your basement before you commit to a location or design.
| Assessment Area | What to Check For | Why It Matters |
|---|---|---|
| Ceiling Height | Measure from floor to joists | Must meet the 7-foot minimum required by Michigan code after finishing. |
| Plumbing Access | Location of main drain/vent stacks & water lines | Closer is cheaper. Minimizes concrete cutting and plumbing complexity. |
| Moisture Evidence | Stains, musty smells, efflorescence, visible water | Must be fully resolved before construction to prevent mold and rot. |
| Obstructions | HVAC ducts, support columns, electrical wiring | These are expensive or impossible to move and must be planned around. |
| Exterior Wall Access | Can you easily run a vent duct outside? | A direct, short path for the exhaust fan is essential for proper ventilation. |
| Floor Slope | Does the concrete floor slope toward a drain? | A natural slope can sometimes aid gravity-fed drainage, but is not always required. |
Thinking through these points early on will help you create a realistic plan and avoid any unwelcome surprises down the road.
Planning for Light and Air
Basements are naturally short on light and fresh air, so you have to intentionally design these elements in. A dark, stuffy bathroom is one nobody wants to use.
Proper ventilation isn't just for comfort—it's a code requirement meant to stop mold and mildew in their tracks. Your plan has to include a high-quality exhaust fan that is ducted directly to the outside of your house. These fans are rated in CFM (cubic feet per minute), and you need one that's powerful enough for the size of your new bathroom.
Lighting can truly make or break the space. A single fixture in the middle of the ceiling just won't do. A much better approach is to layer your lighting:
- Recessed Lights: These provide great overall ambient light without taking up any headroom.
- Vanity Sconces: Placed on either side of the mirror, they offer perfect task lighting for grooming and eliminate annoying shadows on your face.
- Shower Light: A waterproof, recessed fixture inside the shower is a non-negotiable for safety and basic function.
Getting to Grips with Kalamazoo County Codes and Permits
Once you've got a solid idea of what you want, it's time to deal with the official side of things. Around here in Kalamazoo and Portage, you can't just wing it. Following local building codes is an absolute must—it’s what makes your new bathroom safe, functional, and a genuine asset to your home. Trying to sidestep this process? That's a recipe for fines, forced teardowns, and a world of pain when you eventually decide to sell.
Let's be clear: adding a bathroom in your basement always requires a permit from your local building department. This isn't just bureaucratic red tape; it’s the key to a project that's built to last. The permit kicks off a series of inspections where a pro will come out to make sure the plumbing, electrical, and framing are all up to snuff with the Michigan Residential Code.
Code Requirements You Absolutely Cannot Ignore
The full building code is a beast, but for a basement bathroom in Southwest Michigan, a few things always come up. Nail these from the get-go, and your inspections will be a breeze.
- Ceiling Height: You need a finished ceiling height of at least 7 feet. Remember, that’s measured from the finished floor to the finished ceiling, so you have to factor in your flooring, drywall, and any boxes you build to hide plumbing or ductwork.
- GFCI Protection: Every single outlet needs to be a Ground Fault Circuit Interrupter (GFCI). This is a non-negotiable safety measure that prevents shocks in wet areas. Inspectors are sticklers for this, and they will check every one.
- Real Ventilation: An exhaust fan isn't optional, and it needs to be the right size. It also has to be ducted all the way to the outside of your house—not just into the space between your joists. This is crucial for yanking moisture out and keeping mold away.
And a quick heads-up: if you’re adding a bedroom down there at the same time, you'll also need an egress window that meets very specific size and placement rules for a safe fire escape.
Putting Your Permit Application Together
To get your permit, you’ll need to submit detailed plans. We’re talking about drawings that show the layout, framing, a full plumbing diagram, and the electrical plan. This is where having professional drawings really pays off—they show the building department you’ve done your homework and have a viable, code-compliant project.
Across the country, labor usually eats up 40% to 65% of a renovation budget. That’s why bringing in a team like Trademaster Construction to handle the plans and permits right from the start can be a smart move. Homeowners are always happiest when a project runs smoothly, especially families planning for the future with features like curbless showers. The permit fees alone can run anywhere from $600 to $2,500, and that doesn't always include separate plumbing inspection costs. For a deeper dive into what you can expect to spend, check out these insights on basement remodeling costs.
What Happens During Inspections
With permit in hand, you'll be scheduling a few visits from a local inspector as the work progresses. They aren't there to give you a hard time; their job is to protect you and your home.
Think of an inspector as your partner in quality control. Their job is to catch potential problems before they get covered up by drywall and tile, saving you from future structural or safety failures.
Here’s the typical order of events:
- Rough-In Inspection: This is the big one. It happens after all the "guts" are in—framing, plumbing lines, and electrical wires—but before you hang any insulation or drywall. The inspector will be checking everything from the slope of your drain pipes to the security of your wiring.
- Final Inspection: Once every last thing is done—the toilet is in, the paint is dry, the lights work—the inspector returns for a final walkthrough. If everything checks out, they’ll sign off on the project and officially close out your permit. You’re done
Solving The Basement Plumbing Puzzle
Let's talk about the heart of the project: the plumbing. In a basement bathroom, this is almost always the most complex and costly piece of the puzzle. Why? Because your basement floor sits below your home’s main sewer line, which means gravity—the force that makes every other drain in your house work—is working against you. This single fact creates a unique challenge that needs the right solution for your specific home.
Getting your head around the different plumbing options is the first, and most important, step. The path you choose here will have a direct ripple effect on your budget, the amount of concrete that needs to be torn up, and how you'll maintain the bathroom down the road. It’s the single biggest decision you and your contractor will make.
The flowchart below highlights some of the key compliance checks you'll face. Remember, your plumbing plan doesn't exist in a vacuum; it has to work in harmony with all the other code requirements.
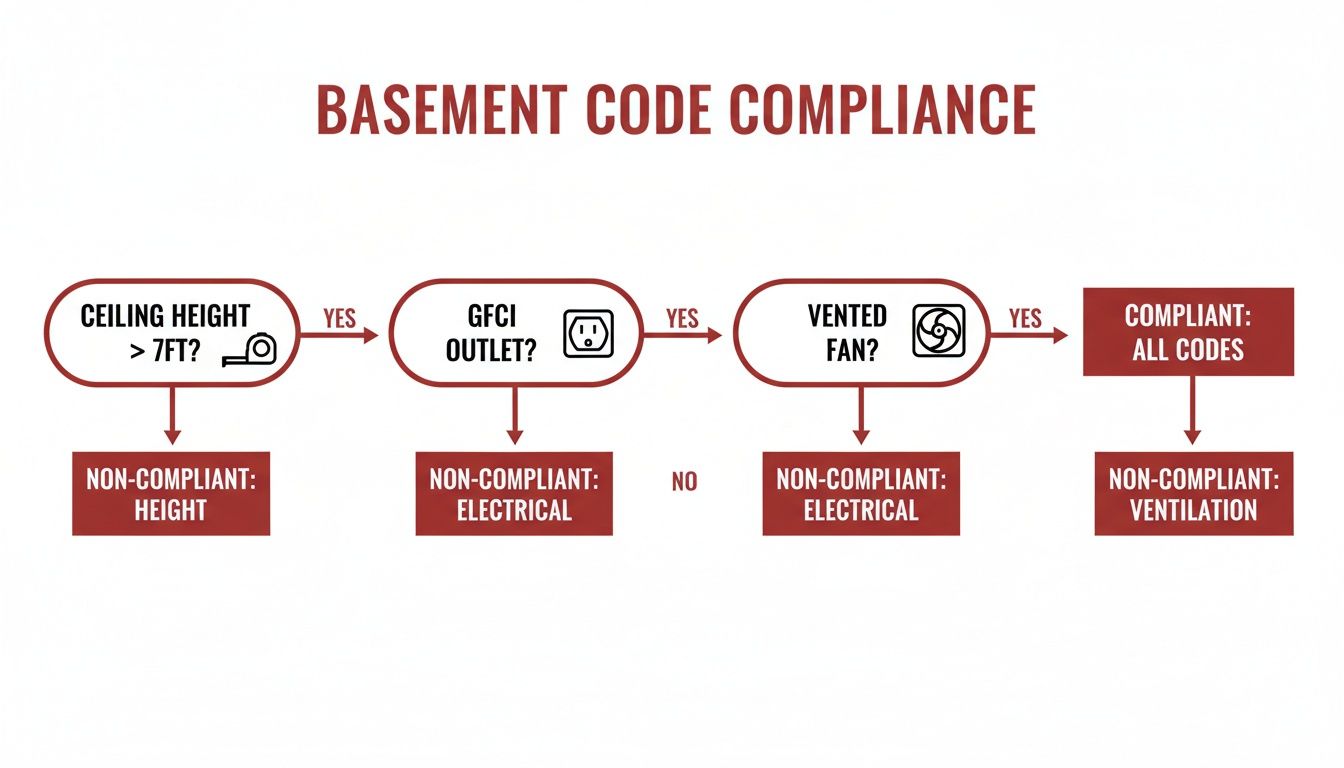
This visual is a good reminder that things like proper ventilation and GFCI outlets are just as non-negotiable as the drain lines for getting that final stamp of approval from the inspector.
Can You Rely On Gravity? The Best-Case Scenario
In a perfect world, your home’s main sewer line would be deep enough to allow for a conventional, gravity-fed drain. This is the dream setup—it’s simple, reliable, and works just like the bathrooms on your main floor.
To get there, a plumber has to break open a channel in your concrete floor to lay new drain pipes. These pipes are then tied into your home's main drain, and everything relies on getting the slope just right so waste flows away effortlessly. Yes, it involves a lot of dust and jackhammering, but the major upside is that there are no moving parts to break down. It’s a set-it-and-forget-it solution.
When Gravity Isn’t On Your Side: Pump Solutions
For most of us, the main sewer line is higher than the basement floor, making a gravity drain impossible. This is where specialized pumps come into play. You’ve got two main choices, each with its own pros and cons.
-
Sewage Ejector Pumps: This is the workhorse solution for most basement bathrooms. It involves digging a pit in the floor to house a sealed basin. All the fixtures—the toilet, sink, and shower—drain down into this basin. When the wastewater hits a certain level, a float switch kicks on a powerful pump that shoots everything up and out to the main sewer line.
-
Up-Flushing Systems: You might know these as macerating toilets. They're a much less invasive option. The system is built around a special toilet with a grinder and pump unit tucked right behind it. When flushed, the unit pulverizes waste and pumps it upward through a small pipe that can be easily hidden in a wall.
An ejector pump is like a mini sewage lift station just for your bathroom, while an up-flushing system is more of an all-in-one toilet solution. I almost always recommend an ejector pump for a full bathroom with a shower, as it's built to handle that much water volume with ease.
As you start planning, getting familiar with some professional tips on how to install sewer lines can be incredibly helpful. It gives you the language and knowledge to have a productive conversation with your plumber about what the job really entails.
To help you decide which system is right for your project, let's break down the common options in a quick comparison.
Basement Drain System Comparison
| Drain System | Best For | Pros | Cons |
|---|---|---|---|
| Gravity-Fed Drain | Homes with a low sewer line. | Extremely reliable, no mechanical parts to fail, quiet operation. | Requires extensive concrete cutting, higher upfront labor cost. |
| Sewage Ejector Pump | Full bathrooms with a shower/tub. | Handles waste from multiple fixtures, very durable and powerful. | Requires a pit in the floor, pump can be noisy, needs electricity. |
| Up-Flushing Toilet | Half-baths or locations far from main plumbing lines. | Minimal concrete work, can be installed almost anywhere. | Can be loud, primarily serves the toilet (some models have sink hookups). |
Ultimately, the right choice balances your home's layout with your budget and how you plan to use the space.
The Pro Tip: Design A Wet Wall
No matter which drain system you go with, do yourself a favor and design a "wet wall." This is a simple but brilliant concept: run all your plumbing lines—hot and cold water supply, drain pipes, and vent pipes—inside a single, slightly thicker interior wall.
This approach organizes all your plumbing in one central, accessible spot. It makes the initial installation cleaner and more efficient, and if you ever need repairs down the line, a plumber won't have to go hunting through multiple walls. It's a small planning detail that pays off big time in the long run.
Designing a Functional and Inviting Space
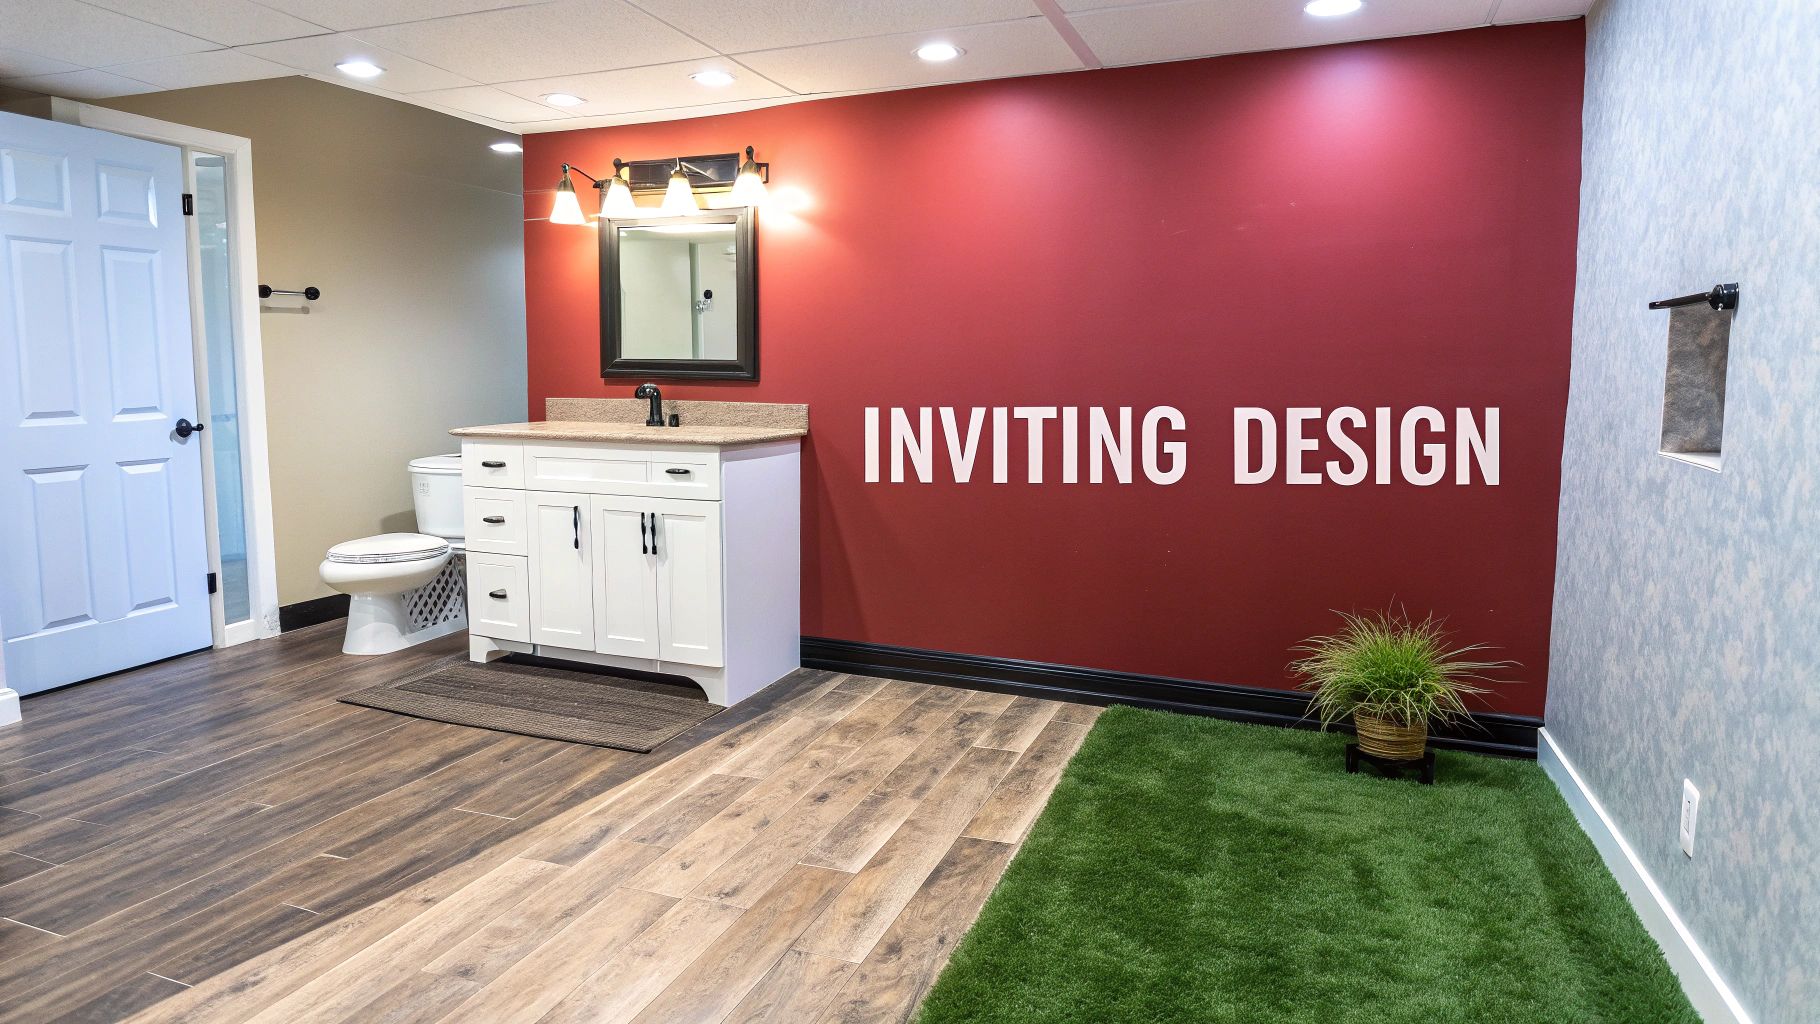
Alright, with the heavy lifting of plumbing and permits behind you, we get to the fun part—designing a space you'll actually love to use. When you add a bathroom in a basement, the choices you make for flooring, lighting, and fixtures go way beyond just looks. They're your first line of defense against the unique challenges of a below-grade environment.
This is your chance to transform a purely utilitarian space into a functional and welcoming retreat. The right materials won't just look great; they'll stand up to potential moisture and limited natural light, making sure your investment stays beautiful for years to come.
Choosing Your Foundation: Flooring and Walls
In a basement, your material choices really do start from the ground up. Concrete slabs have a nasty habit of wicking moisture, so you need flooring that is completely waterproof. Seriously, forget about solid hardwood or wall-to-wall carpet down here. They are a one-way ticket to mold and warping.
Instead, you’ll want to look at materials specifically engineered for damp environments. This ensures that any surprise moisture from a minor leak or high humidity won't force you into a costly replacement down the road.
Your top contenders for basement bathroom flooring are:
- Luxury Vinyl Plank (LVP) or Tile (LVT): This stuff is a fantastic choice. LVP is 100% waterproof, tough as nails, and feels much warmer underfoot than traditional tile. It also comes in incredibly realistic wood and stone looks, giving you all the design flexibility without any of the risk.
- Ceramic or Porcelain Tile: A classic for a reason. Tile is impervious to water and extremely durable. As long as it's installed correctly over a waterproof membrane and you use a quality grout sealant, it creates a bulletproof surface.
Just as critical as the flooring is what’s underneath it. A proper subfloor or underlayment with a vapor barrier is absolutely non-negotiable. This is what stops moisture from the concrete slab from creeping up and wrecking your new floor. For the walls, always go with moisture-resistant drywall (often called green board or purple board) instead of the standard stuff, especially around the shower and toilet.
Lighting a Windowless Space
One of the biggest hurdles in any basement bathroom is the lack of natural light. You have to be strategic with artificial lighting to keep the room from feeling like a cave. The trick is to layer your lighting sources to create a bright, inviting atmosphere.
A single overhead light just isn't going to cut it. A layered approach makes sure every corner of the room is well-lit and usable.
A common mistake I see is under-lighting the vanity. It casts shadows all over your face, making simple things like shaving or putting on makeup a real pain. Sconces on either side of the mirror are the best way to get even, flattering light.
Here’s a simple lighting plan that works every time:
- Ambient Lighting: Start with recessed can lights spread across the ceiling for general illumination. I suggest using "warm white" (2700K-3000K) LED bulbs to create a cozy, less clinical feel.
- Task Lighting: Flank your vanity mirror with wall sconces. This gives you direct, shadow-free light right where you need it most.
- Accent Lighting: A waterproof recessed light right inside the shower is a must-have. It’s a huge plus for both safety and function.
Selecting Fixtures for Function and Style
When it's time to pick out fixtures, think about the typically compact footprint of a basement bathroom and how it will be used long-term. Space-saving designs are often your best friend.
For instance, a wall-mounted or "floating" vanity can make a small room feel much bigger just by showing more floor. A corner shower unit can also be a brilliant way to maximize a tight layout.
If you're planning to stay in your home for the long haul, think about incorporating accessible or "age-in-place" design elements. These features add a ton of convenience now but also boost your home's value and appeal to more buyers down the line.
Consider including features like:
- A curbless shower for easy, trip-free entry.
- Reinforced walls with stylish grab bars near the toilet and in the shower.
- A comfort-height toilet, which is a bit taller and easier for everyone to use.
These thoughtful additions create a bathroom that is safer, more comfortable, and more valuable for anyone, regardless of age or mobility.
Budgeting Your Project and Maximizing ROI
Let's talk money. Nailing down a realistic budget is probably the most crucial part of making sure your basement bathroom project goes smoothly. You’re making a real investment in your home, and knowing exactly where your money is going is the key to finishing on time, on budget, and actually seeing a solid return.
The final bill can swing wildly depending on a few big decisions. A simple half-bath will obviously cost less than a full bathroom with a spa-like custom shower. The plumbing strategy you choose—whether it's a simple gravity-fed setup or a more involved sewage ejector pump—is another major factor that will shape your final costs right here in Southwest Michigan.
A Realistic Cost Breakdown
When you start penciling out your numbers, think in big-picture categories. This helps you avoid getting blindsided by a dozen small expenses that can quickly add up. For a basement bathroom, your costs are basically split between labor and materials.
Here’s where the money typically goes:
- Plumbing: This is almost always the biggest chunk of the budget. It covers everything from breaking up concrete for new drain lines, running the hot and cold water supplies, and installing your drainage system (like that upflush toilet or ejector pump we talked about).
- Electrical: You'll need to budget for running new circuits to power outlets, lights, and—most importantly—a good exhaust fan. Every outlet in a bathroom has to be GFCI-protected, which is a non-negotiable safety requirement in the building code.
- Framing and Drywall: This is the cost of building the actual walls and finishing them with moisture-resistant drywall, which is a must-have for any below-grade space.
- Fixtures and Finishes: Here's where you have the most control. This category includes the toilet, vanity, shower, flooring, paint, and lighting. Your personal taste can make this part of the budget either very modest or incredibly high-end.
As a general rule of thumb, expect labor to eat up about 40% to 60% of your total project cost. While the DIY route is tempting for some parts, I always tell people that professional plumbing and electrical work is essential. It's about safety, passing inspections, and ultimately protecting your investment.
Understanding the Numbers in Southwest Michigan
So, what’s the bottom line? While every project is different, we can look at averages to get a realistic starting point. Adding a bathroom can easily push a standard $20,000 basement finishing project into the $30,000–$35,000 range.
But here’s the good news: basement bathrooms don't just add convenience; they deliver a real return on investment (ROI). According to a report from This Old House, even a mid-range bathroom addition can recoup 34.7% of its cost at resale. An upscale one isn't far behind, with a 32.6% return.
Nationally, the average cost to add a new bathroom can be anywhere from $14,000 to over $48,000, depending on the size and finishes you choose. You can review the full cost analysis on thisoldhouse.com to dig deeper into those numbers.
Maximizing Your Return on Investment
Think of this project as more than just an expense—it's a strategic upgrade. You’re boosting your home’s functionality and its market value at the same time. To get the best possible ROI, you want to make choices that blend timeless style with rock-solid durability.
Here are a few tips I've picked up over the years to make your investment work for you:
- Go for a Full Bath (If You Can): If your basement might ever serve as a guest suite or has a legal bedroom, a full bathroom with a shower is a massive selling point. It’s a much bigger draw for future buyers than a simple powder room.
- Choose Durable, Waterproof Materials: This is non-negotiable in a basement. Go with Luxury Vinyl Plank (LVP) flooring and quality tile in the shower. These materials stand up to moisture, preventing costly damage down the road, and buyers love a low-maintenance home.
- Get Smart with Storage: A well-designed vanity, a recessed medicine cabinet, or some built-in shower niches add huge functional value without eating up a single inch of floor space.
- Don’t Skimp on Lighting and Ventilation: Nobody wants a dim, damp basement bathroom. Bright, layered lighting and a powerful, quiet fan make the space feel clean, airy, and inviting. These are the kinds of details that scream "quality renovation."
When you balance your design dreams with a smart, practical budget, you’ll end up with a beautiful new space that makes your life easier today and pays you back when it's time to sell.
Common Questions About Basement Bathrooms
Even the most well-thought-out plan for a basement bathroom can leave you with a few nagging questions. Over the years, we've heard just about all of them from homeowners here in Kalamazoo and Portage. Getting straight answers to these common concerns is the best way to move forward with confidence.
Let’s walk through some of the questions we get asked most often. These are the real-world details that help you understand what you're getting into and what the payoff will be.
How Much Value Does a Basement Bathroom Really Add?
This is a big one, and the answer is twofold. First, the numbers: Remodeling data shows that a midrange bathroom addition can get you back nearly 35% of what you put into it when you sell. That’s a solid return for any home improvement project.
But honestly, the real value isn’t just about recouping costs. For a potential buyer in Southwest Michigan, a finished basement with its own bathroom is a game-changer. It elevates that space from "storage" to a genuine living area—a guest suite, a rec room, or a private retreat for a teenager. That kind of functionality makes your home stand out and can absolutely justify a higher asking price.
Can I Add a Bathroom Without Existing Plumbing?
Yes, absolutely. In fact, this is the reality for most basement projects, and it's a problem we solve all the time. While you won't be able to rely on gravity like your upstairs bathrooms, there are two standard, reliable solutions we use.
- Sewage Ejector Pump: This is the go-to for a full bathroom with a shower. We install a sealed basin below the floor, and all the fixtures drain into it. A pump inside then pushes the waste up to your main sewer line. It’s a workhorse system.
- Up-Flushing Toilet: You might have heard this called a macerating toilet. The pump is a self-contained unit that sits right behind the toilet. It grinds up waste and sends it on its way through a small pipe. This is a great, less-invasive option, especially for a half-bath.
A good contractor can take one look at your basement’s layout and tell you which approach makes the most sense for reliability and your budget.
What Is the Biggest Mistake to Avoid?
Without a doubt, the single most destructive mistake is failing to handle moisture and ventilation properly. Basements are damp by nature. If you don't get ahead of that, you’re setting yourself up for a future of mold, mildew, and rot that will ruin all your hard work.
Your exhaust fan isn't a luxury—it's the lungs of your new bathroom. A cheap, undersized fan or one that isn't vented directly outside is a guaranteed recipe for long-term moisture problems. Investing in a quality, high-CFM fan is non-negotiable.
This means starting with a solid waterproofing plan for the floors and walls before a single stud goes up. It also means using the right materials, like moisture-resistant drywall (often called "green board"), and installing a powerful exhaust fan that is properly ducted all the way outside your home. Cutting corners here will cost you dearly down the road.
Do I Need a Special Type of Toilet for a Basement?
It all comes down to where your main sewer line is. On the rare occasion that the sewer line is below your basement floor, gravity is on your side, and a standard toilet will work just fine.
But for most homes, the sewer line is higher than the basement floor, meaning waste needs a little help getting where it needs to go. That leaves you with two great options:
- A standard toilet that drains into a separate sewage ejector pump system in the floor.
- An "up-flushing" toilet, which is an all-in-one unit with the pump built right in.
Both are incredibly reliable when installed correctly. The choice usually depends on whether you're adding a full or half-bath and the overall design of the space.
Ready to stop asking questions and start building your dream basement bathroom? The team at Trademaster Construction has the expertise to guide you from the first blueprint to the final tile. We handle the complexities of plumbing, permits, and design so you can focus on the exciting results. Visit us online to explore our Inspiration Gallery and get a realistic price estimate for your project. Start planning your Southwest Michigan basement remodel today.

