
That musty smell that creeps in after a heavy spring rain? That’s not just an annoyance—it's your basement's way of sending up a flare. If you want to stop mold before it starts, you need to get serious about two things: aggressively controlling moisture from every possible source and keeping the air moving.
This isn't about quick fixes. It’s about a complete strategy to make your basement a permanently healthy space.
The Unseen Threat in Southwest Michigan Basements
For anyone with a home in places like Kalamazoo or Portage, the fight against basement moisture is relentless. Our seasons practically roll out the welcome mat for mold. Wet springs, humid summers—it's the perfect storm.
And this goes way beyond a musty odor. We're talking about a genuine threat to your family's health and the very bones of your house. Ignore the early signs, and you’re setting yourself up for a much bigger, more expensive headache later on.
This isn’t some rare problem, either. Researchers estimate that the average prevalence of dampness and mold is a staggering 47% in U.S. homes. That means there's a nearly 50/50 chance your neighbor is dealing with it, too. For us here in Southwest Michigan, that number underscores just how critical prevention is.
Why You Can't Afford to Wait
A damp basement puts everything at risk, from your holiday decorations to the air your family breathes. Mold pumps out spores that can set off allergies and respiratory problems, essentially turning your home’s foundation into an air quality hazard.
Over time, that moisture can rot wooden support beams, crumble drywall, and destroy flooring, tanking your home's value. The first step is learning what to look for; these are the 8 Unmistakable Signs of Mold in a House.
A proactive mold prevention strategy is one of the best investments a homeowner can make. It protects not just the physical structure of your house, but also the health of the people living inside it.
Here’s a quick look at the core strategies we’re going to unpack. Think of it as your game plan for creating a basement where mold simply can’t get a foothold.
Your Basement Mold Prevention Playbook
This table breaks down the essential pillars of a dry, mold-free basement. Each category tackles a different part of the problem, working together to create a comprehensive defense.
| Prevention Category | Key Action | Why It Matters |
|---|---|---|
| Moisture Control | Use tools like dehumidifiers and fans to manage airborne humidity. | Mold needs moisture to live. Controlling humidity takes away its most critical resource. |
| Drainage Mastery | Fix landscape grading, gutters, and downspouts to direct water away. | Stops water from pooling against your foundation and seeping into the basement. |
| Consistent Maintenance | Set a simple routine to inspect and maintain your prevention systems. | Catching small issues early prevents them from becoming massive, costly problems. |
By taking this kind of well-rounded approach, you'll do more than just fight mold. You'll turn your basement from a potential liability into a safe, valuable, and healthy part of your home.
Finding the Source of Your Basement Moisture
Before you can even think about preventing mold, you have to put on your detective hat. If you just start scrubbing and drying without figuring out where the water is coming from, you’re just bailing out a boat with a hole in it. You'll work yourself to exhaustion and get nowhere. Moisture doesn't just materialize; it always has a source.
The tricky part is that water is sneaky. A damp spot on the floor might not be from a crack right underneath it. It could be from a leaky pipe ten feet away, wicking through the concrete. The whole goal here is to trace the symptoms back to the root cause so that your fix is permanent, not just a band-aid.
The Three Ways Moisture Gets In
Water finds its way into your basement in one of three main ways. Getting a handle on these categories is the first step to narrowing down your search, and each one needs a different game plan.
-
Airborne Humidity: This is just moisture that's already in the air. It might come from doing laundry, a basement shower, or simply humid air seeping in from outside. When this warm, damp air hits your cool basement walls or pipes, it condenses, leaving everything feeling clammy.
-
Liquid Water Intrusion: This is the one everyone thinks of—actual water flowing in from outside. We’re talking about leaks through foundation cracks, poorly sealed windows, or gaps where pipes and utilities come through the wall.
-
Moisture Vapor Diffusion: This is the silent creeper. Moisture from saturated soil outside can slowly migrate right through the pores of your concrete foundation. It doesn't look like a leak, but it leaves your walls feeling perpetually damp.
Simple Diagnostic Tools for Homeowners
You don't need a truck full of expensive gear to start your investigation. A few simple, time-tested tricks can tell you a lot about what you're up against. The best one by far is the classic "plastic sheet test," which is brilliant for figuring out if your problem is airborne condensation or water seeping through the walls.
Here’s how you do it: just tape a one-foot square of plastic sheeting tightly to a concrete wall you think is damp. Make sure you seal all four sides with tape. Leave it there for 24 to 48 hours, then come back and check it.
- Moisture on the outside of the plastic (facing the room) means you’ve got a high-humidity problem. The water is condensing from the air in your basement.
- Moisture on the inside of the plastic (against the wall) is the tell-tale sign that water vapor is coming through the concrete from the soil.
- Moisture in both places? Lucky you. You're dealing with a combination of high humidity and vapor diffusion.
This simple test is incredibly valuable. It can stop you from dropping hundreds of dollars on a huge dehumidifier when the real issue is groundwater pressure that needs to be handled from the outside.
Think about a real-world scenario I see all the time. A homeowner in Kalamazoo notices a damp spot along a basement wall that gets worse after it rains. Their first thought is to slap some waterproof paint on the inside. But after a quick walk outside, they find a gutter right above that spot is completely clogged with leaves. Rainwater was just pouring over the side, soaking the ground next to the foundation. The fix wasn't an expensive interior sealing job—it was a ten-minute gutter cleanout.
This is why understanding the core principles of prevention is so important.
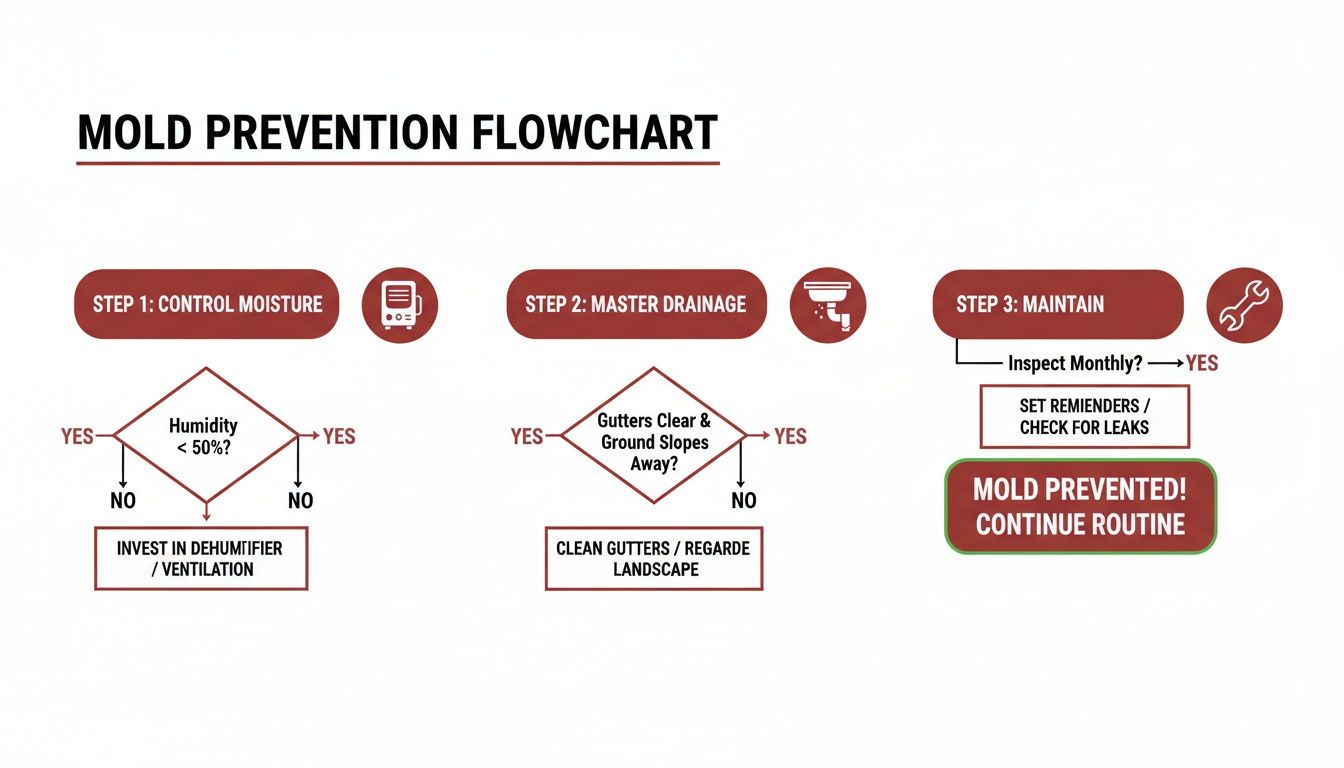
As the chart shows, it all starts with controlling that moisture source before moving on to drainage and maintenance.
Tracing Leaks to Their Origin
If you suspect you're dealing with actual liquid water, your investigation is all about following the evidence. The best time to do this is during or right after a heavy rainstorm—that's when leaks are most active and easiest to spot.
Be sure to check these common weak spots:
- Foundation Cracks: Look over every inch of your interior and exterior walls. Even hairline cracks can let in a surprising amount of water.
- Window Wells: Make sure they aren't full of leaves and gunk. They need proper drainage so water doesn't pool up against the window and seep inside.
- Sill Plate: Check for dampness where the wood frame of your house sits on top of the concrete foundation. This is a prime spot for rot and moisture intrusion.
- Pipe Penetrations: Look closely where water, gas, or sewer lines enter through the foundation. The seals around them can wear out and fail over time.
By systematically working through each potential source, you stop reacting to a damp basement and start proactively fixing the problem. This investigation is, without a doubt, the most important step toward a dry, healthy, mold-free basement.
Getting Serious About Grading and Exterior Drainage
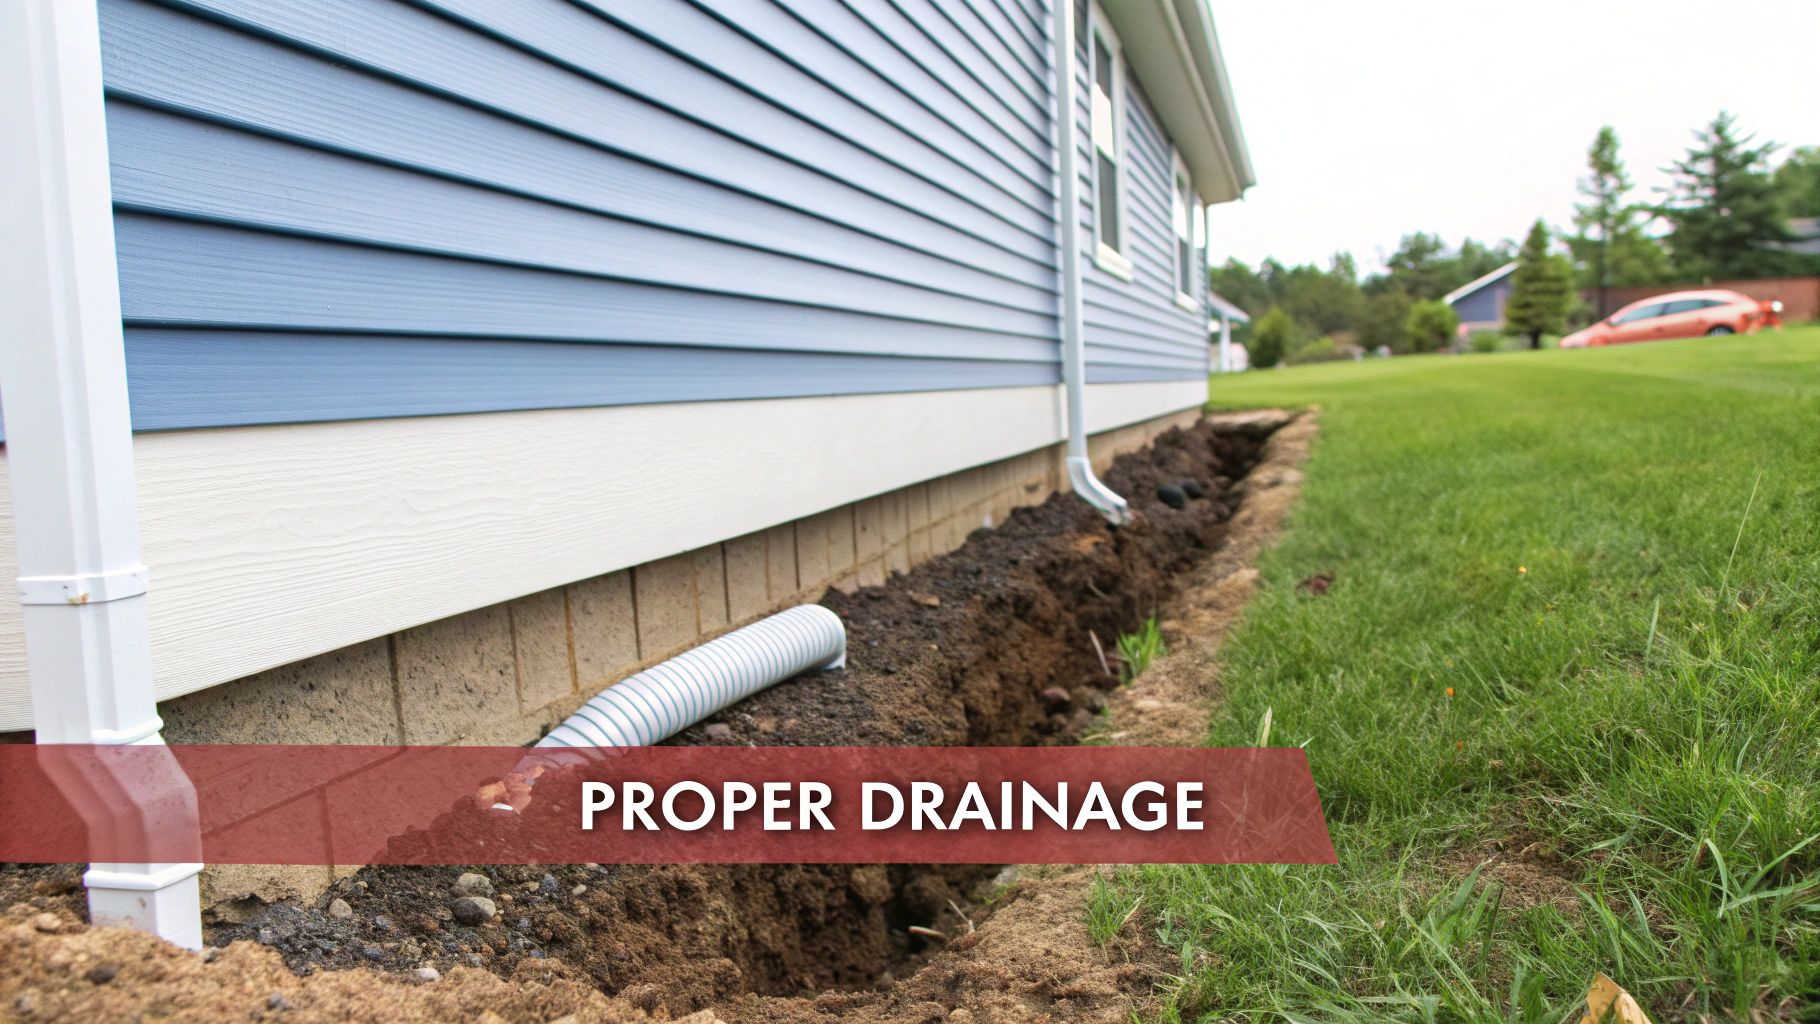
Here's a truth I've learned over decades of dealing with wet basements: the most powerful defense against mold doesn't start in the basement. It starts in your yard.
Think of your foundation like the hull of a boat. The best way to stay dry is to keep water from ever touching it. Too many homeowners jump straight to interior paints and sealants, but those are just Band-Aids. They treat the symptoms. The real fix is stopping water at the source, which means getting serious about your landscape, gutters, and downspouts.
It All Starts With the Slope (Grading)
The single most important factor in keeping your basement dry is grading. It's a simple concept: the ground around your foundation must slope away from the house. Gravity is relentless, and if the ground is flat or, even worse, slopes toward your home, water will pool against the foundation and eventually find its way inside.
This consistent pressure, known as hydrostatic pressure, can force moisture right through the pores in concrete. The solution is often just some strategic landscaping.
You're aiming for a gentle, consistent slope that extends at least six to ten feet out from your foundation walls. We're not talking about building a massive hill. A drop of about six inches over that ten-foot distance is typically all you need to give rainwater a clear path away from your home.
Gutters and Downspouts: Your First Line of Defense
Your gutter system is the unsung hero of a dry basement. Its entire job is to capture the thousands of gallons of water that hit your roof during a storm and direct it safely away. When gutters are clogged with leaves and gunk, they fail. Simple as that.
Water just spills over the sides, saturating the ground right next to your foundation. That's why cleaning your gutters is a non-negotiable chore, especially in the late spring after helicopters fall and again in late fall after the leaves are down.
But clean gutters are only half the battle. What happens to the water after it leaves the gutter is just as crucial. A standard downspout that dumps water right at the corner of your foundation is a recipe for disaster.
A downspout without an extender is like a fire hose aimed directly at your foundation. It concentrates a massive amount of water in the absolute worst spot, practically guaranteeing a moisture problem.
You have to get that water moving. Attach extenders to every downspout to carry water a minimum of six feet from the house—and ten feet is even better if you have the space. You can use simple plastic extenders or install buried drain lines that pop up further down your yard for a cleaner, more permanent solution.
Watch Out for These Common Landscaping Blunders
Even with perfect grading and gutters, some common landscaping choices can completely undermine your efforts. I see these mistakes all the time at homes in Southwest Michigan, and thankfully, they're usually easy fixes.
-
Mulch Piled Against the Siding: Never, ever pile mulch up so it touches your siding. Wood mulch is basically a sponge. It traps moisture against your home's sill plate and foundation, inviting rot and water intrusion. Always leave a gap of at least six inches between mulch beds and your siding.
-
Crowded Foundation Plantings: Planting big, dense shrubs right up against the house is a classic mistake. They trap humidity, block airflow, and prevent the foundation from ever drying out after it rains. Give your foundation some breathing room so air can circulate.
-
Hardscaping That Slopes the Wrong Way: A patio, walkway, or driveway that tilts toward the house acts like a funnel, channeling water straight to your foundation. If you're putting in new hardscaping, make sure your contractor gets the slope right. For an existing problem, installing a channel drain along the edge can intercept that water and redirect it.
Tackling these exterior issues is the single most effective thing you can do to win the war against basement dampness. When you manage the water before it gets to your foundation, you're not just preventing mold—you're protecting the long-term health of your entire home.
Creating a Dry Indoor Environment
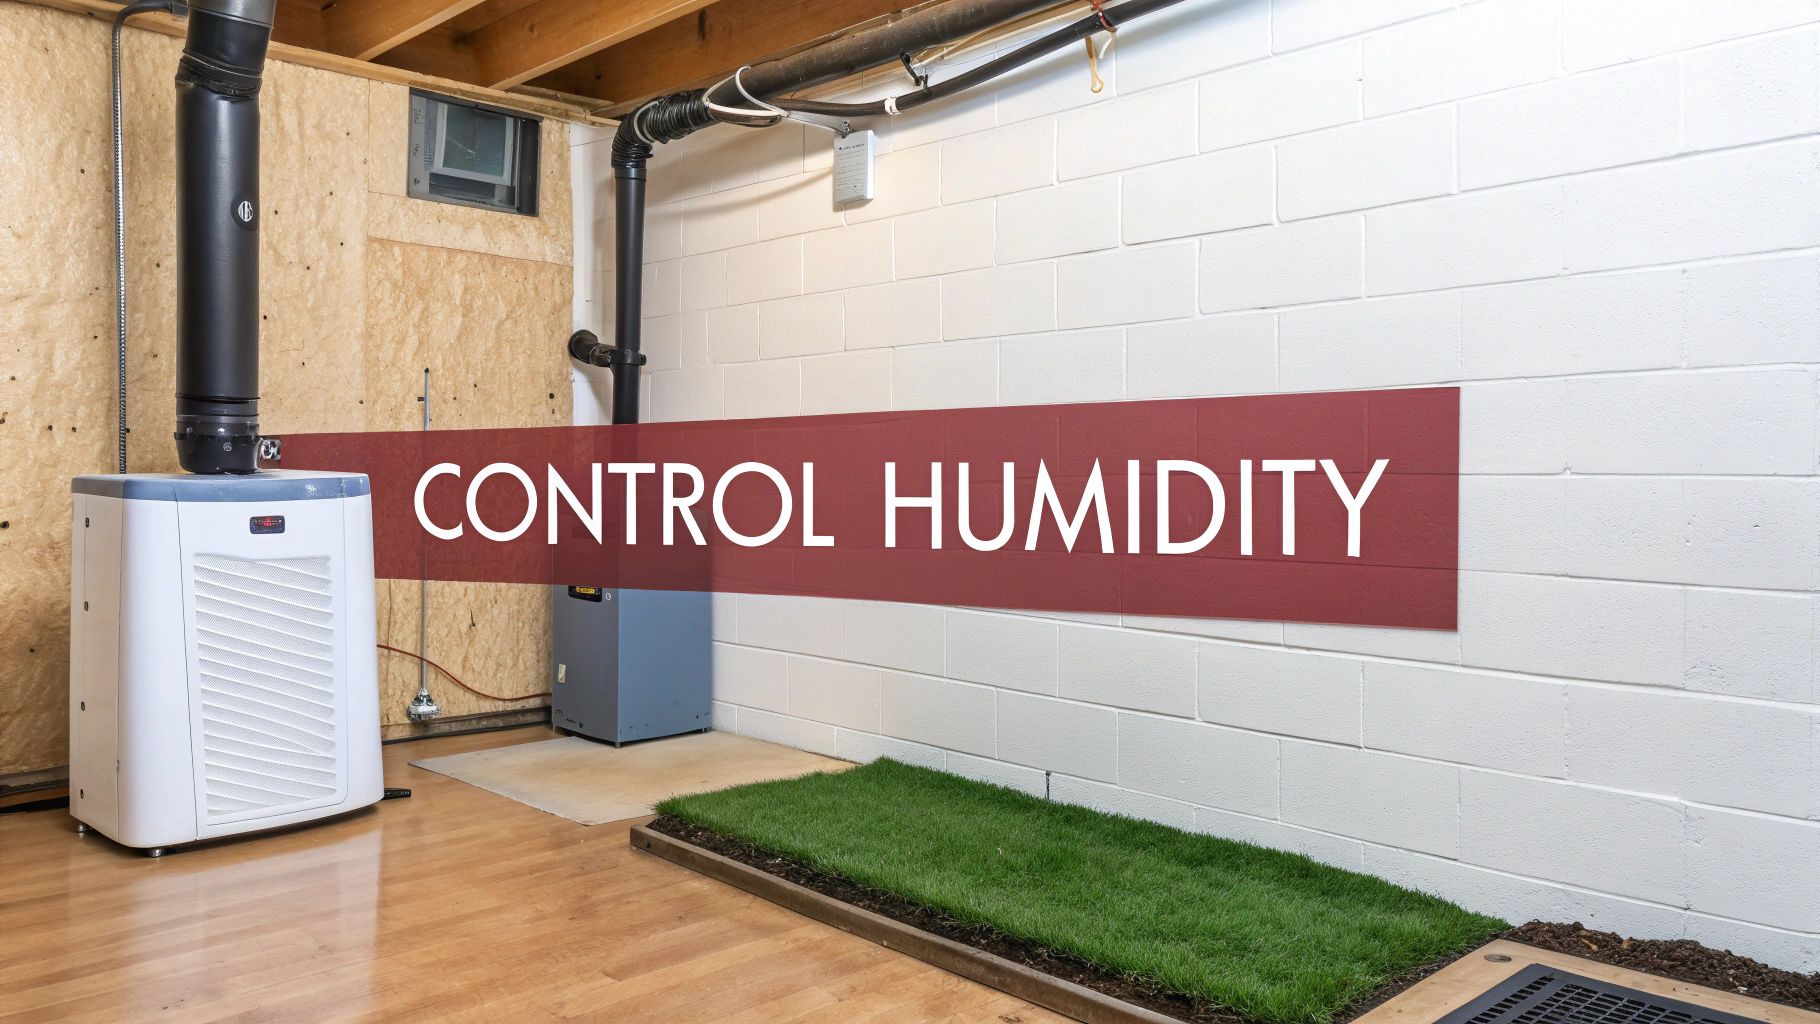
Once you've won the battle against water on the outside of your foundation, the fight moves indoors. The new opponent? The air itself. Creating a dry indoor environment is all about managing airborne moisture—what we call humidity. Mold spores are everywhere, just waiting for a damp surface to set up camp. By getting a handle on your basement's climate, you’re taking away the one ingredient they absolutely need to grow.
Don't underestimate the seriousness of this. The European Community Respiratory Health Survey (ECRHS) II found that 28% of homes reported water damage, and 14% had visible mold. This isn't just a maintenance issue; it's a health issue. The World Health Organization is clear: controlling humidity, keeping it below 60%, and addressing any water intrusion within 24–48 hours are critical for protecting your family's health.
Your Best Tool for Humidity Control: A Dehumidifier
A good dehumidifier is the MVP of a dry basement. It’s constantly working, pulling moisture right out of the air before it can condense on cool concrete walls, floors, and pipes. The sweet spot you're aiming for is a relative humidity between 30% and 50%. Any higher, and you're practically inviting mold to move in.
Sizing is everything. A unit that's too small will run nonstop without ever hitting the target, just wasting electricity and burning itself out.
- For damp spaces up to 1,500 sq. ft., a 30-pint unit is usually a good starting point.
- For very damp spaces up to 2,000 sq. ft., you'll want to step up to a 50-pint model.
- For extremely wet basements, a heavy-duty 70-pint or larger unit is likely necessary.
Pro-tip: Get a model with a continuous drain hose. You can run the hose to a floor drain or sump pump and never have to think about emptying a heavy, sloshing water bucket ever again.
A dehumidifier isn't a "set it and forget it" appliance. It’s a key part of your home’s air quality system. Check the filter monthly, clean it as needed, and ensure there's plenty of space around the unit for proper airflow.
Simple Ventilation and Insulation Wins
Beyond running a dehumidifier, a few small, often-overlooked fixes can make a huge impact on your basement's moisture levels.
Check Your Dryer Vent
One of the most common culprits of excess humidity is a leaky or clogged clothes dryer vent. First, make sure the hose is rigid metal ducting, not the flimsy plastic or foil kind that traps lint and creates a fire hazard. More importantly, check that it's securely attached and vents all the way to the outside, with no gaps letting hot, moist air escape into your basement.
Insulate Cold Water Pipes
In the humid summer months, cold water pipes look like they’re sweating bullets. All that condensation drips onto the floor, joists, and anything stored below, creating perfect little mold incubators. The fix is cheap and easy: wrap your cold water pipes with foam pipe insulation. You'd be surprised how much moisture this one simple step can eliminate.
For more ideas, check out these effective tips to reduce humidity in your home; it’s a crucial part of keeping your basement dry.
Building for the Future: Mold-Resistant Materials
Finishing your basement? This is your golden opportunity to build mold prevention right into the structure. Spending a little more on the right materials now can save you a world of hurt—and a ton of money—later on.
Ditch the traditional paper-faced drywall. Instead, look for products made for potentially damp areas.
- Mold-resistant drywall (Green Board): This has a water-resistant paper facing, making it a solid upgrade for basement bathrooms or laundry areas.
- Paperless drywall: This is the top-tier choice. It uses fiberglass mats instead of paper, giving mold nothing organic to feed on. For any below-grade wall, this is the way to go.
Think about your insulation, too. Forget the standard paper-backed fiberglass batts. Choose something inorganic that won’t absorb moisture or become mold food. Rigid foam board or closed-cell spray foam are fantastic options. By starting with these resilient materials, you’re not just building a new living space; you’re building one that’s designed to stay healthy and mold-free from day one.
The Cost of Prevention Versus the Price of Neglect
It’s so easy to put off the little things. Buying downspout extenders or remembering to empty the dehumidifier can feel like minor chores that can wait until next weekend. But when it comes to basement moisture, pushing off these small, inexpensive tasks is a financial gamble with terrible odds.
The real cost isn't in prevention; it's in the massive expense that comes with neglect.
A proactive mindset involves modest, totally manageable investments. A good-quality dehumidifier might set you back a few hundred dollars, and a tube of foundation crack sealer costs less than a pizza. Think of these as small, one-time expenses that start paying you back immediately by protecting your home's value and your family's health.
The Financial Reality of Mold Remediation
Ignoring a little dampness doesn't make it disappear—it just gives it time to grow into a much more expensive disaster. That faint musty smell you noticed can quickly escalate into a full-blown mold infestation that demands professional intervention.
The price tag for professional mold remediation can be shocking, typically running from $500 to $6,000. For extensive contamination, that number can climb even higher. Suddenly, the $20 you decided not to spend on gutter guards feels like a very painful oversight. This financial hit is often compounded by the added cost of replacing ruined drywall, carpeting, and personal belongings you had in storage.
Investing in basement moisture prevention provides not only immediate property protection but also long-term savings by avoiding expensive remediation and potential health-related costs.
The economic burden of untreated mold extends far beyond the cleanup bill. It's a serious health issue, too. Studies have shown that about 20% of current U.S. asthma cases are linked to indoor dampness and mold exposure, with annual related costs reaching an incredible $3.5 billion. You can find more eye-opening statistics about mold's financial impact in a detailed report from Brighter Day.
Investment in Prevention vs Cost of Remediation
Let's look at a straightforward comparison. A small investment today can genuinely save you from a four-figure repair bill tomorrow. The return on investment for keeping your basement dry is enormous.
| Action | Typical Cost | Potential Savings (Avoided Remediation) |
|---|---|---|
| DIY Gutter Cleaning & Downspout Extenders | $0 – $50 | $1,500+ |
| Running a Quality Dehumidifier (Annual) | $100 – $300 (Electricity) | $2,000+ |
| Sealing Foundation Cracks | $25 – $100 | $2,500+ |
| Professional Exterior Grading | $500 – $3,000 | $5,000+ |
As the numbers clearly show, even the most expensive preventative measure—like professional grading—is often cheaper than a serious remediation project.
Simple maintenance isn’t just another chore on your to-do list; it's one of the smartest financial decisions you can make as a homeowner. The price of neglect is just too high to pay.
Your Top Questions About Basement Mold, Answered
Even with the best intentions, questions always come up when you're trying to get a handle on basement moisture. Getting the right answers can be the difference between a quick fix and a lasting solution. Here are some of the things I hear most often from homeowners.
What Does Basement Mold Smell Like? Is It Always Visible?
That unique, musty smell in your basement is the number one sign of a mold problem. It's often described as earthy or damp, a bit like wet soil or rotting wood. That odor is caused by gases—called Microbial Volatile Organic Compounds (MVOCs)—that mold releases as it grows and breaks down organic materials.
Here’s the most important takeaway: you will almost always smell mold long before you see it. Mold thrives in dark, hidden spots. It loves the space behind drywall, underneath carpet pads, inside wall cavities, or above ceiling tiles where a small leak might have gone unnoticed.
If you walk downstairs and that musty smell hits you, take it seriously. It's a clear signal to start hunting for a hidden moisture source, even if you can't see any visible growth. Don't just get used to the smell—it's your home's early warning system.
Can I Just Paint Over a Small Patch of Mold?
This is probably the most common mistake I see, and it's a dangerous one. The short answer is an absolute no, you should never paint over mold. Mold-resistant and mold-inhibiting paints are fantastic products, but their job is to prevent future growth on a clean surface. They won't kill or contain an existing mold colony.
Painting over active mold is like putting a tiny bandage on a serious wound. The mold is still very much alive under that new coat of paint. It will keep feeding on the paper in your drywall, spreading its roots, and releasing spores. Before long, it will push right through the new paint, and you'll be right back where you started, only this time the problem will be much more severe.
Here’s the right way to handle it:
- First, fix the moisture source that allowed the mold to grow.
- Kill and completely remove the existing mold. For a small area, a simple vinegar-water solution or a commercial mold killer can work well.
- Let the area dry completely.
- Prime the clean, dry surface with a high-quality, stain-blocking, and mold-inhibiting primer.
- Finally, apply your top coat of paint.
If you skip these steps, the mold is guaranteed to come back.
Is a Dehumidifier Enough for a Naturally Damp Basement?
Because they're below ground, basements are naturally cooler and more prone to dampness. But a chronically "damp basement" isn't something you should just accept. A good dehumidifier is an absolutely essential tool for managing moisture in the air (ambient humidity). For a lot of homes where the main issue is just condensation on cool walls during humid Michigan summers, a dehumidifier can be a total game-changer.
A dehumidifier is your frontline defense against airborne moisture, but it's not a substitute for stopping active water leaks. It's designed to manage the air, not to clean up water intrusion from outside.
However, if your basement’s dampness is from liquid water getting in from the outside, a dehumidifier is barely a temporary fix. It’s completely outmatched. If you've got foundation cracks, bad grading that sends rainwater rushing toward your house, or a high water table, your dehumidifier will be fighting a battle it can't win. It will run nonstop, spike your electric bill, and never actually solve the core problem.
You have to figure out where the moisture is coming from first. If that plastic sheet test shows moisture is coming up through the concrete, you need to fix your exterior drainage and seal those cracks before you can rely on a dehumidifier.
When Should I Call a Professional Instead of Doing It Myself?
Knowing your limits is a key part of being a homeowner. DIY is great for saving money on a lot of common issues. You can absolutely handle cleaning small patches of surface mold (the general rule of thumb is anything less than 10 square feet), sealing minor cracks, cleaning your gutters, or running a dehumidifier.
But there are times when you need to pick up the phone. You should call a professional when you're dealing with issues that are widespread, structural, or potentially hazardous.
Think about hiring an expert in these situations:
- Widespread Mold: If you find mold covering more than just a small patch, it’s a job for certified remediation pros. They have the training and safety gear to handle it properly.
- Signs of Structural Problems: Big foundation cracks (especially horizontal ones), walls that are bowing inward, or crumbling concrete demand an expert opinion from a structural engineer or foundation repair company.
- Persistent Water Intrusion: If your basement gets wet after every big rain and you can't figure out why, a waterproofing contractor can diagnose and fix those complex issues.
- A Musty Smell That Won't Go Away: If you've cleaned and run a dehumidifier and that smell is still there, it means there's a hidden moisture source you haven't found yet.
- Planning to Finish Your Basement: This is probably the most critical time to call in a pro. Before you invest tens of thousands of dollars finishing a basement, have a trusted contractor assess and permanently fix any moisture problems. Building a beautiful new living space on top of a damp foundation is just asking for a costly disaster down the road.
A dry, healthy basement is the foundation of a healthy home. If you're considering a basement finishing project in Southwest Michigan, addressing moisture is the non-negotiable first step. At Trademaster Construction, we help homeowners build beautiful, durable spaces from the ground up, starting with a foundation you can trust. Let us help you create a basement that adds value and enjoyment to your home for years to come. Visit us at https://www.trademasterkz.com to get started.

