
You're standing at the kitchen sink in a Southwest Michigan home, staring at a puddle beneath the cabinet. The old garbage disposal hums but doesn't grind, leaks around the flange, or refuses to turn on at all. Replacing the unit may look like a straightforward afternoon project, but the plumbing connection is only half the job. The trouble usually starts when the new disposal doesn't fit the sink, the drain layout restricts flow, or the electrical supply isn't safe for the replacement.
Garbage disposal installation works best when you treat it as a coordinated plumbing, mechanical, and electrical project. A careful compatibility check prevents most rework. A proper leak test catches problems before the cabinet floor swells. And when the existing wiring or drain system is questionable, stopping early is cheaper and safer than forcing a new appliance into an old setup.
Before You Start Your Garbage Disposal Installation
Most failed replacements begin with a new disposal already on the floor and the old one halfway removed. The homeowner discovers that the sink opening is wrong, the cabinet is too shallow, or the only outlet under the sink isn't properly protected. Put the new unit aside and inspect the entire work area first.
Confirm the physical fit
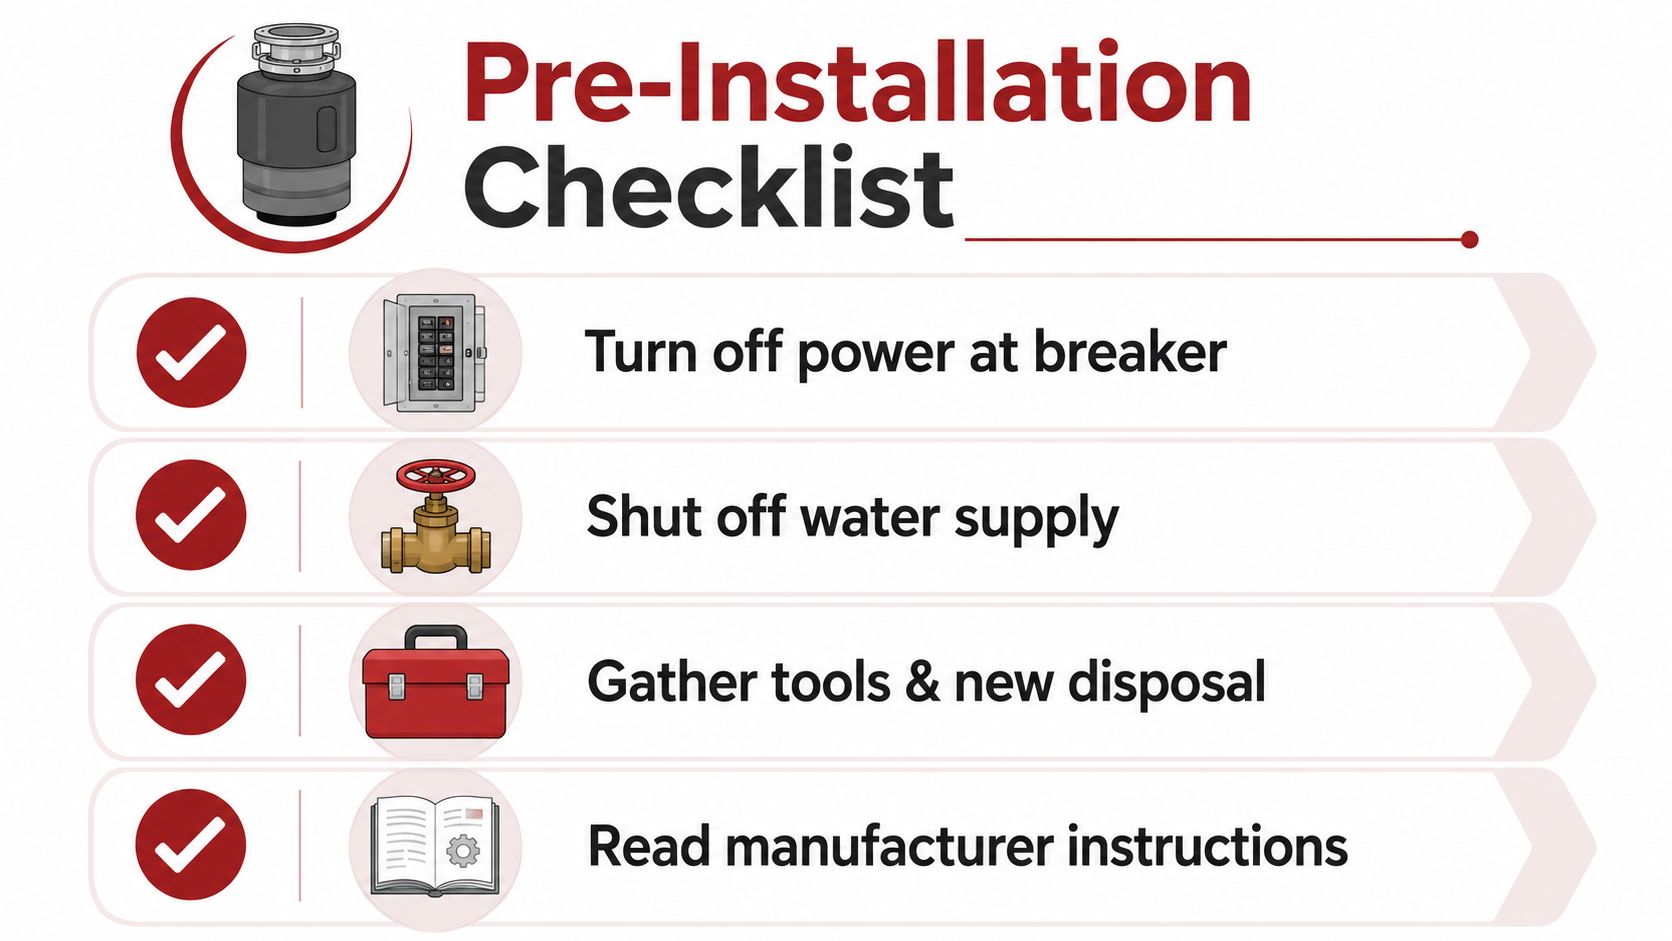
Start by disconnecting power at the breaker, not only at the wall switch. Shut off the water supply if the work will disturb nearby valves or plumbing, then remove everything from the cabinet. Place a bucket and towels below the trap because residual water and food waste are normal when the drain is opened.
Measure the sink drain opening and compare it with the replacement flange. Many disposer flanges are designed for a 3.5-inch sink drain opening, while compatible products may specify a 3-3/8-inch inside diameter and a 3-bolt mounting pattern, as shown in this garbage disposal flange specification. Don't assume a replacement mounting ring will fit the existing flange. Different manufacturers and models can use different mounting systems.
Look for enough vertical and horizontal clearance beneath the sink. Account for the disposal body, discharge tube, trap, dishwasher hose, electrical box, and cabinet doors. An older cabinet base may leave little room for a larger or quieter model, and forcing the unit into contact with the cabinet can transmit vibration.
Inspect the electrical and drain paths
Most disposals use a 120-volt grounded circuit, and installation guidance commonly identifies a dedicated 15- to 20-amp breaker as typical for safe operation, as outlined in this garbage disposal wiring reference. Don't proceed until you know whether the unit is cord-connected or hardwired, where the disconnect is located, and whether the receptacle is accessible.
Check the drain direction before removing anything. The discharge outlet may need a different orientation than the old unit, and a poorly positioned outlet can create awkward or restrictive piping. For a visual overview of the physical replacement sequence, the how to install a garbage disposal guide offers a useful companion reference.
You'll generally need an adjustable wrench, screwdriver, pliers, bucket, towels, a wire tester, approved wire connectors, and the manufacturer's mounting hardware. Plumber's putty may be required for the flange, although some models specify a supplied gasket instead. Read the disposal manual before disconnecting the old unit because the dishwasher inlet, mounting assembly, and wiring instructions vary.
Removing the Old Unit and Mounting the New Disposal
Support the old disposal before loosening its mounting ring. It's heavier and more awkward than it looks, especially when you're working alone in a dark cabinet with your shoulders twisted around the sink plumbing.
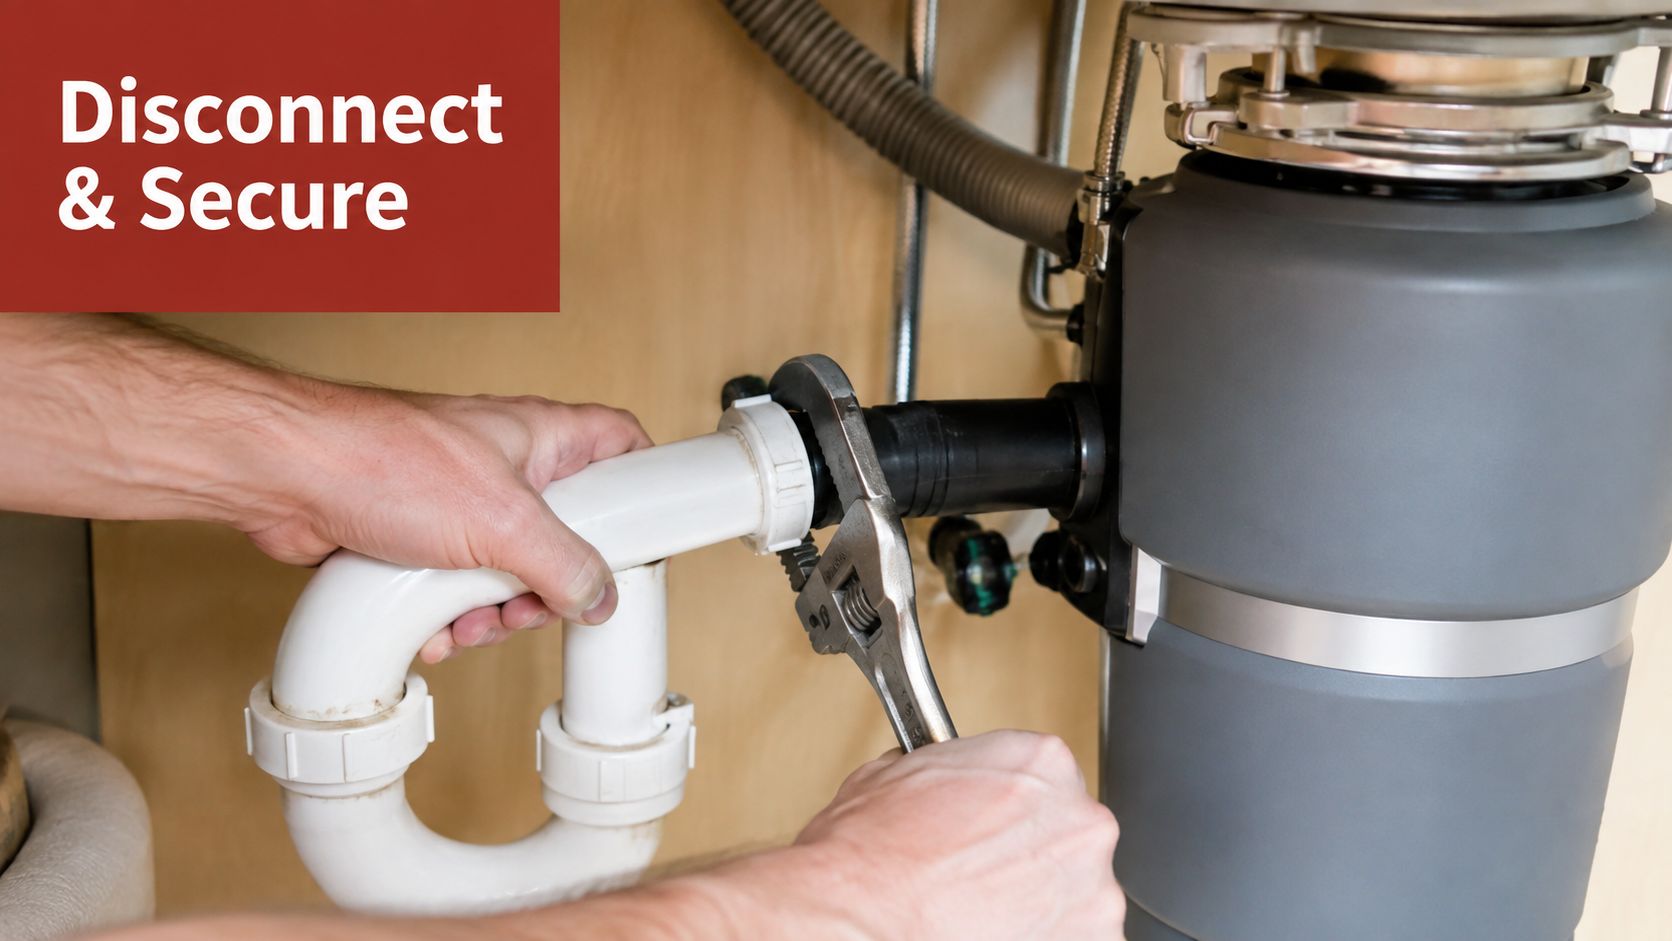
Place a bucket under the discharge connection and loosen the drain hardware carefully. Disconnect the trap or discharge tube from the disposal, then remove the dishwasher hose if one is attached. Keep track of the gaskets and washers, but don't assume they should be reused. Flattened or hardened seals are common leak sources.
Before touching wires, confirm the breaker is off with a properly rated tester. Remove the electrical cover plate, identify the connections, and disconnect the old unit only after testing. If the installation is hardwired and the conductors are brittle, damaged, or confusing, stop and have an electrician evaluate it.
Remove the old mounting assembly
Hold the disposal body with one hand while turning the mounting ring with the other. A disposal wrench, often supplied with the new unit, can help release the locking tabs. Rusted hardware may require penetrating oil and patience. Avoid prying aggressively against the sink because stainless steel and composite sinks can still be damaged by concentrated force.
Once the old assembly is off, scrape away old putty and clean the underside of the sink opening. Inspect the opening for cracks, distortion, or corrosion. A flange that doesn't sit flat won't seal reliably, no matter how tightly you tighten the mounting screws.
Install the new flange and mounting ring
Apply plumber's putty only if the manufacturer calls for it. Set the flange into the sink opening, position the supporting gasket and backup ring underneath, and install the mounting hardware. Tighten the screws evenly in rotation so the flange draws down flat instead of tilting toward one side.
Most common assemblies use three mounting screws or bolts. The exact arrangement differs by product, so follow the included instructions rather than matching the old unit by appearance. The disposal should hang level and sit securely before you attach the discharge tube.
Practical rule: If the new mounting ring doesn't align naturally, don't compensate with excessive force. Recheck the flange, gasket, and model compatibility first.
The disposal body is easier to mount when the discharge tube is prepared according to the manual before lifting. Align the tabs with the ring, support the weight, and rotate the unit into position. Tighten the locking mechanism evenly, then check that the body doesn't swing, contact the cabinet, or pull the drain piping out of alignment.
For a guided walkthrough of the sequence, use the embedded installation video below.
Electrical Connections and Code Compliance
The disposal may hang securely and still be unsafe if its electrical supply is outdated, shared incorrectly, ungrounded, or inaccessible. Check the circuit and the under-sink space before connecting the appliance. Older Southwest Michigan kitchens are often remodeled in stages, so the receptacle, switch, breaker, and wiring may not belong to the same upgrade.
Code-focused guidance calls for GFCI protection, an accessible disconnect, and a grounded connection. The correct breaker and control method also depend on the disposal, the manufacturer's instructions, and the home's existing wiring. A cabinet that cannot provide safe access to the receptacle or disconnect is an installation problem, not a minor inconvenience.
Questions to answer before wiring
A dedicated circuit is commonly used for a disposal. Installation references describe a 15- to 20-amp breaker as typical in this code-focused garbage disposal installation summary. An existing kitchen circuit still needs evaluation before it is reused. Check conductor size, grounding, breaker compatibility, outlet condition, and the other loads already served.
A disposal and dishwasher may share a circuit only when the arrangement complies with applicable code and both manufacturers' requirements. If the outlet lacks GFCI protection, the disconnect is hidden behind the disposal, or the cabinet has no safe receptacle, correct the electrical installation before mounting the new unit.
Stop the DIY work if the existing setup does not pass those checks.
Make the connection safely
Switch off the correct breaker and verify that power is absent at the wiring point. The commonly described connection is black to black, white to white, and green or bare copper to ground, but the appliance manual and the actual circuit conductors determine the final connection. Use the required strain relief and approved wire connectors. Keep every splice inside the electrical compartment, then replace the cover before restoring power.
The disposal installation guide from Home Depot also emphasizes confirming that power is off before wiring. Do not use an extension cord as a permanent supply, and do not assume a wall switch proves the circuit is dead.
Call an electrician if you find aluminum conductors, damaged insulation, no equipment grounding conductor, an overcrowded box, an inaccessible shutoff, or wiring that conflicts with the manual. These conditions require diagnosis before the disposal is energized.
The safest installation lets someone disconnect power quickly without reaching through the disposal cabinet.
Plumbing Connections and Dishwasher Integration
A disposal drains well only when the route from its outlet to the sanitary drain is direct, supported, and correctly vented. Under-sink compatibility matters before any pipe is cut. Check the outlet position, cabinet clearance, existing branch connection, trap location, and the condition of the drain materials. A common failure is not a loose fitting, but a layout with extra traps, poor alignment, or a discharge tube that rises and falls enough to restrict flow.
ASHI explains that placing a second trap in series restricts wastewater movement and raises the risk of clogs. A correctly arranged Y-fitting at the sanitary tee lets both basins drain without adding another trap, as described in this garbage disposal installation and maintenance guidance.
Build the drain connection correctly
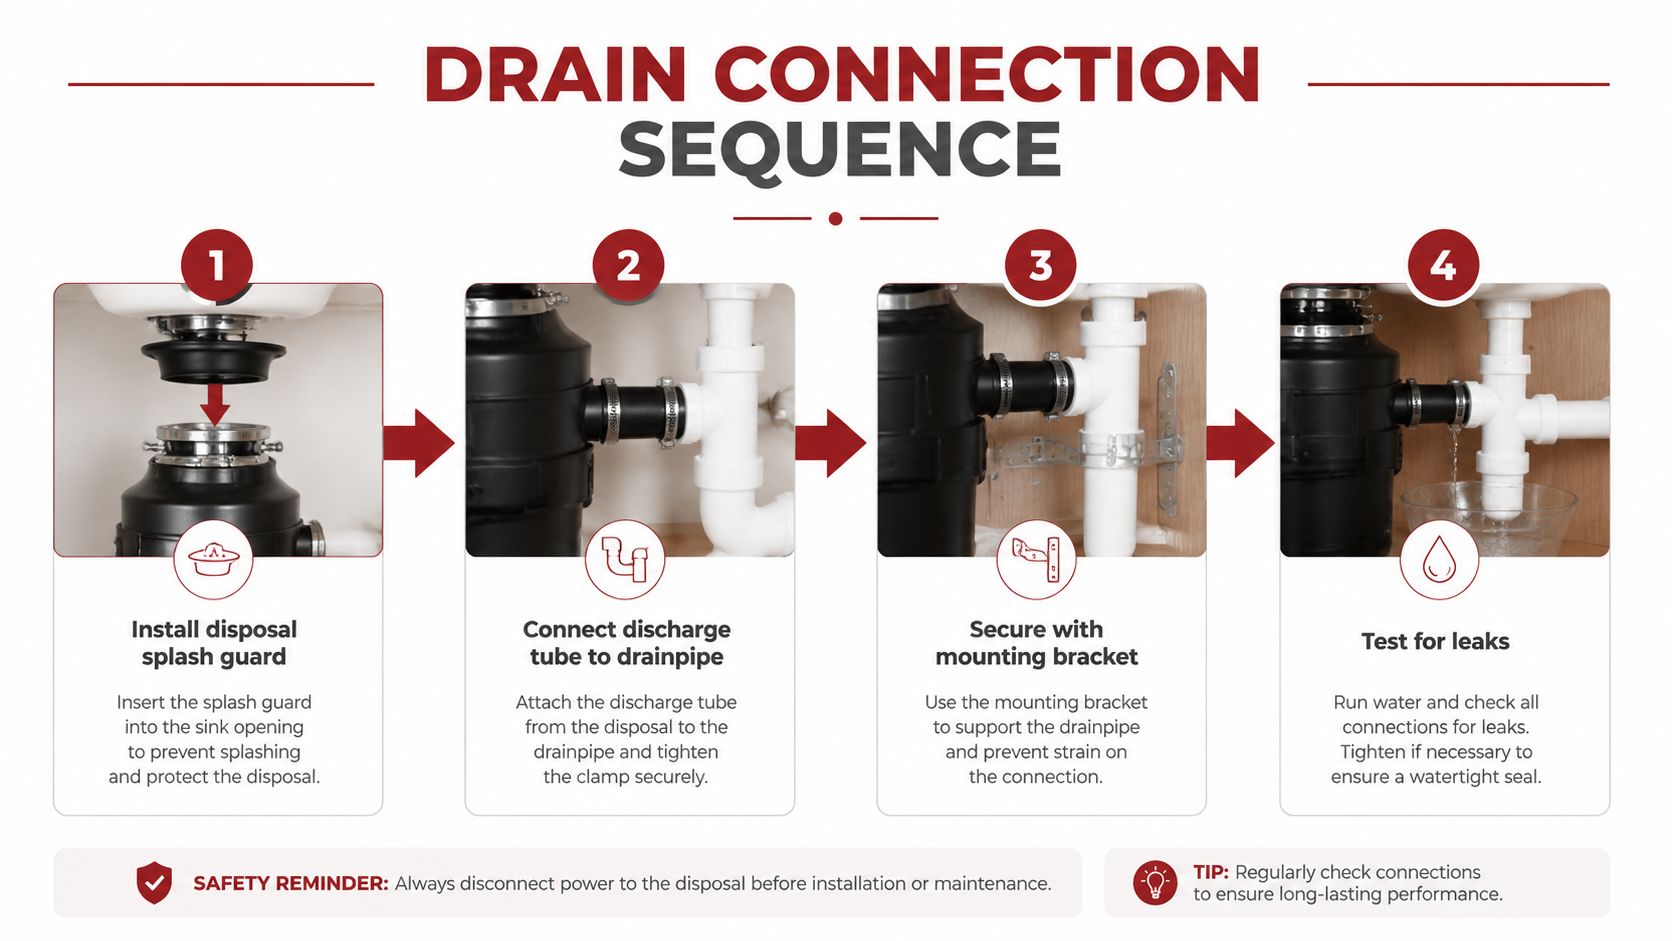
Orient the disposal before cutting or assembling pipe, with its discharge outlet aimed toward the existing drain route. Attach the discharge tube using the supplied gasket and fasteners. Keep the run as direct as the cabinet allows, and support it without forcing the pipe into position. Strain at the disposal outlet can become a leak after the cabinet is closed.
The disposal should have its own P-trap and drain connection. If a dishwasher shares the disposal, confirm that the branch drain meets the applicable local requirement, including the commonly specified 2-inch branch size. The electrical and plumbing provisions should both be checked against the applicable code and manufacturer instructions, as noted earlier, rather than assumed from an older installation.
Connect the dishwasher line
If the dishwasher drains through the disposal, remove the inlet knockout before connecting the hose. Tap it out carefully with a screwdriver and hammer, then retrieve the loose plug from inside the disposal. Leaving that plug in place causes an immediate drainage failure.
Clamp the dishwasher hose securely to the inlet and route it without kinks or low spots that can hold wastewater. Follow local plumbing practice and the appliance instructions, using a high loop or air-gap arrangement where required. This plumbing vent guide from Aureli Construction provides background on vent sizing and drainage behavior.
Do not add multiple traps to compensate for a misaligned pipe. Rework the branch connection instead. Brittle PVC, galvanized sections, unusual tees, insufficient slope, or a drain route that cannot align without force are good reasons to stop the installation and call a plumber before permanently mounting the disposal.
Testing Your Installation and Troubleshooting Common Issues
Testing should happen before the cabinet is restocked. Keep the disposal unplugged or the breaker off while inspecting the mechanical connections, then restore power only after the wiring cover is secured and the drain assembly is complete.
Run water into the sink and watch the flange, mounting ring, discharge tube, trap, dishwasher inlet, and every slip-joint connection. Check from below with a dry paper towel because small leaks may not drip visibly at first. Functional testing should include drainage, disposal operation, and dishwasher discharge.
Use a deliberate test sequence
-
Check the flange: Fill the sink with a modest amount of water and inspect the underside of the flange. A leak here usually means uneven mounting pressure, a damaged gasket, or an improperly prepared sink surface.
-
Check the drain path: Release the water and watch how quickly both basins empty. Slow drainage can point to restrictive geometry, a clogged branch, insufficient slope, or an improperly oriented discharge tube.
-
Test the motor: Turn on cold water before activating the disposal. Listen for a steady grind and watch for vibration, cabinet contact, or movement at the mounting ring.
-
Test the dishwasher connection: Run the dishwasher drain function if available and inspect the inlet hose and disposal chamber for leaks or backup.
Match symptoms to causes
A unit that hums without grinding may have a jammed impeller or grinding mechanism. Turn off power at the breaker before investigating, never place your hand inside the disposal, and use the supplied wrench or the manufacturer's approved procedure. A reset button may restore operation after an overload, but repeated tripping indicates a jam, electrical problem, or mechanical fault.
If the disposal won't turn on, check the breaker, wall switch, GFCI device, cord connection, and reset button in that order, with power isolated before opening any electrical compartment. A new unit that leaks from its lower housing generally has an internal seal or body problem, not a drain-fitting problem, and replacement is usually more practical than attempting an internal repair.
A successful first test is quiet, dry, and boring. Noise, movement, or moisture deserves attention before normal use.
DIY Versus Professional Installation in Southwest Michigan
A straightforward replacement can be a reasonable DIY project when the sink flange matches, the drain piping is sound, the outlet is grounded and GFCI-protected, and the new unit uses the existing control method. Expect roughly 2 to 4 hours for a straightforward DIY installation, with longer work when electrical upgrades are needed. That estimate is a planning guideline, not a guarantee, because cabinet access and corroded fittings can change the job quickly.
DIY makes sense when
You're a good candidate for DIY work if the old disposal is a direct replacement, the mounting assembly is compatible, and you can safely shut off and verify electrical power. You should also have enough space to support the unit while aligning the ring, plus the tools to remove the trap without damaging the surrounding drain.
The savings come mainly from avoiding labor, but the trade-off is responsibility for leaks, wiring errors, code compliance, and any damage caused during removal. A failed installation can also delay a kitchen project if the sink cabinet becomes unusable.
Call a professional when
Bring in a licensed plumber or electrician when the sink area lacks a compliant outlet, the circuit is shared in a way you can't verify, the grounding is uncertain, or the disconnect isn't accessible. Corroded plumbing, nonstandard drain geometry, a damaged sink opening, insufficient cabinet clearance, and a dishwasher connection that doesn't match the new disposal also move the job beyond a simple swap.
For homeowners in Portage, Kalamazoo, and nearby Southwest Michigan communities, professional service is particularly practical during a broader kitchen remodel. The disposal can be coordinated with cabinet dimensions, sink selection, dishwasher drainage, countertop changes, and electrical work instead of being forced into a finished layout.

Project cost depends on whether the work is a direct replacement or requires new wiring, drain modifications, cabinet changes, or a different disposal model. Before scheduling, use Trademaster Construction's instant pricing tool to build a practical ballpark for the surrounding kitchen work. If you're taking a break after comparing options, you can even browse this unrelated Gun Lake Casino review and bonus before returning to the renovation plan.
Trademaster Construction helps Southwest Michigan homeowners coordinate garbage disposal installation with complete kitchen remodels, cabinet updates, plumbing adjustments, and electrical planning. Visit Trademaster Construction to discuss your Portage or Kalamazoo project, review practical design options, and get clear guidance before work begins.

