
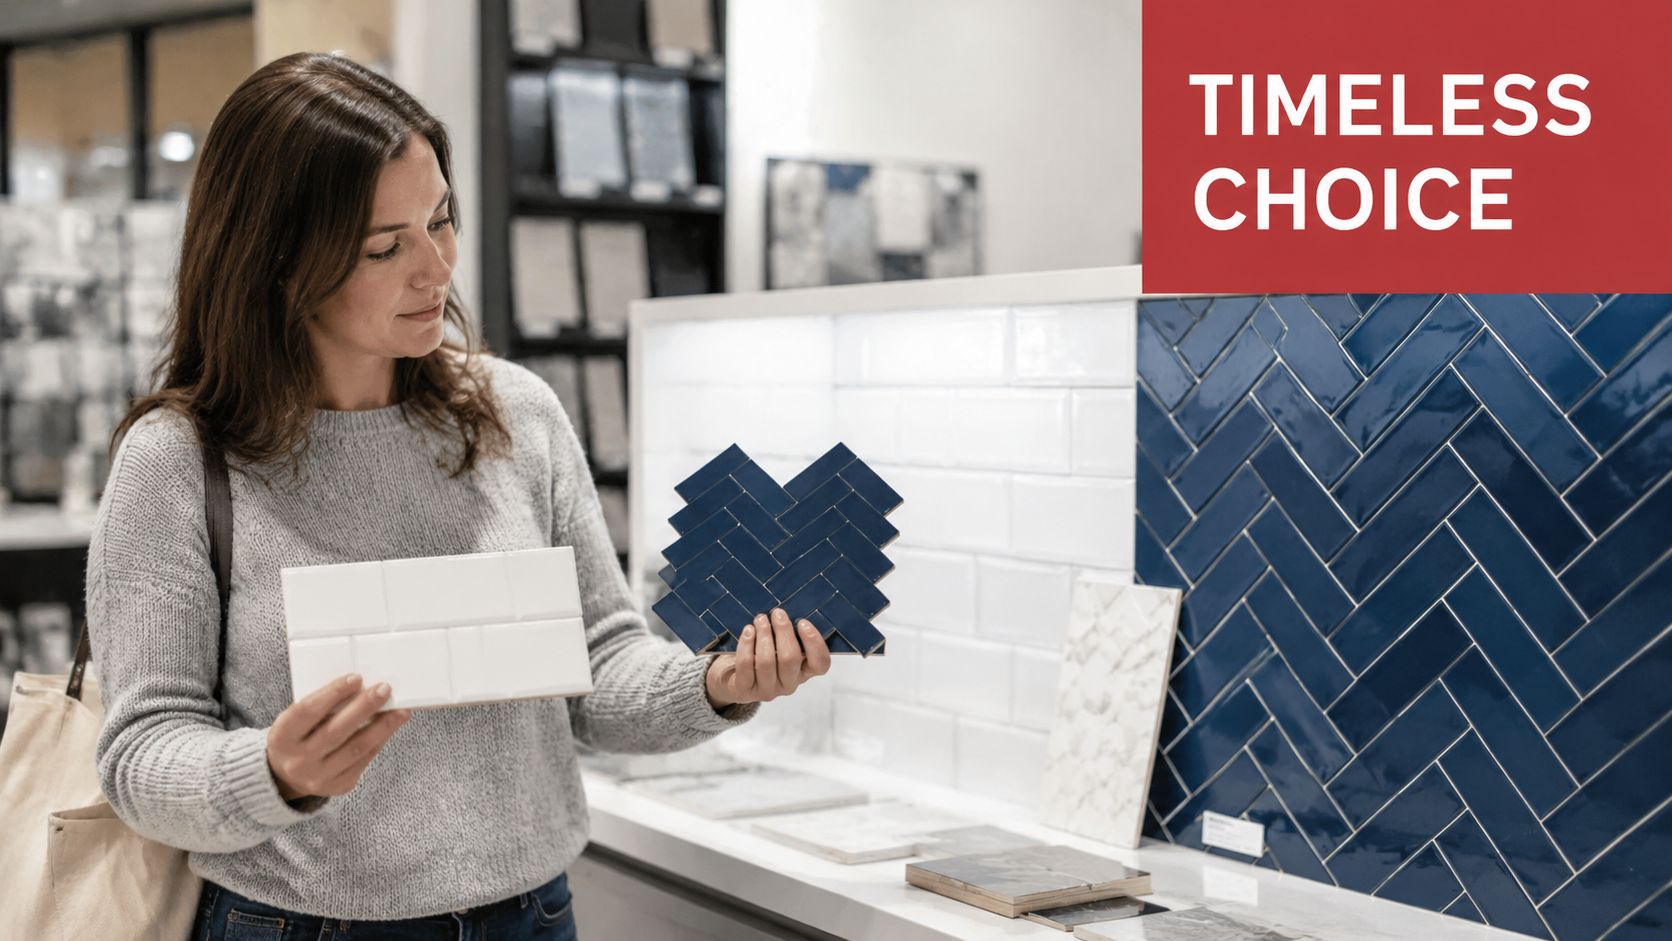
You're standing in a tile showroom with two samples in your hands. One is a familiar subway tile. The other is arranged in a sharp zigzag that looks far more custom, but you're wondering whether it'll make your kitchen feel elegant or busy. That decision usually comes down to more than color. The herringbone tile layout succeeds or fails before the first tile meets the adhesive, based on proportion, centerlines, orientation, and edge planning.
A well-planned pattern can make a backsplash feel custom, give a narrow floor more direction, and add texture without requiring an ornate material. A rushed layout can create awkward slivers, drifting lines, and a perimeter that looks accidental. The practical choices below will help you decide whether true herringbone fits your room, your tile, and your installation skills.
What Makes Herringbone Tile Layout Timeless
True herringbone uses rectangular tiles set at right angles to one another. Each piece meets the next in a staggered arrangement, producing a broken zigzag that resembles the skeleton of a herring fish. Unlike a random geometric design, the pattern depends on repetition. Every joint has to support the next joint, so small layout errors become visible as the installation expands.
The geometry has practical roots. In the Roman Empire, a related paving method called opus spicatum placed angled bricks on roads and public surfaces. The interlocking arrangement helped distribute load and improve durability, allowing a construction technique to move from infrastructure into decoration. The pattern's later history includes wood parquet flooring, including a cited early example installed in 1539 at the François I Gallery in the Château de Fontainebleau, a milestone in its transition from utility to luxury design. The history of herringbone traces that long path from Roman paving to European interiors.
Why the pattern still works
Herringbone adds directional movement and visual texture without demanding a highly decorative tile. A pale ceramic backsplash can look traditional, while the same arrangement in charcoal porcelain or marble can feel distinctly contemporary. It also works across ceramic, porcelain, marble, and wood-look tile, which makes the layout useful in kitchens, bathrooms, entries, and feature walls.
The pattern can guide the eye toward an island, a range, a doorway, or the longest dimension of a room. That doesn't guarantee a small space will feel larger, but a carefully chosen direction can make the room feel more ordered and elongated rather than boxed in.
The timeless quality comes from that balance. Herringbone carries a historic association with parquet floors, yet rectangular modern tile keeps the result clean. Design work begins with choosing between pattern variations, selecting a proportion that repeats smoothly, and deciding where the layout should point.
Herringbone vs Chevron vs Brick Pattern Differences
The three patterns can look similar in a showroom, especially when grout lines are narrow. Their construction is different, and that difference affects cutting, waste, difficulty, and the character of the finished room.
True herringbone uses uncut rectangular tiles. The ends meet at 90-degree offsets, creating a visible step at every zigzag. The installer cuts tiles to fit the perimeter, but the tile faces themselves remain rectangular. That makes herringbone more approachable for a careful DIY backsplash than chevron, although precision is still essential.
Chevron creates a continuous V. Tiles are cut at 45-degree angles so their ends meet point to point, with no stepped joint. The uninterrupted arrows look crisp and architectural, but the angled fabrication produces more waste and requires more exact cutting. If a retailer or inspiration board labels a point-to-point V as herringbone, check the tile edges before ordering. The distinction can change your material quantity and labor plan.
Brick bond, also called running bond, is simpler. Each horizontal row overlaps the row below by 50 percent, creating straight lines and a relaxed masonry feel. It has less visual movement than herringbone and usually makes a dependable choice when the room already contains strong cabinets, countertops, or architectural details.
Quick comparison
| Feature | Herringbone | Chevron | Brick Bond |
|---|---|---|---|
| Visual effect | Broken zigzag with stepped joints | Continuous V-shaped arrows | Straight, staggered horizontal rows |
| Installation difficulty | Moderate, with rectangular perimeter cuts | High, because angled tile cuts must meet precisely | Lower, with simpler row alignment |
| Waste | Typically about 15% to 20% extra material, depending on the room tile waste planning guide | Often higher than true herringbone because the tile ends require angled cuts | Usually lower than angled layouts |
| Best applications | Backsplashes, bathrooms, entries, feature floors | Focal walls and highly tailored statement areas | Large walls, simple floors, calm kitchen designs |
Installer's distinction: If the ends form a clean point-to-point arrow, you're looking at chevron. If each joint has a small step, it's true herringbone.
Choose brick bond when calm repetition matters more than movement. Choose chevron when you want a deliberate architectural statement and have access to accurate wet-cutting equipment. Choose true herringbone when you want a custom appearance without fabricating every tile end.
Choosing the Right Tile Size and Proportions
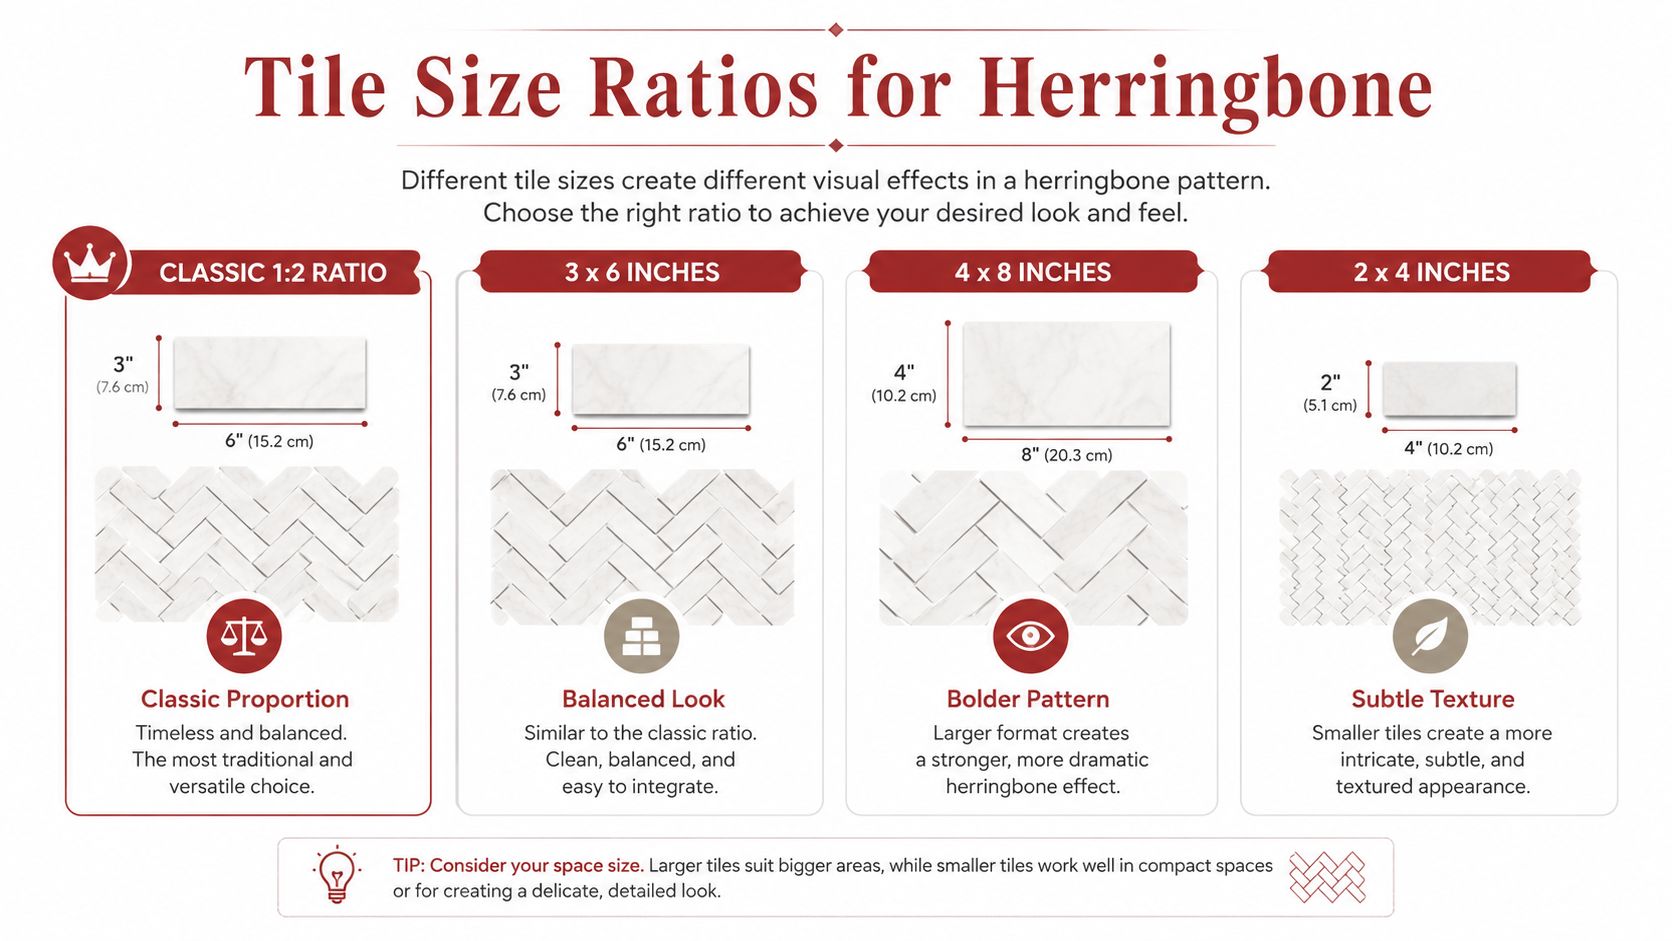
A 3-by-6-inch subway tile in herringbone has a different visual weight from a 4-by-24-inch format, even with the same grout color. True herringbone works best when the tile's length-to-width ratio is about 2:1 or 3:1. That proportion keeps the interlocking pattern readable and helps limit awkward end cuts. 4-by-12-inch tiles create fewer grout lines than the smaller subway format, while 4-by-24-inch tiles produce a longer, more modern sweep. This herringbone installation guide explains how proportion and joint width affect the finished pattern.
Match scale to the room
Small formats create a tighter, busier weave. They suit backsplashes and bathroom floors when you want more texture, but the extra intersections leave less room for spacing mistakes. Larger tiles create a broader zigzag with fewer grout lines. They can work across an open kitchen or feature wall, provided the substrate is flat and nearby surfaces can carry that scale.
Tile size also affects waste. Longer pieces may cover more field area, but they can create difficult perimeter cuts around cabinets, doorways, and narrow returns. Before choosing a format, lay out sample pieces near the room's most visible edge and check how the pattern finishes. A tile that is too short for its width can make the joints resemble a basket weave or cramped blocks.
Set the grout joint deliberately
Installers commonly use grout joints of about 1/16 to 1/8 inch for a refined herringbone appearance. A 1/16-inch joint can look nearly smooth with rectified porcelain or accurately sized marble. A 1/8-inch joint gives standard ceramic more room to accommodate slight size variations. Tighter joints demand a flatter substrate and more consistent tile sizing. They do not correct a poor layout or uneven tile.
Dry-lay a test section before mixing thinset. A 3-by-3-foot sample provides enough repetition to judge the pattern, grout color, tile variation, and the relationship between tile thickness and nearby flooring. Check transition height at doors and adjoining rooms before ordering material. The pattern may look right on paper, yet still require extra preparation or a different tile thickness to finish safely.
Planning Your Layout Starting Point and Orientation
A herringbone layout can look custom or chaotic before the first tile is bonded. In an older kitchen, the walls may be out of square, the cabinets may interrupt the field, and the room's physical center may not match the view from the doorway. Set the pattern from the sightlines that matter, not from the nearest wall.
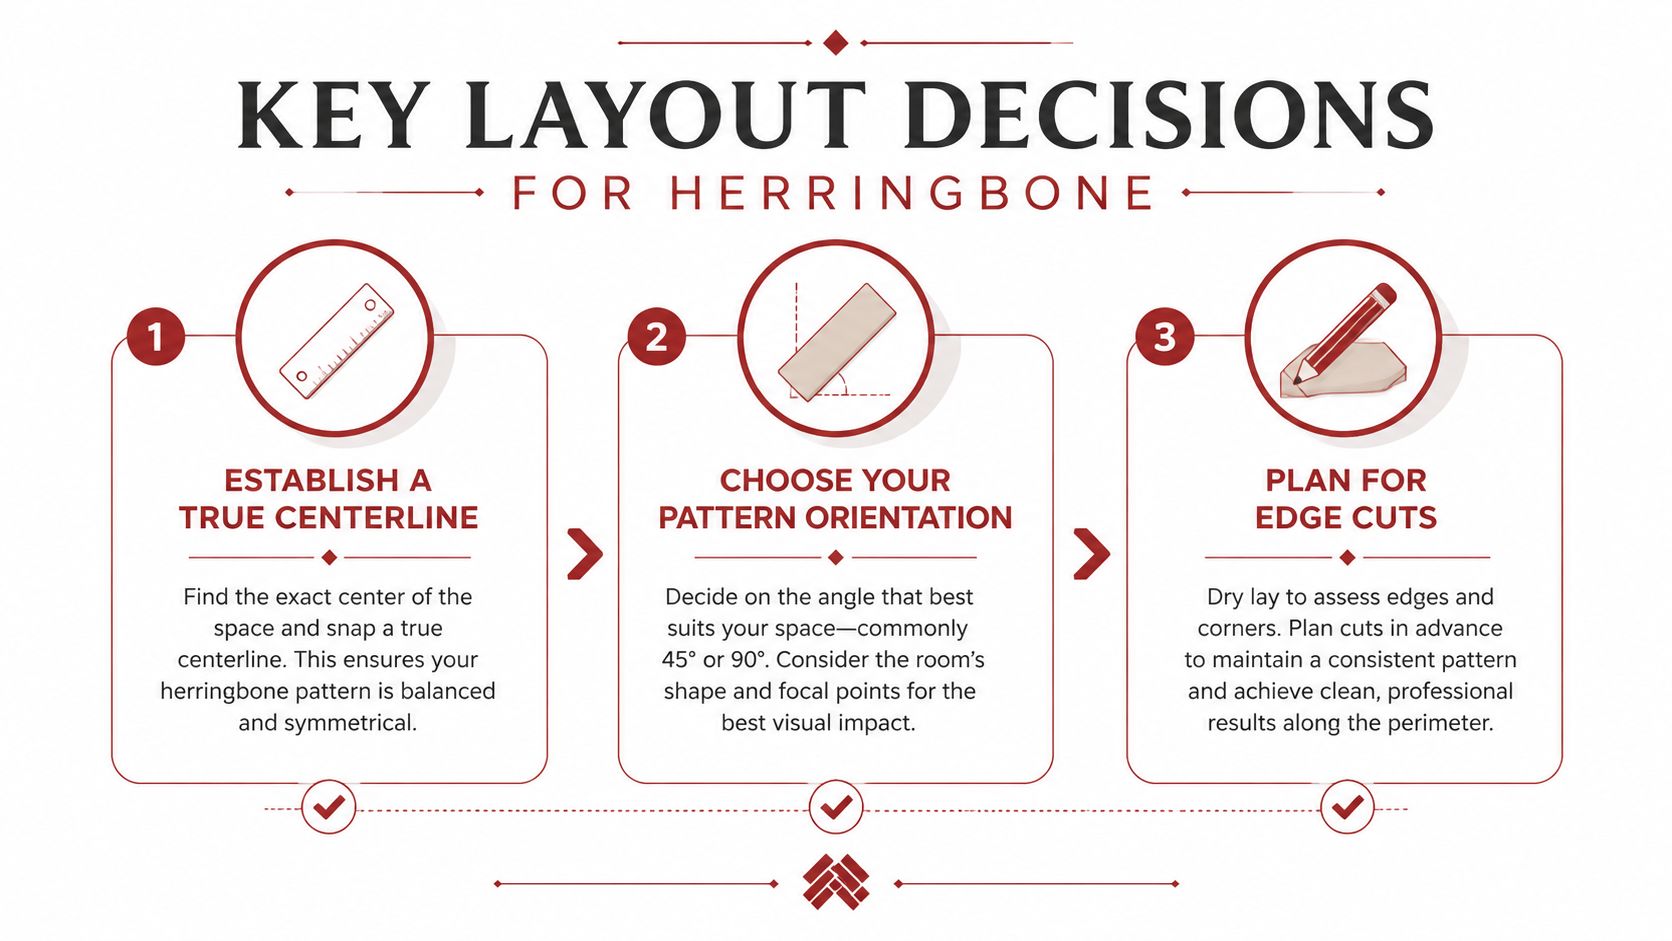
Establish the visual center
Identify the dominant view first. In a kitchen, it may be the range wall or island. In an entry, it is often the line from the front door into the home. Snap perpendicular chalk lines through that visual anchor, then check them against cabinet faces, door openings, and the most exposed walls.
Use a dry layout to judge the whole rhythm, not one attractive corner. Set enough pieces to show repeated joints, then inspect the arrangement from the entry, adjoining room, and main work area. Establishing a true centerline and setting out rows before installation helps protect alignment. These herringbone layout tips also cover orientation, scale, and setting-out decisions that are easy to miss.
Choose the direction that serves the room
The familiar arrangement is a 45-degree herringbone, with the pattern set diagonally to the walls. That angle requires an accurate diagonal reference, not a visual guess. The Home Depot's herringbone installation PDF provides a reference for this conventional setup.
A straight 90-degree layout, sometimes called square herringbone, produces a more grounded effect. It can suit an open room or cabinetry with strong horizontal and vertical lines. Choose based on the focal point, room proportions, and the direction you want the joints to lead the eye.
Orientation also changes the waste pattern. A diagonal arrangement usually creates more partial pieces at the perimeter, especially around cabinets, doorways, and narrow returns. Mark those boundaries before ordering tile, then estimate how many full pieces will be lost to cuts. Keeping the pattern centered may leave balanced cuts on both sides, while shifting the starting point can protect a prominent edge or reduce unusable slivers.
Set the perimeter before spreading thinset
Mark doorways, niches, cabinet ends, and transitions on the floor or wall. Decide where the cut pieces will land and whether each edge will receive trim, a finished corner, or a joint against another surface. If the first row begins too close to one wall, the final row may become a thin strip that attracts attention.
Check the finished height at adjoining flooring, including the tile, underlayment, and setting materials. This decision affects doors and transitions, so resolve it before installation rather than after the pattern is fixed.
A short visual demonstration can clarify how the pieces interlock and how the starting lines control the field.
Best Rooms and Applications for Herringbone Tile
Room conditions should set the tile size and direction. A backsplash, shower wall, entry floor, and open living area each place different demands on scale, moisture resistance, traffic, and visible edges. The centerline and viewing direction also matter. A pattern that looks balanced from the kitchen doorway may feel off from the room's main seating area.
A kitchen backsplash often suits a compact rectangular tile, such as a 2-by-8-inch or 3-by-12-inch subway format. Run the pattern horizontally toward the main wall when you want the zigzag to support the cabinet lines rather than compete with them. Behind a range, herringbone can form a controlled focal area, while a quieter arrangement elsewhere keeps the wall from becoming visually busy.
Bathrooms can take a denser pattern on walls and floors, provided the tile matches the surface and exposure. Smaller formats, such as 1-by-4-inch or 2-by-6-inch pieces, create more grout intersections and a finer texture. For floors, check the specific tile's slip characteristics. The herringbone layout does not make an unsuitable tile safer.
Room-by-room recommendations
| Room Type | Ideal Tile Size | Orientation | Key Consideration |
|---|---|---|---|
| Kitchen backsplash | 2-by-8-inch or 3-by-12-inch | Horizontal toward the main wall | Keep the pattern subordinate to cabinets and counters |
| Bathroom wall or floor | 1-by-4-inch or 2-by-6-inch | Follow the strongest sightline | Use a tile appropriate for moisture and floor traction |
| Entry or mudroom | 4-by-16-inch or wood-look plank tile | Point inward from the entry | Plan thresholds, dirt, and traffic before installation |
| Open-concept area | Larger rectangular format or a controlled inset | Aim toward a focal zone | A border or medallion can control material use and visual intensity |
| Very small powder room | Mini mosaic sheet where appropriate | Keep cuts visually balanced | A full field can become fragmented if the room has many interruptions |
In a very small powder room, fixtures and corners can interrupt nearly every full piece, weakening the pattern's rhythm. A mini mosaic may preserve the overall appearance with less visible fragmentation, but the field still needs careful centering around the room's strongest sightline.
Entryways and mudrooms suit wood-look plank or larger-format herringbone when the layout points inward from the threshold. Set the pattern against the traffic path, then check how it meets doors, thresholds, and adjacent flooring. Open living areas often benefit from a defined inset or border. A wall-to-wall field can compete with cabinetry, furniture, and other finishes.
Maintenance should influence the material choice as well as the room choice. For practical advice on keeping ceramic tiles looking new, review guidance on routine cleaning, grout maintenance, stain prevention, and care suited to the tile's finish.
Estimating Material Costs and Project Timeline
Herringbone estimates become accurate when the layout is priced in layers. Start with the actual tiled area, then account for the pattern's centerline, orientation, perimeter cuts, and pieces lost around outlets, doors, niches, or cabinets. The centerline matters financially as well as visually. A layout that leaves narrow edge pieces can require more cutting and produce fewer reusable offcuts.
For a simple example, take a 50 sq ft backsplash. Calculate the tile quantity from the full backsplash area, then separate the field from areas interrupted by outlets or openings. Add the project's planned waste allowance, then price the resulting tile quantity at the selected tile rate. Add thinset or adhesive, grout, edge trim, transition pieces, and substrate repair. If the tile is sold by the box, round up to complete boxes and keep enough material from the same production lot for visible repairs.
Herringbone requires more than a tile price comparison. Small rectangular tile may cost less per piece but take longer to set because every joint needs alignment. Larger tile can cover the field faster, yet its edge cuts may be more conspicuous and harder to place neatly. Borders, insets, and a deliberate centerline can make a backsplash look custom, while each added detail increases layout time and cutting.
Build the estimate in layers
| Project Type | Material Cost (per sq ft) | Labor Cost (per sq ft) | Estimated Timeline |
|---|---|---|---|
| Small backsplash | Varies by tile selection and accessories | Varies by cut complexity | Shorter than a full floor, with detailed cuts around outlets |
| Bathroom floor | Varies by porcelain, ceramic, or stone selection | Varies with preparation and pattern scale | Longer than a straight layout because of repeated alignment and edge cuts |
| Entry or mudroom | Varies by format and tile material | Varies with thresholds and room shape | Preparation and perimeter work often control the schedule |
| Open living area | Varies by tile and design scope | Varies with size, substrate, and borders | A larger field may move faster, while insets and borders add layout time |
The schedule depends on demolition, substrate correction, curing requirements, room access, and how much time the dry layout takes. A backsplash can suit a capable DIY installer with a wet saw and patience for outlet cuts. A floor with out-of-square walls, door transitions, niches, or damaged substrate usually benefits from professional installation because alignment errors remain visible across the field.
For a project in Southwest Michigan, homeowners can use the instant pricing tool to develop a ballpark budget before scheduling a conversation. It will not replace a site inspection, but it can help compare a custom tile plan with the available remodeling budget.
Common Herringbone Installation Mistakes to Avoid
Herringbone doesn't forgive casual preparation. The pattern may look repetitive, but every repeated joint exposes the last alignment decision, so an error near the center can travel visibly across the room.
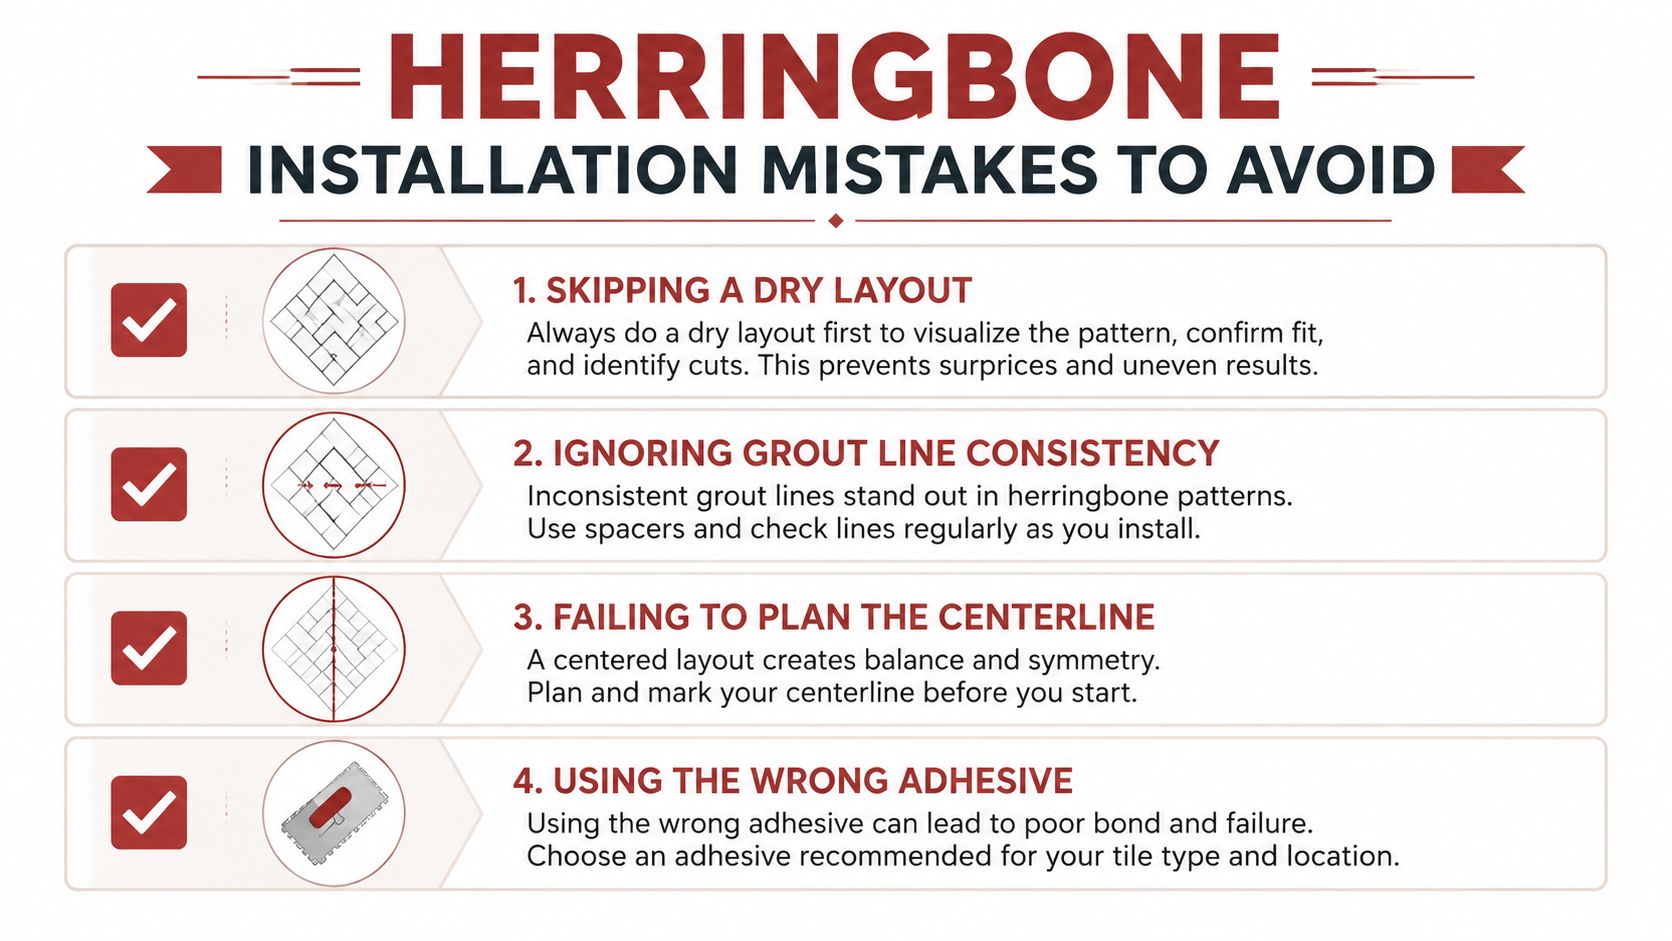
The first mistake is skipping the dry layout. Without one, you may discover thin pieces at a doorway or a centerline that lands awkwardly against a cabinet only after the adhesive has started curing. Set out the pattern first, mark the cuts, and photograph the arrangement before lifting the tiles.
Correct the problems before adhesive
- Unplanned waste: Order at least 15% to 20% extra tile for typical herringbone work, using a higher allowance when the room has complicated edges. The planning ranges are summarized in this herringbone waste guide.
- Wrong border cuts: True herringbone uses rectangular pieces in the field. Cutting border pieces at the wrong angle can create triangular gaps and interrupt the stepped rhythm, so mark each perimeter piece from the dry layout.
- Uneven grout joints: Use spacers at every relevant intersection and check the pattern repeatedly with a straightedge. A joint that gradually widens makes the zigzag look wavy.
- Unprepared substrate: Check flatness before setting tile. The commonly cited tolerance of 1/8 inch over 10 feet appears in installer guidance, and angled edges make lippage particularly noticeable. If the surface doesn't meet that standard, correct it before layout.
- Wrong adhesive: Match the mortar or adhesive to the tile material, substrate, and installation location. A product suitable for a dry backsplash may not be appropriate for a wet shower or a floor subject to movement.
Don't mix tile lots casually during the installation. Keep boxes from the same lot together, blend pieces from multiple boxes when the manufacturer recommends it, and inspect every tile before spreading mortar.
A stair project has additional concerns around nosings, transitions, and secure footing. If your renovation connects herringbone tile to steps, review this tile stair guide from Tip Top Furniture for context on the different demands of tiled stairs.
DIY ends when the project requires substrate correction, complex waterproofing, numerous transitions, or a layout you can't dry-fit confidently. A professional installer can protect the design intent by solving those conditions before the first permanent row is placed.
Trademaster Construction helps homeowners in Portage, Kalamazoo, and nearby Southwest Michigan communities plan and complete custom tilework as part of a broader kitchen or bathroom remodel. Visit Trademaster Construction to discuss your herringbone layout, review remodeling options, and use the pricing resources to prepare for the next step.

