
You've chosen a mosaic for a shower niche, backsplash, or bathroom floor because the sheets look simple to handle. Then the first few pieces go up, and the pattern starts showing uneven lines, raised edges, or dark patches behind translucent glass. The problem usually isn't the tile. It's the wall or floor beneath it.
Mosaic tile installation is less about placing small pieces and more about managing a flat, rigid, properly waterproofed substrate. Small tiles can follow gentle slopes, but their many joints also reveal dips, ridges, poor mortar coverage, and sheet misalignment. In wet areas, the tile, mortar, and grout still aren't a waterproof system by themselves.
Why Mosaic Tile Demands More Than Just Placement
A sheet of mosaic may look easy to handle until it reaches a wall with a shallow dip or a floor with movement underneath. The small format repeats every imperfection through narrow joints, so a surface that seems acceptable under paint can produce waves, lippage, uneven spacing, or dark patches behind translucent glass. Mesh-backed sheets hold pieces together, but they do not flatten the substrate or keep a flexible wall from moving. (Mission Tile West's history of mosaic tile art)
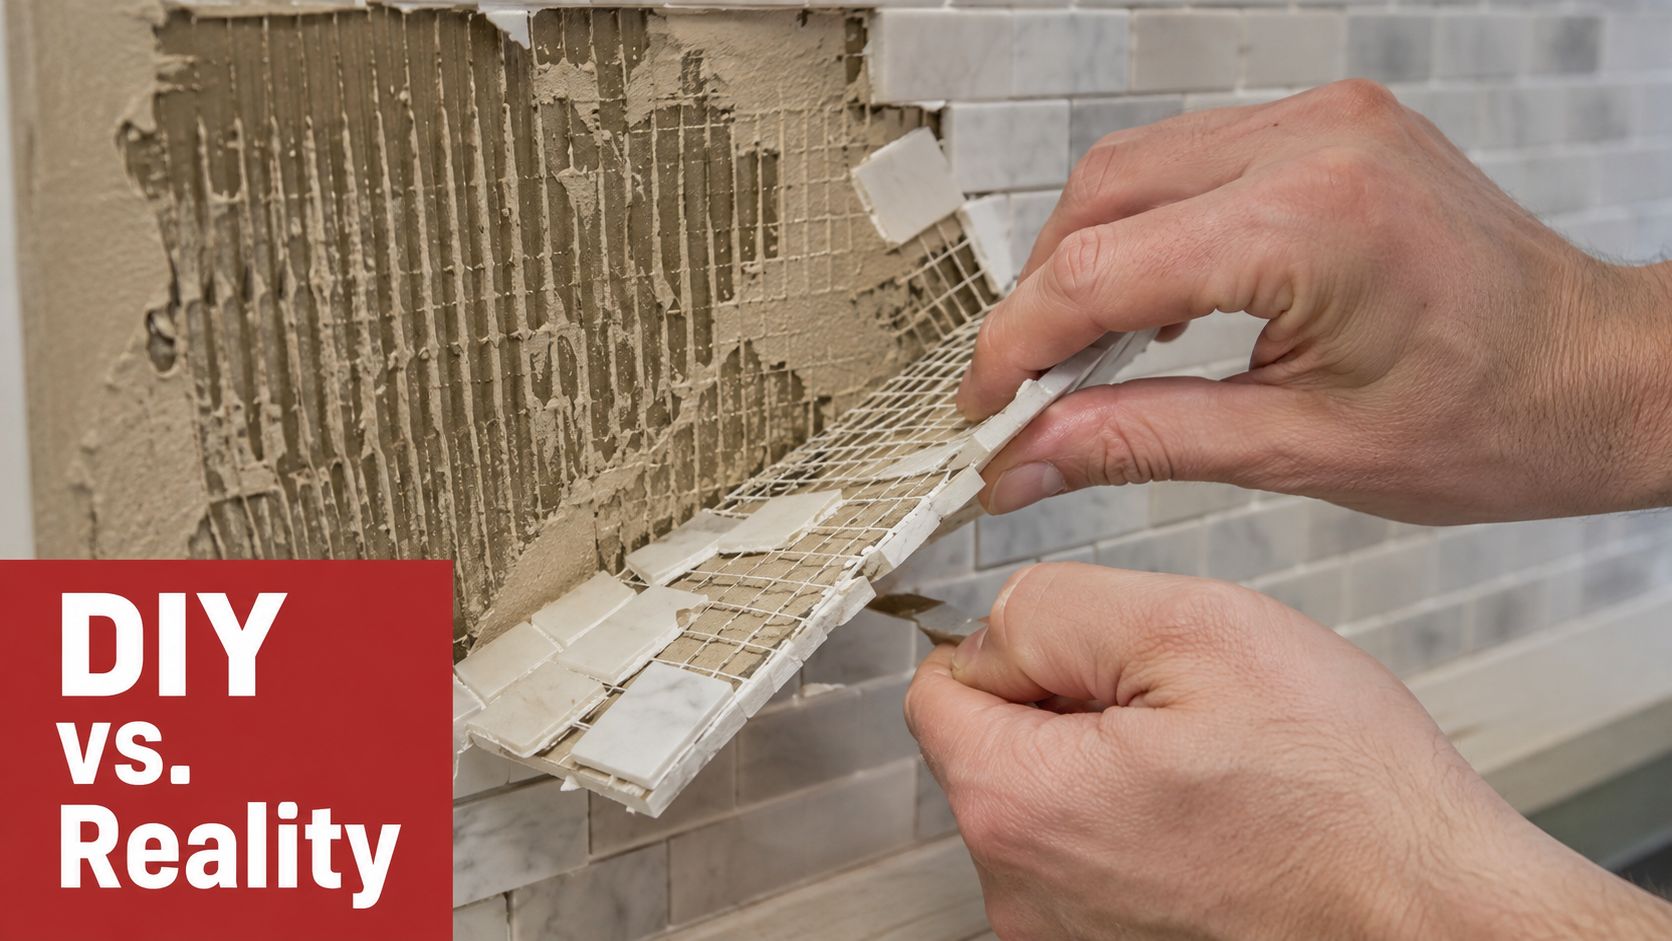
The installation usually moves quickly only after the preparation is complete. Check the framing or slab, correct the plane, remove dust and contaminants, and confirm that the substrate, mortar, tile, and grout belong in the same system. Mortar should bond the tile, not compensate for major waviness. A straightedge reveals problems before they become visible sheet lines.
Preparation controls the finish
A practical rule among setters is that mosaic work is mostly substrate management, with tile placement taking less time once the base is ready. That preparation includes checking rigidity, correcting flatness, choosing the right setting materials, and detailing waterproofing wherever water can reach the assembly.
Mosaic pieces are generally treated as individual units when each is under 6 square inches. Ceramic and porcelain mosaic assemblies also use the L/360 deflection limit. On floors, excessive framing movement can crack grout or loosen tile, even when the sheets were aligned correctly. (National Tile Authority's mosaic overview)
Practical rule: Inspect the surface with a straightedge before spreading mortar. Small pieces will expose defects that paint or large tile may disguise.
Wet areas demand a complete waterproofing system
Showers, curbless bathroom floors, and wet zones beside basements need continuous waterproofing at corners, penetrations, benches, niches, and drains. The membrane must suit the substrate and follow its installation requirements. Tile, mortar, and grout alone do not create a reliable waterproof assembly.
Renovation also opens access to concealed plumbing. Before closing a wall, inspect the shower valve, supply lines, and drain, and arrange to upgrade plumbing during renovations when those components need attention. Repairing them after installation can require removing an otherwise sound mosaic.
Substrate Preparation and Technical Benchmarks
Mosaic tile exposes preparation errors quickly. A surface must be flat, clean, dry, and rigid. Because many small pieces share narrow joints, a shallow ridge or depression can produce a visible wave across an entire sheet, even when each piece is set carefully.
For ceramic and porcelain mosaic assemblies, the L/360 deflection benchmark remains the relevant limit. Excessive movement can crack grout or loosen tile, particularly on floors. Mortar coverage and movement-joint requirements should follow the applicable ANSI and TCNA installation guidance for the tile, substrate, and exposure. Do not treat a single benchmark as a substitute for the complete system requirements.
Check the surface before choosing the tile system
Run a long straightedge across walls or floors in several directions. Mark high spots and depressions, then correct them with a material approved for that substrate and location. Mortar bonds tile; it is not a reliable bulk-leveling compound. If the base needs grinding, patching, or profiling, have the work completed before setting begins. A qualified Atlanta concrete preparation contractor can prepare a concrete surface that has contamination, weak areas, or an unsuitable profile.
The substrate choice should match the exposure and the assembly. Cement backer board provides a stable tile surface when framed and installed correctly, but its seams require treatment, and wet areas need a separate waterproofing plan. Foam shower panels and pans can simplify slope and drain integration. Uncoupling membranes can help manage certain floor assemblies, but they follow the prepared floor rather than correcting major unevenness. Prepared concrete performs well only after defects and moisture conditions have been evaluated.
Mosaic Substrate Material Comparison
| Substrate Material | Relative Cost | Flatness Performance | Moisture Resistance | Installation Difficulty |
|---|---|---|---|---|
| Cement backer board | Moderate | Good when framed and installed correctly | Requires dedicated waterproofing in wet areas | Moderate |
| Foam shower panel or pan | Higher | Consistent when properly supported | Designed for wet-area use when seams and penetrations are treated correctly | Moderate |
| Uncoupling membrane | Moderate | Follows the prepared floor, so it doesn't fix major unevenness | Depends on the product and detailing | Moderate |
| Prepared concrete | Variable | Good only after defects are corrected | Moisture condition must be evaluated before installation | Variable |
Waterproofing is part of the structure
In showers, curbless bathroom floors, and other wet zones, tile and grout are the finish, not the drainage layer. Build a continuous waterproofing system across the field, corners, seams, penetrations, benches, niches, and drains. The membrane must suit the substrate and be installed according to its requirements. If the system calls for a flood test, complete it before covering the work, while leaks remain accessible.
Renovation also provides access to concealed plumbing. Inspect the shower valve, supply lines, and drain before closing the wall, and arrange to address any needed plumbing upgrades during the renovation. A leak discovered after mosaic installation may require removing sound tile, mortar, and waterproofing. That repair is far more disruptive than correcting the problem while the assembly is open.
National Tile Authority's installation benchmarks can provide general installation context, but the project specifications and the membrane manufacturer's instructions control the final assembly.
Setting the Mosaic Sheets for a Professional Finish
A mosaic can look aligned on the worktable and still reveal every defect after installation. Small pieces follow the substrate closely, so a shallow dip, raised seam, or uneven mortar bed becomes a visible change in the sheet's plane. Start with layout, but treat surface control and bedding as part of the finish, not as separate tasks.
Build a repeatable setting process
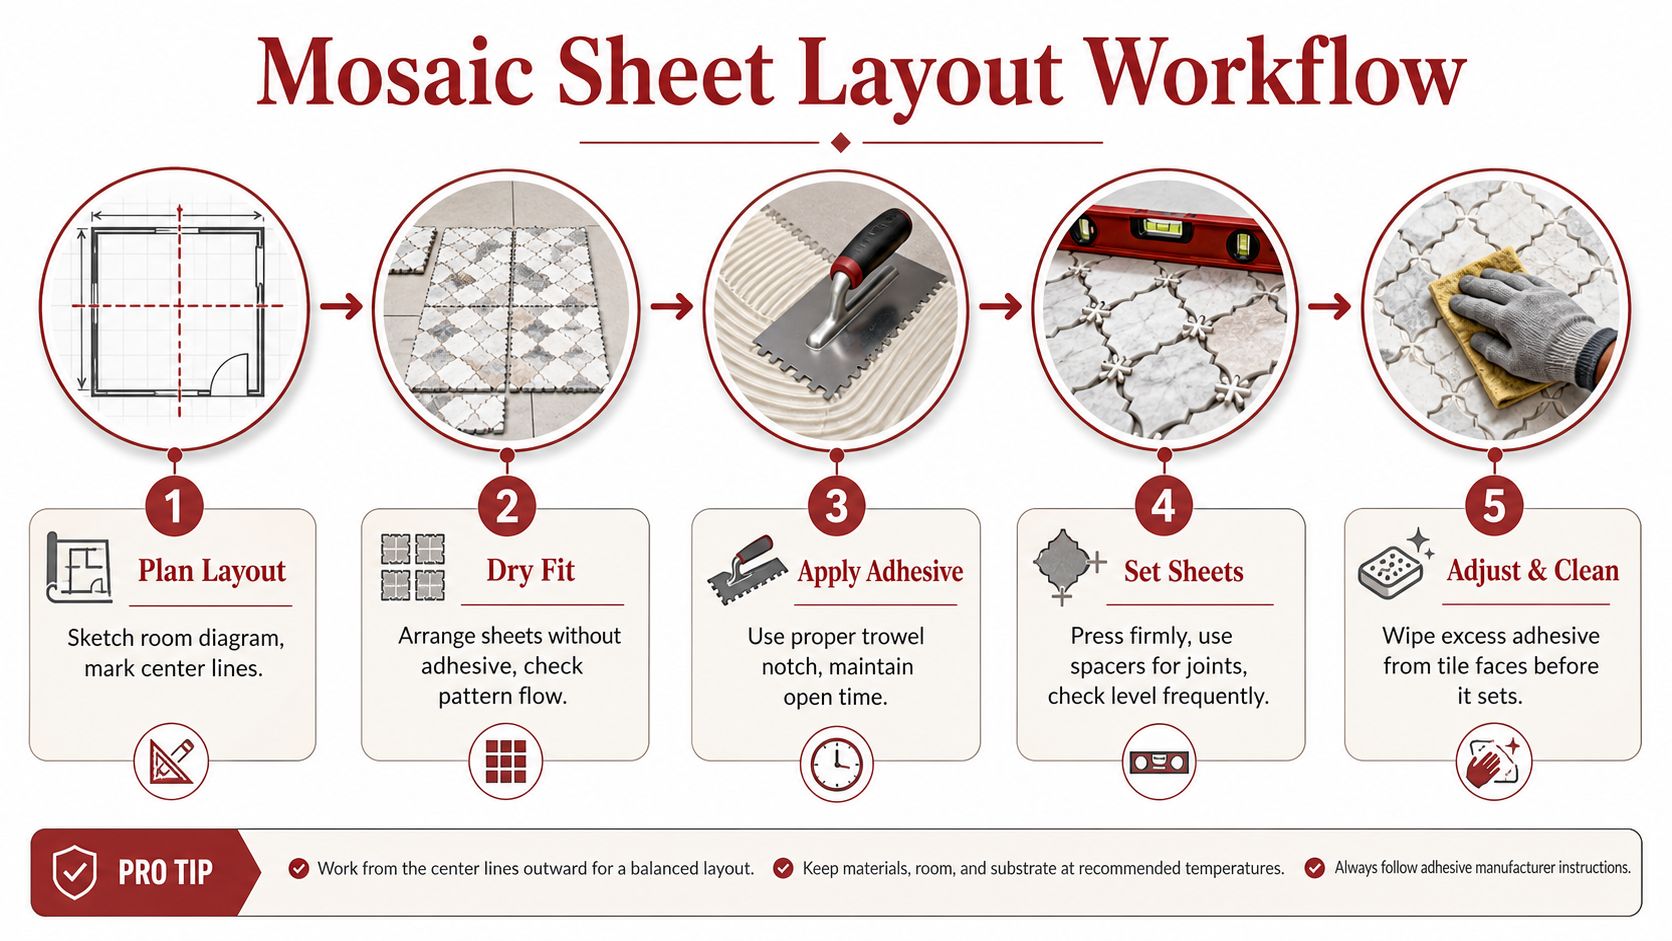
Dry-fit the sheet module. Mark each sheet's starting and ending points. Check the pattern at corners, niches, drains, cabinet edges, and exposed borders. The joint between sheets must match the spacing within the sheet, or the grid will break. Adjust the layout before mixing mortar. A narrow strip at a visible edge is difficult to disguise.
Choose mortar for the tile and location. Ceramic and porcelain mosaics commonly use a compatible modified thin-set. Over an uncoupling membrane, follow the membrane manufacturer's mortar requirements. Glass and light-colored mosaics generally need white polymer-modified mortar to reduce show-through and color shift. The mortar must suit both the tile and the substrate, especially in wet areas. (National Tile Authority's mortar guidance)
Key mortar into the substrate. Press the flat side of the trowel into the surface first, then comb a consistent bed with an appropriate notch. A small V-notch is often used for sheet work, but the notch still depends on tile thickness, substrate flatness, and mortar. Flatten the ridges enough for the sheet to bed fully. Hollow channels can telegraph through translucent tile and leave weakly supported pieces.
Work in a small area. Spread only the amount you can cover before the mortar skins over. One manufacturer's sheet guidance recommends areas of about eight or ten tiles at a time, a V-notched trowel, and pressing the mesh side into fresh material. It also specifies about 3 mm of smoothed adhesive thickness and approximately 24 hours before grouting, subject to the product instructions. (The Home Depot mosaic installation guide)
Embed without creating waves. Press the sheet with a flat trowel, beating block, or grout float. Work across the face with even pressure. A rubber mallet used directly on small glass pieces can chip or shift them. A flat tool distributes pressure and helps keep the sheet plane consistent.
Inspect the bond. Lift an occasional sheet while the mortar is fresh. Check contact at corners, edges, and around changes in the substrate. In wet areas, the target is at least 95% mortar coverage. (National Tile Authority's coverage guidance) If coverage is poor, correct the notch, mortar quantity, or pressing method before setting more sheets.
Clean the joints immediately. Remove mortar squeezed into grout spaces before it hardens. Full joints are not a substitute for full bedding. Excess mortar reduces grout depth and leaves a surface that is harder to clean.
Keep cuts and transitions deliberate
A wet saw suits straight cuts in ceramic, porcelain, and many glass products when the blade matches the material. Tile nippers can handle small curves and fixture openings, but delicate glass and polished stone usually need slower, controlled cutting. Around a drain, arrange pieces so cuts continue the pattern. Random slivers draw attention and can leave fragile edges.
For paper-faced sheets, remove the facing only after the mortar has grabbed enough to hold the pieces. Correct alignment while the sheet remains workable, then inspect the joints instead of trusting the paper to conceal them. ANSI-related guidance emphasizes tight joint control, accurate alignment, and full bedding for paper-faced glass mosaics. (TCNA ANSI standards resource)
Use a consistent field sequence: snap reference lines, dry-fit the module, spread mortar, set one sheet, adjust its perimeter joints, and inspect the surface from several angles. Lift sheets periodically to verify coverage. If a sheet is hollow or out of plane, fix it while the mortar is fresh.
Grout Selection and Long-Term Maintenance
Mosaic tile exposes more grout than large-format tile, so joint color, texture, depth, and cleanup strongly influence the finished surface. The small format also magnifies uneven joints and shallow packing. A mosaic is not automatically low maintenance. More joints give residue, discoloration, and incomplete cleanup more places to remain visible.
Match grout to the joint and tile surface
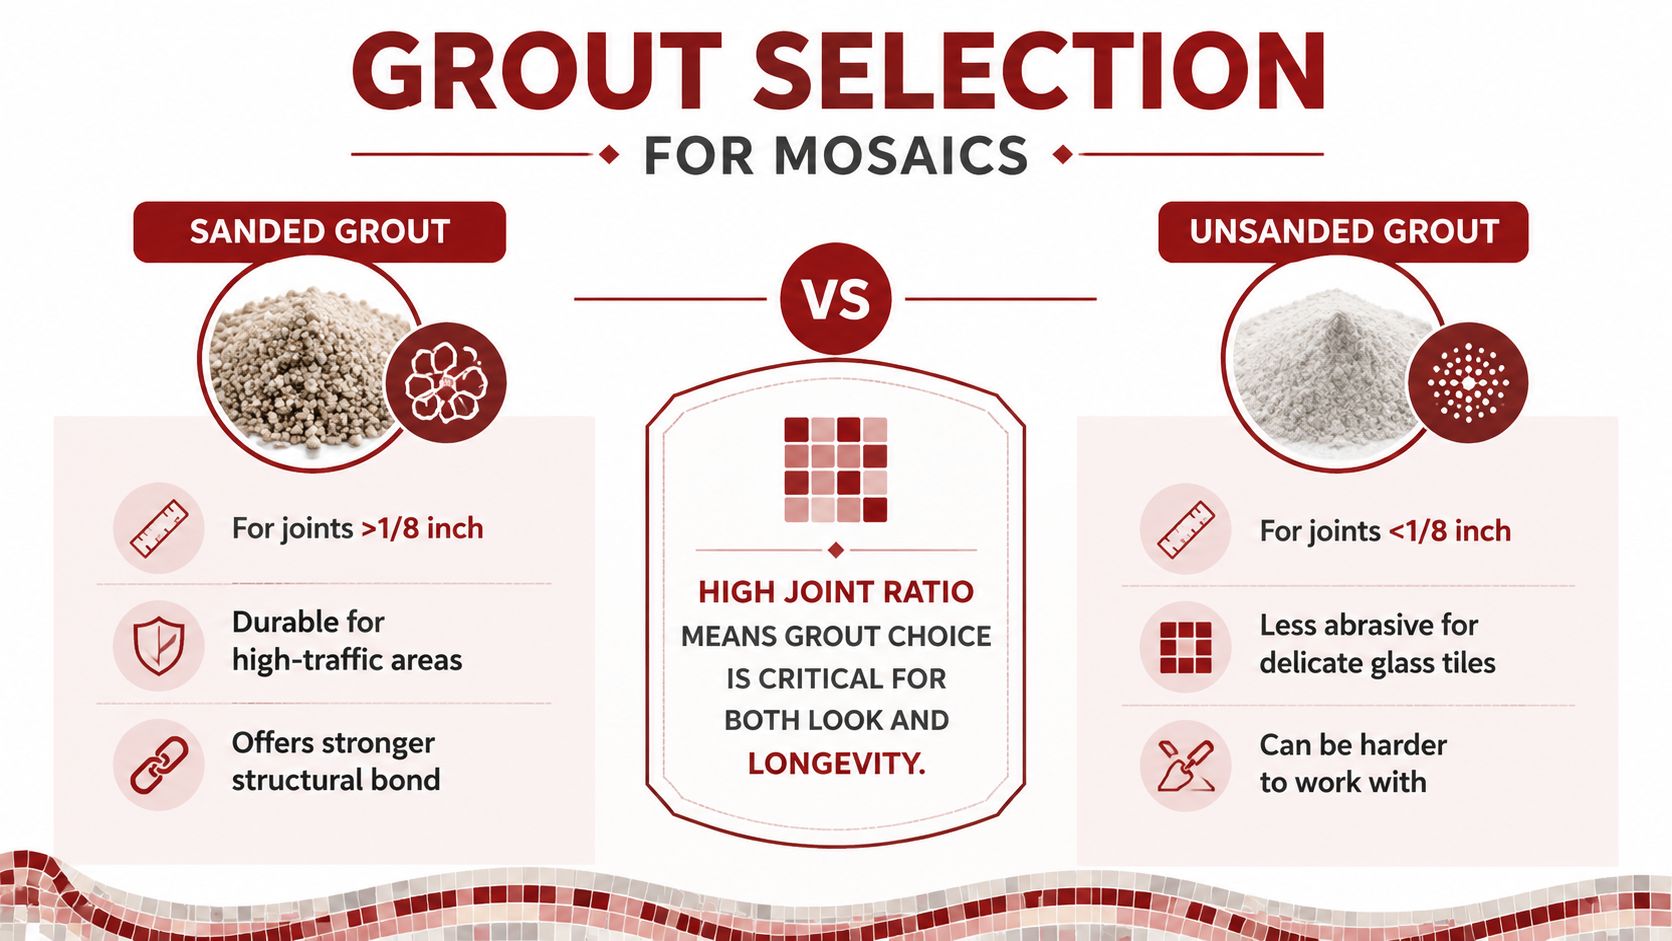
Use the sheet design and product instructions to select joint width. A Lowe's mosaic guide describes traditional grout gaps from 1/8 inch to 3/8 inch and advises keeping the sheet-to-sheet gap consistent with the spacing between the tesserae within the sheet. (Lowe's mosaic product guide) Follow the specific tile and grout documentation rather than forcing a preferred joint size onto the material.
For narrow joints, unsanded or fine-grained grout can reduce abrasion on delicate glass and polished surfaces. Sanded grout suits some wider joints, provided the tile manufacturer approves it. Its aggregate can scratch certain glass and stone finishes. Epoxy grout resists staining well in demanding wet areas, but it costs more, requires prompt cleanup, and becomes less forgiving as it sets.
Porous natural stone may need sealing before grouting when the manufacturer requires it. This limits pigment lodging in the surface, but the sealer must be compatible with the stone, grout, and wet-area conditions. Dense glass, porcelain, and ceramic have different sealing requirements, so check their documentation instead of applying one product to every tile.
Pack the joints and clean on schedule
Hold the float at about a 45-degree angle and force grout diagonally across the sheets until the joints are full. Work in manageable sections. Remove excess while the grout remains workable with a well-wrung sponge and clean water. Avoid flooding the surface, which can wash grout from the joints or leave a weak, uneven finish.
Finish rule: Remove squeezed-out mortar early and time grout cleanup carefully. Later scrubbing will be lighter and less likely to damage the tile surface.
After curing, use a mild, tile-safe cleaner with a soft sponge or cloth. Abrasive pads can dull glass, polished stone, and glossy finishes. In a shower, remove standing water where practical, maintain ventilation, and inspect joints and corners for cracks or gaps. Repair a small failure early before water and dirt reach the substrate. In wet areas, grout maintenance cannot compensate for failed waterproofing beneath the mosaic, so treat any recurring dampness or movement as a substrate or waterproofing problem rather than a cleaning issue.
Project Costs and When to Hire a Professional
A mosaic project can exceed its tile budget before the first sheet reaches the wall. Mortar, grout, cutting tools, substrate repairs, backer board, waterproofing, trims, sealers, and disposal all affect the final cost. Small tiles also demand flatter surfaces and more careful bedding, so preparation often determines both labor time and rework risk.
The useful comparison is the assembly, not an invented price per square foot. A dry backsplash with a sound wall is a different job from a shower floor requiring structural review, slope, drain integration, continuous waterproofing, and precise sheet alignment. Premium glass and natural stone add handling requirements, while irregular pieces can increase cutting and fitting time.
DIY vs. Professional Mosaic Installation Cost Breakdown
| Cost Category | DIY Estimate | Professional Estimate |
|---|---|---|
| Mosaic sheets | Homeowner purchases selected ceramic, porcelain, glass, or stone | Contractor sources or installs homeowner-selected material |
| Mortar and grout | Purchased separately, with compatibility responsibility on the homeowner | Included in the installation proposal or specified for the assembly |
| Substrate preparation | Homeowner supplies tools and correction materials | Labor and materials reflect the substrate's actual condition |
| Waterproofing | Membrane, seam treatment, drain details, and testing handled by homeowner | Integrated into the wet-area installation process |
| Cutting and setting | Tool rental or purchase, plus personal labor | Skilled cutting, layout, embedding, and alignment labor |
| Rework risk | Homeowner carries the cost of removal and replacement | Contract terms and warranty conditions may define correction responsibility |
Know where the risk changes
DIY suits a small, accessible backsplash when the wall is sound, dry, and easy to correct. The risk changes sharply with a shower pan, curbless transition, steam shower, floor movement, complex drain cuts, or a mural that must align across sheets. In those settings, a minor substrate or waterproofing error can remain hidden until the finished surface is removed.
Before accepting a professional quote, ask for the substrate method, mortar type, waterproofing details, movement accommodation, and grout system. The installer should explain how penetrations, changes of plane, sheet alignment, and mortar coverage will be handled. A proposal that says only “install tile” leaves the technical scope unclear and makes comparisons unreliable.
For an early planning benchmark, use Trademaster Construction's instant pricing tool before comparing detailed estimates. Trademaster Construction works on kitchens, bathrooms, basements, and custom tile projects in Southwest Michigan. Homeowners in Portage, Kalamazoo, and nearby communities can use that step to organize questions about scope, materials, and preparation.
Ask who pays if the substrate needs correction after demolition, or if sheets must be removed because coverage and alignment are unacceptable. Those decisions belong in the written scope.
The hidden cost of a failed wet-area installation is disruption. Removing bonded mosaics can damage the substrate, expose waterproofing defects, and extend the renovation. Saving on preparation makes sense only when the assembly is simple enough for the homeowner to control every technical detail, from surface flatness through waterproofing and final cleanup.
Final Verification and Common Mistakes to Avoid
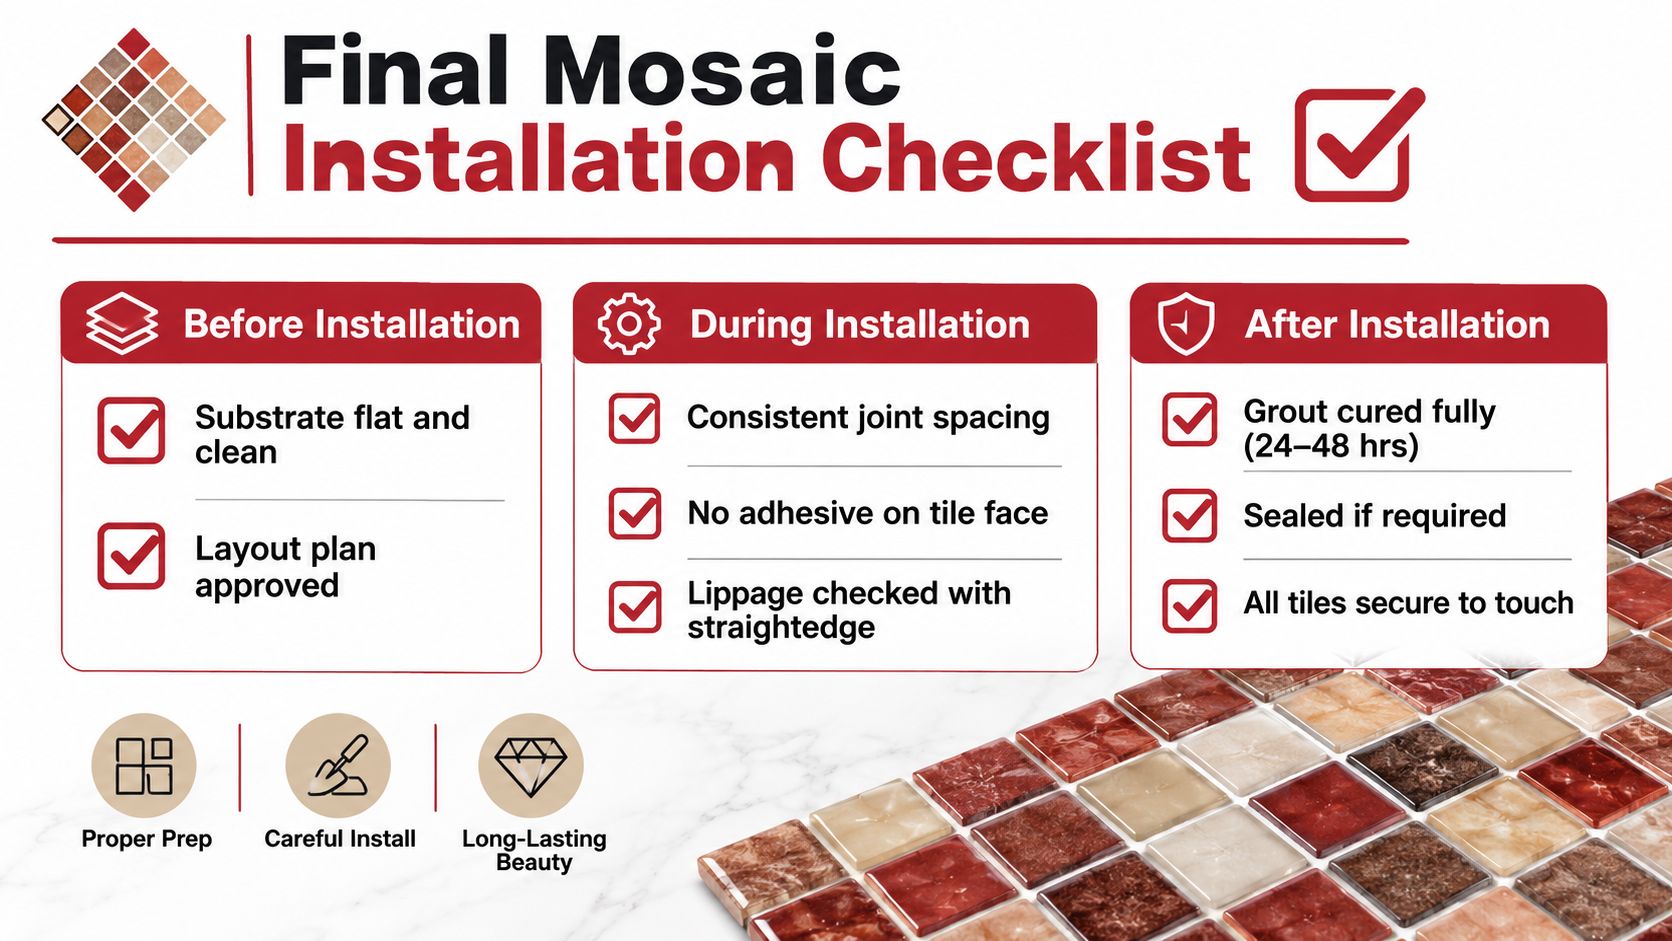
Before setting the first sheet, inspect the substrate with a straightedge. Confirm that it is clean, rigid, and suitable for the approved dry layout. Small mosaic pieces follow every dip and ridge, so minor unevenness can become visible across the finished surface. In wet areas, check membrane continuity at corners, seams, penetrations, and drains before covering the work. Follow the membrane manufacturer's installation instructions for inspection and detailing.
During setting, lift sheets periodically to confirm mortar contact. Wet-area installations require at least 95% mortar coverage, with the sheets fully bedded rather than spot-bonded. Keep joints clear, check lines often, and provide movement joints at changes of plane and wherever the assembly requires them. General installation guidance is available in the National Tile Authority's mosaic installation guidance.
Mistakes that create expensive repairs
- Using mastic in a wet area: Choose a mortar approved for the tile, substrate, and exposure.
- Treating mesh as a leveling device: Mesh holds pieces together, but cannot correct a warped wall.
- Skipping coverage checks: A sheet may look bonded while voids remain underneath.
- Grouting over uncleared joints: Hardened mortar reduces grout depth and weakens the joint.
- Rushing the cure: Follow the mortar and grout manufacturer's curing requirements before water or heavy use.
- Ignoring movement: Seal changes of plane and provide the required movement accommodation.
Tile failures usually begin with movement, poor flatness, incompatible materials, inadequate waterproofing, or a rushed schedule. Careful preparation prevents repairs.
Trademaster Construction can help plan substrate work, waterproofing, layout, and custom tile details in Southwest Michigan homes. Visit Trademaster Construction to review remodeling options and organize the project scope.

