
You wake up on day two of the remodel and reach for the coffee maker that isn't there. The sink is disconnected. The stove is in the garage. There's dust on the dog bowls, and somebody has stacked your everyday plates in a box labeled “misc.” That's the moment you realize a kitchen remodel isn't just a construction project. It's a household disruption project.
That's also why most advice on how to survive a kitchen remodel falls short. Packing dishes matters. A microwave on a folding table matters. But what really determines whether your family stays sane is whether you planned for lost routines, delayed decisions, blocked paths through the house, and a kitchen that may be partly unusable for much longer than you hoped.
Recent renovation coverage shows just how long this process can stretch. A 2024 Houzz study reported that kitchen renovations took an average of 9.6 months of planning and 5.1 months of building, which means the project often takes nearly a year from first decisions to final completion, as reported in OregonLive's coverage of the Houzz home survey. If you treat that kind of project like a short inconvenience, daily life will get ugly fast.
Why Most Remodels Feel Harder Than Expected
The hardest part usually isn't demolition noise. It's the loss of systems your family uses without thinking. Morning coffee, school lunches, pet feeding, mail drop, grocery storage, after-work cleanup. Once the kitchen is offline, all of those routines scatter into other rooms.
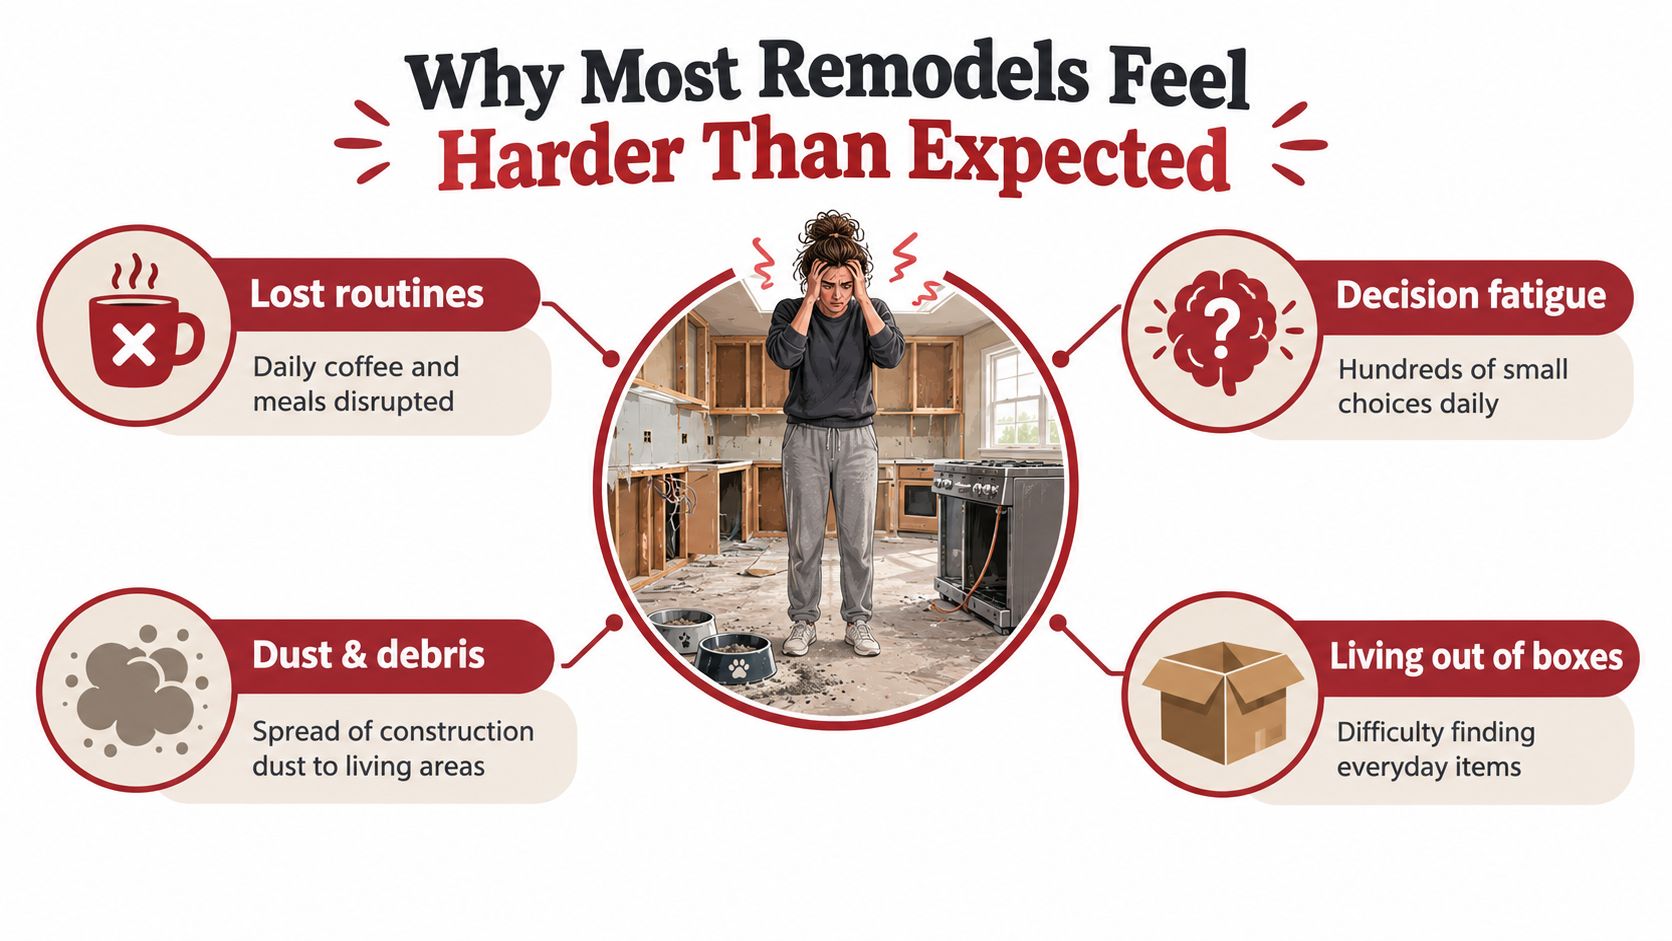
A big renovation study found that 85% of homeowners experienced significant stress during remodeling, and 57% reported renovation fatigue tied to delays, disruptions, and decision fatigue. The top stressors were living through construction at 55%, delays at 35%, and design decisions at 29%, according to Kitchen & Bath Design News coverage of the study. Those numbers line up with what happens on real jobs. Families don't break down because one wall came down. They break down because every day starts with twenty small workarounds.
The friction points that wear people down
Some problems are obvious. Others sneak up on you after the first week.
- Counter space disappears: Meal prep gets pushed onto a dining table, folding table, or laundry counter.
- Refrigeration gets awkward: A garage fridge sounds fine until you're walking outside in the rain for milk.
- Traffic patterns change: Contractors, tools, and protective floor covering reroute everybody through unfamiliar parts of the house.
- Basic cleanup gets harder: When the sink is gone, even washing fruit or rinsing a coffee mug becomes a chore.
- Too many decisions stay open: If you're choosing hardware, grout, paint, and lighting during active construction, the project starts making decisions for you.
Practical rule: Remodel stress comes from broken routines more than broken drywall.
What works better
The families who handle remodels well usually do one thing differently. They plan daily life before demo day. They decide where breakfast happens, where dishes get washed, where school bags land, where pets stay during the workday, and who in the household gives final answers to the contractor.
That kind of planning doesn't feel exciting, but it's what keeps the project from taking over the house.
Building a Realistic Timeline Before Demolition
Most homeowners focus on the construction calendar because that's the visible part. The bigger schedule risk usually shows up before the first cabinet comes out. Design choices, permit review, cabinet lead times, appliance availability, and trade sequencing all stack up before anyone swings a hammer.
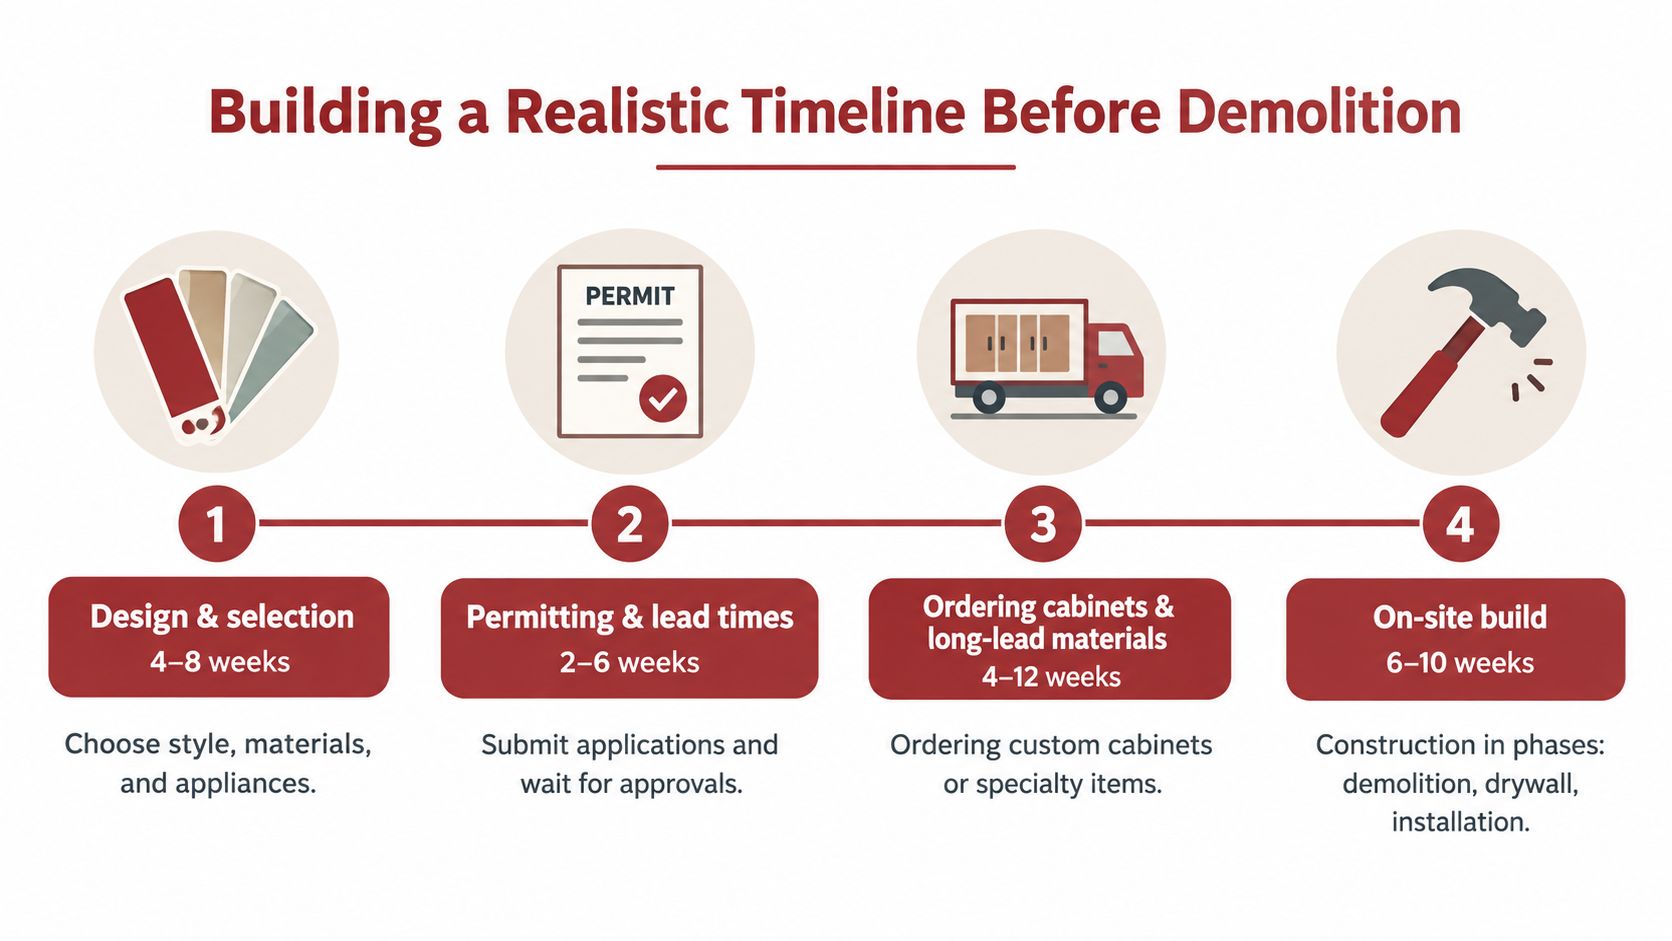
One published checklist breaks kitchen remodels into stages that include planning and design at 2 to 8 weeks, contractor bidding at 1 to 3 weeks, permits at 1 to 6 weeks, cabinet manufacturing at 4 to 16 weeks, demolition at 2 to 5 days, rough plumbing and electrical at 3 to 10 days, inspections at 1 to 5 days, cabinet installation at 3 to 7 days, and countertop templating at 1 day, according to this kitchen remodel checklist and timeline guide. That's why the calendar people imagine at the start rarely matches the one they live through.
Count backward from the date that matters
If you need the kitchen working before Thanksgiving, before school starts, or before houseguests arrive, don't ask when demolition can begin. Ask what has to be approved, ordered, delivered, and installed before that target date.
Build the schedule in reverse:
- Completion target: Pick the date that matters to your household.
- Countertop and finish milestones: Countertops usually depend on cabinet install and final templating.
- Cabinet delivery: Cabinet delays affect everything downstream.
- Permits and inspections: These don't care about your vacation calendar.
- Selections and drawings: Layout, appliance specs, lighting, and plumbing locations need to be settled early.
What to lock in first
Some selections have to happen early because they affect rough-ins and ordering. Others can flex a little.
| Decision Area | Lock Early | Can Wait Slightly Longer |
|---|---|---|
| Layout | Appliance locations, sink location, island size | Decorative shelving details |
| Cabinets | Cabinet line, finish, dimensions | Pull style if lead times allow |
| Plumbing | Sink base size, faucet type, pot filler decision | Accessories |
| Electrical | Lighting plan, outlet placement, appliance power needs | Exact bulb style |
| Appliances | Range, refrigerator, hood, dishwasher models | Small countertop appliances |
In Southwest Michigan, timing also changes with the season. Spring schedules fill fast because many homeowners want work underway before summer. Holiday periods slow approvals, deliveries, and homeowner decisions. Winter can be productive for planning, ordering, and getting ahead of the seasonal rush.
The visible build is only one slice of the job. Selections and lead times often decide whether the project feels organized or chaotic.
Setting Up a Temporary Kitchen That Actually Works
A temporary kitchen fails when it's treated like a camping setup. It works when it's built like a stripped-down service station for real daily use. The goal isn't to recreate your old kitchen. The goal is to keep breakfast, lunches, simple dinners, refrigeration, and cleanup from becoming exhausting.
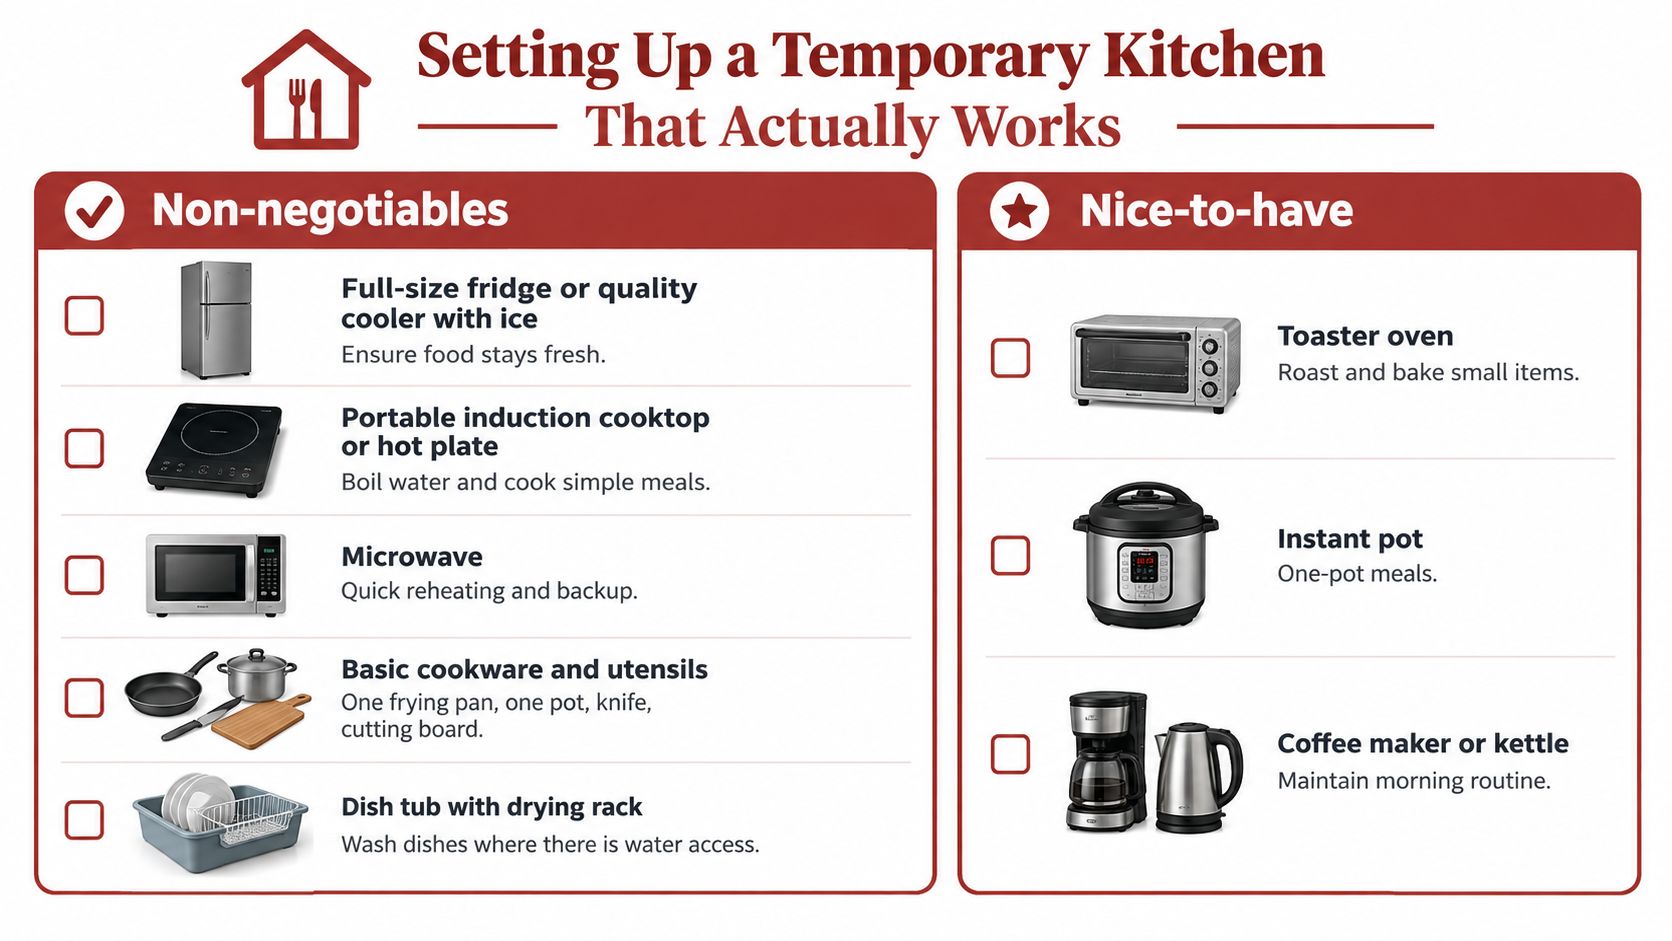
A renovation planning guide specifically recommends a temporary kitchen with a microwave, induction hot plate, and fridge access as the minimum setup needed to keep meals manageable while the main kitchen is offline, as noted in this renovation timeline planning guide. That's the baseline. Most families need a little more than the baseline to stay functional.
The setup that earns its keep
Pick one zone in the house with easy traffic flow and some separation from the loudest work area. A dining room corner, basement bar area, mudroom, or garage can work if temperature and safety are manageable.
Start with these pieces:
- Cold storage first: A full-size refrigerator is better than relying on coolers. If you do use a cooler, make it backup storage, not your primary system.
- Simple cooking gear: An induction burner, microwave, toaster oven, and electric kettle cover most short-term meals.
- One real prep zone: Use a sturdy table or countertop with a cutting board that stays out all the time.
- Basic wash station: Keep a dish tub, drying rack, soap, and towels near whatever sink you'll use most.
- Core tools only: One chef's knife, one skillet, one saucepan, one sheet pan, one stirring utensil set.
Placement matters more than people think
Don't tuck the temporary kitchen wherever there's empty space. Put it where the house can support it.
- Keep it near water access: Hauling dirty dishes across the house gets old quickly.
- Avoid sleeping areas: Early coffee, microwave beeps, and cleanup noise travel more than people expect.
- Store daily-use items in labeled bins: Plates, lunch containers, school snacks, paper towels, and coffee supplies should all be within arm's reach.
- Make safety visible: Keep a fire extinguisher nearby and avoid overloading outlets with too many countertop appliances.
Families with kids do better when they simplify meals before the project starts. Make a short menu rotation. Repeat it. Batch-cook where you can. If you need ideas, a collection of freezer meal recipes for busy weeks can help you stock meals before demolition day so you're not improvising dinner every night.
If a meal requires the full oven, three mixing bowls, and half your pantry, it probably doesn't belong in your temporary kitchen plan.
Budgeting With a Contingency Buffer
Kitchen remodel budgets usually don't blow up because the first estimate was dishonest. They go sideways because homeowners confuse the project price with the project exposure. Once demolition starts, the house gets a vote.
A practical kitchen remodel budget should include a contingency reserve of about 10% to 20% of total project cost, with higher reserves when the home is older or the work involves layout changes or behind-the-walls updates, according to this kitchen remodel contingency fund guide. The math is simple. The discipline is the hard part. That reserve needs to sit separately from your upgrade wish list.
Where overruns usually start
Cabinet upgrades, subfloor repairs, electrical corrections, plumbing adjustments, and finish changes are common pressure points. They don't always show up on the original scope because some conditions only become visible after tear-out.
Here's the key distinction. A contingency fund is not money for “if we feel like nicer pendants.” It's money for “the wall is open and now we need to fix what's inside it.”
| Budget Category | % of Projects That Exceed Budget | Typical Overrun Range |
|---|---|---|
| Hidden conditions behind walls or under floors | Not quantified in the verified data | Varies by condition and scope |
| Electrical or code-related upgrades | Not quantified in the verified data | Varies by jurisdiction and existing systems |
| Plumbing changes after demolition | Not quantified in the verified data | Varies by layout and access |
| Cabinet and finish selection changes | Not quantified in the verified data | Varies by product tier and availability |
Set the budget in layers
Use a three-tier approach.
- Base scope: Everything required to complete a safe, functional kitchen.
- Contingency reserve: Protected funds for surprises and necessary corrections.
- Optional upgrades: Nice-to-have choices that only move forward if the project stays stable.
Industry coverage also shows why early cost planning matters. Houzz survey coverage reported that a small kitchen major remodel averaged about $29,400, while a small minor remodel averaged $11,700. For large kitchens, the averages were $42,400 for a major remodel and $17,800 for a minor remodel, according to Houzz survey results on kitchen remodel costs.
Before you sign a contract, get a rough scope number and then add your contingency. An estimating tool like the instant pricing tool helps homeowners anchor a ballpark budget before they start negotiating allowances, options, and scope trade-offs.
Staying Put Versus Partial Relocation
A lot of homeowners assume moving out will automatically reduce stress. It doesn't always work that way. In one survey, 81% of people who stayed put or partially moved out and 78% who moved out completely still reported at least some stress. Extreme stress was higher among those who partially moved out at 8% or fully moved out at 10% than among those who stayed put at 3%, according to Houzz coverage on moving out versus staying put during a kitchen remodel.
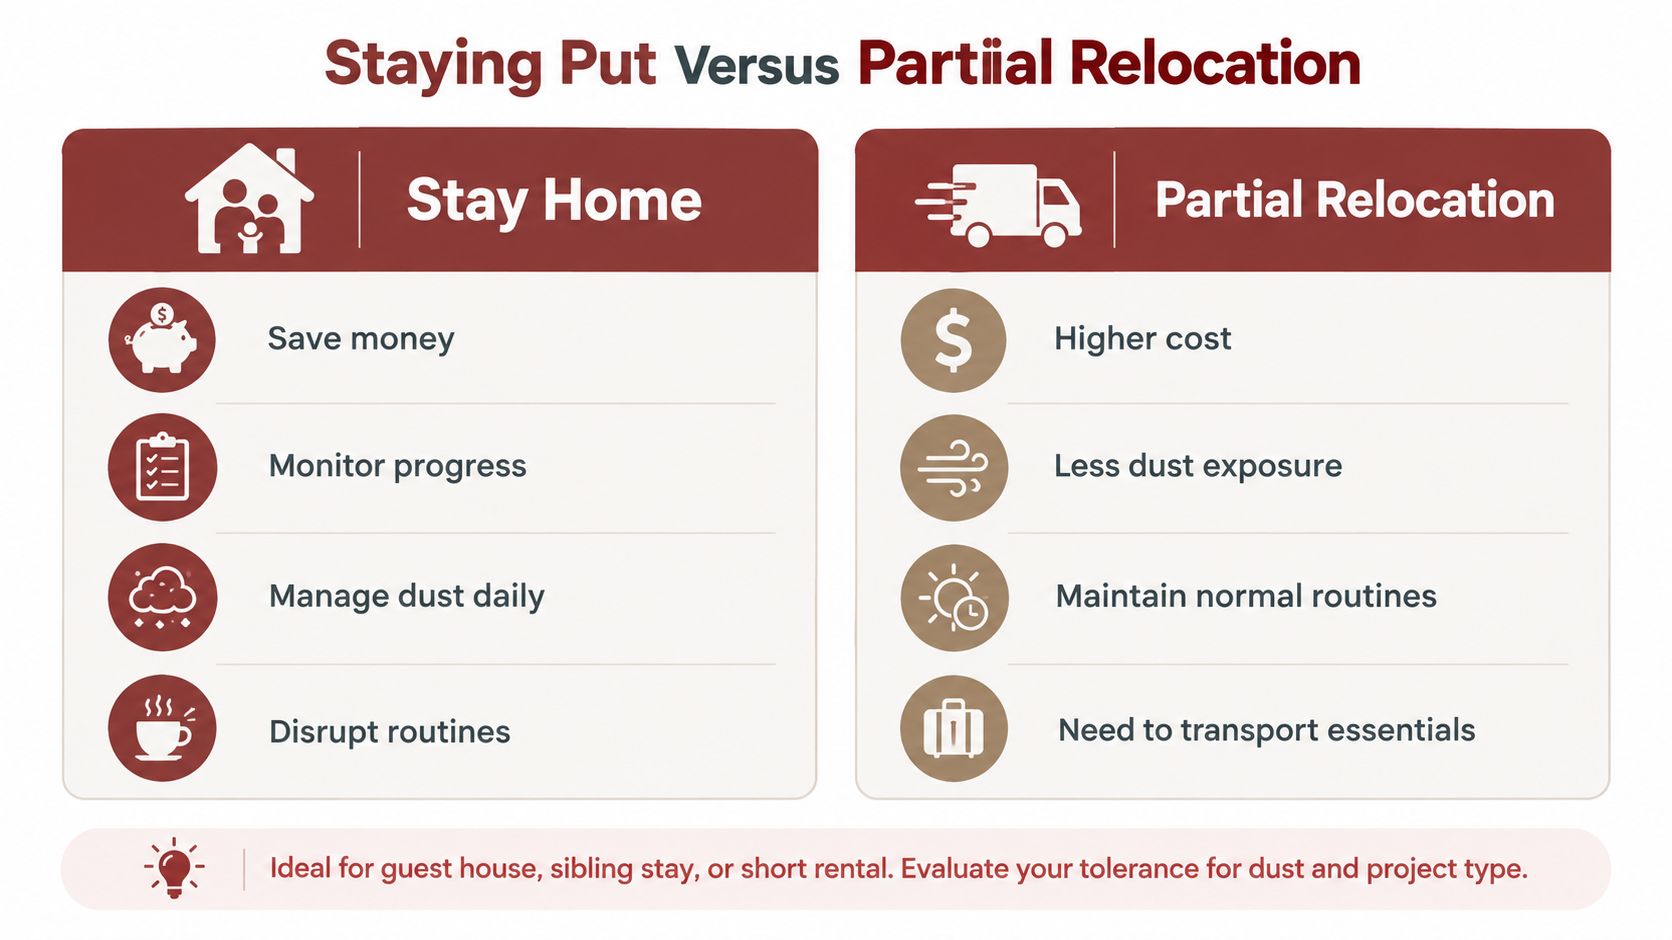
That result surprises people, but it makes sense on real projects. Moving out solves dust and noise. It doesn't solve uncertainty, decisions, schedule changes, or the need to answer questions quickly.
When staying home works
Staying put is usually manageable when the remodel keeps some household systems intact and the family can tolerate inconvenience.
- Best fit: Cabinet refreshes, targeted updates, phased work, and jobs that preserve most plumbing and electrical locations
- Upside: No second housing setup, easier access to your belongings, and easier site check-ins
- Downside: Constant awareness of the project, noise, dust, and temporary meal routines
For many households, the best way to stay home is not just staying home. It's creating a fully functional temporary kitchen and protecting one clean path through the house.
A short visual breakdown can help frame the decision:
When partial relocation helps
Partial relocation tends to make more sense when the job affects more than the kitchen. If crews are opening walls, shutting down water, changing layout, or creating conditions that are hard on pets, young kids, or work-from-home schedules, leaving for part of the project can be worth it.
Use practical triggers, not emotion:
- Move out temporarily if the job includes full gut work, major utility interruptions, or unsafe circulation through the house.
- Stay put if the project is compact, well-contained, and your family can handle a temporary kitchen without major strain.
- Use a hybrid approach if demolition week and final install week are the toughest windows.
Managing Daily Life During Construction
Daily life during a remodel needs a system. Otherwise, every morning starts with new problems. Dust gets into rooms it shouldn't. Pets drift into work areas. One spouse approves a change the other spouse didn't want. Lunch prep happens on top of unopened mail. None of that is unusual. It's just what happens when the house loses its normal boundaries.
Control dust and protect traffic paths
Plastic barriers help, but they aren't enough by themselves. Seal supply and return vents near the work zone, keep doors closed, and ask the crew how they'll handle dust at the end of each day. If flooring outside the kitchen is staying in place, use protective coverings on the main route from entry door to work area. Homeowners looking for examples of durable temporary surface protection can review options like Floor Runners (floor Druggets) for house movers, which show the kind of barrier that helps preserve finished floors during repeated foot traffic.
Give the jobsite a defined path. Crews should know where materials come in, where demo debris goes out, and which bathroom they can use if that's part of the arrangement.
Make one person the point of contact
Too many remodel headaches come from split communication inside the household. One person tells the tile installer one thing. Another person tells the project lead something else. The crew loses time, and the family loses confidence.
Use a simple system:
- One decision-maker: That person gives final yes or no on site questions.
- One message thread: Keep answers in writing so nobody relies on memory.
- One recurring walkthrough: A quick daily or near-daily check catches problems early.
The cleaner the communication, the fewer “I thought we agreed on that” moments you'll have.
Protect kids, pets, and one quiet room
Children and pets don't understand jobsite boundaries. Gates, closed doors, and a strict no-entry rule matter more than verbal reminders. Ask for tool storage to be consolidated, and do a quick visual safety check before bedtime.
Also protect one room from the project. A bedroom, office, or den that stays clean and crew-free gives the household somewhere to decompress. That matters more than people think when construction starts feeling endless.
Keep meals and cleanup on autopilot
The temporary kitchen works better when you remove decisions from it. Repeat breakfasts. Rotate a short dinner list. Use paper goods strategically if sink access is limited. Keep one backup takeout plan for days when inspections, shutoffs, or countertop work interrupt the setup.
If water access changes during the day, know in advance where handwashing, bottle filling, and basic cleanup will happen. That single detail saves a lot of frustration.
Your Survival Checklist and Next Steps
The households that survive kitchen remodels best don't wing it. They treat preparation like part of the job. That's the difference between a house that feels inconvenient and a house that feels unlivable.
Before demolition
Run through these items before the first day of work:
- Map the timeline: Know what is ordered, what is approved, and what can still delay the start.
- Photograph existing conditions: Take pictures of plumbing locations, electrical walls, adjacent flooring, and nearby rooms.
- Label by zone: Pack dishes, pantry goods, coffee supplies, and kids' lunch items by use, not by random box size.
- Freeze meals early: Build up easy dinners before the kitchen goes offline.
- Set up the temporary kitchen completely: Don't wait until after demo to discover you forgot a can opener or dish rack.
- Seal adjacent rooms: Use plastic sheeting and close off rooms you want to keep clean.
During construction
Once the job is active, consistency matters more than effort.
- Do a short daily walkthrough with the lead carpenter or project contact.
- Review change orders quickly so work doesn't stall waiting for a decision.
- Keep pathways clear between entry, work area, and your temporary kitchen.
- Reset the temporary kitchen nightly so mornings don't start in chaos.
- Protect one calm room and keep it off-limits to crews and project storage.
A final deep clean also deserves planning. If you want a room-by-room reference for what post-project cleanup typically involves, the Canes Cleaners cleanup checklist is a useful way to catch the details people miss after construction dust settles.
One last judgment call matters more than style choices. Decide whether you're doing a smaller phased remodel or waiting for a full renovation. Recent trend coverage notes that homeowners are increasingly choosing smaller-scope projects, and preserving existing infrastructure can reduce total project expense by 30% to 40%, as discussed in This Old House coverage of kitchen remodeling trends. That can be a smart move, but only if you plan the day-to-day logistics of living through a staged project.
If you're still trying to figure out whether your remodel is financially comfortable before you request bids, start with a ballpark number. That step alone clears up a lot of false starts.
Trademaster Construction helps Southwest Michigan homeowners plan and build kitchen remodels with the kind of real-world process this article is about, including scope development, practical design decisions, and early budgeting. If you want to see what your project may cost before you start collecting bids, visit Trademaster Construction and use the pricing resources to get oriented.

