
You're standing in an unfinished room with a tape measure in one hand and a pencil in the other. The drywall is still open, so moving a fixture is easy. Once the ceiling is finished, the same mistake means patching, sanding, repainting, and living with a light that still lands in the wrong place.
That's why recessed lighting placement is a layout problem first and an electrical problem second. The ceiling height establishes the starting grid, while beam angle, fixture output, joist direction, cabinets, furniture, and room function determine whether that grid works. A kitchen, basement, bathroom, and living room may have the same ceiling height, but they shouldn't automatically receive the same lighting plan.
Why Spacing Starts With the Ceiling, Not the Room
Start by measuring the finished ceiling height, not the room's square footage. A widely used baseline divides ceiling height by two, so an 8-foot ceiling typically starts at about 4 feet between fixtures, a 9-foot ceiling at about 4.5 feet, and a 10-foot ceiling at about 5 feet, as outlined in Home Depot's recessed lighting buying guide.
That rule works because light travels from the ceiling toward the work plane. A taller ceiling changes the distance the beam must cover, so spacing based only on room width can leave either dark gaps or an overcrowded ceiling. Treat the formula as a starting point, not a finished design.
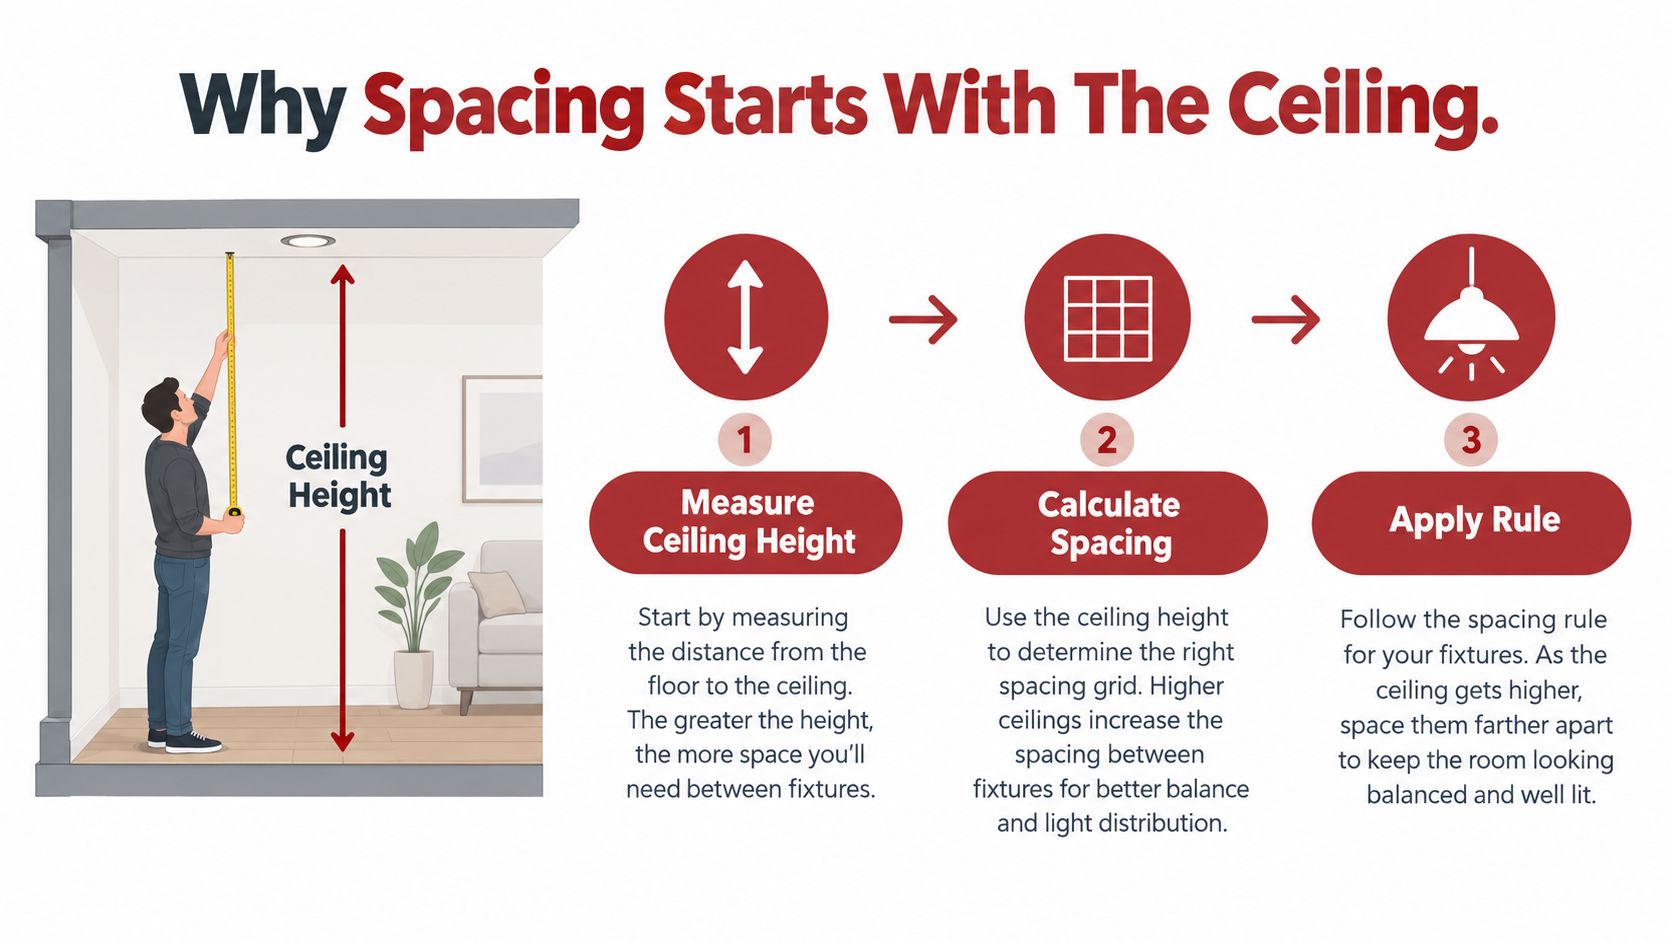
Use the formula as a baseline
For a straightforward rectangular room, measure the length and width, mark a preliminary grid, and compare the grid with the ceiling framing. The first row often needs to be placed about half the fixture spacing from the wall. Major placement guidance also commonly puts the first row roughly 1.5 to 2 feet from a wall for wall washing, or about 2 to 3 feet from the wall when the goal is to reduce shadows and avoid a dark perimeter. Those distinctions are covered in the Home Depot recessed lighting layout guide.
A separate practical method spaces general ambient fixtures at about 60% to 70% of ceiling height, with the first row about half that distance from the wall. For example, an 8-foot ceiling may land around 5 to 6 feet between fixtures, while a 9-foot ceiling may land around 6 to 6.5 feet, particularly with wide-beam lamps around 40 to 50 degrees, according to MFM's recessed lighting guidance.
Adjust for the ceiling you actually have
Below 8 feet, the divided-by-two rule can produce a tight pattern that feels harsh, especially with high-output fixtures or a narrow beam. Above 10 feet, the same rule may leave insufficient overlap at the work plane. Beam angle and lumen output have to take over from the simple formula.
Joist direction matters before room function does. A row that looks perfect on paper may land directly under a joist, duct, or supply line. Vaulted and sloped ceilings create another problem because the beam no longer drops straight down. Fixtures may need to sit farther from the wall or be aimed with adjustable trims so the light lands on the floor, counter, or seating zone instead of sliding up the slope.
Practical rule: Measure the ceiling, inspect the framing, and choose the beam spread before you commit to fixture centers.
Mapping the Layout on the Ceiling Before You Cut
Draw the plan before you touch the drywall. Measure wall to wall in both directions, transfer those dimensions to paper, and mark the room's centerline. Then sketch the intended rows and compare them with cabinets, islands, furniture, shower glass, fans, and access panels.
On the ceiling, snap a chalk line in the direction of the planned row, followed by a perpendicular line that establishes the spacing. A laser level can make this faster on long rooms, but chalk lines remain useful when the ceiling is open and the framing is visible.

Find the framing before marking centers
A stud finder can identify joists through finished drywall, while nail pops often reveal their location more reliably in an unfinished ceiling. Confirm the direction of the joists, then shift the row so the housings fit cleanly between them. Don't force a symmetrical plan if the framing makes it impractical. A small, deliberate adjustment looks better than a fixture squeezed against a joist or relocated around a duct.
Mark every fixture center with a pencil tick, a small piece of painter's tape, or a laser plumb point. Before cutting, use a small inspection opening or probe to verify that the planned position clears:
- Joists and blocking: Confirm the housing or canless driver has room.
- HVAC ducts: Look for rigid ducts, flex runs, and boots that may cross the ceiling bay.
- Supply lines: Check for plumbing and other services, especially below bathrooms.
- Electrical boxes: Keep clear of ceiling fan boxes and existing junction points.
- Room features: Recheck cabinet faces, shower glass, attic hatches, and beams.
A useful companion is Forward Electrical's RECI lighting guide, which provides additional planning context for organizing fixture positions before installation.
Make the final ceiling check
Stand at the doorway and look at the proposed marks from the room's main sightline. Check that opposing rows feel balanced, wall offsets are intentional, and task fixtures align with the surfaces they're meant to illuminate. In kitchens, look from the counter. In living rooms, sit where the television and seating will be.
Five minutes of layout work can prevent five holes that need patching and paint. The ceiling should be treated like a finished elevation before the first cut is made.
Room-by-Room Recessed Lighting Placement Plans
A useful room plan starts with a quick sketch of what needs light, not with a fixture count. The kitchen needs countertop coverage, the living room needs comfortable vertical illumination, and the basement needs a layout that respects low ceilings, stairs, and multiple activity zones.
Compare the starting points
| Room | Ceiling Height | Fixture Spacing | Wall Offset |
|---|---|---|---|
| Kitchen | 8 feet | About 4 feet in a straight counter run | About 24 inches from the counter edge |
| Bathroom | Varies | Center over vanity and tub, adjusted to the room | Place for face and wet-area coverage |
| Living room | Varies | Wash seating zones rather than the coffee table | Use a deliberate perimeter or wall-wash offset |
| Hallway | Varies | About half the ceiling height | Center the row, adjusting around access panels |
| Basement | Often lower | Tighter spacing where the lower ceiling requires it | Add coverage around stairs, windows, and bar areas |
The kitchen usually needs the most precise layout. On an 8-foot ceiling, a straight counter run can place fixtures roughly 24 inches off the counter edge and 4 feet apart, with a separate row over the island. The aim is to keep the light ahead of the person working at the counter, rather than behind them where their body casts a shadow. Under-cabinet lighting should still carry part of the task load.
In a bathroom, center fixtures over the vanity and tub instead of placing one directly behind the person's head. Use adjustable gimbals where the layout needs directional control, and select shower-rated trims with placement that follows the fixture instructions and local inspection requirements. A showerhead, glass enclosure, exhaust fan, and vanity mirror all compete for ceiling space, so mark those elements together.
Let the room function break the grid
In a living room, wash seating zones and walls rather than the coffee table. Avoid centering a downlight directly over the television, where reflections and glare can make the screen uncomfortable. A few perimeter fixtures on a separate dimmer often create a calmer room than a uniform field of bright spots.
Hallways usually work well with one centered row, spaced at roughly half the ceiling height. Step the row around attic accesses, smoke alarms, and framing obstacles rather than forcing a light into a service location.
Basements need more than a repeated grid. Add attention around window wells, stair landings, and the bar area, then tighten the layout where the ceiling is low. Recessed fixtures should also coordinate with pendants, sconces, and utility lighting. For installation considerations, Black Rhino Electric's recessed lighting installation resource offers useful context on residential lighting work.
Matching Beam Angle, Lumens, and Ceiling Height
Two fixtures can sit the same distance apart and produce completely different results. A 25-degree beam creates a concentrated pool of light, while a 75-degree beam spreads illumination more broadly and softens the transition between fixtures. If you space both types by the same grid, the narrow beam is more likely to create hot spots and dark gaps.
Choose the ceiling height first. Then use the beam angle to estimate the footprint on the work plane. A simple cone estimate uses the ceiling height and the half-angle of the beam, then doubles the result to approximate the full diameter. It's not a substitute for the manufacturer's photometric data, but it shows why a narrow beam needs more careful placement.
Read the three variables together
Lumens describe light output, not spacing by themselves. A high-output fixture with a narrow beam may illuminate a small area intensely, while a wide flood distributes the same general output across a larger footprint. Kitchens and reading areas need stronger task coverage than a hallway, so the fixture choice and spacing should follow the work being done.
The recommendations below are planning ranges, not guarantees. Confirm the actual beam pattern and output on the fixture specification sheet.
| Ceiling Height | Narrow Beam (25–35°) | Medium Beam (40–50°) | Wide Beam (60–75°) |
|---|---|---|---|
| 8 feet | Tight spacing for accents and focused zones | Balanced starting point for general coverage | Broader ambient wash with fewer dark gaps |
| 9 feet | Use overlap and aim carefully | Extend spacing only after checking coverage | Works well for ambient areas with suitable output |
| 10 feet | Best for accenting or taller features | May need higher output and deliberate overlap | Useful for general wash, with photometric verification |
Narrow beams around 25 to 40 degrees generally require tighter spacing to avoid scalloping. Wide beams around 60 to 80 degrees can support spacing near the 70% ceiling-height approach, as explained in Pro Lighting's recessed lighting spacing guide. Accent layouts commonly use 4 to 6 feet between fixtures, depending on the desired effect, according to Home Depot's accent layout guidance.
Color quality matters as much as brightness in rooms with tile, paint, food, and skin tones. A CRI of 90 or higher is a worthwhile specification for bathrooms and pantries where accurate color helps, while the color temperature should remain consistent with nearby fixtures.
Dimmers, Switches, and Smart Control Placement
A recessed lighting plan can look fine during the day and feel wrong at night if every fixture comes on at full output. Dimmers let you lower ambient light, brighten a work zone, and keep wall washing from becoming glare. They're part of the layout, not an afterthought.
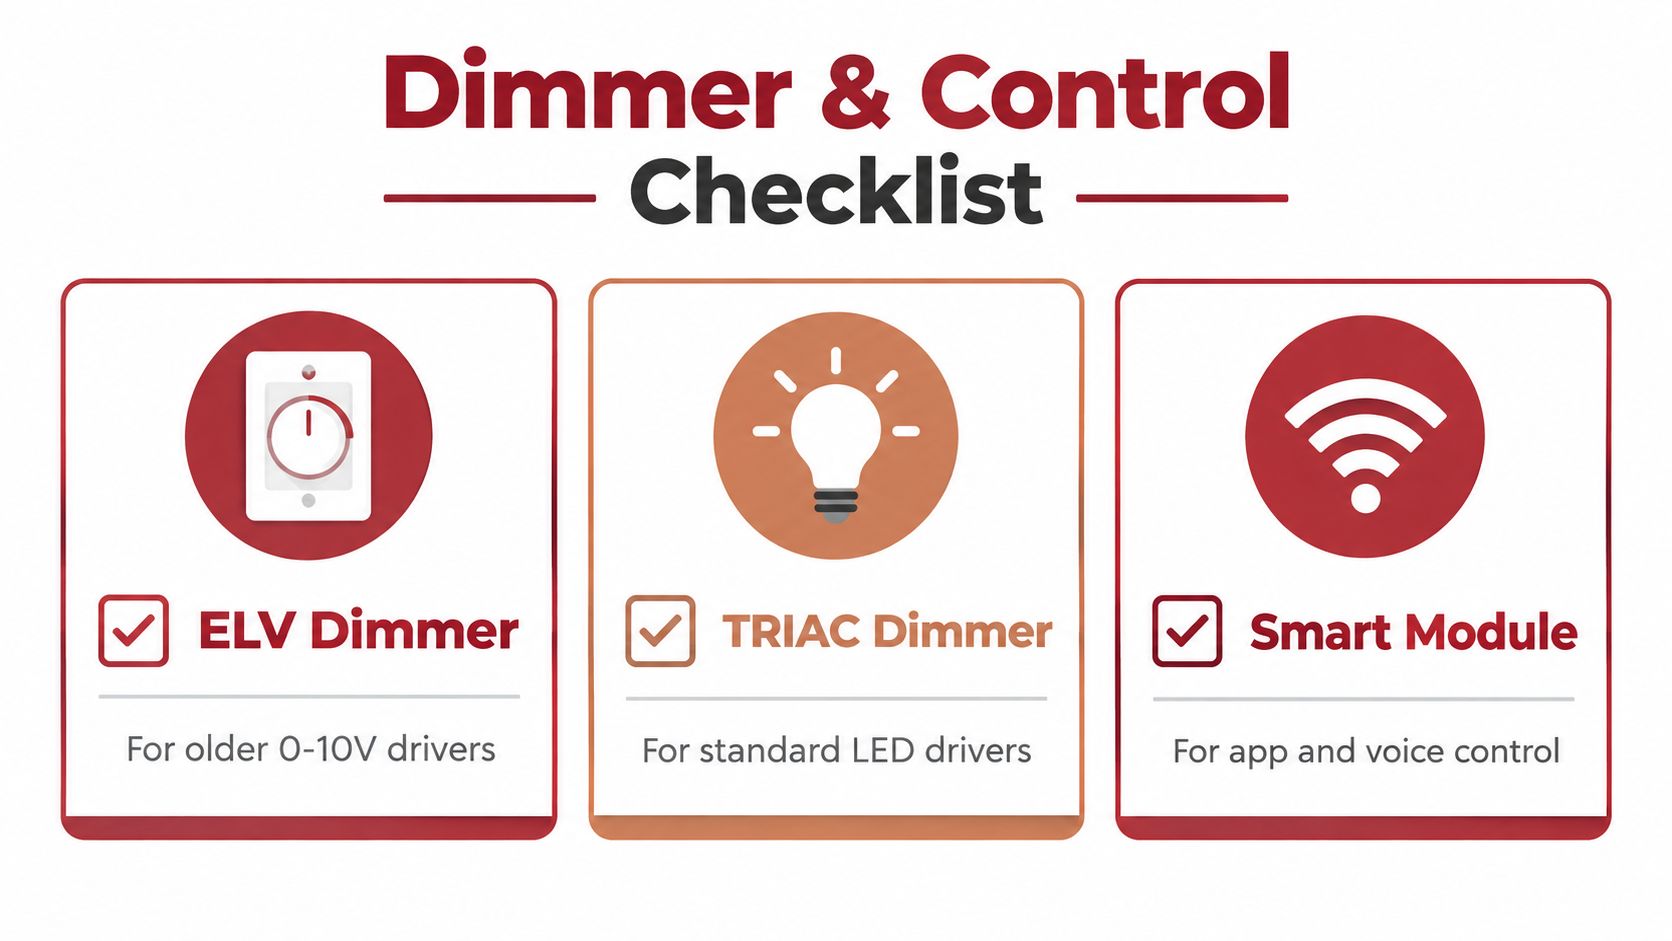
Match the control to the fixture driver. An ELV dimmer is associated with older 0-10V drivers, while a TRIAC dimmer is used with standard LED drivers. Smart modules such as Lutron Caséta or Leviton Decora add app and voice control, provided the fixture and module are compatible.
Put controls where people enter
Place the primary switch at the natural entry point, not behind a door that opens against the wall. Group fixtures by purpose rather than wiring every ceiling light to one control. A kitchen may need separate controls for counter task lights, island fixtures, and general ambient lighting. A living room often benefits from distinct seating and perimeter zones, while a hallway path may need switching from both ends.
Coordinate the controls with pendants, cabinet lighting, ceiling fans, and exhaust fans. Multi-location switching can make a long hallway or basement stair route much easier to use, but the wiring plan needs to be established before the boxes are closed.
Box fill deserves attention before the trim goes on. Four 12-gauge conductors plus a switch can reach the limit of a single-gang box, so a deeper 22-cubic-inch box or a two-gang box may be appropriate when combining a dimmer with a smart hub. The exact calculation depends on the conductors, devices, grounds, and box rating.
Use the manufacturer's compatibility list rather than assuming any LED dimmer will work.
A short visual checklist helps separate the control choices:
- ELV dimmer: Consider for older 0-10V driver applications.
- TRIAC dimmer: Use with compatible standard LED drivers.
- Smart module: Select for app and voice control when the fixture supports it.
A practical installation overview can help homeowners understand the sequence before calling an electrician:
Common Recessed Lighting Placement Mistakes
Most callbacks don't come from the fixture itself. They come from a layout that looked acceptable on paper but ignored the ceiling's framing, the room's use, or the way the beam lands.
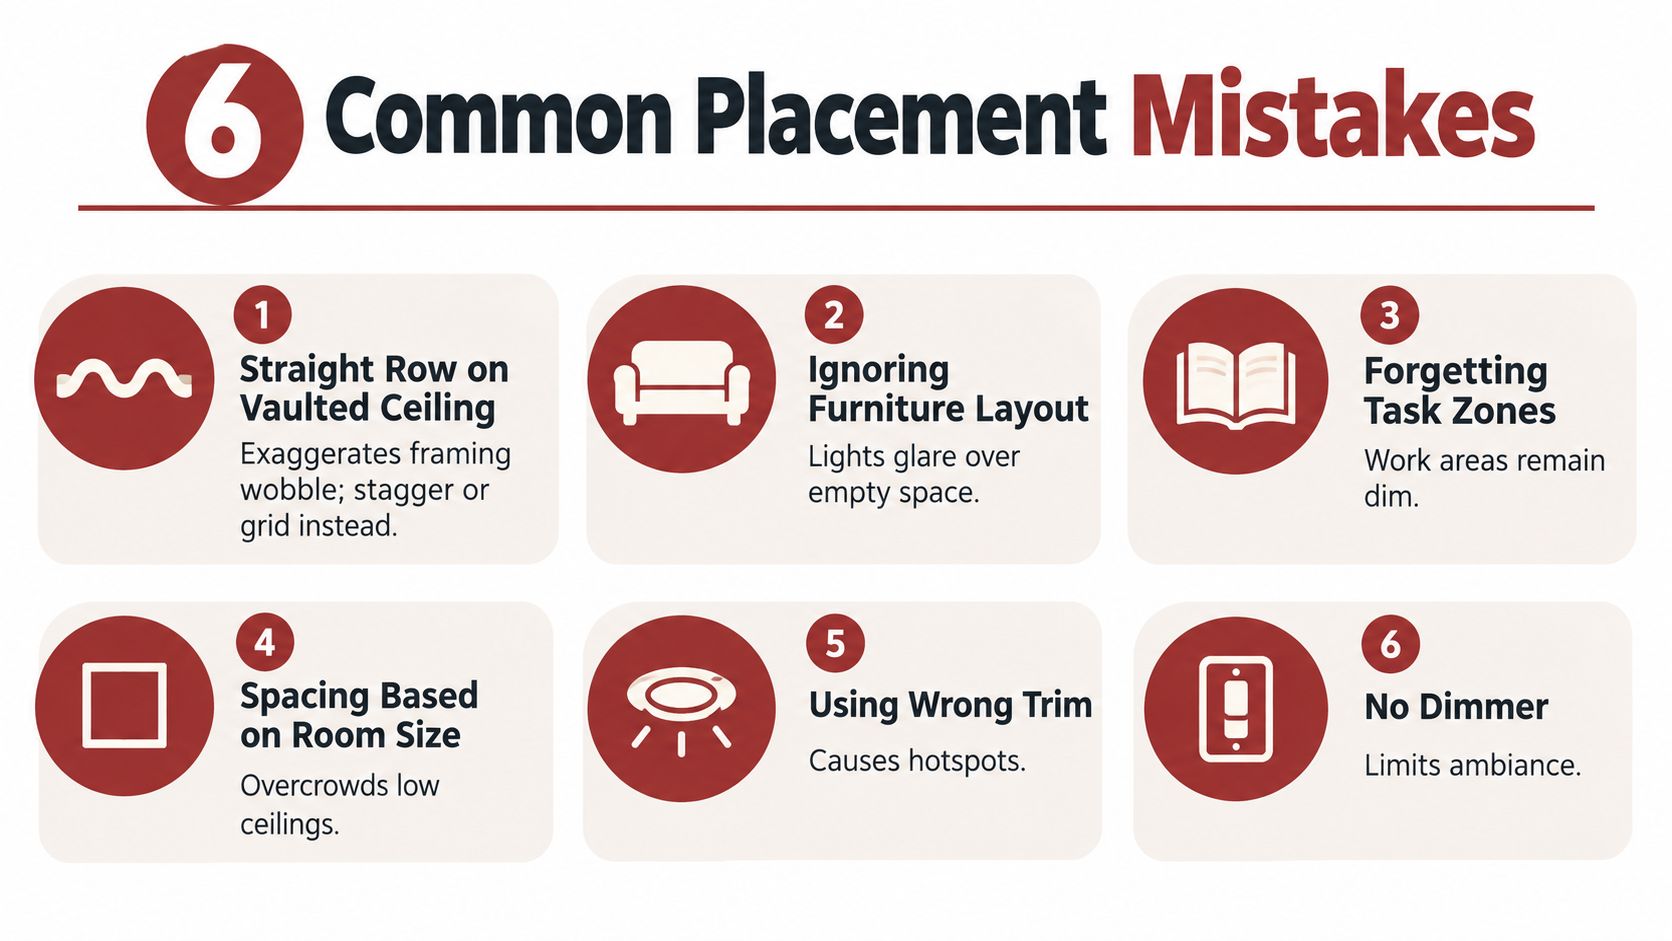
Six problems that show up repeatedly
Straight rows on vaulted ceilings: A single rigid row can exaggerate framing irregularities and make the slope look uneven. Stagger or grid fixtures so the layout follows the architecture.
Fixtures pushed against joists: A plan drawn without confirming joist direction often leaves housings squeezed into the wrong bay. Probe or scan first, then shift the row deliberately.
Wrong insulation clearance: IC-rated and non-IC fixtures have different installation requirements. Treating them as interchangeable can create a fire hazard where insulation surrounds a fixture that isn't approved for that condition.
Wall-wash trims set too far out: General ambient placement and wall washing aren't the same layout. For wall washing, the first row is commonly set about 1.5 to 2 feet from the wall, while cabinet or countertop lighting often sits 12 to 18 inches from the cabinet face, as described in Philips Hue's recessed-lighting placement guidance. Too much distance leaves scallops and weakens the feature wall.
Over-lighting open rooms: More fixtures don't automatically make a great room more comfortable. Guidance from PacLights on planning recessed layouts warns that exceeding about 4 to 6 lights per 100 square feet can become excessive in practice. The better comparison is fixture count, beam spread, output, and task zones, not fixture count alone.
No coordination with other trades: Cabinets, HVAC ducts, shower trim, ceiling fans, and pendants can all force a relocation if they aren't on the same plan. Mark them before cutting, especially in kitchens and bathrooms.
A ceiling full of evenly spaced lights can still be poorly lit if the fixtures illuminate empty floor instead of the surfaces people use.
Code, Safety, and When to Bring in a Pro
Southwest Michigan remodels still need a code-aware electrical plan. New circuits and added fixtures may require a permit and inspection, depending on the municipality and the scope of work. Local requirements can affect housing type, wiring methods, protection, and access, much like the broader building code constraints for new houses affect a house plan.
Use IC-rated housings where the fixture will contact insulation, and follow the manufacturer's required clearances for non-IC equipment. Kitchens, bathrooms, and basements may also require AFCI or GFCI protection based on the circuit and location. Confirm the applicable rules with the local authority having jurisdiction rather than relying on a generic online diagram.
Check the safety details before rough-in
A sound prewire checklist includes:
- Circuit capacity: Verify that the panel and existing circuit can support the added load.
- Protection: Confirm AFCI and GFCI requirements for the location and circuit.
- Box fill: Account for conductors, grounds, devices, and smart controls.
- Working clearance: Keep electrical panels and attic hatches accessible.
- Rated assemblies: Protect fire-rated ceilings and assemblies with approved methods.
- Existing wiring: Stop and investigate aluminum branch circuits, shared neutrals on multi-wire branch circuits, or knob-and-tube wiring.
DIY work becomes less predictable when there's no attic access, old wiring is buried in the ceiling, or a new switch leg must interact with existing circuits. A licensed electrician can also identify conflicts before they become inspection failures or unsafe concealed connections.
Before requesting quotes, estimate the fixture count, housing or canless type, trim, dimmers, switch boxes, wiring access, and patching needs. The Trademaster Construction instant pricing tool can help you build an early project budget around labor, fixture quantity, and control costs. It won't replace a site evaluation, but it gives homeowners a practical starting point for planning a kitchen, bathroom, or basement remodel.
For a coordinated remodel in Portage, Kalamazoo, or nearby Southwest Michigan communities, Trademaster Construction can help align recessed lighting with cabinetry, tile, HVAC, furniture zones, and the broader renovation plan. Use the instant pricing tool first, then bring a measured layout and your fixture preferences into the conversation so the estimate reflects the work your ceiling requires.

