
The dish rack has been sitting by the sink since breakfast, and the butcher block under it looks a shade darker than the rest of the run. Winter heat in a Portage or Kalamazoo kitchen pulls moisture out of the wood, then a humid July pushes it back in. Pale patches show up beside the faucet. A coffee ring sits where someone set a mug down and walked away. That mix of drying, swelling, and everyday spills is what butcher block countertop care has to handle, and oil alone will not fix a wet seam.
Why Butcher Block Care Differs from Other Countertops
Laminate, quartz, and stone shrug off a splash and wait for a wipe. Wood does not. A butcher block countertop is a bundle of strips glued into a slab, so water, food acids, and knife edges meet grain, glue lines, and finish at the same time. Edge grain shows long stripes and takes a scratch along the fiber. End grain, the checkerboard face on classic blocks, drinks moisture faster because the open ends of the cells face up. An oil finish slows that uptake. It does not seal the wood the way a film of polyurethane would, and it wears off wherever you wash, cut, or set down a hot pan.
The 2022 FDA Food Code draws a hard line here. Wood and wood wicker generally may not be food-contact surfaces, with an explicit exception for hard maple or an equivalently hard, close-grained wood used as cutting boards, cutting blocks, baker's tables, and certain utensils. Suitability depends on species, construction, finish, and how you use the top, not on how warm the wood looks in a showroom.
Cosmetic marks versus hygiene problems
A light knife track and a groove that holds chicken juice are not the same problem. The same code says cutting blocks and boards exposed to scratching and scoring must be resurfaced when damage keeps them from being effectively cleaned and sanitized, and discarded if they cannot be resurfaced. Light wear can be sanded and refinished. Deep grooves, open cracks, or anything that traps food and moisture is a cleaning failure.
Practical rule: Judge the surface by whether you can clean it, not by whether the marks bother you in daylight.
Southwest Michigan kitchens make that judgment seasonal. Forced-air heat in winter dries indoor air and pulls oil and moisture out of the top. Humid summers swell the strips, which can open a hairline at a seam or around a sink cutout. Build the habit around those swings: prompt cleaning, full drying, and surface renewal when wear stops being cosmetic. Local health rules can differ, especially if the counter is used directly for food prep, so treat the code as the durable principle rather than a permit for every species and every film finish.
Building a Daily Cleaning and Drying Routine
Most butcher block trouble starts as a puddle someone meant to wipe later. The fix is a short sequence you can run after a weeknight dinner, before the plates even hit the dishwasher.
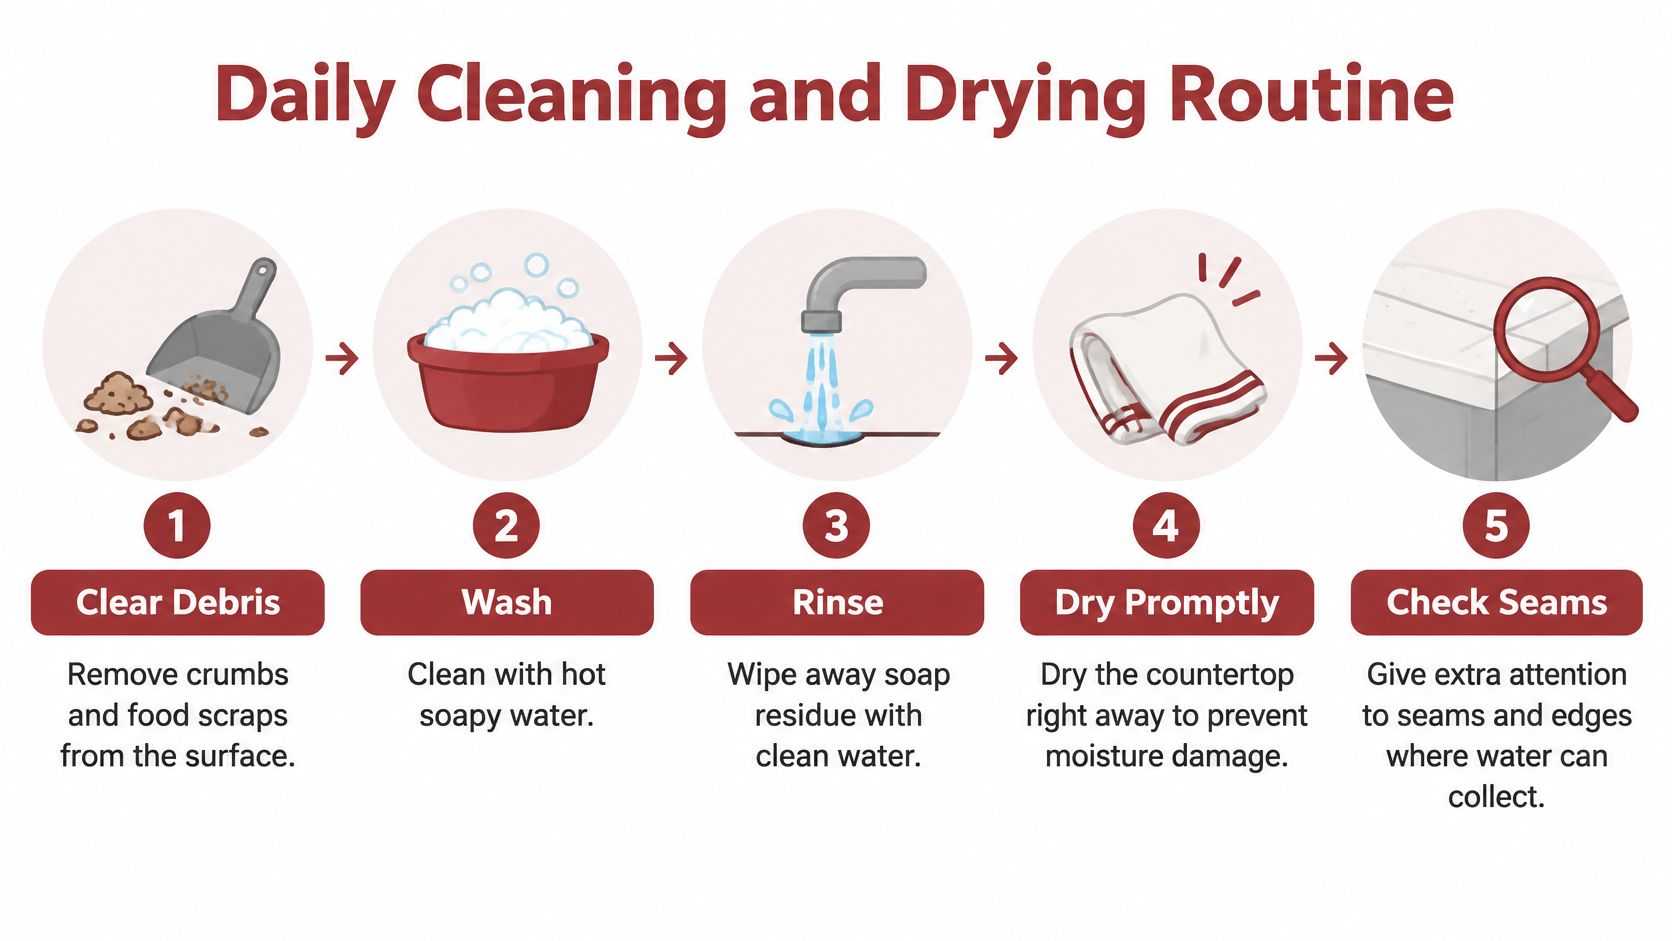
The sequence after each prep session
- Clear debris. Sweep crumbs, onion skins, and meat trimmings into the bin or a compost bowl. Food left in a seam turns into a stain and a smell.
- Wash with hot soapy water. Use a soft cloth and a mild dish soap. Hot water and soap lift grease without stripping an oiled face the way a harsh degreaser will.
- Rinse the soap off. A second cloth with clean water keeps a film from drying in the grain. Soap residue looks dull and holds dirt.
- Dry promptly. Wring the cloth until it is damp, not dripping, then wipe until the wood looks dry. Finish with a dry towel on the field of the counter.
- Check seams, the sink lip, and the dish-rack footprint. Those are the spots that stay wet after the rest of the top looks fine. Lift the rack, dry underneath, and wipe the joint where two slabs meet.
Cutting-board care guidance commonly summarized for home kitchens matches that order: remove debris, wash with hot soapy water, rinse, and dry promptly. Never leave a wet cloth, standing water, or a saturated sponge on the counter, especially at seams and around the sink. Air-drying in a ventilated room beats parking a damp towel on the wood, because the towel becomes the puddle.
What not to use on an oiled top
- Skip bleach as a daily cleaner. Save disinfection for a real contamination event, and only on a surface that can take it.
- If you do disinfect, measure the mix. A commonly cited USDA home dilution is 1 tablespoon of unscented liquid chlorine bleach per U.S. gallon of water, about 1:256, applied after washing and rinsing, then rinsed with clean water and dried. Do not combine bleach with acids, ammonia, or other cleaners.
- Keep raw meat off the same zone as bread and salad. Distinct boards for raw meat and for produce or bread cut cross-contamination risk.
- Leave steel wool and aggressive pads in the garage. They cut grooves that hold soil.
A clean counter is a dry counter. The wash only counts after the sink edge and the seam are dry too.
Manufacturer notes on oiled tops line up with this: hot water and soap, air-drying in a ventilated space, and no bleach or abrasive cleaners as routine care. Do the five steps the same evening you cook. Ten minutes now saves a swollen seam next month.
Removing Stains and Deep Cleaning Without Damage
A bottle labeled food-safe does not answer homeowners' real question. Finish safety, cleanability, and everyday hygiene are three different jobs, and a single product rarely does all three.
Research on wood and plastic cutting blocks found that wood generally yielded fewer recoverable bacteria than plastic. Clean wood absorbed a bacterial inoculum within roughly 3–10 minutes, and after 12 hours at room temperature and high humidity, counts fell by at least 98% and often more than 99.9%, as reported in the wood and plastic contamination study. A separate finding in that work showed coated wood had significantly more recoverable bacteria than uncoated wood. A film finish can change how the surface behaves under a microscope. It does not automatically make the counter safer for chopping.
Stains you can lift without sanding
Coffee rings, grease, dark water marks, and beet or berry juice sit in the top fibers when they are wiped late. Start with the daily wash, then a second pass with hot soapy water along the grain. For a sticky film, a choosing a gentle all purpose cleaner walkthrough is a useful check before you reach for anything stronger, because a harsh solvent can strip oil and leave the grain thirsty. Blot, don't flood. Dry the spot, then judge it in daylight. A pale halo often means the oil left with the cleaner, not that the stain is still there.
When a diluted bleach mix belongs, and when it doesn't
Use the measured bleach solution from the earlier routine only after a real contamination, such as raw poultry juices on the worktop, and only if that finish can tolerate it. Apply briefly, rinse, and dry. Skip it for coffee, for a water ring, and for weekly "just in case" scrubbing. Repeated bleach on an oiled top dries the wood and can darken soft grain.
Countertop versus cutting surface
Reserve direct cutting, especially raw meat, for a board you can replace or resurface without tearing out the kitchen. Use the counter as a cleanable landing zone: platters, mixing bowls, a board on top. Wash the counter with soap and water as soon as raw protein has been nearby, and keep ready-to-eat food on a different zone. Families who want the warmth of wood in a Southwest Michigan remodel get a calmer workflow when the block is the worktop and the board takes the knife.
Oiling and Sealing on a Realistic Schedule
Oil replaces moisture the wash cycle and the furnace remove. It is not a substitute for a failed sink seal, which is a different repair. Timing depends on whether the top is new, how hard you cook, and whether the house is in heating season.
One maker's care sheet says to seal or finish every surface within 48 hours of pulling the shrink wrap, because unprotected wood dries and moves. The mineral-oil method there is an even, liberal coat, about 20 minutes of absorption, then a clean towel to lift the excess, with later coats ranging from every few weeks to every few months based on use. Clean before and after each use. Details are in the Home Depot use-and-care sheet.
| Stage | Frequency | Purpose |
|---|---|---|
| New install, first stretch | Daily for 5–7 consecutive days | Saturate and stabilize dry wood |
| Break-in | Once a week for 3–5 weeks | Replace what early washing pulls out |
| Established top | About once a month | Offset normal drying from heat, humidity swings, cleaning, and water |
| Dry look or failed water test | As soon as you notice it | Restore moisture before cracks open |
Those intervals come from Hudson Block maintenance guidance. The same notes say not to submerge the top or leave water pooled, and they flag pale color, a dry feel, or water that no longer behaves normally as the cue to oil. Heated Southwest Michigan winters lower indoor humidity and speed that drying, so a January kitchen often needs a coat before the calendar says "month." The numbers are a starting frame. Usage and the finish in front of you override the chart.
How to put the oil on
Use food-grade mineral oil, not olive, vegetable, or leftover cooking oil. Cooking oils can turn sticky and sour in the wood. Cutting board oil mistakes to avoid is worth a read before you grab whatever is by the stove. Wipe the counter clean and dry. Spread a liberal coat with the grain, including edges you can reach. Give it time to soak, then buff off anything that still sits on the surface. A heavy film attracts dust and feels tacky under a cutting board.
Conditioner dwell times are longer than a quick mineral-oil wipe. Howard's butcher block conditioner instructions say raw wood should get at least two coats of cutting-board oil first, each soaking at least one hour. After that, one coat of conditioner should stand at least 20 minutes. On countertops, the conditioner should soak overnight, with excess wiped off the next morning. Plan that as an evening job, not a five-minute pass between meals.
If water soaks in and darkens the grain, the top is thirsty. If it beads, the current coat is still doing its job.
A new installation needs the concentrated schedule. An established counter usually settles near monthly, sooner when the furnace runs hard or when you wash the sink zone every night. Scratches that need sanding get another coat of food-grade mineral oil after the dust is gone, which is the next decision, not a reason to flood the whole kitchen.
Sanding and Refinishing Scratches and Scoring
The prep zone beside the sink in a lot of Kalamazoo kitchens tells the same story. Toast crust, a chef's knife, and a damp board have scored a patch about as wide as a cutting board. Some lines are pale and smooth. A few are dark, rough, and deep enough to catch a fingernail.
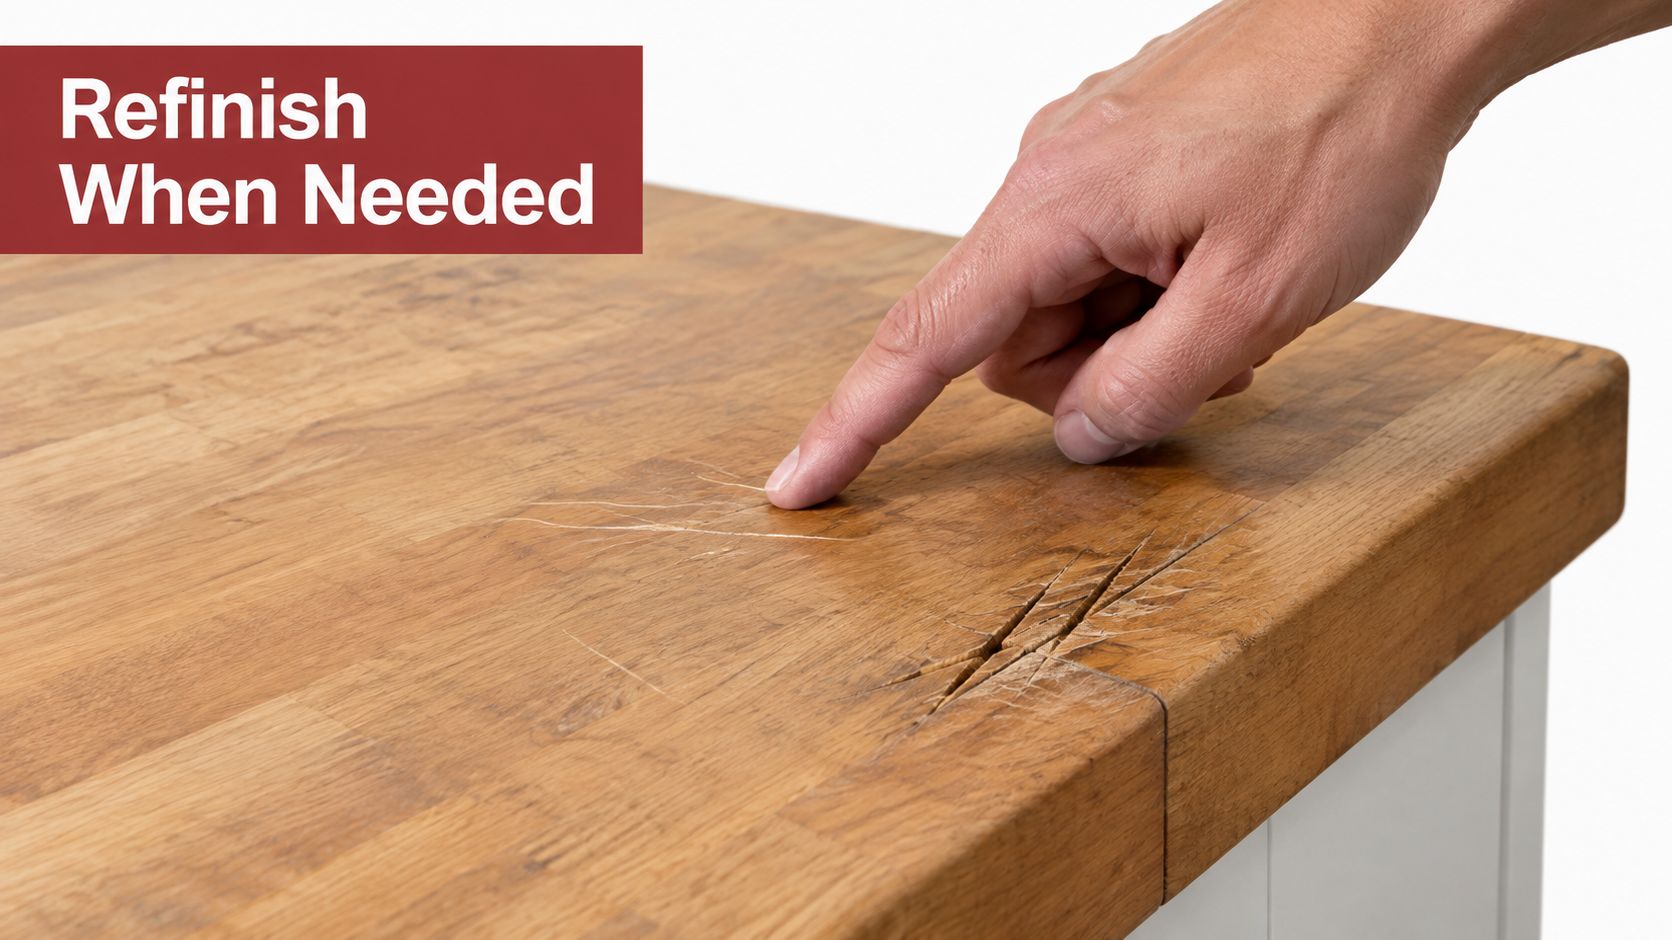
Reading that patch before you sand
Run a clean hand across the zone with the lights on. Cosmetic wear feels even and wipes clean. Hygiene wear holds crumbs, looks permanently damp in the grooves, or shows an open crack at a glue line. That is the point where another coat of oil only shines the dirt. The food-code standard covered earlier is the milestone: if scoring keeps the wood from being cleaned and sanitized, resurface it, and if you cannot resurface it, stop using that piece for food.
A light repair on sound wood
For scratches that have not opened the slab, sand with 220-grit abrasive in the direction of the grain, which is the method in the Hudson maintenance notes already cited for oiling schedules. Stay inside the damaged patch at first so you do not dish a low spot into the field. Vacuum the dust, then wipe with a barely damp cloth and let it dry. The dust film will clog the new oil if you skip that. Apply food-grade mineral oil to the sanded area and feather it into the surrounding finish so the repair does not read as a bald rectangle. Color evens out over a day or two as the oil settles.
This short walkthrough shows the same grain-direction sanding and re-oil sequence on a worn wood surface.
When the seasonal check says stop
Once a season, usually when you switch from heat to open windows, inspect the cutting zone again. If the grooves return immediately, you are chopping on the counter. Move that work to a board. If the crack is open, the strip is loose, or sanding would cut through the thickness near a sink cutout, the repair is no longer cosmetic. Replacing that section, or the run, beats forcing oil into rotten grain.
Sand only while the wood can still be made smooth enough to clean. Past that, the block is done as a food surface.
Preventing Moisture Damage and Deciding When to Call a Pro
Monthly oiling cannot save a counter that is wet from underneath. Moisture damage on butcher block usually begins at vulnerable interfaces: the sink cutout, end grain, seams, the dishwasher zone, faucet penetrations, and the underside. A failed sink seal, standing water from a dish rack, or an unprotected underside will beat any oil schedule.
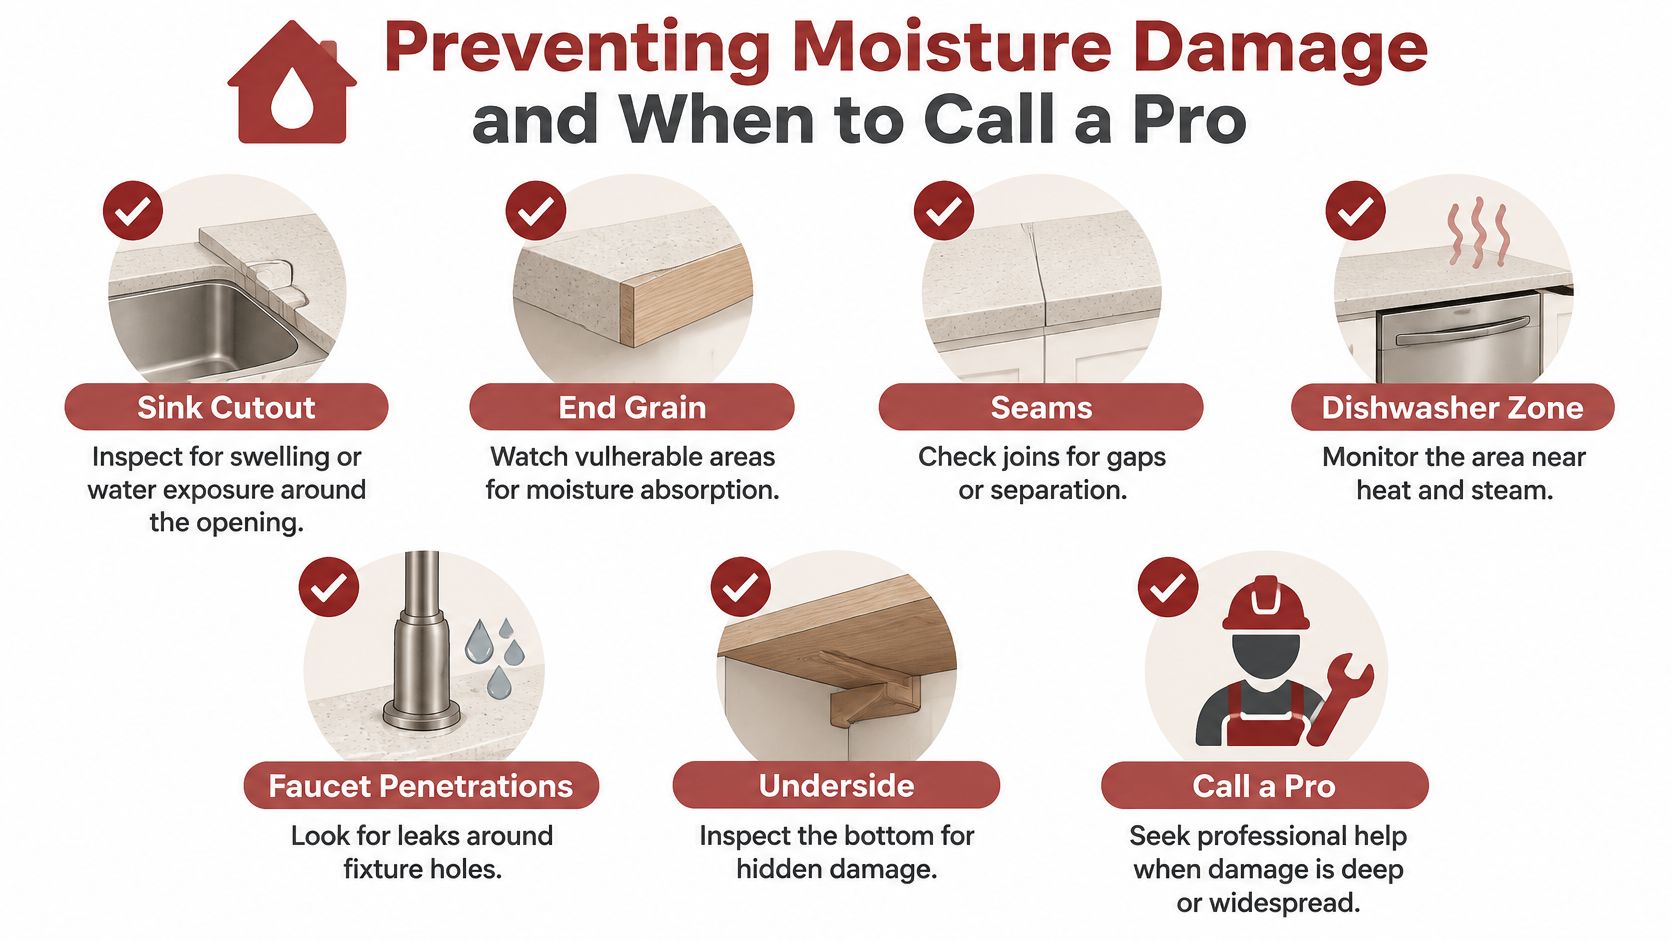
What you can inspect yourself
- Sink caulk, at least once a year. Press the bead. If it is cracked, missing, or pulled away from the wood or the bowl, water is already in the cut edge.
- End grain and cut edges. These faces should have been sealed before install. Bare end grain at a sink opening wicks like a straw.
- Seams and faucet holes. Dark lines that stay damp after the top is dry point to a joint or penetration, not to a stain on the surface.
- The dishwasher zone and the underside. Steam and a missing moisture barrier above the dishwasher, or an unsealed bottom, swell wood you cannot see until the top cups.
Persistent darkening near the sink is rarely an oil problem. The useful repair is to remove failed caulk, dry the assembly fully, sand contaminated wood, and reseal the cutout. Wiping more mineral oil across the field leaves the wet edge untouched. If the area smells musty or the grain stays soft, AMPM Restoration Services' mold prevention guide is a clear explanation of how moisture on wood turns into a bigger indoor problem, which is the moment to stop experimenting with oil.
DIY care versus a remodeler
| Task | Homeowner | Installer or remodeler |
|---|---|---|
| Daily wash, dry, and monthly oil | Yes, if the finish is intact | Not required |
| Fresh caulk on a sound cutout | Often, if you can dry the joint | Better if the wood is already swollen |
| Seal all faces, protect cut edges, add a dishwasher barrier, and allow seasonal movement | Ask for this before install | This is the work that makes maintenance possible |
| Widespread cupping, soft wood, or a loose seam | Stop and call | Reset, reseal, or replace the run |
Rigid fastening that pins the slab so it cannot expand and contract is a common reason gaps and warps show up after the first heating season. That is an installation detail, not a cleaning failure. Trademaster Construction, a Southwest Michigan remodeler focused on kitchens, bathrooms, basements, and tile, plans counter work with that movement and with clear scope before anyone cuts a sink opening. For a ballpark before you book a conversation, the instant pricing tool is the practical way to estimate project costs and see whether you are looking at resealing, a partial replacement, or a full top.
Trademaster Construction plans kitchen remodels across Portage, Kalamazoo, and nearby communities, including butcher block runs that are sealed at the cutouts and built to move with the seasons. If your sink edge is dark, your seams are opening, or you are pricing a new wood top against stone, start with their planning process and a straight conversation about scope. Visit Trademaster Construction to see project examples, use the pricing tool, and schedule a call when you are ready.

