
You're looking at the space between your kitchen and dining room, wondering whether a peninsula would give you the prep area and seating you're missing. Then you open the dishwasher, pull out a chair, and realize the same patch of floor already does several jobs.
That's where peninsula kitchen design needs to start. Before choosing cabinetry or countertop colors, establish whether people can cook, pass through, sit down, and approach the work surfaces without blocking one another. For a Southwest Michigan remodel, those measurements help distinguish a useful addition from a permanent bottleneck.
What a Peninsula Kitchen Is and How It Compares
A peninsula is a counter attached at one end to a wall or base cabinet run and open at the other. Between a kitchen and dining room, it creates a partial boundary without closing off the view. The same element performs three jobs: work surface, storage base, and room divider.
The form became important in post-World War II open-plan housing, where cooks could remain visually connected to adjoining rooms, a shift documented in architectural research on the living-kitchen. That connection remains the practical appeal, not just a particular decorating style.
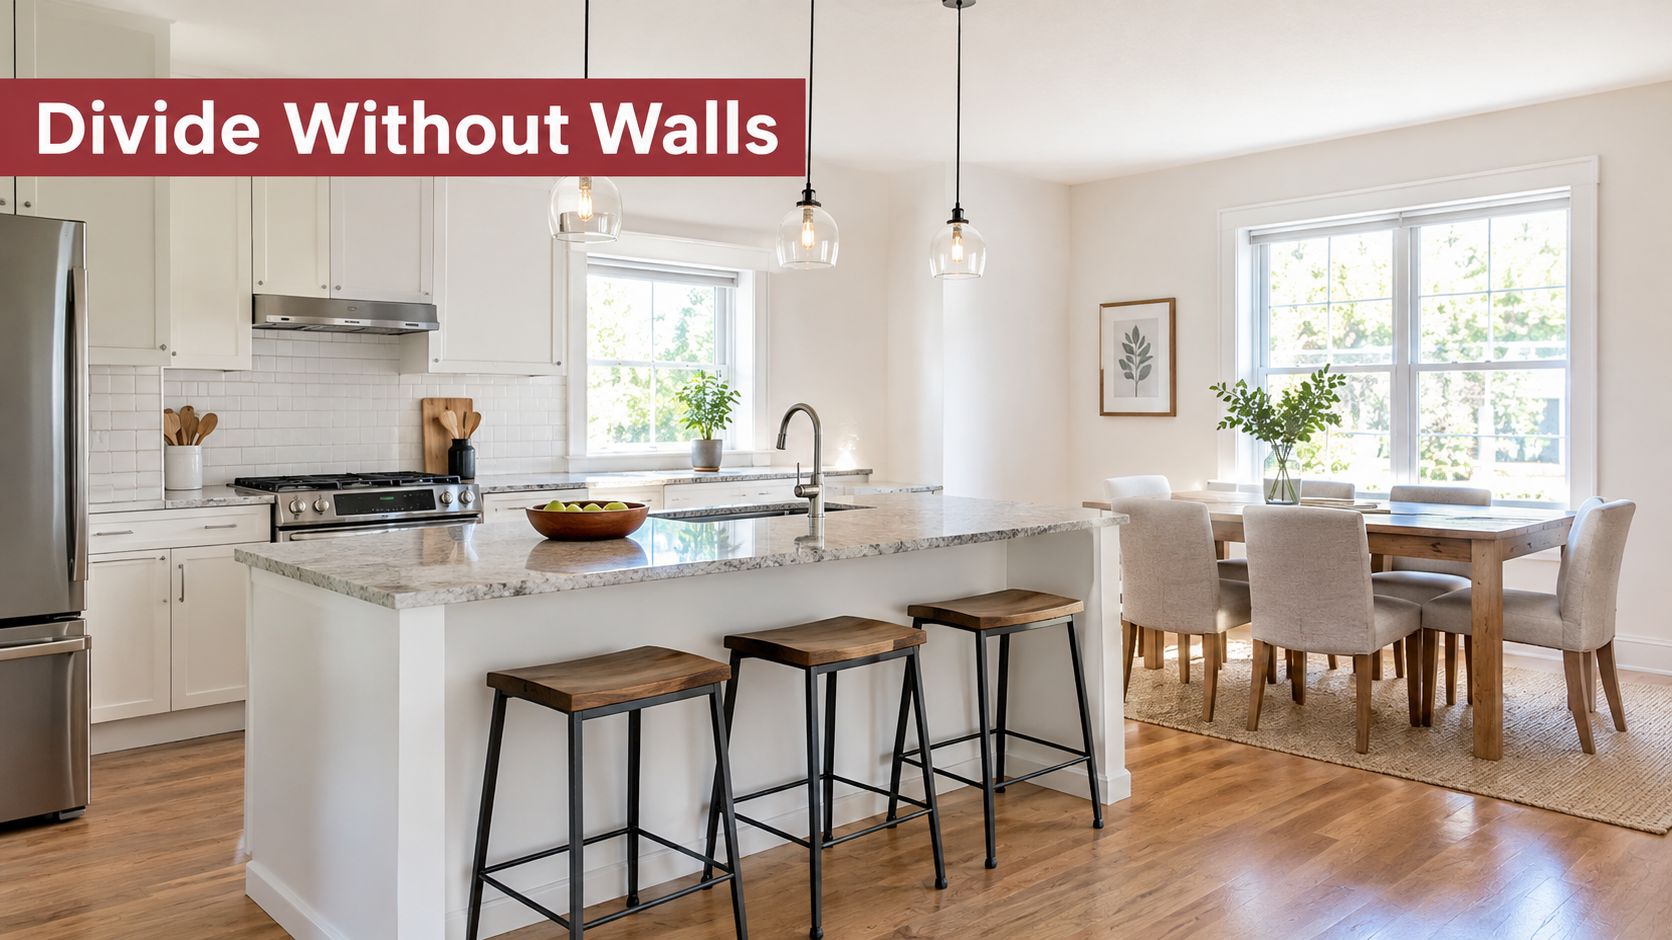
This kitchen shows how an open counter and adjoining dining area can share space visually.
A peninsula is worth considering for several reasons:
- More working space: Use the counter for preparation, serving, or seating without necessarily removing an entire wall.
- Storage below: Assign the base to cookware, dishes, or cleanup supplies.
- Less structural intervention: Retaining a suitable wall may avoid the scope of a structural opening, though project pricing still needs confirmation.
- A view into the room: Position prep work so the cook faces household activity rather than a wall.
Peninsula compared with other kitchen layouts
| Layout | How It Connects | Seating Potential | Best Fit | Main Trade-off |
|---|---|---|---|---|
| Peninsula | Attached at one end to a wall or cabinet run | A short stool run, subject to measured clearance | Medium kitchens and remodels with a fixed wall | Blocks cross-traffic if the aisle is too narrow |
| Island | Freestanding and reachable from all sides | Seating along an available side or sides | Rooms with circulation space around the entire unit | Plumbing and power routing can increase scope |
| Galley | Parallel cabinet runs | Usually none within the working aisle | Narrow rooms and tight footprints | Passing another cook can be difficult |
| Open layout without a peninsula | Wall cabinetry or open floor | Freestanding table | Rooms that should stay visually open | Less built-in counter and storage |
Choose the peninsula when a partial divider solves a problem. Reject it when its open end pinches the kitchen entrance or when every trip through the room must pass behind occupied seats.
Clearances a Peninsula Needs to Work
A peninsula can fit on a floor plan and still block the route between the kitchen and the next room. Check traffic and access before choosing stools or finishes. The University of Missouri Extension kitchen-planning guidance recommends at least 48 inches between opposing cabinets or appliances. It also recommends a work-triangle total of 15 to 22 feet, with 12 feet as the absolute minimum and 26 feet as the maximum.
Treat those figures as planning benchmarks, then test the actual appliance doors and routes. An aisle with everything closed may feel workable; an open dishwasher can take up the space another person needs to pass.
Measure the working aisle first
Measure finished face to finished face, including countertop edges, trim, and handles. Cabinet-box dimensions alone can overstate the available passage.
Sketch each appliance door in its open position. Check whether a refrigerator door conflicts with the peninsula end, and whether an open drawer or dishwasher blocks access to the sink. The nominal aisle width does not show those conflicts.
Clearance and seating benchmarks for a peninsula
| Dimension | Typical Benchmark | Why It Matters |
|---|---|---|
| Walkway for one cook | At least 48 inches between opposing cabinets or appliances | Provides working room and passage beside the peninsula |
| Walkway for two cooks or open dishwasher | 48 inches is the cited minimum; test the aisle with the appliance fully open and both people in position | An open door can use part of the measured aisle |
| Opposing runs | At least 48 inches between opposing cabinets or appliances | Keeps the working aisle from falling below the cited benchmark |
| Seating overhang | Measure the selected stool's knee space and countertop support needs before setting the edge | Provides room to sit while accounting for the counter structure |
| Width per stool | Set the spacing from the actual stool width and the seated user | Reduces crowding between seats |
| Walkway behind seats | Measure with stools occupied and pulled back | Checks whether someone can stand and pass |
| Counter depth with overhang | Cabinet depth plus the measured overhang | Shows how far the seating edge projects into the room |
| Two-stool run | Allow the combined width of both selected stools, with space to use them | Prevents a planned two-seat counter from becoming cramped |
Treat seating as occupied space
A tucked stool takes up less room than an occupied one. Have someone sit, stand, and pull the stool back while another person walks behind. Include nearby dining chairs in the test.
The cabinet base, countertop overhang, seated person, and route behind the stool each use space. Measure all of them before committing to the peninsula's length and position.
Practical rule: If the route works only with stools tucked in and appliances closed, the layout has not passed the traffic test.
Record the narrowest usable point, not the widest stretch of aisle. Reserve any accessible approach and turning space your household needs before assigning the remaining counter edge to seats.
How to Test a Peninsula Layout in Six Steps
Painter's tape, a tape measure, actual stools, and a loaded laundry basket can reveal problems that are easy to miss on a floor plan. Before testing, keep your required accessible area clear rather than treating it as leftover space.
For the work-center checks, the National Kitchen & Bath Association's planning guidelines recommend individual travel distances of 4 to 9 feet, a combined triangle no longer than 26 feet, or 7.9 meters, and no more than 12 inches, or 305 millimeters, of intersection with an obstacle. The guidance also addresses additional work centers using the individual travel-distance range.
Use this process illustration alongside your measured floor plan.
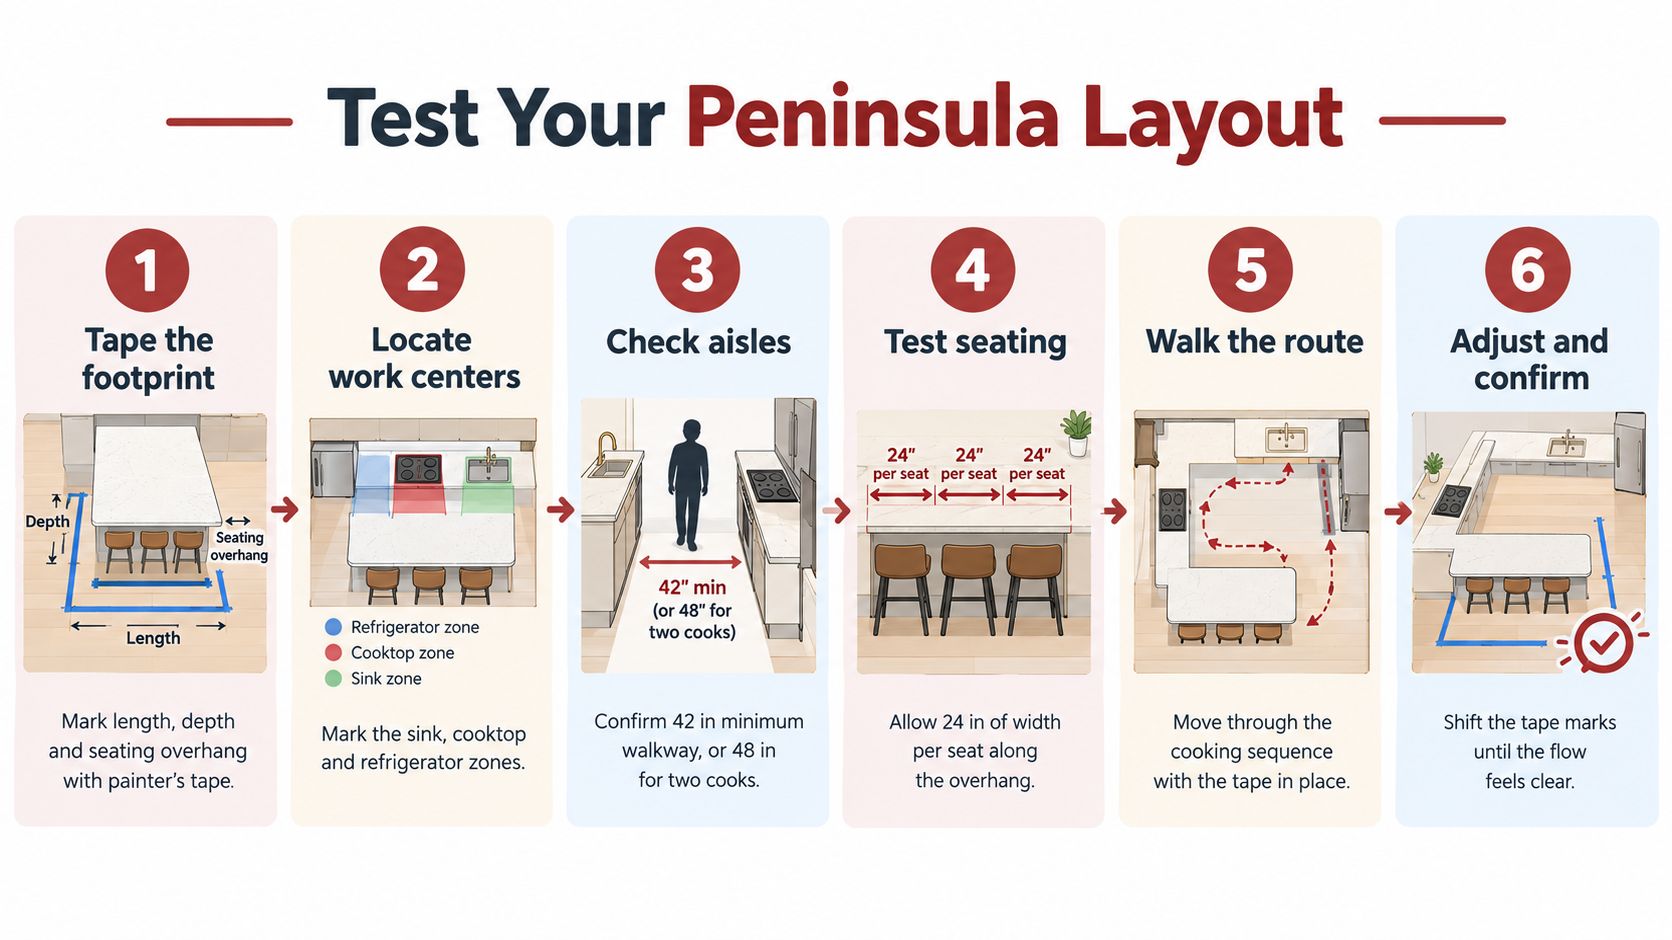
Tape the complete footprint. Mark the cabinet base, countertop edge, seating overhang, and aisle boundaries separately so you don't confuse storage depth with total projection. Write the proposed length and depth directly on the tape.
Locate the work centers. Mark the center fronts of the sink, cooktop or range, and refrigerator, using the work-triangle definition in the Missouri guidance. Check that you've measured from the working fronts rather than the backs of appliances.
Measure the travel paths. Record each connection and the combined total against the NKBA benchmarks above, including a coffee station or secondary prep area where relevant. Put a sink on the peninsula only if the complete arrangement improves, not merely one connection.
Check for obstruction. Stretch a tape between work centers and note where it crosses the proposed peninsula. If it exceeds the obstruction allowance above, shorten the peninsula or reconsider the work-center location.
Walk a realistic cooking route. Carry a loaded tray or laundry basket from the refrigerator to the sink and cooking area while someone else enters the room. Note detours, sideways turns, and places where you must stop, rather than relying on walking time alone.
Test occupied seating. Sit down, pull the stool back, and open the nearby refrigerator and dishwasher separately. Measure the remaining passage and compare it with the circulation space your plan requires.
A shorter peninsula that lets people move comfortably is more useful than a longer one that adds a seat nobody can reach.
When competing arrangements both appear workable, use the preferred triangle band noted earlier as a tie-breaker. Don't let a favorable total conceal a blocked doorway or an awkward approach to an appliance.
Accessible Peninsula Layouts for Aging in Place
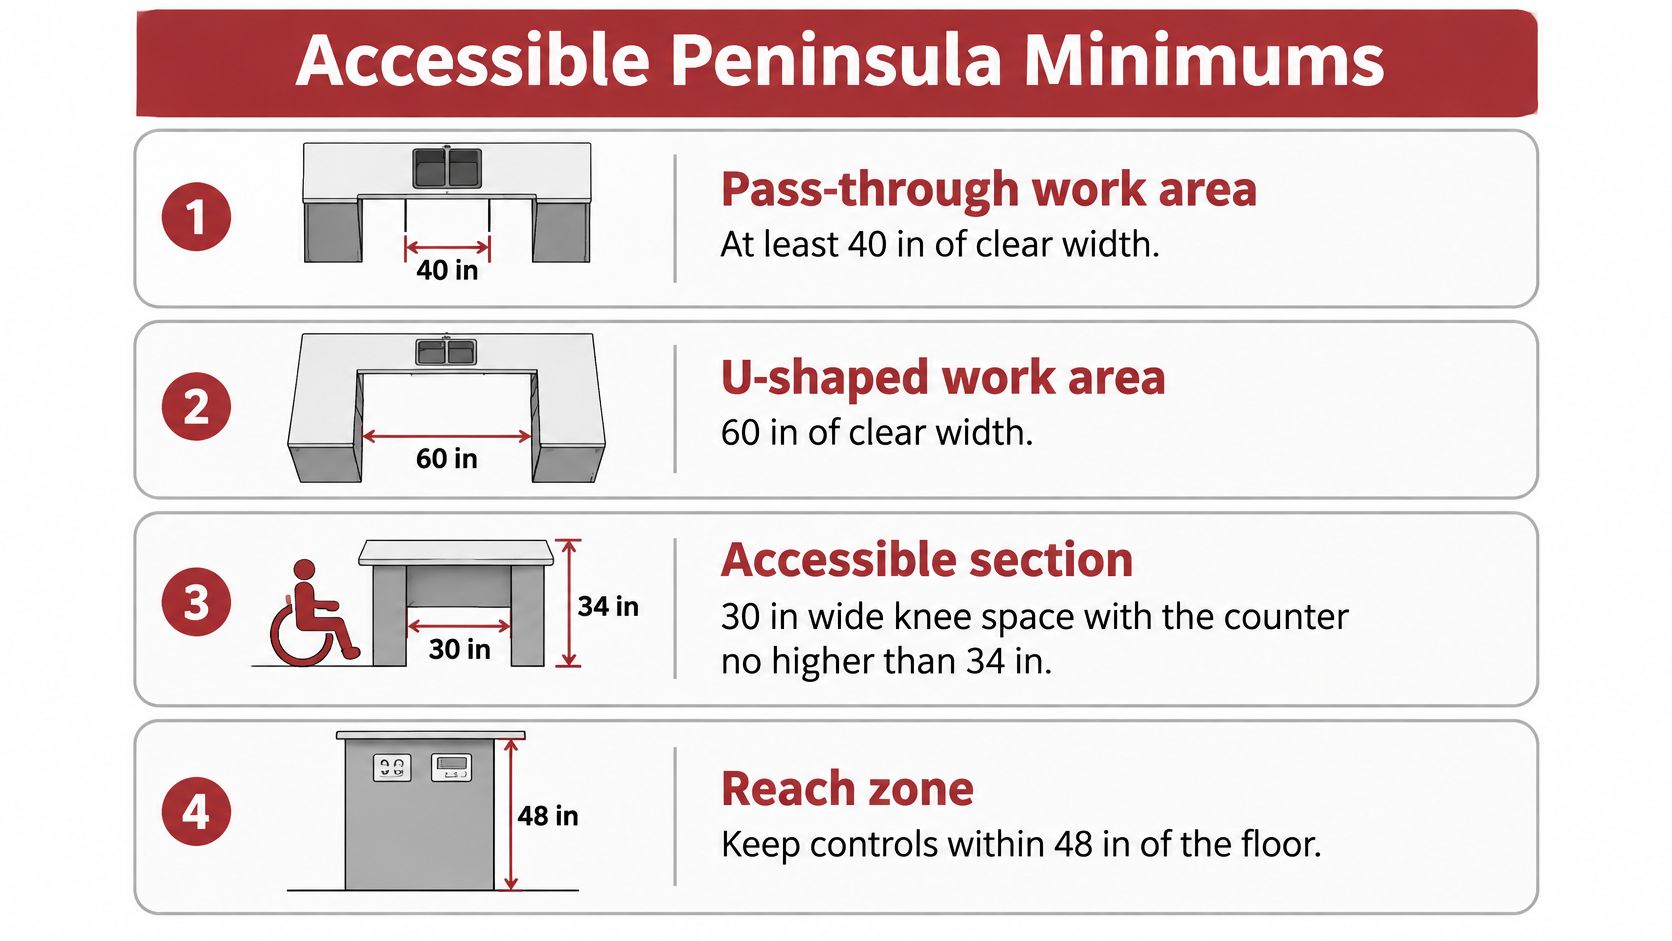
A peninsula can fit through the kitchen entrance and still block a wheelchair user from reaching the sink. Check the accessible work zone and turning space before choosing seating, storage, or finishes. The U.S. Access Board's kitchen provisions specify a 40-inch clear width in pass-through work areas, 60 inches in U-shaped work areas, an accessible work surface at least 30 inches wide and no higher than 34 inches above the finished floor, and maneuvering space using a 60-inch turning diameter or a compliant T-shaped arrangement, as applicable.
The diagram can help you and your designer identify the clearances, work-surface height, and control-reach zones to review.
Accessible peninsula dimensions
| Requirement | Value | Applies To |
|---|---|---|
| Pass-through work area clear width | 40 in. | Between opposing cabinets, counters, appliances, or walls |
| U-shaped work area clear width | 60 in. | U-shaped work areas, including some peninsula layouts |
| Accessible work surface width | At least 30 in. | Work surface with a forward approach and knee/toe clearance |
| Accessible counter height | No higher than 34 in. | Dedicated accessible work surface |
| Turning space | 60-in. diameter or compliant T-turn | Clear maneuvering space |
For a forward approach, allow at least 30 inches of clear floor space in width, 48 inches in depth, and knee clearance of at least 27 inches high, 30 inches wide, and 19 inches deep. Toe clearance extends at least 17 inches deep under the work surface. Confirm the precise layout against the applicable provisions with your design professional.
Reserve access before storage
Draw the approach and turning area first, then position the peninsula, cabinets, and appliances around that space. A lowered counter does not provide seated access if a base cabinet or decorative end panel blocks the knee and toe area.
A fixed peninsula can work if it leaves the required clear space. Shortening it may open the turning route while preserving a useful work surface. A two-sided work zone can put seated preparation on one side and standing cleanup on the other, provided both approaches remain clear.
Keep stools out of the turning area, check that the peninsula end does not obstruct knee clearance, and make sure an open dishwasher will not block the approach. These dimensions are not blanket legal requirements for every private-home remodel, so confirm which provisions apply to the project.
The deciding test is practical: can the intended user reach and use the work surface independently while another person works nearby?
Seating, Storage and Cabinetry on the Peninsula
Choose the seating height together with the counter height, not after the cabinetry order. A stool's seat height and a countertop's finished height are different measurements, and the gap between them determines whether someone can sit comfortably.
Counter-height seating keeps preparation and casual dining on a continuous surface. A raised bar creates a separate eating edge, but it also changes sightlines and makes transferring dishes across the counter less direct.
Decide what happens at the counter
Stools can tuck away neatly, while chairs with backs or arms may suit longer meals better. Neither is automatically the right choice. Test the actual seat for stability, foot support, and the effort required to get on and off it.
Assign the peninsula a primary use before adding equipment:
- Preparation and serving: Preserve an uninterrupted surface for ingredients, platters, homework, or a laptop.
- Cleanup: A sink lets the person washing up face the room, but plumbing, splash management, and dish staging need deliberate space.
- Cooking: A cooktop needs a coordinated ventilation solution and separation from seated activity.
- Coffee or wine service: Place supplies where someone can serve themselves without entering the cook's main route.
Don't ask the same short counter to support every activity. A sink, drying area, coffee machine, and occupied seating can leave very little usable preparation space.
Put storage where the user stands
On the kitchen side, drawers can keep pots and pans accessible without requiring a deep reach into a cabinet. Locate a trash or recycling pull-out where the person preparing food can use it without stepping around an open door.
An appliance garage or end shelf needs a defined purpose and a checked operating envelope. Don't place a projecting shelf where a seated diner's knees or shoulders will meet it.
Finish the exposed end with a panel or shallow bookcase only after checking the approach. Decorative cabinetry shouldn't consume clearance that made the layout workable.
Storage decision: When space runs short, choose between accessible seating and additional cabinet depth. Don't pretend the same floor area can serve both without compromise.
Back-to-back storage may suit a serving-focused peninsula. A clear seating side is the better choice when daily meals or seated preparation matter more than another cabinet.
Power, Lighting and Finishes for the Peninsula
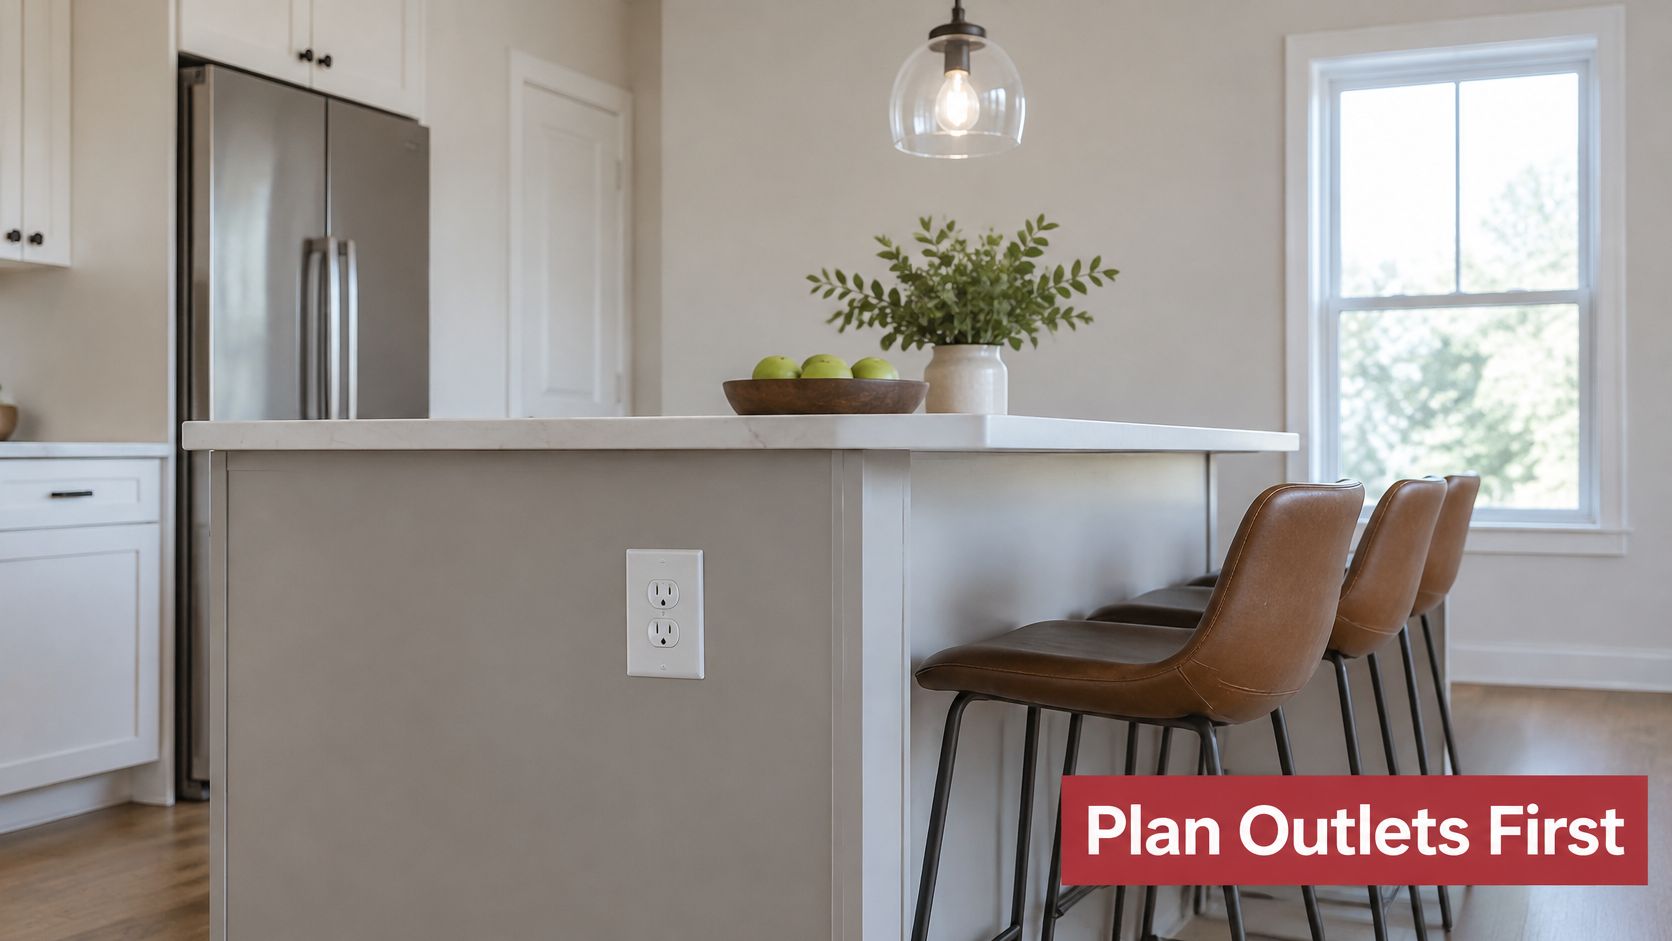
A peninsula that works for circulation can still fail at the counter if an outlet, pendant, or hard-to-clean surface gets in the way. Set outlet locations with the cabinet design and appliance use, then verify that the layout meets the locally adopted electrical code.
The summary of the 2021 International Residential Code provisions for peninsula receptacles is a reference, not a substitute for confirming the rules that apply to your home. Ask a licensed electrician or local inspection authority to check the adopted code edition and amendments, and specify permitted outlet locations for this peninsula before countertop fabrication. Requirements can depend on the applicable code and installation conditions, so don't use a height or outlet-count rule from a general summary as the construction specification.
Coordinate light with the work
Center pendants over the usable counter area, not automatically over the room. Check sightlines from the standing work position and seated side before fixing fixture height. A fixture that lights the counter well can still obstruct views or feel too low to someone seated.
- Task light: Direct light onto preparation and cleanup areas.
- Ambient light: Keep the surrounding circulation visible after dark.
- Dimming control: Lower the light for meals while retaining enough illumination for work.
Under-cabinet LEDs help with nearby counters, but do not necessarily light an exposed peninsula. Review the proposed fixtures with the cabinetry and counter layout in place.
Select finishes for contact and maintenance
A peninsula takes repeated contact from hands, dishes, and small appliances. Check samples for resistance to heat, stains, and impacts, then confirm the product's cleaning and sealing requirements. For butcher block, ask how often the selected finish needs maintenance and how it handles standing moisture. For laminate, check the edge and seams, which can be vulnerable to water or impact damage. With stone, confirm care requirements and how the fabricator will finish exposed edges.
Edge profiles affect both comfort and durability. A rounded or eased edge feels less sharp against a forearm; a square profile gives a crisp look but can expose corners to chipping. Handle the actual sample and compare its edge with the counter's intended daily use.
A waterfall end adds material, fabrication, and installation work. Price it separately, then weigh that visual feature against other improvements in the project.
Budget the Peninsula Before You Commit
Cost depends on what the peninsula touches. A cabinet-and-counter extension is a different scope from a layout change involving a sink, cooktop, new wiring, flooring repairs, and structural work.
Measure the proposed footprint and identify appliance locations before selecting finishes. Ask the contractor to separate retained work from relocated work so you can see what each design decision changes.
Typical peninsula cost components
| Cost Item | Typical Range | What Moves the Price |
|---|---|---|
| Base cabinets for the peninsula | Project-specific quote | Door style, drawer count, and box quality |
| Countertop | Material and fabrication quote | Quartz, granite, laminate, or butcher block and edge profile |
| New outlet or circuit | Electrical scope required | Panel access, routing, and applicable protection requirements |
| Sink or cooktop relocation | Trade-specific quote | Plumbing or gas routing and ventilation |
| Pendant or linear lighting | Fixture and installation quote | Fixture selection and wiring access |
| Wall or beam alteration | Structural assessment required | Load-bearing conditions and required support |
Compare matching scopes
Give each contractor the same drawing, appliance assumptions, and finish allowances. Otherwise, a lower total may exclude electrical work, countertop support, or flooring restoration.
Carry the circulation and accessible-zone decisions into the estimate. For homeowners in Portage, Kalamazoo, and nearby communities, a dedicated lowered section or revised appliance position should appear in the scope rather than emerge after cabinet ordering.
Keep a contingency appropriate to the project's unknowns, especially where walls or floors will be opened. Ask which concealed conditions could change the price and how those changes would be approved.
For a preliminary project budget, use the instant pricing tool to get a ballpark estimate before scheduling a consultation. This week, measure the footprint, complete the layout test, and request an estimate based on the arrangement that works best.
Trademaster Construction offers kitchen remodeling guidance from initial concept through design and construction for Southwest Michigan homeowners. Bring your measured footprint and access priorities to a consultation so the team can help coordinate the peninsula's layout, cabinetry, and construction scope.

