
The usual advice is to start with waterproof flooring and mold-resistant drywall. That gets the order backward. In a Michigan basement, the hidden drainage, insulation, air seals, and drying paths determine whether those finishes stay usable. Start with a moisture and radon diagnosis, then choose basement finishing materials you can maintain, reach behind, and repair without rebuilding the room.
Quick-Pick Materials for Each Basement Situation
| Basement situation | Recommended assembly | Main reason |
|---|---|---|
| Dry, heated walkout basement | Rigid XPS or appropriately rated polyiso against walls; mold-resistant drywall held clear of the floor; LVP flooring; painted open ceiling | Moisture-tolerant insulation and a floating floor accommodate ordinary indoor humidity. |
| Occasional seepage after heavy rain | Correct drainage first; rigid foam; cement board or PVC wall panels below grade; sealed concrete or tile flooring; removable ceiling panels | Cleanable surfaces and accessible cavities simplify recovery if water returns. |
| Chronically damp or unresolved water | Bare or suitably sealed concrete floor; leave walls exposed until repaired, then consider PVC or cement board; open or metal ceiling; no carpet | Avoids trapping water beneath absorbent layers or hiding active leakage. |
| Flood-prone property in a mapped zone | Approved concrete, masonry, ceramic tile, closed-cell foam, epoxy paint, and metal assembly; no drywall, batts, or carpet below the applicable flood elevation | Flood exposure requires material and assembly approval, not merely a waterproof product label. |
| Age-in-place home needing curbless access | Continuous foundation insulation; suitable wall finish with grab-bar blocking; flush LVP or tile; plumbing access panels; accessible ceiling sections | Reduces trip hazards and allows repairs without removing large finished areas. |
| Unheated storage-grade space | Code-appropriate rigid foam at foundation walls; cement board or PVC where a covering is needed; bare concrete floor; open ceiling | Limits unnecessary finish expense while keeping moisture-sensitive materials away from concrete. |
Recommended assembly by basement situation means a starting specification, not permission to cover an existing problem. The living-space recommendations assume the water source has been corrected. The unresolved-water row is deliberately different: stop enclosing surfaces until you understand what's getting wet.
A dry walkout can still have a buried rear foundation wall that needs different treatment from its above-grade framed wall. Likewise, an accessible floor isn't just a smooth product. Its underlayment, doorway transitions, drain locations, and approach to adjoining rooms must work together.
Treat product substitutions carefully. Polyiso suitable for an above-grade framed wall isn't automatically suitable against damp foundation masonry. Closed-cell foam in a flood-aware assembly still needs approval for the application, along with the required protective covering.
Match your basement to the closest row, then check moisture conditions and local requirements before purchasing anything. Don't let an attractive sample board become the specification for the entire room.
Moisture Control Layers to Install Before Any Finish
Correct moisture before covering it. A stain isn't a diagnosis, and a dry wall on installation day doesn't establish that the foundation stays dry after snowmelt or heavy rain.
Inspect from outdoors inward
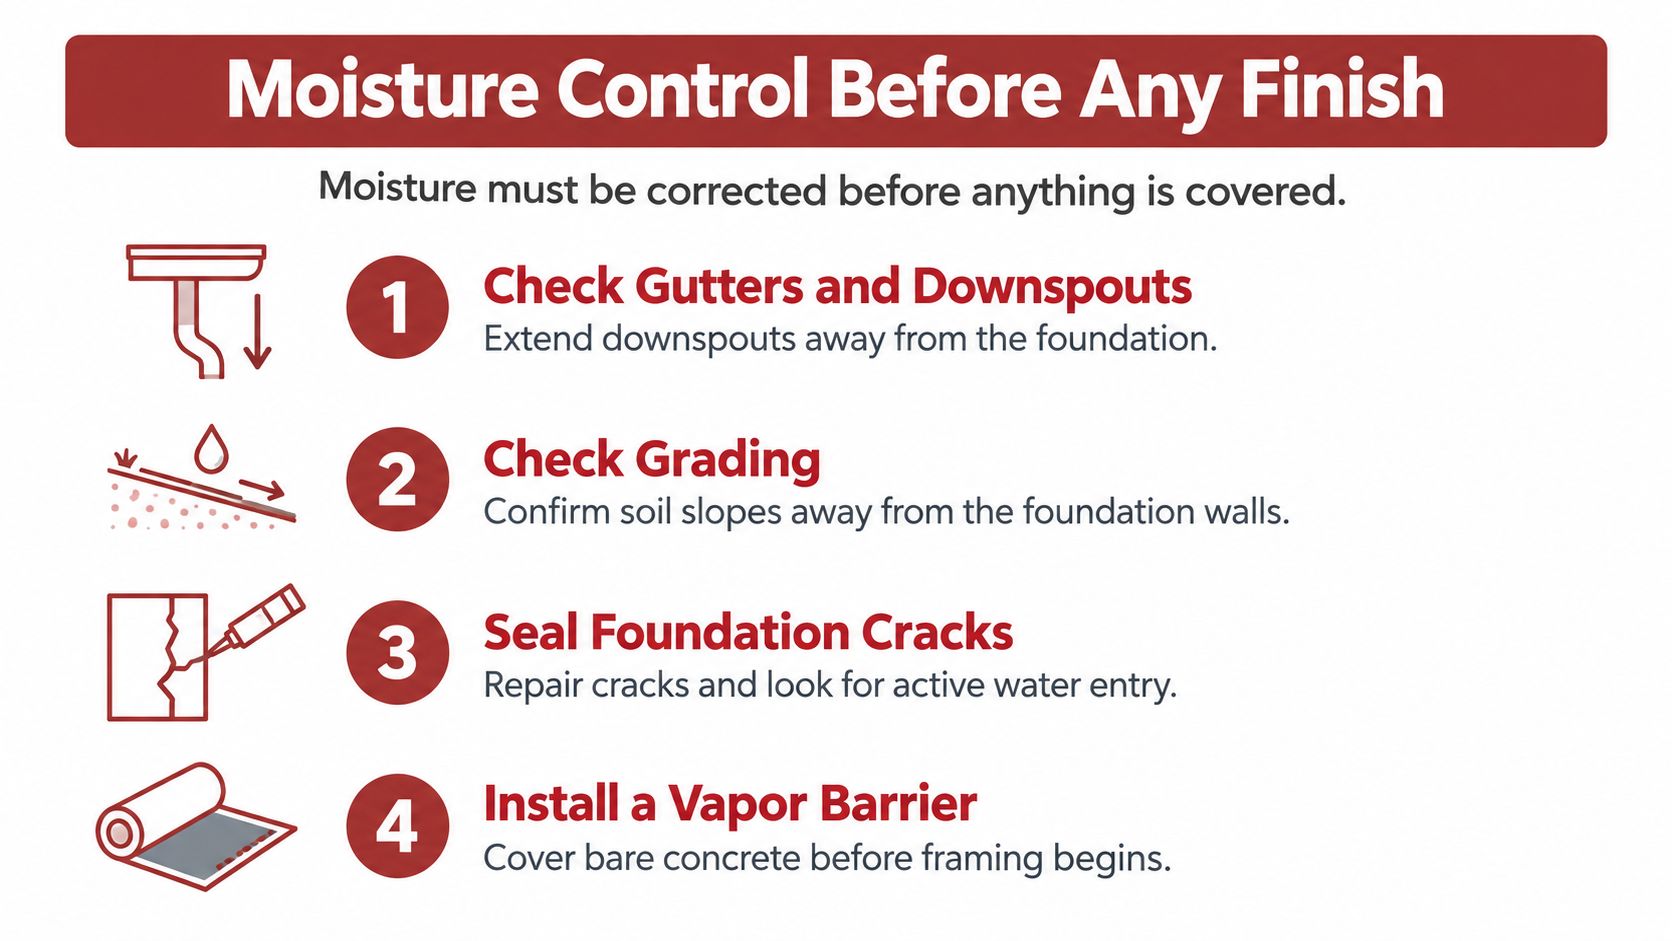
- Check gutters and downspouts. Clear debris, inspect leaking joints, and discharge roof water away from the foundation rather than into settled backfill.
- Check grading. Look for soil, mulch, or paving that directs runoff toward the house. Correct the slope without burying siding or other vulnerable details.
- Test the sump system. Check pump operation, discharge routing, and standing water. A running pump accomplishes little if its discharge returns beside the foundation.
- Check the dryer exhaust. Confirm that it terminates outdoors, not in the basement or another enclosed space.
- Inspect walls and slab. Mark efflorescence, staining, peeling coatings, damp joints, and wet cracks. Photograph their locations so you can compare conditions after rain.
- Open suspect cavities. Remove wet drywall or insulation far enough to locate the source. Don't install new material over a concealed damp pocket.
The DOE basement moisture-control guide describes XPS at approximately R-5 per inch and recommends leaving at least a 1/2-inch gap between drywall and the floor. XPS tolerates moisture and doesn't absorb liquid water, which makes it a practical foundation-wall layer.
Fiberglass or cellulose pressed against wet masonry can remain damp. Wood framing and paper-faced gypsum need separation from that masonry, not just a coat of paint on their room-facing surfaces.
Use this checklist to organize the preparation work.
Build a drying strategy, not a plastic sandwich
Concrete can transfer moisture through capillary action, vapor movement, and air leakage. A durable assembly addresses those paths with compatible insulation, sealed joints, and deliberate transitions at the slab and rim joist.
The infographic's vapor-barrier step needs assembly-specific interpretation. Don't automatically staple polyethylene behind every basement wall. Choose the vapor-control layer and its location together with the insulation so the finished assembly can dry.
For background on concrete-wall water entry and waterproofing approaches, Superior Home Improvement's basement waterproofing guidance for Utah homeowners is a useful comparison resource. Michigan drainage, soil, and code decisions still need local evaluation.
Before framing: You should be able to identify where water went, what corrected it, and how you'll inspect that location afterward.
Keep carpet padding and other absorbent floor layers out of damp rooms. They can hold water where you can't see or readily remove it.
Before framing, confirm:
- Water entry is corrected. No active seepage remains behind the proposed wall.
- Materials are dry. Existing framing and insulation aren't being enclosed wet.
- Layers connect. Foundation insulation, joint seals, and floor-edge details form a continuous system.
- Inspection remains possible. Sump equipment, cleanouts, and known trouble spots stay accessible.
Code, Flood and Radon Rules That Limit Materials
Code and flood restrictions can rule out a finish before appearance or price matters. In Portage or Kalamazoo, check local requirements rather than copying specifications from another state. Material choice should follow the site conditions and the rules for the proposed space.
Complete the location checks
Establish permit and fire-blocking requirements. The Battle Creek Basement Finishing Guide requires a building permit and compliance with the current Michigan Residential Code. It specifies fire blocking from the perimeter top plate back to the basement wall, with horizontal blocking at a maximum of 10 feet on center. Show these concealed details on the plans before framing makes the gaps difficult to access.
Check finish classifications. Municipal basement-finish requirements summarized in that guide limit interior wall and ceiling finishes to a flame-spread classification no greater than 200 and a smoke-density classification no greater than 450. Trim, molding, handrails, and doors are excluded. Check the classification sheet for the exact panel, facing, adhesive, or coating. A moisture-resistant label does not establish fire performance.
Determine flood restrictions. FEMA's flood-resistant materials guidance identifies drywall, blown-in insulation, fiberglass batts, carpeting, untreated wood, and plywood as vulnerable materials. It lists concrete, stone, masonry, ceramic and clay tile, decay-resistant or pressure-treated lumber, epoxy paints, and metal as resistant examples. Ask the building department for the applicable flood protection elevation and whether the space may be finished. Choosing flood-resistant materials does not make a restricted basement use permissible.
Test and plan for radon. Radon-resistant construction requirements vary by jurisdiction. Ask the local building department which provisions apply to an existing-home basement remodel, rather than assuming new-construction rules govern the work. Test the house, then coordinate any needed mitigation before finishes block access to the collection point, pipe route, electrical needs, or service area. The basement housing research publication provides general housing research context, not local radon requirements.
Put decisions on the drawings
Record the adopted code edition, required insulation target, fire-blocking locations, foam protection, and flood restrictions in the project documents. Keep product documentation with the permit paperwork so inspectors can assess the actual assembly, not a similar product from the same manufacturer.
For materials behind finished surfaces, plan how they can be inspected and repaired later. Confirm each product's intended application and installation limits before ordering. A general assurance that a panel suits basements is not a substitute for its product documentation.
Insulation Materials Compared by R-Value and Moisture
R-value matters, but it does not decide whether insulation will work on a basement wall. Start with the moisture conditions and judge each option as part of the full assembly, including how it handles water, how it can be repaired, and whether the wall remains accessible later. If the basement still gets wet, adding a built-up floor or wall finish may make the problem harder to address.
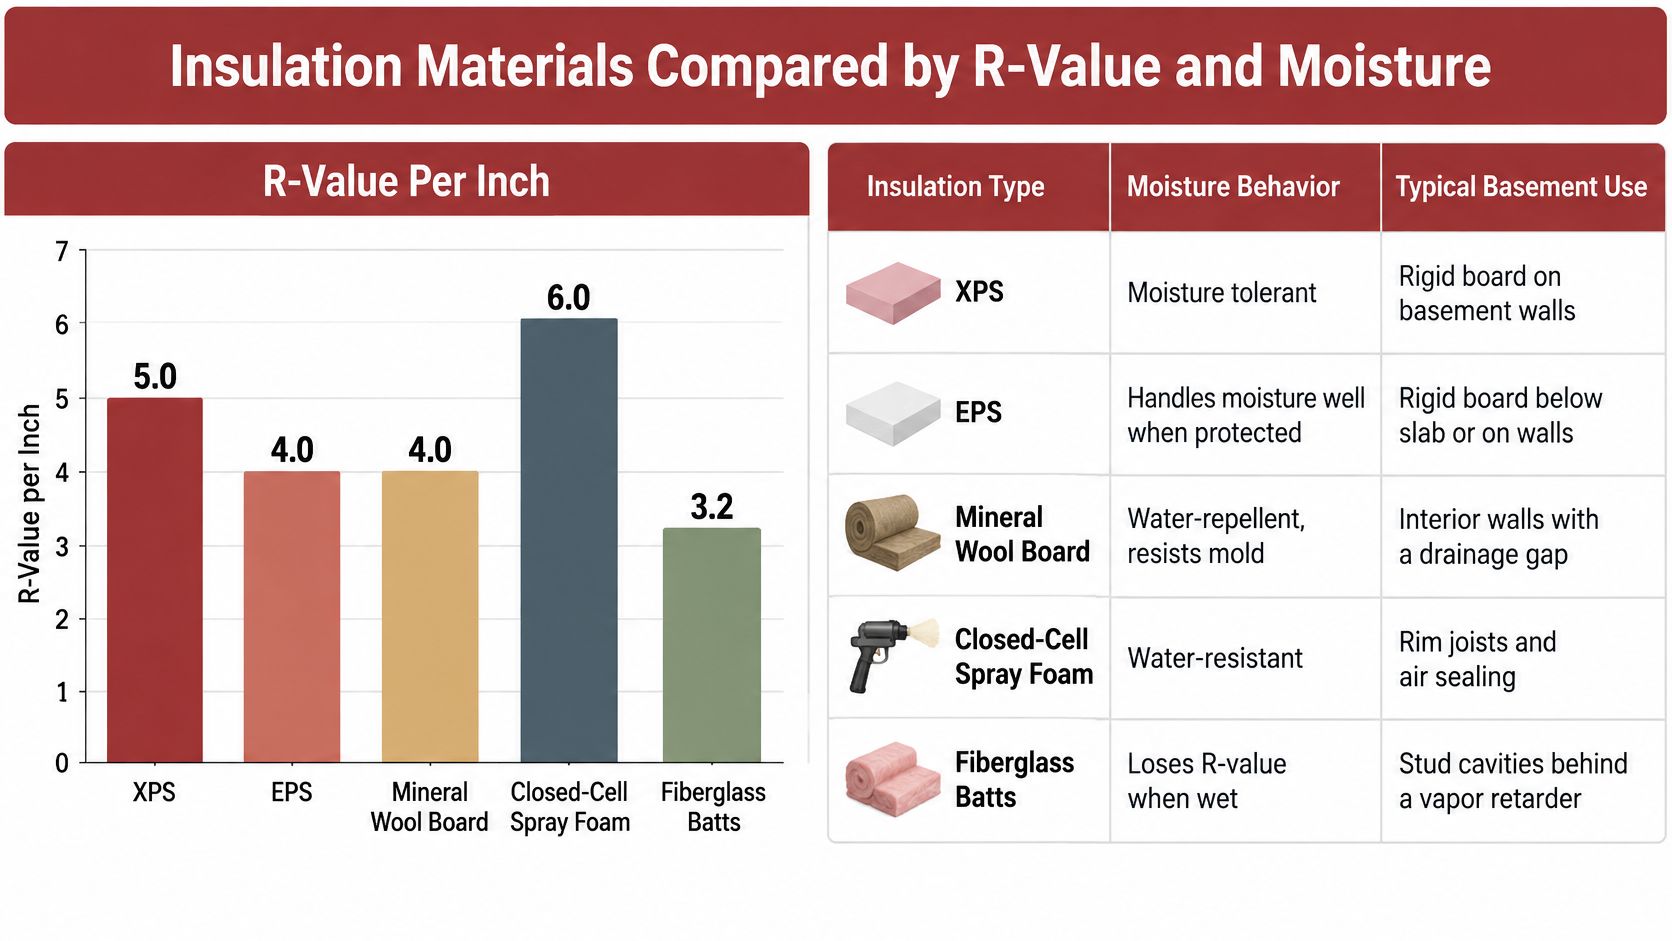
The figures below are typical R-value ranges per inch for preliminary comparison. The product's declared rating and installed thickness govern the actual specification.
| Material | Typical R-value per inch | Moisture behavior | Typical basement use |
|---|---|---|---|
| Extruded polystyrene (XPS) | About R-5 | Tolerates moisture; doesn't absorb liquid water | Foundation walls; appropriately rated under-slab applications |
| Expanded polystyrene (EPS) | About R-3.6 to R-4 | Handles moisture when correctly specified and protected | Foundation walls where board thickness and budget permit |
| Polyiso board | About R-5.5 to R-6 at standard conditions | Needs protection from ground moisture; foil facing affects drying | Above-grade walls and suitable ceiling assemblies with sealed joints |
| Closed-cell spray foam | About R-6 to R-7 | Resists water and air movement | Rim joists, irregular cavities, and difficult sealing locations |
| Open-cell spray foam | About R-3.5 | Can absorb water; unsuitable against wet masonry | Selected dry interior assemblies |
| Mineral wool batts | About R-4 | Water-repellent; can dry after wetting | Interior framed walls and sound control |
| Fiberglass batts | About R-3 to R-4 | Can remain damp against masonry | Framed cavities separated from the foundation |
Insulation R-value and moisture behavior belong in the same comparison. A higher number does not make a material suitable for a wet wall, and moisture resistance does not replace the required thermal performance.
Choose by wall position
Rigid foam is practical on a reasonably flat foundation wall. Its joints and edges can be inspected and sealed before framing covers the assembly. EPS can suit a project where its required thickness fits without interfering with stairs, doors, or room dimensions.
Use more care with polyiso below grade. Confirm the product's intended use, moisture limitations, and declared thermal performance under expected conditions. Foil facers also affect how the wall dries, so consider the whole assembly rather than the board alone.
Closed-cell spray foam can fit irregular rim-joist surfaces and difficult transitions where board fitting is awkward. The substrate, application conditions, installed depth, and protective covering all matter. It is harder to remove or work around later than a mechanically fitted board, so keep future access and repairs in mind.
Batts can provide sound control in dry interior partitions, but they do not replace moisture and air control at the foundation. Open-cell foam also behaves differently from closed-cell foam, even though both are spray-applied. Keep either type away from wet masonry unless the proposed assembly is suitable for those conditions.
Understand the target before choosing thickness
The Building America foundation analysis describes the 2009 IRC and IECC requirement for basement walls in DOE climate zones 4 and higher as either R-10 continuous insulation or R-13 framed-wall insulation, subject to exceptions. In DOE-supported estimates for cities from St. Louis to Buffalo, the analysis found annual savings of $250–$400 with R-10 basement-wall insulation.
These are historical code provisions and modeled savings, not a current permit determination or a promise about utility costs. Ask the building department which target and assembly apply to the project.
A cavity rating and a continuous-insulation rating aren't interchangeable. Framing interrupts cavity insulation, so compare the complete wall, not just the number printed on the package.
For a hypothetical 1,000-square-foot foundation wall, an R-10 XPS layer would need approximately two inches of board using the R-5-per-inch assumption. That sets the insulation thickness and net coverage, but not the order quantity. Openings, cuts, damaged edges, and board layout affect how much material to buy. A framed-cavity option would instead need to meet its applicable R-13 specification.
Use the installation video to examine how the layers and transitions fit together, then compare the proposed detail with the product instructions.
Framing, Air Sealing and Sealant Choices
Air sealing and insulation are one system. Seal the leakage paths while you can still reach them, then fit insulation without leaving bypasses around its edges.
Choose framing with concrete contact in mind. Use pressure-treated or naturally decay-resistant lumber where required, and separate wood from concrete with the appropriate capillary-break detail. Steel studs avoid wood rot, but they don't eliminate condensation, corrosion, or the need for continuous insulation.
Seal in a workable order
- Prepare small joints. Remove dust, loose mortar, and failed sealant with a stiff brush and vacuum. Apply a masonry-compatible sealant to sound surfaces, using backer rod where the joint design requires it.
- Select caulk or foam by opening size. ENERGY STAR's basement air-sealing guide recommends caulk for cracks approximately 1/4 inch or smaller and spray foam for gaps from about 1/4 inch to 3 inches. Check the foam's application temperature, cure requirements, and permitted gap size before use.
- Connect the sill detail. In new work, install the specified sill gasket beneath the plate and connect its seals continuously. In an existing house, don't assume you can insert a gasket under a loaded sill; seal accessible joints or have the deficient detail evaluated.
- Fit rim-joist insulation. Cut batts to fit without compression or voids, or fit rigid board and seal its perimeter. Don't push insulation over an unsealed opening and expect the fibers to stop airflow.
- Treat service penetrations correctly. Seal around plumbing, wiring, and ducts with compatible materials. Where a fire-blocking or firestopping detail applies, use the approved system rather than ordinary foam chosen by color.
Separate decorating caulk from assembly sealants
Paintable trim caulk is useful at finish joints. It isn't automatically suitable for a moving concrete crack, a wet masonry joint, or a protected penetration.
Alex Trend Painters' caulking advice for Irish home repainting provides useful context for preparing and finishing decorative joints. Apply those workmanship principles to trim, while selecting basement assembly sealants for their actual substrates and exposure.
Keep sealant beads accessible for inspection before covering them. Check continuity at corners, partition intersections, foam edges, and the transition to the floor above.
- Protect service access. Leave electrical panels, shutoffs, cleanouts, and equipment service areas unobstructed.
- Respect combustion needs. Don't block combustion-air openings or assume a tighter mechanical room remains safe without evaluation.
- Plan humidity control. Provide suitable ventilation and dehumidification rather than relying on air leaks to keep the space comfortable.
A tighter basement doesn't necessarily produce more moisture, but it changes how moisture leaves. Account for occupant activity, laundry, bathrooms, and incoming outdoor humidity before closing the walls.
Wall and Ceiling Finishes That Tolerate Damp Air
Start with moisture and radon diagnosis, not a finish shortlist. Paper-faced gypsum and wood-based panels can support mold or deteriorate when wet masonry is behind them. The finish is only as reliable as the assembly behind it. A higher-priced panel cannot fix a wall that cannot dry, and a basement that still gets wet may need no built-up finish at all. Judge each option by how the full assembly handles moisture, how repairs can be made, and whether concealed areas remain accessible.
These are hypothetical budgeting allowances, not local quotations. Obtain a project-specific installed quote where noted rather than assuming a price.
| Finish | Moisture tolerance | Approx. installed cost per sq ft | Best location |
|---|---|---|---|
| Paper-faced gypsum drywall | Low | Hypothetical allowance of $2 to $4 | Dry, heated living areas over a suitable insulated assembly |
| Mold-resistant gypsum board | Moderate | Obtain an installed quote including finishing | Conditioned storage and utility rooms without active dampness |
| Cement backer board | High | Hypothetical allowance of $2 to $4 | Wet-wall substrates and areas near floor drains |
| PVC or vinyl wall panels | High | Hypothetical allowance of $3 to $6 | Bathrooms, bars, and cleanable utility zones |
| Mineral fiber drop ceiling tile | Low to moderate; can sag when wet | Hypothetical allowance of $2 to $5 | Dry areas needing overhead access |
| Painted open joists or bulkhead drywall | Open structure remains inspectable; drywall needs dry conditions | Quote preparation and painting separately from bulkhead construction | Ceilings where access and headroom matter |
Match the finish to its job
Standard drywall gives a smooth living-room finish at a relatively low material cost, but only suits a dry, properly insulated assembly. Mold-resistant gypsum changes the facing or core, depending on the product. It is not waterproof, and it does not belong over an unresolved damp cavity.
Cement board tolerates wetting better than gypsum, but it is usually a substrate rather than a finished surface. Compare complete installed assemblies, including joints, fasteners, any needed waterproofing, and the final coating or tile. PVC panels are easy to wipe down; check corner and edge details, expansion, and how the panels can be removed. Some interlocking systems cannot be taken out independently from the middle of a wall.
Use moisture measurements to investigate conditions, not as a universal pass-or-fail threshold for concrete.
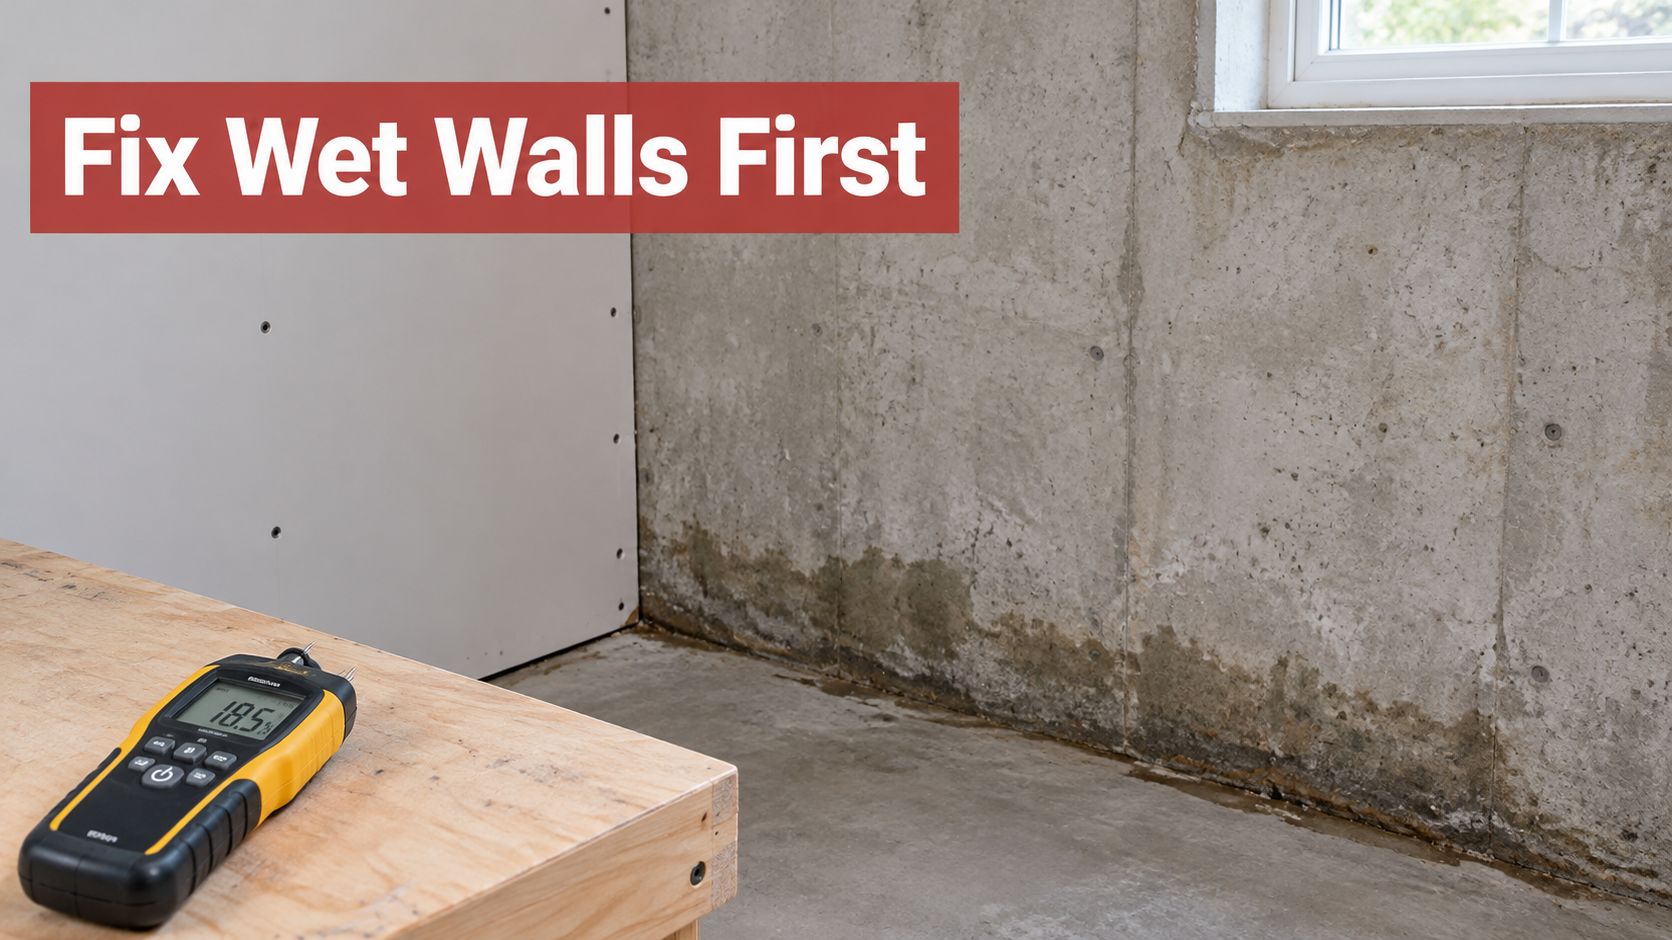
A meter reading depends on the instrument, setting, and material. The pictured display is not an acceptance limit for drywall or flooring installation.
Keep drying and access deliberate
The EPA mold guidance explains that a vapor-control layer placed on the room side of below-grade insulation can restrict drying. Choose the wall assembly so moisture has a drying path, and do not enclose wet framing or insulation behind gypsum. A finish that hides a damp cavity can make the damage harder to find and repair.
For ceilings, mineral fiber tiles provide access but can stain or sag after plumbing leaks. Painted open joists preserve visibility and headroom, though cleaning, masking, and sound control still take work. Drywall bulkheads can conceal selected ducts without closing the entire ceiling.
Leave a repair route where a repair is foreseeable.
Place access panels to reach the component that needs service, not just where an opening looks convenient. Size each opening to operate the valve, remove the trap, or reach the connection with tools.
Flooring Materials for Wet and Dry Basements
| Flooring | Moisture tolerance | Approx. installed cost per sq ft | Comfort and repair profile |
|---|---|---|---|
| Luxury vinyl plank (LVP) | High as a finish over a dry, stable slab | Hypothetical allowance of $3 to $8 | Less cold-feeling than tile; plank repairs require a workable removal method; flush transitions are possible |
| Porcelain or ceramic tile | Very high for the tile itself | Hypothetical allowance of $6 to $15 | Hard and cold; grout needs upkeep; individual tiles can be replaced |
| Modular carpet tile | Moderate; exclude chronically wet areas | Hypothetical allowance of $4 to $8 | Soft and quiet; damaged modules can be replaced locally |
| Engineered wood | Limited suitability below grade | Obtain a product-specific installation quote | Warm appearance; vulnerable assemblies can require extensive replacement |
| Sealed or painted concrete | High for the concrete; coating performance needs verification | Hypothetical allowance of $2 to $6 | Hard and cold; easy to inspect; localized surface repairs remain visible |
These are hypothetical comparison allowances, not Southwest Michigan market prices. Slab preparation, adhesive removal, crack treatment, leveling, and moisture-control requirements can change an installed quote substantially.
Judge the layers beneath the surface
LVP is moisture-tolerant, but a waterproof plank doesn't make a waterproof room. Water can remain beneath it, and an attached pad or separate underlayment may have different limitations from the plank itself.
Check slab flatness with a straightedge and test moisture using the method required by the flooring manufacturer. Preserve required movement clearances, and don't pin a floating floor beneath fixed cabinetry unless the installation instructions permit it.
Tile offers a durable wear surface but demands a sound substrate. Inspect cracks and movement joints before specifying mortar, membrane, grout, and tile. A cracked slab covered without the appropriate detail can produce a cracked finished floor.
The EPA remodeling and indoor-air-quality guidance cautions against carpet in areas with chronic moisture problems or near water sources because water can remain in absorbent layers and support mold. Carpet tiles offer localized replacement, but modular construction doesn't remove that moisture limitation.
Engineered wood isn't the default choice for a Michigan basement. Some products permit below-grade installation under specified conditions, but I would keep it out when moisture history, slab testing, or humidity control is uncertain.
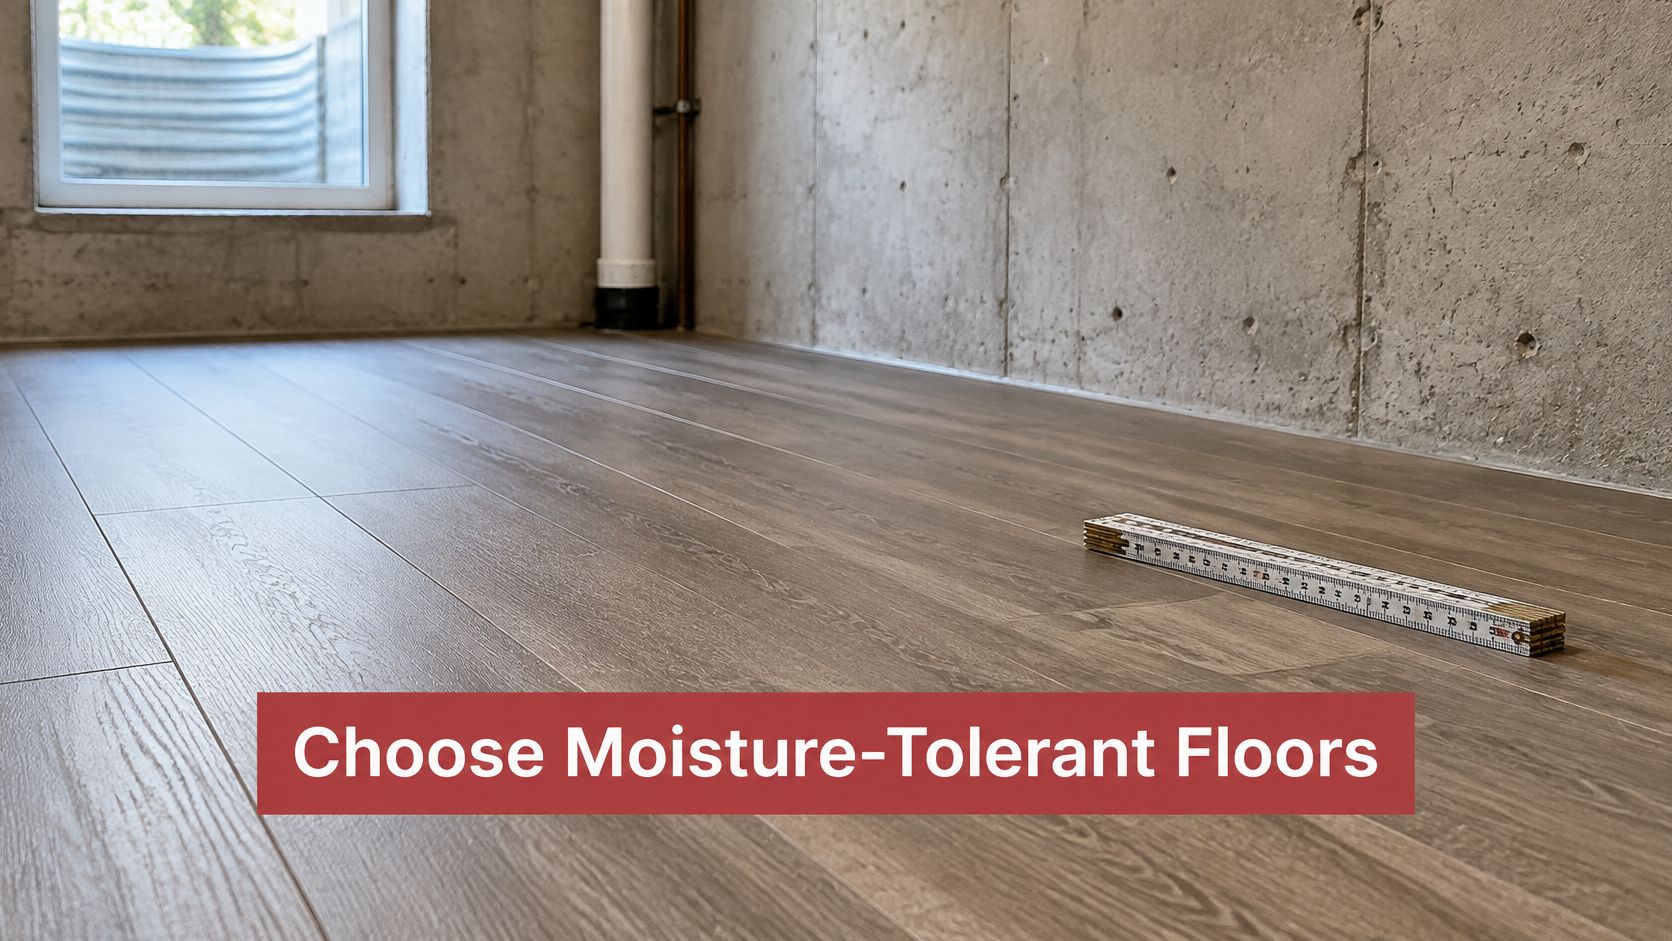
The photograph illustrates a plank appearance, not approval of laminate for the conditions in your basement.
Plan for mobility and localized repairs
An accessible route needs consistent elevation, secure edges, and a surface that suits the user's mobility equipment. A thick, soft floor can make rolling harder, while a glossy hard surface may be slippery when wet.
- Compare slip performance. Ask for the manufacturer's test information for the exact finish and expected wet or dry use.
- Mock up transitions. Check adjoining floor heights before ordering underlayment or tile.
- Consider acoustics. Concrete and tile reflect sound; use furnishings and suitable wall treatments rather than moisture-sensitive padding to compensate.
- Specify low-emission products. Include adhesives, coatings, and underlayments, not just the visible floor.
- Save repair stock. Keep matching planks or tiles and document the product and installation method.
For a periodically wet utility basement, exposed concrete may be more sensible than any built-up floor. A coating still needs proper preparation and moisture compatibility, and bare concrete may be preferable where coatings repeatedly fail.
To compare the appearance of a finished concrete surface, Atlanta Concrete Solutions' Atlanta home concrete polishing services offers a useful visual reference. Polishing and sealing aren't interchangeable treatments, so specify the desired finish rather than asking for shiny concrete.
If the floor is wet now, fix the source before choosing a floating floor.
Price Your Material Package and Confirm Code Before Buying
Choose a package by the work it must perform, not by a premium label. The following tiers use the hypothetical component allowances above, not complete project prices.
Build a package around the room
Budget package. Use properly specified XPS at foundation walls, paper-faced drywall in reliably dry living areas, LVP, and a painted open ceiling. Obtain a separate insulation quote that includes thickness, joint sealing, fastening, and protective coverings. This is a reasonable starting point for a dry, heated family room, provided the preparation work is included.
Mid-range package. Consider product-appropriate polyiso at above-grade locations or closed-cell foam where irregular surfaces justify it. Use cement board at actual wet-wall locations, and choose tile or LVP with carefully detailed transitions. A walkout with a corrected seepage problem needs documented moisture work, not just a more expensive finish package.
Premium package. Spend on targeted closed-cell foam, cleanable PVC panels, suitable tile, planned access openings, and mobility details. Quote grab-bar blocking, doorway transitions, and service access explicitly. An age-in-place design benefits more from those decisions than from decorative upgrades that make future repairs difficult.
These packages can't be totaled by adding wall and floor unit prices. Wall area, floor area, and ceiling area are different quantities, and their preparation costs aren't interchangeable.
Ask for a complete scope
Require separate allowances for demolition, concealed damage, moisture correction, insulation, framing, fire blocking, electrical changes, flooring preparation, permits, and finish work. Identify exclusions, too. Otherwise, a low finish price can obscure expensive work that remains necessary.
An insulation quote should identify the product and installed thickness. A flooring quote should state who is responsible for moisture testing and slab preparation. A ceiling quote should identify access panels and any required protective assembly.
Follow this purchasing order:
- Inspect and correct moisture sources. Keep records of the repairs and remaining limitations.
- Test for radon and establish flood constraints. Resolve routes and restrictions before room layouts become fixed.
- Confirm the local assembly requirements. Obtain insulation, fire-blocking, and foam-protection decisions.
- Select the material package. Include transitions, service access, and replacement methods.
- Request a ballpark estimate. Use the instant pricing tool to estimate project costs before scheduling a planning conversation, then refine the budget against the actual site conditions.
The useful comparison isn't the cheapest panel against the most expensive panel. It's the total installed assembly, including what you'll have to remove when a pipe leaks or a mobility need changes.
Trademaster Construction offers basement remodeling and planning services for homeowners in Kalamazoo, Portage, and nearby Southwest Michigan communities. Visit Trademaster Construction to discuss a material package that accounts for your basement's moisture conditions, service access, and intended use.

