
You already have tile samples on the table and a date in mind for demolition. The walls are not measured, the shower valve has no assigned wall, and nobody has written down who needs to roll into that bathroom. That gap is where remodels get expensive.
Project planning design treats every choice as a schedule and budget risk with its own lock-in date. A cabinet layout made after framing moves plumbing. A curbless shower decided after the floor is open means reframing. I would fix clearances and a signed scope before I picked a second finish.
The sequence below is the one that keeps kitchens, baths, and basements predictable in occupied homes around Portage and Kalamazoo. Each stage produces a page you can hold. If that page does not exist, the next stage is not ready.
Planning Stages and What Each One Settles
Remodels go sideways when finish samples come before measurements. Follow the six stages in order. Do not skip ahead because a showroom has a cabinet in stock.
| Stage | What Gets Decided | Output to Have in Hand | Checkpoint Before Moving On |
|---|---|---|---|
| Phone consultation | Goals, inspiration, general budget expectations | Shared list of goals and must-haves | Team confirms the project fits their process |
| Site evaluation and scope | Existing conditions, layout limits, must-have features | Written scope statement | Decision makers sign off on the scope |
| Design consultation | Layout, style, realistic investment range | Preliminary layout and budget range | Budget range agreed before design work |
| Selections and decision log | Cabinets, fixtures, tile, lighting, hardware | Finalized specification list | Long-lead items ordered or flagged |
| Permits and approvals | Permit scope and required inspections | Permit submitted | Permit status confirmed before demolition |
| Pricing and baseline schedule | Fixed bid, timeline, contingency allowance | Firm bid and schedule | Written approval before work starts |
From the first call to a layout
The process starts with a free phone consultation with the owner or a construction expert. You bring ideas, photos, and general budget expectations. We listen for goals and decide whether the project fits our design-build process. The output is a shared list of goals and must-haves, not a price.
Site evaluation turns that list into existing conditions, layout limits, and a written scope. Everyone who can say yes has to sign it. During the design consultation, we evaluate the existing layout, review design ideas, name constraints and opportunities, and set a realistic investment range. Design work waits until that range is agreed. A pretty plan with no range is just a drawing.
Permits, price, and the stop test
Selections come next, as a specification list. Long-lead items are ordered or flagged before anyone talks about a start date. Permits follow the locked scope, and demolition waits until permit status is confirmed. Pricing then produces a firm bid, a baseline schedule, and a named contingency allowance. Written approval is the last checkpoint before work starts.
Practical rule: If a stage has no written output, the next stage is not ready to start.
Planning is what makes rough-ins, inspections, and closeout predictable. A verbal "we're good" does not count as a checkpoint.
How to Lock Scope and Requirements Before Design
Run this routine on a kitchen or a bathroom before anyone prices the work. A dedicated project manager is the single point of contact, so the scope has one owner from the first page.
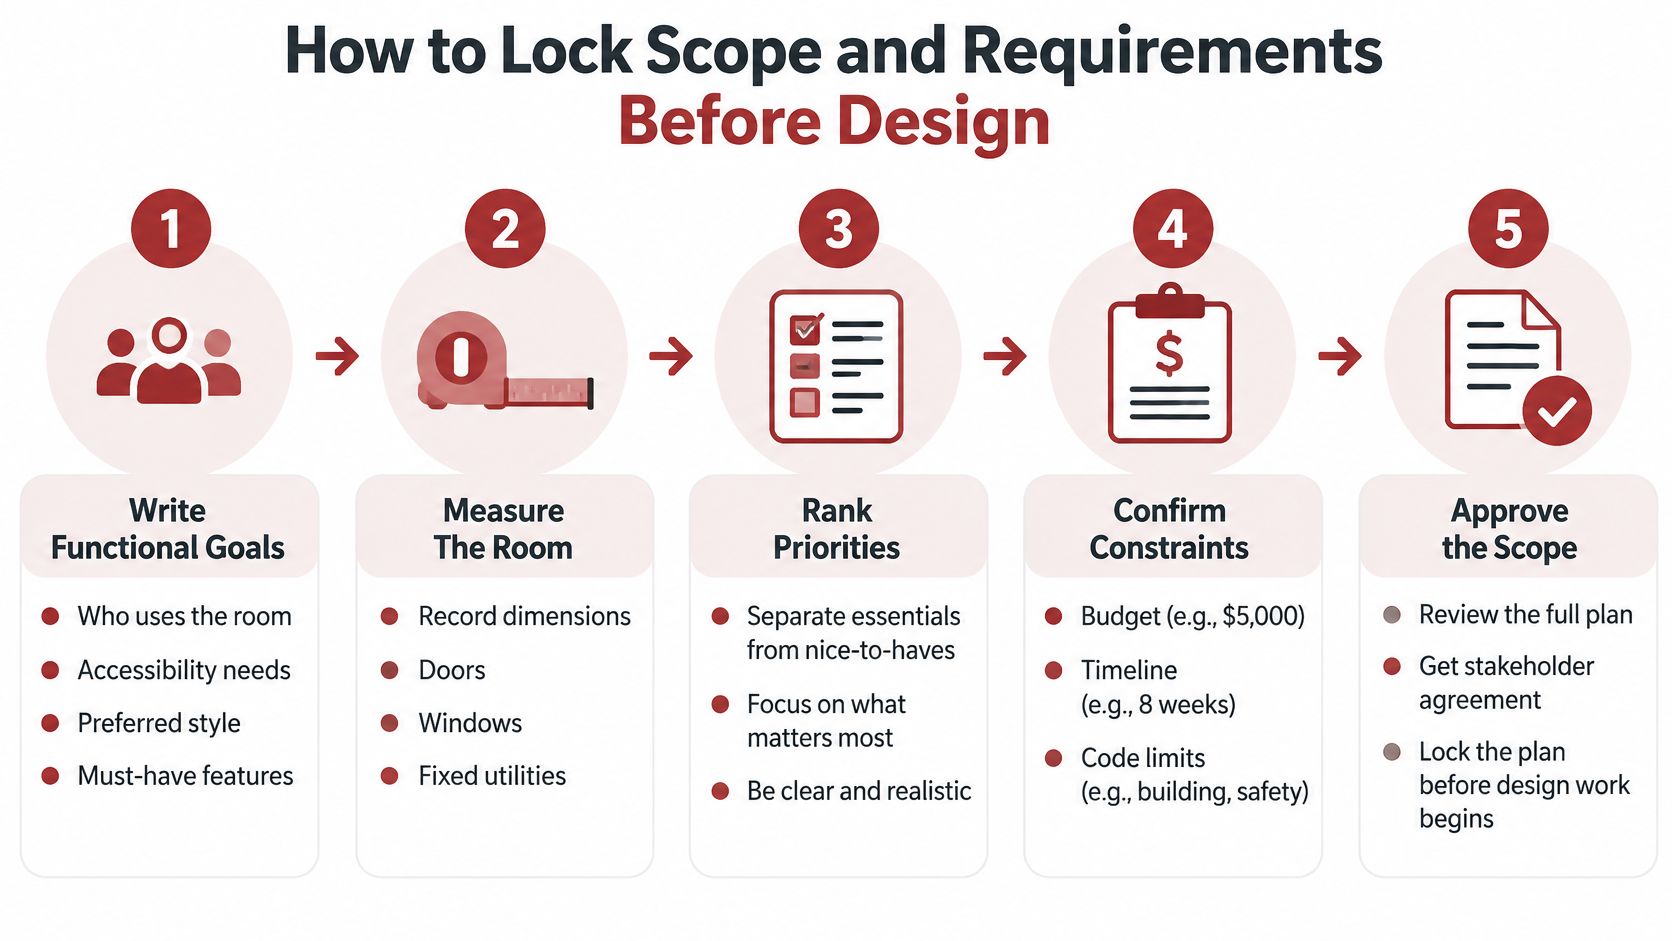
Write the functional goals. Name who uses the room, accessibility needs, preferred style, and which features are must-have versus optional. The reason is simple: a "nice kitchen" is not a requirement. The common slip is listing finishes and skipping the people.
Turn needs into a room-by-room scope statement. Say what changes and what stays, including doors, windows, and fixed utilities you measured. The reason is that unspoken "while you're in there" items become the job. The slip is a one-line scope such as "remodel the bath."
Build a work breakdown structure. Cover design, selections, permits, demolition, rough-ins, inspections, finishes, and closeout. The PMI article on getting back to basics reports that 41% of cited project problems involved an inability to agree on requirements, while 29% involved requirements that failed to capture customer needs. The same guidance ties an incomplete work breakdown structure to scope creep, unclear assignments, schedule slippage, and cost overruns. The slip is a trade list with no inspections on it.
Assign an owner to each task. That includes who calls for each inspection. Unowned tasks wait until someone is annoyed. The slip is "the contractor will handle it" with no name.
Get written approval before pricing or construction. A later change has to show cost, schedule effect, lead time, and approval status before anyone builds it. The slip is letting a salesperson price a wish list that the household has not signed.
A log you can actually sign
A bathroom decision log is the practical control. One page can lock shower valve position, grout color, lighting circuits, and grab-bar blocking, plus tile pattern and hardware. A finished scope is one or two pages the homeowner signs: goals, what changes, what stays, the task list with names, and the decision log. If two decision makers disagree, you are still in step 1.
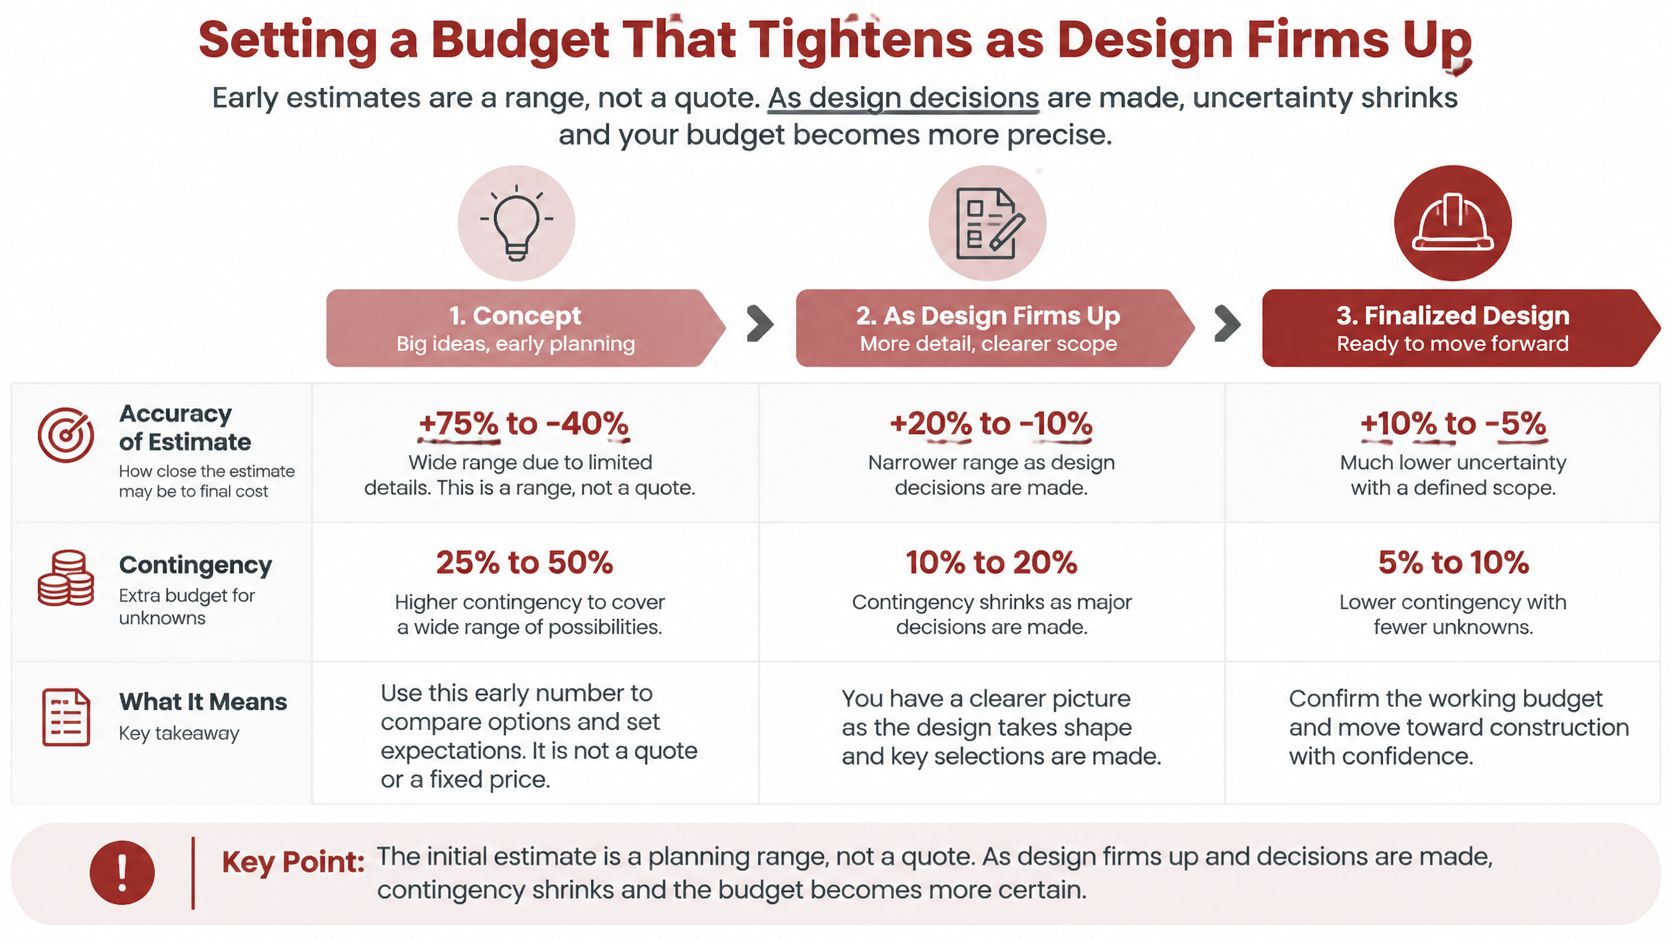
Setting a Budget That Tightens as Design Firms Up
An early number is a range, not a quote. Treat a ballpark written as a fixed price, before measurements, as a planning error.
| Planning Stage | Typical Estimate Accuracy | Design Contingency Range |
|---|---|---|
| Concept, little information | +75% to -40% | 25% to 50% |
| Scope and site conditions defined | About ±30% | 15% to 30% (schematic design) |
| Design development | About ±30% | 5% to 15% |
| Complete construction documents | +10% to -5% | 0% to 5% |
The U.S. General Services Administration identifies an order-of-magnitude estimate, when little information is available, at approximately +75% to -40%. Once scope, blocking plans, and existing conditions are defined, a budgetary estimate can generally reach about ±30%. A construction estimate from complete drawings and specifications narrows to about +10% to -5%.
Design contingency is a different reserve, and it shrinks on purpose. The National Park Service cost-estimating handbook lists 25% to 50% at pre-design, 15% to 30% at schematic design, 5% to 15% in design development, and 0% to 5% once construction documents are finalized. Accuracy can sit near ±30% through design development while the contingency falls, because more of the scope is named even though the documents are not done.
Reading one bathroom number
Say a bathroom is written as a $30,000 concept figure. Label it "concept, little information." On the GSA range, that early band is wide in both directions, so the honest move is to carry a 25% to 50% design contingency beside it. The same $30,000 printed as a fixed quote, before anyone measures the joists, is not a bid. After scope and site conditions are defined, rewrite the figure as a budgetary estimate near ±30%, with schematic contingency of 15% to 30%. After drawings, selections, and specifications are complete, the working number should sit near +10% to -5%, and design contingency should be close to zero.
Keep a separate allowance for concealed conditions. That money is not the design contingency, and it is not an upgrade fund. Re-check the labeled range after measurements, after selections, and after the drawings are finished. Three checks, three narrower numbers.
Accessibility Clearances and Permit Holds
Clearances shape the room. They are not finish choices you settle at the tile store.
| Shower Type | Clear Interior | Minimum Entry Width | Clearance Requirement |
|---|---|---|---|
| Transfer-type shower | 36 by 36 inches | 36 inches | 36 by 48 inches measured from the control wall |
| Roll-in shower | 30 by 60 inches minimum | 60 inches | The 30-by-60 compartment is the wheelchair clear space |
Federal accessibility guidance specifies a transfer-type shower at 36-by-36-inch clear interior dimensions, a 36-inch minimum entry, and a 36-by-48-inch clearance measured from the control wall. A standard roll-in shower needs at least 30 inches of clear width by 60 inches of clear depth and a 60-inch minimum entry.
What those inches do to the floor
A transfer shower's 36-by-36 box plus the 36-by-48 clearance from the control wall sets where the toilet, door swing, and vanity can sit. The control wall also sets grab-bar backing and valve reach. A roll-in compartment at 30 by 60, with a 60-inch entry, usually means a longer wet area, a shallower curb or none, and a drain slope that still reaches the drain without a lip. Waterproofing has to stop at a boundary you drew before demolition, not wherever the tile happened to end. Glass, framing, and the curb height all follow that line.
Steps before the wall opens
Document how the person moves: wheelchair, walker, or a plan for later years. Mark both clearances on the layout in inches, not "a bigger shower." Decide blocking locations before backer board, because tile hides the only solid place a bar can land.
We handle scheduling, procurement, subcontractor coordination, permitting, and inspections. Ask which inspections must pass before waterproofing, rough-ins, or framing are covered. In an occupied house, an open wall with no written approval turns the only bathroom into a jobsite. Put these approvals in writing first:
- Mobility method recorded, with the shower type chosen.
- Clearances dimensioned on the plan.
- Blocking and drain slope noted before demolition.
- Permit submitted, and the cover-up inspections named.
- Sign-off that those inspections pass before the next trade closes the work.
Design Decisions and the Build Schedule
Selections are schedule items. A 2025 U.S. homeowner survey in the How America Renovates report found that materials accounted for 58% of cost overruns and labor for 40%.
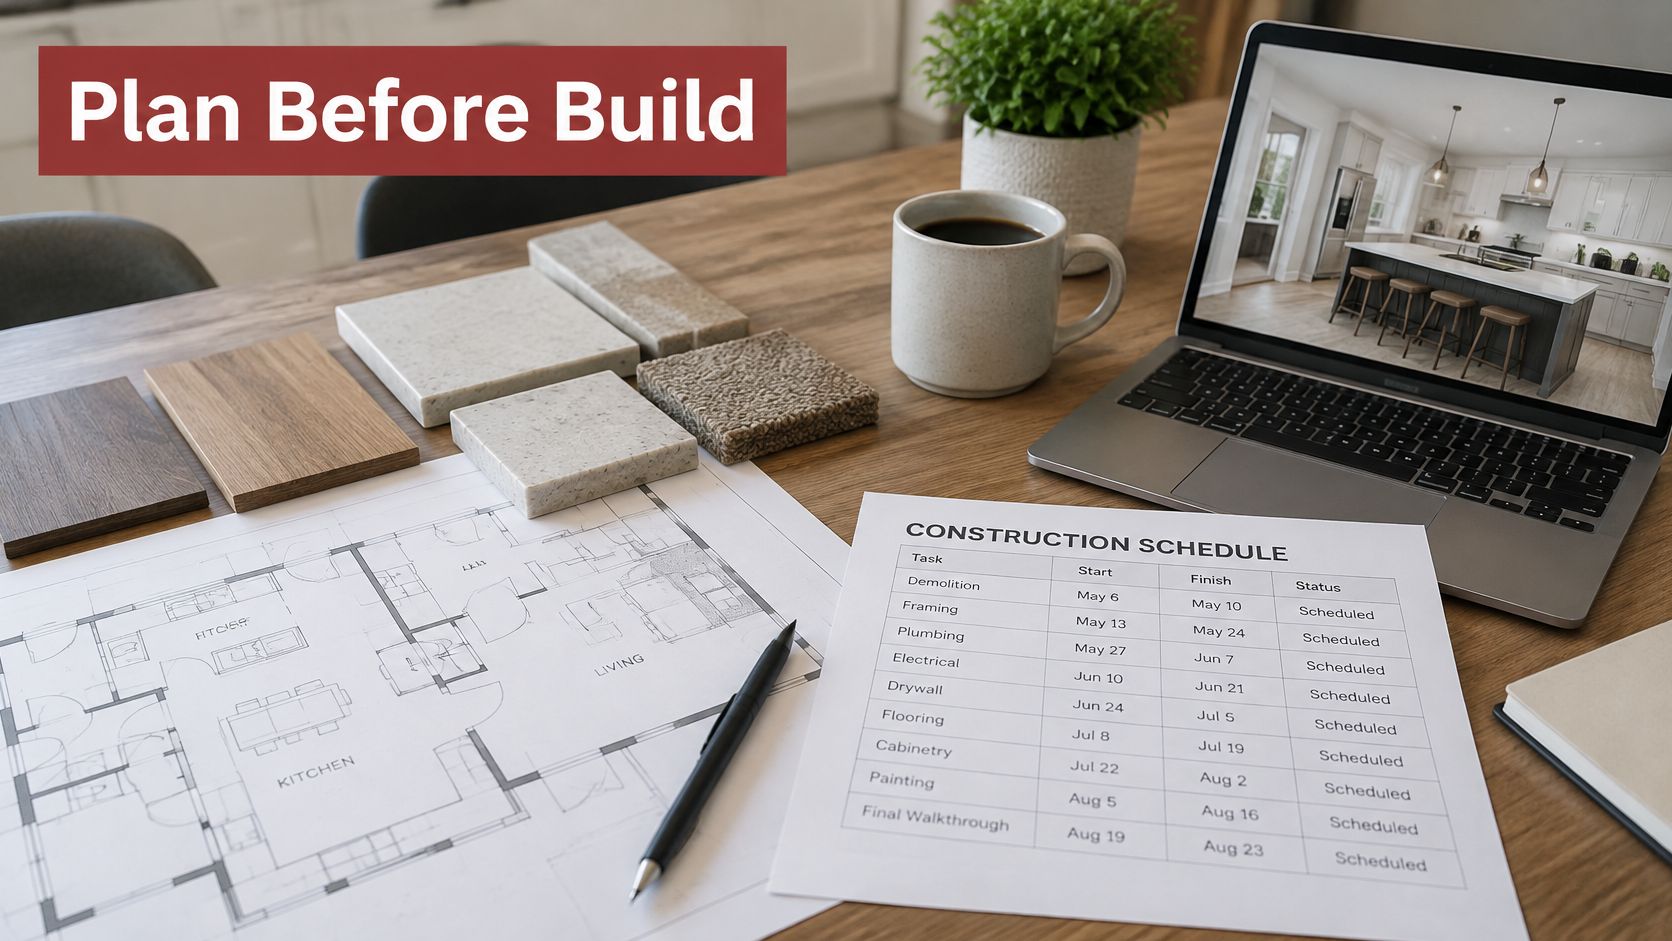
The table below is the lock-in list I would tape to the selections meeting. The photo is the working surface: drawings, samples, and a dated schedule in one place.
| Decision | Lock In By | Can It Wait? |
|---|---|---|
| Cabinet layout and appliance locations | Before framing and rough-ins | No, it moves plumbing and electrical |
| Shower valve and fixture trim | Before the wall closes | No, valve position is fixed in the wall |
| Tile layout | Before setting tile | Partly, color and grout can follow shortly after |
| Lighting and outlet placement | Before drywall | No, changes after drywall mean rework |
| Appliance model | Before cabinet install | Partly, dimensions lock but the model can change within an allowance |
| Hardware, paint and fixture finish | Before trim and punch list | Yes, with a budget allowance |
Order the work so one late choice cannot stall it
Build in dependency order: demolition and protection, framing, rough-ins, inspections, waterproofing, backer board, cabinets, tile, trim, testing, punch list, and final approval. The project manager coordinates final selections, refines the plans, and leads a pre-construction review that enforces the selections deadline. Reserve days for inspections and for long-lead products. We do not start demolition until materials are ordered, inspected, and delivered.
Lighting and outlet placement lock before drywall. If the new bath or kitchen loads the existing service, sort an electrical panel upgrade before rough-in, not after the drywall is up. For anything with a long lead, write good, better, and best alternates. A less customized cabinet with stock availability often protects the start date better than a fully custom box that ships in twelve weeks. The attractive option is not automatically the better plan.
Watch a short walk-through of how a dated schedule keeps trades from stacking on an open wall.
Before you approve a selection, ask three questions. Can it wait? What does it lock (plumbing, electrical, cabinet size)? What is the lead time, and is a stock alternate already priced?
Selecting Contractors and Communication Checkpoints
Price the signed scope, not the lowest number on a vague bid. Hand every bidder the same scope statement and decision log. Compare exclusions, allowances, contingency, and the start date line by line. A cheap bid that excludes the shower pan is not cheaper.
Confirm licensing and insurance. Ask for recent projects of similar size, and call references about schedule reliability, not just finish quality. Ask who pulls the permit, who schedules and attends each inspection, and who is the single point of contact. If three people can give you three answers, you do not have a manager yet.
Some firms keep drawings and photo logs together with AI tools for remodeling contractors. Software does not replace a named person who returns a call.
Agree on these checkpoints before work starts:
- Pre-construction review. Confirm the baseline schedule and the approved selections in one meeting.
- Weekly progress call. Cover the schedule, open decisions, and deliveries due that week.
- Shared photo log. Shoot every concealed stage before the walls close.
- Inspection sign-off. The next trade does not start until that inspection is recorded.
- Closeout walkthrough. Build the punch list and the final approval together.
Keep the decision log and the change log in one shared document. Agree that urgent questions get an answer within one business day. A beautiful portfolio with no checkpoint list is a harder job to live through.
Change Orders, Allowances and Contingency Rules
Unlogged changes cost more than surprises. A surprise at least has a photo. A hallway conversation becomes someone's memory of a free upgrade.
Split the money into three piles before demolition, and do not let them share a balance.
Unknown-conditions allowance. This is its own reserve, separate from design contingency. Arkansas construction-financing rules say contingency normally should not exceed 10%, with 5% to 10% for low-cost work and 1.5% to 2.5% where the project cost is higher. The examples are unexpected utility relocation, damaged roof decking, and rock excavation. A concealed plumbing leak or moisture-damaged framing belongs here.
Scope changes. A fixture upgrade you asked for is not a field discovery. It needs a change order with cost, schedule effect, and material lead time before anyone installs it.
Corrections of mistakes. The same rules say contingency is not for remedial work caused by design errors, construction errors, or poor coordination. That bill goes to the party that made the mistake.
- Keep one shared change log that both parties sign.
- Require a field-condition authorization with photos for every hidden-damage claim.
- Re-check the remaining allowance after every approved change.
- Route any correction of a mistake away from the allowance.
A change that is not written down is a cost nobody has agreed to pay.
Set Your Budget Range Before Choosing Finishes
Start with a ballpark from our instant pricing tool so the first number is a stage-labeled range, based on project type, before you choose finishes. Treat that figure as the first number to refine, not the last. Project length comes from sending the actual details, not from a generic week count.
Before the design consultation, gather three things: a written scope list with must-haves and room measurements, a budget range labeled with its planning stage, and the choices that can wait. Add photos and a target timeline so we can judge fit quickly.
In the first week, send the ballpark request, assemble the scope list, book the free phone consultation, and log each decision in one shared document.
A remodel is planned in stages, and each stage has its own accuracy and its own approval.
Trademaster Construction plans and builds kitchens, bathrooms, basements, and custom tilework for homeowners in Portage, Kalamazoo, and nearby communities, from a written scope through a firm fixed-price bid. If you want this planning sequence applied to your rooms, bring measurements, photos, and the decisions that cannot wait. Visit Trademaster Construction and send your project details so we can set a realistic range before any finish is ordered.

