
You're usually not looking into a basement egress window because you woke up excited to cut through your foundation. It usually starts with a more familiar goal. You want a guest room for family, a bedroom for a teenager, a quieter office, or a family room that makes the basement feel like part of the house instead of storage.
Then the same question comes up in Kalamazoo, Portage, Mattawan, Schoolcraft, and just about every other part of Southwest Michigan. Can the basement legally and safely be used as living space? That's where basement egress window installation moves from “nice upgrade” to a serious part of the remodel.
In this part of Michigan, homeowners also have to think beyond the opening itself. Soil conditions can be stubborn. Clay-heavy ground doesn't forgive sloppy drainage. Spring thaw, summer downpours, and leaves piling into a window well can turn a good-looking install into a water problem if the exterior details are weak. The good news is that this is a solvable project when it's planned correctly from the start.
Why Your Basement Needs an Egress Window
A basement room only works as real living space if people can get out safely in an emergency. That's the plain-language reason an egress window matters. It's not just a bigger basement window. It's an emergency escape and rescue opening.
A lot of homeowners first run into this when they start sketching out a basement bedroom. They've already picked flooring, lighting, and paint colors, then someone asks a practical question: where's the emergency exit? If the answer is “the stairs,” that usually isn't enough for a sleeping room in a basement.
It's about safety first
If there's smoke, fire, or a blocked stairway, the basement needs another way out. That's the core purpose of basement egress window installation. It gives the people inside a direct route to escape, and it gives first responders a way to get in.
Practical rule: If you want a basement bedroom, treat the egress window as a life-safety requirement first and a remodeling feature second.
That mindset changes the whole project. You stop thinking in terms of swapping one small window for another and start thinking in terms of cutting an opening that works effectively when someone needs it under stress.
It also affects whether the space counts
Homeowners often want the basement to function like the rest of the house. They want a conforming bedroom, a legal guest space, or a finished lower level that won't raise questions later when they sell. An egress window often plays a big role in whether that room can be treated as habitable space.
That's why this work belongs in the same category as structure, waterproofing, and mechanical rough-ins. It isn't trim-level remodeling. It's infrastructure.
Here's what basement egress window installation usually includes:
- Opening the foundation: The wall often has to be cut larger than the original window opening.
- Excavating outside: Soil has to be removed so the new window and well have space.
- Installing the window well: The well holds back the earth and creates a usable exit path.
- Managing water: Drainage, gravel, grading, and sealing determine whether the project stays dry.
- Finishing inside: Drywall, trim, insulation details, and paint make the new opening look like it belonged there all along.
In Southwest Michigan, the water side of the job is where many homeowners underestimate the work. The window itself is only part of the system. The well, the drain path, the surrounding soil, and the way water moves around the house matter just as much.
Understanding Michigan Code and Permit Requirements
Before anyone cuts concrete, the code dimensions have to be right. Michigan jurisdictions commonly follow the International Residential Code benchmark for emergency escape and rescue openings. Under that standard, a compliant opening generally needs a minimum net clear opening of 5.7 square feet when the window is above grade, or 5.0 square feet when it is at grade or below grade, with a sill no more than 44 inches above the floor and an opening at least 20 inches wide by 24 inches high, as outlined in Pella's egress window guide.
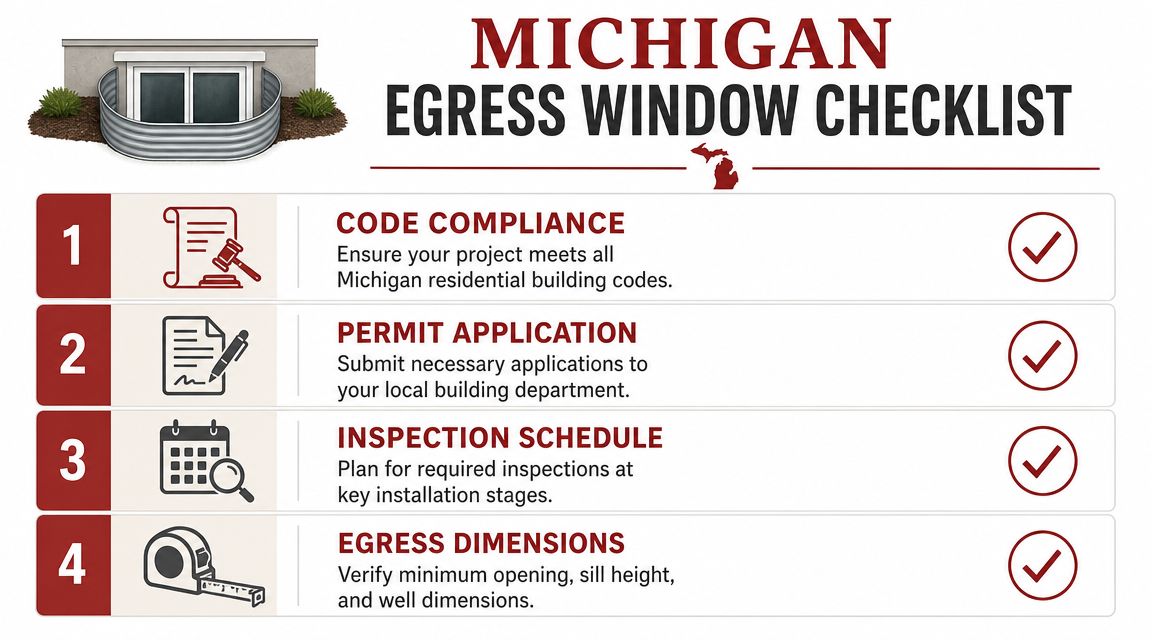
Those numbers sound simple until you stand in front of an existing basement window. Many older basement windows look decent from the outside but still fall short once you measure the net clear opening, which is the actual open space available for escape, not just the glass size or rough frame size.
What the code numbers mean in practice
A few measurements matter more than anything else:
| Code point | What it means for the homeowner |
|---|---|
| Net clear opening | The openable area has to be large enough for a real escape route, not just a bigger-looking window |
| Sill height | If the bottom of the opening is too high above the floor, a child or older adult may not be able to use it quickly |
| Minimum width and height | A window can fail even if one dimension works and the other doesn't |
This is where product selection matters. A window that looks large on paper can still disappoint if the operating sash or frame eats up too much usable opening. That's why good installers measure the actual clear opening, not just the catalog size.
Don't assume an “egress-size” unit is compliant in your wall. The installed opening, sill height, and well setup all have to work together.
Why permits matter in Kalamazoo and Portage
In Southwest Michigan, permit requirements and inspection steps can vary by municipality, but the basic rule is simple. If you're cutting or enlarging a foundation opening and creating a code-required escape opening, get the proper permit and inspection path in place.
That protects you in several ways:
- Safety review: The work gets checked for code compliance, not just appearance.
- Future resale: A buyer and home inspector will ask whether the bedroom or finished basement was done properly.
- Insurance and liability: Unpermitted structural work can create headaches when there's a claim or a sale.
- Contractor accountability: Plans, inspections, and documented approvals keep everyone honest.
Questions worth asking your local building department
Homeowners don't need to know every line of the code book, but they should ask clear questions before work begins:
- Permit scope: Does the permit cover foundation cutting, the window, and the well?
- Inspection timing: When does the inspector need to see the work?
- Site conditions: Are there local rules about drainage, setback concerns, or well details?
- Bedroom use: If the basement room is intended as a sleeping room, are there any additional local interpretations to confirm?
A permit slows the front end a little. It saves a lot of pain later. In my experience, the cleanest basement remodels are the ones where the code conversation happens early, before anyone orders a window or starts digging.
The Complete Installation Process from Excavation to Sealing
A proper basement egress window installation follows a sequence. Skip steps or do them out of order and the whole project gets harder, sloppier, and riskier. The standard progression is well established: protect the interior, excavate to expose the foundation, cut the opening, level and fasten the window, anchor the well, and install drainage/backfill so the well does not become a water trap, as described in Evolve Egress's installation process overview.
Early in the job, it helps to see the whole process laid out visually.

Step one starts inside, not outside
The outside dig gets the attention, but the first move is protecting the basement interior. Concrete dust, debris, vibration, and falling fragments can travel farther than people expect. Floors get covered. Nearby belongings get moved. Temporary dust containment goes up.
Then the crew lays out the opening from the inside and outside so the cut lands where it should. Errors here can be costly. You have to account for the finished floor height, the required sill height, the actual window unit, and the rough opening needed to install it correctly.
Excavation has to match the plan
Once layout is confirmed, excavation begins. In Southwest Michigan, local conditions quickly become apparent. Some yards offer decent access and manageable soil. Others have tight side yards, decks, AC units, irrigation lines, or dense clay that sticks to every shovel and machine bucket.
Homeowners who want a better sense of what the digging side of the job involves can look at this overview of Excavation from Firm Foundations. It gives useful context on site access, soil removal, and why digging around structures takes planning.
After the area is opened up, the crew exposes enough foundation to cut the new opening and set the well correctly. That means you don't just dig a narrow slot and hope for the best. The hole has to give enough room to work safely and enough room to build the drainage layer and well assembly without forcing everything into place.
The foundation cut is the point where basement finishing turns into structural work. That's not where you want guesswork.
Cutting the foundation is the technical heart of the job
For poured concrete or block walls, the opening has to be cut cleanly and to the right dimensions. This usually involves specialized cutting equipment and a controlled process for removing the section without damaging the surrounding wall.
Here's where the craft matters:
- Layout accuracy: The cut has to line up with the approved opening and the finished interior.
- Clean edges: Rough, chipped cuts make waterproofing and window installation harder.
- Structural awareness: The installer has to understand what's being removed and what support the opening needs.
- Moisture planning: The rough opening should be prepared so flashing, sealant, and fastening details can effectively do their job.
A lot of DIY videos make this part look like an aggressive saw-cut and a lucky break-out. On a real house, it's more controlled than that. The wall has to keep doing its job after the opening is created.
A short video can help you picture the work sequence in the field.
Setting, fastening, and sealing the window
Once the opening is ready, the window gets dry-fit, adjusted, and installed so it's level, plumb, and properly supported. If the unit is out of square, you'll feel it every time you operate it. In an emergency, that matters.
The installation side usually includes:
- Checking the rough opening for size, plane, and support.
- Setting the unit so it operates smoothly without racking.
- Fastening it correctly to the structure.
- Sealing the perimeter to block air and water.
- Preparing for interior finish work so trim and wall repair look intentional.
The best installs don't rely on caulk alone. They use a full weather-management approach, with the rough opening, the window flange or attachment detail, and the surrounding materials all working together.
Installing the Window Well and Ensuring Proper Drainage
The common homeowner assumption is that the hard part is over once the window is in. It isn't. The window well and its drainage system decide whether the project stays dry through Michigan rain, snowmelt, and freeze-thaw cycles.
That matters even more now because weather extremes are getting more severe. The National Oceanic and Atmospheric Administration reported 28 separate billion-dollar weather and climate disasters in 2023, a point highlighted in Window Well Experts' guide to egress well installation. For a basement opening, that means drainage details can't be treated as optional trim work.

A window well has two jobs
A good well has to do two things at once. It has to retain the surrounding soil, and it has to preserve a clear, usable exit path from the basement window to grade.
If it only does the first job, you've built a steel or composite bucket next to your house. That's why the shape, attachment, and bottom treatment matter so much.
What works in Southwest Michigan soil
Southwest Michigan homes often deal with compacted soils and clay-heavy conditions. Clay tends to hold water rather than let it move down easily. That changes the way the well should be built.
What usually works better:
- A real drainage plan: The bottom of the well needs a place for water to go, not just a few loose stones tossed in the hole.
- Clean gravel layer: Gravel helps reduce splash, supports drainage, and keeps mud from building directly against the opening.
- Connection to broader water management: Site grading, footing drains, and the path of roof runoff all affect this one opening.
- Regular maintenance access: If leaves, mulch, or debris can clog the bottom, the system will eventually struggle.
A helpful outside reference on choosing backfill materials and drainage explains why material choice changes how water moves and how pressure builds against retaining surfaces. The same principle applies around a window well. Backfill isn't just dirt you put back in the hole.
A dry egress well isn't created by luck. It comes from matching the well, drain path, backfill, and site grading to the conditions around the house.
What fails most often
Most failures come from one of three problems:
- Undersized or missing drainage
- Poor backfill that traps water against the well
- Neglected maintenance after installation
I've seen wells that looked clean on install day and acted like small ponds after a season of runoff, leaves, and heavy rain. The homeowner often blames the window first. More often, the issue starts outside the window.
A solid well installation should leave you with confidence that the opening will still perform after repeated storms, not just pass inspection on a dry day.
Budgeting Your Project and Deciding Between DIY and a Pro
Cost matters because this isn't a cosmetic add-on. Basement egress window installation involves foundation work, excavation, waterproofing, drainage, and finish carpentry. According to HomeAdvisor's egress window cost guide, most homeowners spend between $2,723 and $5,877, with an average project cost of about $4,227, and labor alone can run from $100 to $1,000 per window.

For Southwest Michigan homeowners, the best next step is getting a local ballpark instead of relying only on a national range. If you're budgeting the project, use this instant pricing tool to get a more realistic starting point based on the work you're considering.
Why one project costs more than another
The range is broad for a reason. Price moves up or down based on conditions on your property.
Some of the biggest cost drivers are:
- Foundation type: Poured concrete and block walls present different cutting and finishing challenges.
- Access to the work area: Tight lots, fences, decks, and landscaping can slow excavation.
- Soil and drainage conditions: Clay soil and water-management upgrades can add labor and materials.
- Window and well choice: Product selection affects both installation details and finish quality.
- Interior repair needs: Some basements need more framing, drywall, trim, or finish restoration after the opening is installed.
Estimating software also plays a role in getting these jobs scoped correctly. Homeowners curious about how contractors organize concrete-related measurements and cost inputs may find Exayard concrete estimating software useful as a behind-the-scenes example of how takeoffs and budget planning are structured.
DIY versus hiring a pro
This is one of those projects where DIY savings can disappear quickly if something goes wrong.
| Option | Upside | Risk |
|---|---|---|
| DIY | You may save on labor if you already have the skill set and tool access | Foundation cutting, code mistakes, water intrusion, and failed inspections can erase those savings fast |
| Professional installation | Better control over code compliance, drainage, structural work, and finish quality | Higher upfront cost |
DIY makes more sense for paint, trim, and some interior finish tasks. It makes less sense when the work includes cutting a foundation wall and building a below-grade drainage system that has to stay dry for years.
If you're asking whether this is “just a window job,” the answer is no. It's a structural opening plus exterior water management.
For most homeowners, the smartest move is to DIY only the parts that fit their skill level and leave the structural and below-grade work to a qualified installer.
Finishing Touches and Long-Term Maintenance
Once the heavy work is done, the project still needs to be finished like it belongs in the house. Inside, that usually means repairing drywall, insulating and trimming the new opening, patching any cut-back finishes, and painting so the basement doesn't look like a retrofit. A well-finished egress window should bring in light, operate smoothly, and feel intentional in the room.
The final appearance matters, especially if the basement is becoming a bedroom, office, or family room. A clean stool, jamb, and casing package can make the window feel like part of the original design instead of a late fix.
What to keep an eye on after installation
Long-term maintenance is simple, but it isn't something to ignore.
- Clear the well: Remove leaves, mulch, and debris so the drain path stays open.
- Check the window operation: Open and close it occasionally to make sure it doesn't stick.
- Inspect seals and trim: Look for signs of moisture, staining, or air leakage around the unit.
- Watch the grade outside: Settling soil can redirect water toward the well if it isn't corrected.
- Check any cover hardware: If there's a well cover, make sure it remains secure and easy to remove when needed.
The long view
A basement egress window does more than satisfy an inspector. It makes lower-level living space safer, more usable, and easier to defend as a real part of the home. In Southwest Michigan, the projects that age well are the ones that respect both code and water.
If the opening is compliant, the well is built for drainage, and the finish work is done cleanly, you end up with more than a new window. You get a basement space that feels legitimate, comfortable, and ready to use.
If you're planning a basement remodel in Southwest Michigan and want a quick way to size up the cost before scheduling anything, Trademaster Construction offers an easy pricing tool that can help you start with a realistic number. It's a practical first step for homeowners in Kalamazoo, Portage, and nearby communities who want to explore basement egress window work as part of a larger finishing project.

