
It’s a question we hear all the time: "Can I just tile over my old shower tile?" The short answer is yes, you can. But the much more important answer is that it's a shortcut that only works out if the existing conditions are absolutely perfect.
Think of it like putting a beautiful new veneer over an old piece of furniture. If that original piece is solid, flat, and structurally sound, you’ll get a fantastic result. But if it's warped, wobbly, or has any hidden damage, that new top layer is just a temporary fix hiding a much bigger problem.
What "Tiling Over Tile" Actually Means
For homeowners wanting a fresh look without the cost and chaos of a full demolition, tiling over the old stuff sounds like a dream. It cuts down on project time, saves a good chunk of money on labor, and avoids the incredible amount of dust and debris that comes with tearing out tile and backer board. It's a renovation strategy that has become more common, especially for bathrooms that are in great shape but just look dated.
The catch? This whole approach depends entirely on the condition of your current shower. Your old tile surface becomes the new foundation. Any problems lurking underneath—a loose tile here, a bit of moisture there, or a surface that isn't perfectly flat—are just going to be inherited by your brand new tile. Down the road, that often leads to much bigger headaches.
Weighing the Pros and Cons
Before you jump in, you really need to understand the trade-offs. You're essentially balancing the immediate gratification of a quick, cheaper update against the risk of long-term failure. You might save some cash today, but you're also placing a bet on the quality of work you can't even see.
This method has certainly found its place in the market as a clever way to handle certain bathroom remodels. Done right, it can get a project finished 30-50% faster than a full tear-out, which is why it's so tempting for quick flips or cosmetic updates. If you're curious about the industry trends, you can explore the full research on ceramic tiles from Grand View Research.
The core principle is simple: A new tile installation is only as strong as the foundation it's built on. When you tile over existing tile, that foundation is the old tile, the mortar behind it, and the wall structure itself.
To help you sort it all out, we've put together a quick comparison. This table gives you an at-a-glance look at what you stand to gain versus what you could lose by taking this shortcut.
Tiling Over Tile in a Shower Quick Pros and Cons
| Aspect | Pros (The Upside) | Cons (The Risks) |
|---|---|---|
| Cost & Time | Significantly lower labor costs and a much faster project timeline due to skipping demolition. | Potential for much higher long-term costs if hidden issues cause the new tile to fail. |
| Durability | Can be very durable if the existing tile is perfectly sound, flat, and well-bonded. | Any weakness, movement, or moisture in the old layer will compromise the new installation. |
| Structural Integrity | Avoids potential damage to wall studs and plumbing that can occur during a tear-out. | Adds significant weight to the wall, which could strain the structure if not built to handle it. |
| Waterproofing | Less invasive, as the original waterproofing membrane behind the first tile layer remains intact. | You are trusting an old, unseen waterproofing membrane that could already be compromised. |
Looking at this, it becomes pretty clear that while the upsides are appealing, the risks are serious. The decision really hinges on whether you can be 100% confident in the integrity of your existing shower walls.
Your Essential Pre-Installation Inspection Checklist
Before you even think about picking out new tiles, you need to play detective. The entire success of a tile-over-tile job hangs on the condition of your existing shower walls. A thorough inspection isn't just a good idea—it's the single most critical step you'll take.
Think of your old tile as the foundation for your new shower. Any cracks, loose spots, or hidden moisture you ignore now will morph into much bigger, more expensive headaches down the road. This checklist walks you through exactly what to look for.
This decision guide gives you a quick visual on the key checkpoints.
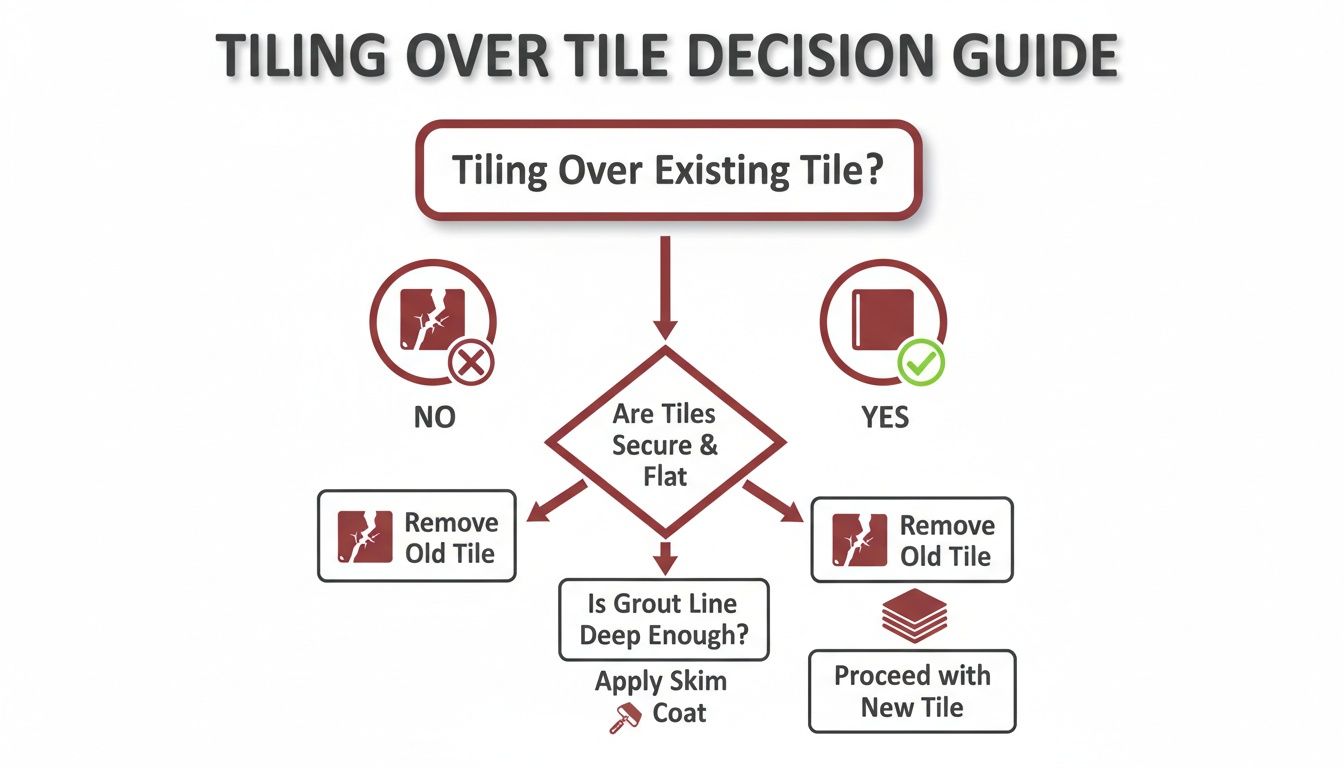
As you can see, any sign of instability—like a broken tile or a hollow sound—is an immediate dealbreaker for tiling over the top.
Sounding Out Your Tiles for Hidden Problems
Your first job is to listen to what the walls are telling you. We do this with a simple but surprisingly effective technique called "sounding out."
- Gently tap each tile with a solid object, like the plastic handle of a screwdriver or even just your knuckle.
- Listen closely to the sound. A solid, sharp "tick" means the tile is well-bonded to the wall.
- Pay attention to any hollow sounds. A hollow, drum-like echo is a huge red flag. This indicates delamination, which is a technical way of saying the bond between the tile and the wall has failed.
A few isolated hollow spots might be okay, but if you find large patches or more than 10-15% of the tiles sound hollow, stop right there. Tiling over a delaminated surface is like building a house on quicksand; it's simply destined to fail.
The Grout and Caulk Inspection
Next, get up close and personal with the grout lines and caulk seams. These are your shower's first line of defense against water, and their condition tells a story about what's happening behind the scenes.
- Check for Cracks and Crumbling Grout: Scan for hairline cracks or spots where the grout is visibly falling apart or missing. These gaps are direct invitations for water to sneak in behind the tiles.
- Inspect the Caulk: Look at the caulk in the corners and where the walls meet the shower pan or tub. Is it peeling away, cracked, or discolored? Knowing how to remove moldy caulk from your shower is crucial, as this is often a sign of long-term moisture problems.
- Look for Stains: Dark spots or discoloration in the grout can signal persistent moisture or even mold growing inside the wall cavity.
These aren't just cosmetic flaws. Compromised grout and caulk mean the underlying waterproofing has likely been getting wet for years.
Ensuring a Perfectly Flat Surface
Your beautiful new tile will only be as flat as the surface it’s stuck to. Even minor dips or bows in the existing wall will get magnified once you add another layer of tile and thin-set.
Grab a four-foot level or a long, straight board and press it against the wall—vertically, horizontally, and diagonally. Slide it across the entire surface, keeping an eye out for any gaps between the level and the tile. If you can slide a nickel (about 2mm) underneath it at any point, the wall is too uneven for a successful overlay.
A flat foundation is non-negotiable. Any significant variations in the existing tile surface will create an uneven finish, leading to lippage (uneven tile edges) and potential weak spots in the new installation.
Tiling over tile can definitely save time, but it's not a shortcut for proper prep. The goal is to ensure your modern update is built on a solid, reliable foundation that will last for years to come.
The Hidden Dangers: Moisture and Structural Strain
It's tempting to think you can just slap a new layer of tile over the old and call it a day. Who wouldn't want to skip the messy demolition? But before you do, you need to understand the two massive risks hiding behind the walls: trapped moisture and serious structural strain.
These aren't small problems. They’re the kind of issues that can cause a catastrophic failure down the road, turning your "shortcut" into a repair job that costs way more time and money than you ever saved.
The biggest gamble you’re taking is putting all your faith in an old, invisible waterproofing membrane. Behind that original layer of tile is a barrier that’s supposed to be the last line of defense against water. If that barrier has even a tiny, pinhole-sized failure, you're setting yourself up for big trouble.
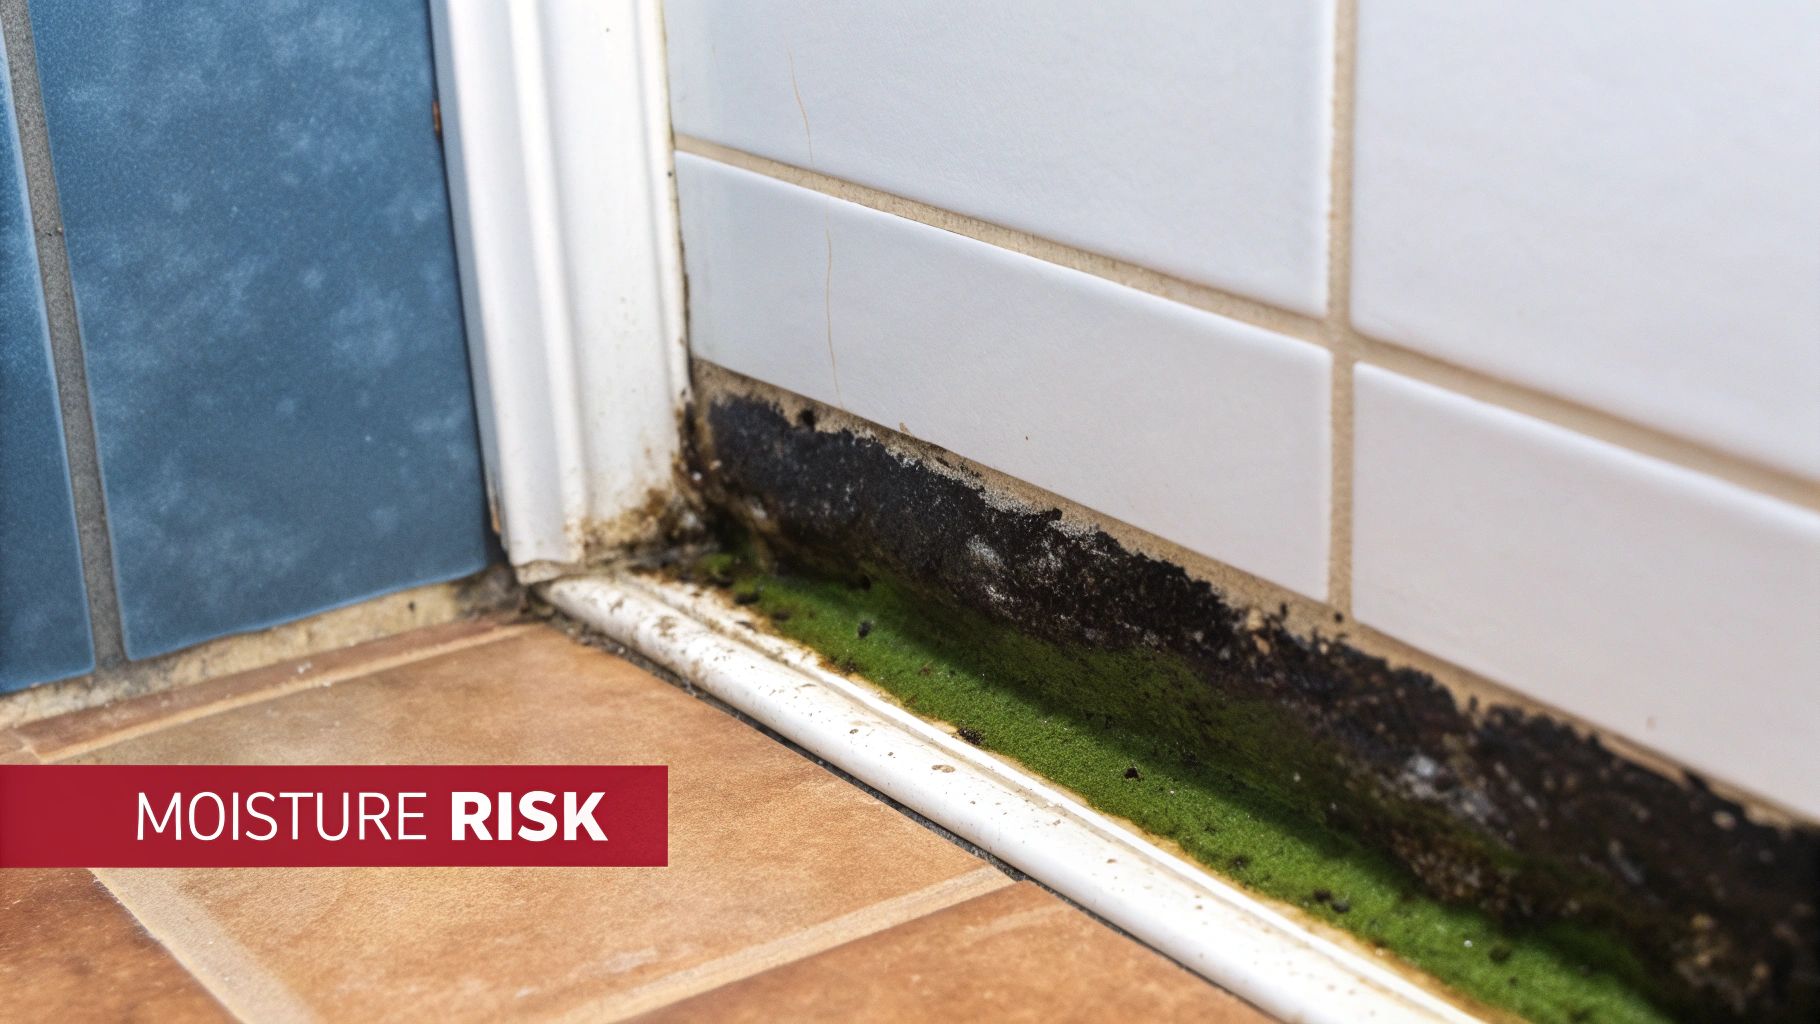
The Moisture Trap You're Creating
Think of it this way: it’s like putting a brand-new roof over an old, leaky one. Sure, it looks better for a little while, but you haven't actually fixed the leak. Any water that eventually finds its way through tiny cracks in the new grout will get stuck between the two layers of tile.
This creates a dark, damp, and stagnant pocket of air—the perfect breeding ground for mold and mildew. That trapped moisture doesn't just hang out, either. It will slowly seep into your wall studs and subfloor, causing wood rot and threatening the structural integrity of your home. Suddenly, your simple cosmetic update has spiraled into a major remediation project.
The real danger is what you can't see. By covering up the original tile, you're essentially sealing in any existing moisture problems, allowing them to fester and grow undetected until the damage becomes severe and costly.
This is exactly why that pre-installation inspection is so non-negotiable. If you see any signs of crumbling grout or failing caulk, you have to assume the original waterproofing has already been compromised.
Understanding the Weight Problem (Structural Load)
The second huge issue is the sheer weight you’re adding. Tile, mortar, and grout are heavy. A typical ceramic tile installation weighs somewhere between 4 to 6 pounds per square foot. When you add a second layer, you're literally doubling that load.
This extra weight puts a tremendous amount of stress on the wall studs. Your home's walls were built to handle one layer of tile, not two. They simply weren't engineered for that kind of load.
- Wall Stud Strain: Over time, the increased load can cause the studs to bow or flex. This can lead to cracks in your new grout lines or, in a worst-case scenario, cause entire sections of tile to pop off the wall.
- Foundation Stress: The cumulative weight from a double-tiled shower can put undue stress on floor joists and even the home's foundation, especially in older homes.
- Awkward Fixtures: The added thickness—often 1/2 inch or more—pushes everything outward. Your showerhead, valve controls, and soap dishes will now be recessed, looking awkward and requiring expensive extenders just to work properly.
This weight problem is a slow-burn disaster. It won't be obvious right after the job is done, but over months or years, the constant strain can cause subtle shifts that ultimately ruin your beautiful new tile. Before you even think about this method, you need a professional to assess whether your home's structure can safely handle the extra load. It’s a critical step to avoid creating a future nightmare.
So, When Does Tiling Over Tile Actually Make Sense?
After running through all the potential pitfalls, you might be wondering if there’s ever a good time to tile over existing shower tile. The answer is yes, absolutely—but only in very specific, near-perfect conditions. This method should never be seen as a band-aid for a failing shower. Instead, think of it as a purely cosmetic upgrade for a shower that's already in fantastic shape.
It’s a bit like giving a classic car a new paint job. You wouldn't dream of spraying fresh paint over rust spots and dents, right? But if the body is solid and straight, a new coat of paint can make it look brand new. Tiling over tile follows the exact same logic: the foundation has to be flawless.
This approach really shines in a few select situations. It’s a fantastic, budget-conscious choice when your current shower is structurally solid, completely level, and has absolutely no signs of water damage, but the tiles themselves are just… dated. We’re talking about those avocado green or funky floral patterns from the 70s—prime candidates for a modern refresh.
The Perfect Candidate for a Tile-Over-Tile Job
What does that ideal scenario look like? If your shower passes every single point on an expert inspection checklist with flying colors, you might just have a green light. A perfect candidate is often a shower that doesn’t see a ton of daily use, like one in a guest bathroom or a secondary bath.
This strategy is also a go-to for homeowners looking to make a quick, high-impact update before putting their house on the market. A fresh, modern tile job can seriously boost a bathroom's appeal to potential buyers without the major time and expense of a full tear-out, offering a great return on your investment.
These aren't just hypotheticals, either. With the tile and terrazzo contracting market expected to reach USD 143.09 billion by 2030, pros are increasingly seeing tile overlays as a practical tool in their toolkit. Industry benchmarks show these projects succeed in about 92% of cases if the existing tile base is sound, which dramatically lowers the risk of failure. For folks in Southwest Michigan with older homes, this can mean sidestepping a costly waterproofing membrane replacement that could easily add thousands to a renovation budget. You can discover more about the tile contracting market and its trends.
When This Method Is the Smart Financial Move
Ultimately, the choice often boils down to a balance of cost, time, and risk. Tiling over tile makes the most sense when your main goal is a speedy aesthetic upgrade on a tight budget.
Think about these common scenarios where it's often the right call:
- Guest Bathrooms: These showers get minimal use, which puts far less long-term stress on the tile and the structure beneath it.
- Pre-Sale Updates: A quick way to modernize a bathroom to catch a buyer's eye without over-investing in a home you're about to sell.
- Purely Cosmetic Refreshes: This is for showers where the only real issue is the color or pattern of the tile, not its physical condition.
Here's the bottom line: tiling over tile is a strategic shortcut, not a one-size-fits-all solution. It works brilliantly when the job is purely cosmetic and the existing installation is in rock-solid condition.
By knowing when to use this method, you can make a smart, practical choice. If your project fits the bill, you can move ahead with confidence. And if it doesn't, you've just saved yourself from a potentially expensive mistake by recognizing that a more thorough approach is the only way to go.
Comparing Your Shower Renovation Options
Figuring out if you can tile over your existing shower is a great start, but it's really just one piece of a much bigger puzzle. To make a smart decision for your home, you need to see the whole picture. Each renovation path offers a different mix of cost, time, and long-term results.
Let's break down the tile-over-tile method and see how it stacks up against the two other main players in the game.
The Gold Standard: A Full Tear-Out
When you hear remodelers talk about the "gold standard," this is what they mean. A full tear-out is exactly what it sounds like—we take everything out, right down to the wall studs, and start completely fresh. It’s definitely the most involved option, but it brings total peace of mind and gives you a blank canvas.
Starting from scratch means we can install a modern, top-of-the-line waterproofing system. This is your chance to rip out that old, questionable moisture barrier and replace it with a new, seamless one. You're basically hitting the reset button on your shower's lifespan. It also opens the door to moving plumbing around, adding built-in niches for your shampoo bottles, or even installing a bench—things you just can't do with an overlay.
A full tear-out isn't just about new tile; it's about building a completely new, warrantied shower system from the inside out. It's the only method that guarantees there are no hidden issues lurking behind the walls.
Yes, this approach costs the most and takes more time. But what you're buying is unmatched durability and a solid boost to your home's value. If this is your forever home, or if you have any inkling that something’s not right behind the current tile, this is the only way to go.
The Quick Fix: Regrouting and Sealing
On the other end of the spectrum is the partial fix. If your tiles themselves are solid but the grout is looking grimy, cracked, or just plain sad, a professional regrouting and sealing can make a world of difference. The process involves carefully grinding out the old grout and applying fresh, high-quality grout, followed by a professional-grade sealer to protect it.
Make no mistake, this is a cosmetic touch-up. It’s the perfect choice for a shower that works perfectly fine but just needs a visual facelift to look clean and modern again. It’s far cheaper and faster than retiling, often knocked out in a single day. The critical thing to remember, though, is that this doesn't solve any hidden waterproofing problems. It just makes the surface look good.
To make sure your shower renovation is handled right from the start and to weigh all your options, it's always a good idea to chat with experienced pros who offer professional bathroom renovation services.
A Head-to-Head Comparison
To really see the trade-offs, it helps to put the options side-by-side. The table below breaks down how these three approaches compare across the factors that matter most to homeowners like you.
Shower Renovation Approaches Compared
| Factor | Tiling Over Tile | Full Tear-Out | Partial Fix (Regrouting) |
|---|---|---|---|
| Estimated Cost | Low to Moderate | High | Very Low |
| Project Timeline | 2-4 Days | 1-2 Weeks+ | 1 Day |
| Long-Term Durability | Moderate (Depends on foundation) | Excellent | Low (Aesthetic fix only) |
| Overall Risk | High (Hidden moisture/structural) | Very Low | Low (Minimal investment) |
So, what's the final verdict? It really comes down to your specific situation. If your current shower is in fantastic shape and you're simply over the 90s-era style, tiling over the top can be a savvy, budget-friendly move.
But if there’s even a shadow of a doubt about the wall's integrity or the waterproofing behind it, a full tear-out is the only path to a beautiful, long-lasting shower you can trust for years to come.
Making the Final Call with a Pro on Your Side
So, now you have a much clearer picture of what's involved in tiling over an existing shower. You know what to look for, what the red flags are, and when this kind of project might actually make sense. But reading a guide is one thing; making the right call for your own home, with your money on the line, is another beast entirely.
The truth is, information alone can't replace the seasoned eye of someone who has seen dozens of these projects succeed—and fail. While your own initial inspection is a great first step, getting a professional's take is the only way to be absolutely sure you aren't just putting a pretty new bandage on a serious underlying problem.
From Good Idea to Getting It Done Right
Here in Southwest Michigan, from Kalamazoo to Portage, we've seen it all at Trademaster Construction. We don't just see a layer of old tile; we see the whole story behind the wall. We know the quirks of the homes in our area and can spot the subtle signs of moisture damage or a failing shower pan that a homeowner might easily overlook.
Making the smartest investment for your home means knowing when to call in an expert. A professional consultation isn't an expense—it's insurance against the catastrophic failure of a compromised shower system.
Think of us as the final checkpoint. We're here to bridge that gap between your DIY assessment and a project you can feel confident about for years to come. We’ll give you the straight "yes" or "no" based on real-world experience, making sure your new shower is built on a solid foundation.
Your Next Step Toward a Flawless Shower
Ultimately, the best decision comes from partnering with an expert who can help you weigh the options for your home, your budget, and what you’re trying to achieve. Whether a tile-over-tile job is a brilliant shortcut or a full tear-out is the only sensible move, we're here to give you clarity and deliver top-notch work.
Ready to get a definitive answer?
- Explore Our Work: See the quality we bring to every bathroom we touch in our Inspiration Gallery.
- Get a Ballpark Estimate: Want a rough idea of the numbers? Our Pricing Tool can help you map out potential costs.
- Schedule a Consultation: The best way to know for sure is to have us put eyes on it. Contact Trademaster Construction today to book a no-obligation chat. Let's figure out the right path for your shower, together.
Got Questions About Tiling Your Shower?
Even the most detailed guides can't cover every specific question that pops up during a real-world project. When it comes to something as tricky as tiling a shower, it’s completely normal to have a few lingering "what ifs." Let's tackle some of the most common questions we hear from homeowners.
What Kind of Mortar Do I Need to Tile Over Old Tile?
This is a big one. Grabbing a standard bag of thin-set mortar is a mistake that will guarantee your project fails. The slick, non-porous surface of existing glazed tile gives standard mortar nothing to grip, and your new tiles will literally fall off the wall.
For a job like this, you have to use a high-performance, polymer-modified thin-set mortar. Think of it as thin-set on steroids. These mortars are packed with special polymer additives that create a powerful chemical bond, almost like an epoxy, allowing them to stick tenaciously to smooth surfaces. Always read the bag—make sure it explicitly says it's approved for bonding to existing tile or other non-porous materials.
Don't skip this. Using the right mortar is the single most critical decision you'll make. The wrong adhesive is the number one reason these tile-over-tile jobs end in disaster.
Will Adding Another Layer of Tile Make My Shower Feel Cramped?
It will definitely shrink the space, but you might not notice it as much as you'd think. A new layer of tile and mortar adds about 3/8 to 1/2 an inch of thickness to each wall. In a typical 3×5 foot shower, you’re looking at losing roughly an inch of width and depth.
The real headache isn't the slightly smaller space—it's how that new thickness messes with everything else.
- Plumbing Fixtures: Your shower valve, tub spout, and shower head will suddenly be sunken into the wall. You'll need to buy special plumbing extenders to bring them out flush with the new surface.
- Shower Doors: That perfectly fitted glass door? It's probably not going to fit anymore. You'll likely need to have it re-measured and potentially replaced.
- The Drain: The shower floor drain will now be sitting below the new tile level, which is a big problem for drainage. An extender will be needed to raise it to the correct height.
How Do I Prep Shiny Tiles So New Ones Will Stick?
Adhesion is the name of the game, and a glossy tile surface is your worst enemy. Before you even think about mixing mortar, you have to rough up that old tile to give the new adhesive something to bite into.
The best way to do this is with an orbital sander and some coarse, 60-grit sandpaper. The mission is simple: scuff every square inch of the old tile until the shine is completely gone. This creates what contractors call a "mechanical profile"—a fancy term for a textured surface that mortar can physically lock onto.
Once the sanding is done, the cleanup is just as critical. Vacuum up all the dust, then wipe everything down with a damp cloth to get the rest. Any dust you leave behind will act as a bond-breaker, sabotaging the whole installation from the start.
Have more questions about your shower remodel in Southwest Michigan? The team at Trademaster Construction has the hands-on experience to give you clear, honest advice for your home. Get in touch with us today to talk about your project.

