
The usual advice is to choose frameless glass for a clean look, then work out the installation. That's backward. A curbless shower door belongs on a shortlist only after you know where the water will drain, how far the waterproofing will extend, where the showerhead will aim, and how much entry space the glass will leave.
For a bathroom remodel in Portage, Kalamazoo, or nearby Southwest Michigan, the best choice isn't necessarily the enclosure with the least metal. It's the one that contains everyday spray without blocking the accessible entrance you removed the curb to create.
Why the Door Alone Does Not Hold Water
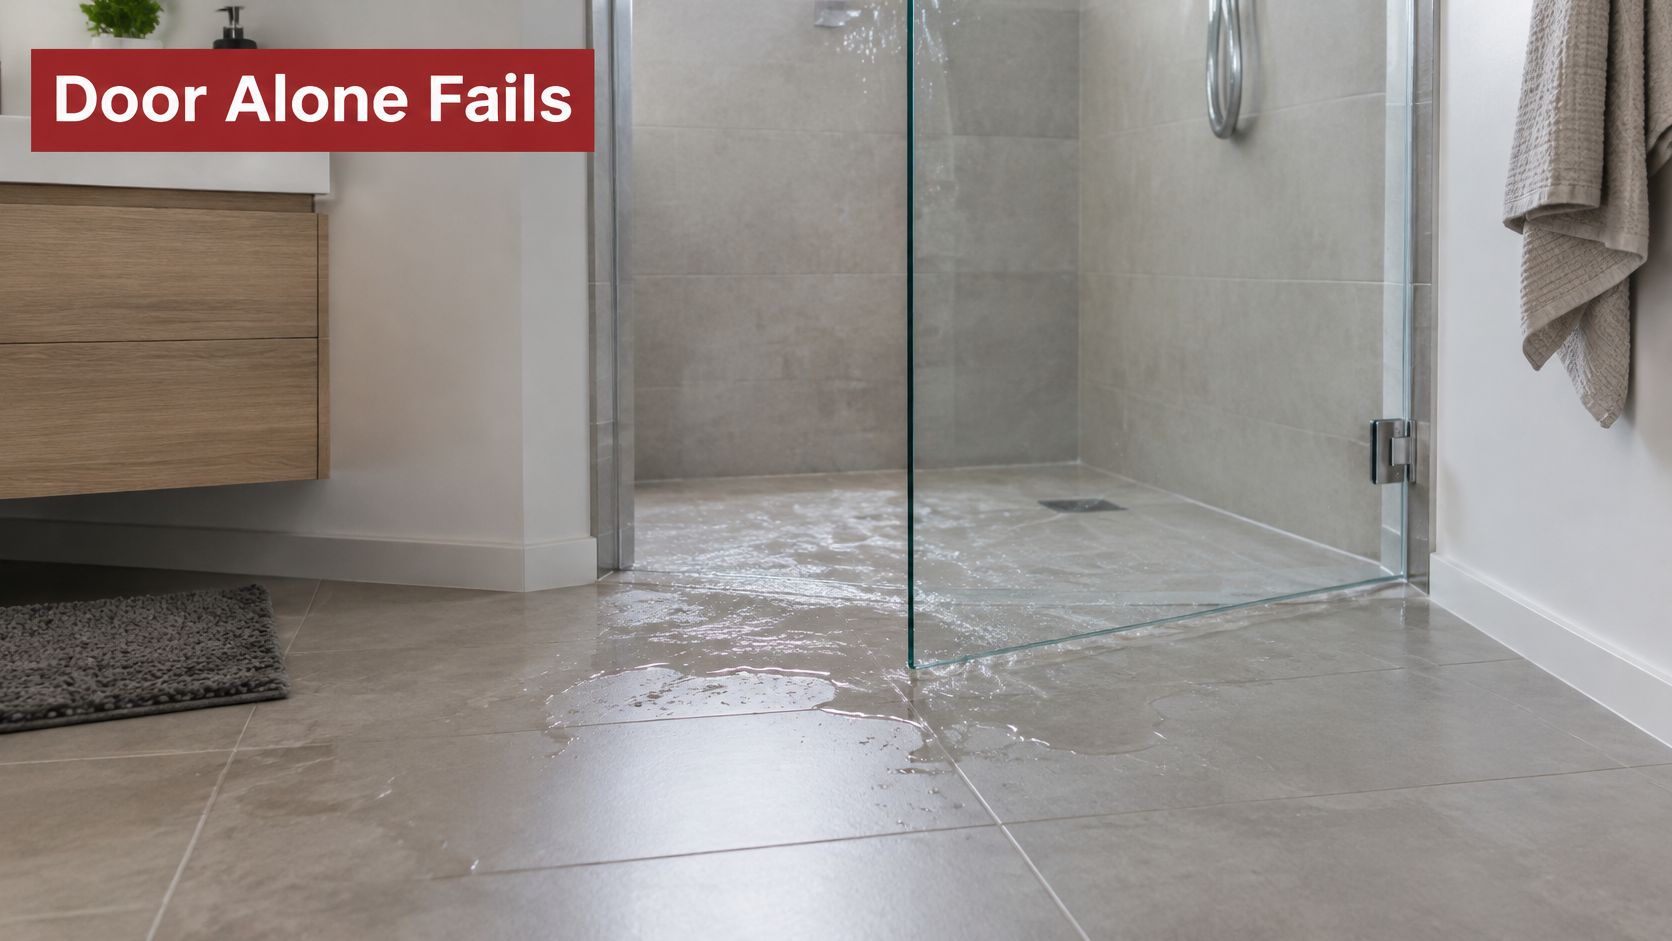
Buying a glass door won't, by itself, stop water from leaving a flush shower. Glass intercepts spray. The floor moves water toward the drain, the drain removes it, and the waterproofing protects construction beneath the tile. If those parts disagree, a better-looking door won't resolve the problem.
The City of San Diego's curbless-shower guidance identifies the missing threshold as a water-control challenge and emphasizes enclosure design that prevents splash and leakage onto the surrounding floor. That means the glass quote needs to account for the wet-area floor, not just the opening between walls.
Water escaping past the glass is an assembly problem worth investigating before changing the door.
The tests that matter before appearance
The candidate menu is frameless hinged, semi-frameless hinged, sliding, pivot, and fixed panel. Before choosing among them, apply these tests:
- Containment: Does the arrangement keep direct splash inside and retain the warmth you want? An open fixed-panel arrangement won't hold steam like a closed enclosure.
- Access: Can the intended user enter comfortably, with the moving door open and its panels parked, without losing the wheelchair, walker, or standing space nearby?
A fixed panel can fail containment in a narrow bathroom. A hinged door can fail access if its swing occupies the only clear floor beside the shower.
Buying rule: Price the glass and the waterproofed floor as one assembly, even when different trades install them.
Inspectors may require waterproofing beyond what an enclosure supplier includes. Local code determines the final wet-area requirements, so settle those before treating a glass-only quotation as the project budget.
Five Curbless Shower Door Types Compared
Curbless shower door types at a glance
| Door type | Water control | Space it needs | Hardware burden | Usual fit |
|---|---|---|---|---|
| Frameless hinged | Strong when full height with a sweep | Outward or inward swing arc | Heavy glass on wall hinges | Primary baths with a clear swing path |
| Semi-frameless hinged | Strong; metal helps the glass stay aligned | Swing arc with a slimmer sightline | Hinges plus a jamb or header | Remodels that want support without a full frame |
| Sliding bypass | Moderate; bottom track is a potential leak line | No swing; needs panel overlap | Rollers, header, and a guide | Tight halls and tub-to-shower swaps |
| Pivot | Good if the meeting edge seals | Arc inside, outside, or both | Top and bottom pivots | Entries with a weak side-wall hinge location |
| Fixed panel | Weakest; relies on distance and aim | Open walk-through, no moving leaf | Clamps or a bottom channel only | Wide showers with the head aimed away |
Leave this comparison with a pair of finalists, rather than declaring a universal winner. Each form solves a different constraint, and a practical room layout can eliminate an attractive option quickly.
A frameless hinged door uses tempered glass on hinges with very little surrounding metal. A semi-frameless hinged door adds a jamb or header to support alignment while keeping much of the glass visually open. Both need a real parking place for the moving leaf.
A sliding bypass door moves overlapping panels along a track instead of swinging into the room. A pivot door turns on hardware near the top and bottom, allowing a different support arrangement where a side wall isn't a suitable hinge location. A fixed panel doesn't move at all; users enter through the gap beside it.
Read the choices through practical contrasts
Water comes first. A door that closes across the opening generally controls splash better than an uncovered gap. Don't mistake minimal hardware for better performance, and don't assume a bottom guide or track automatically forms a watertight threshold.
Space comes next. Sliding glass avoids a swing arc, while a generously sized open entrance avoids a moving leaf altogether. A hinged or pivot door needs clearance not only to open, but also to let someone approach the controls, dry off, and reach a towel.
Upkeep is the final contrast. Fewer rollers and sweeps mean fewer moving or flexible parts to clean and replace. Fixed glass simplifies hardware maintenance, but that advantage disappears if someone must wipe the bathroom floor after every shower.
Match the finalist to the room
- Primary bathroom: If the open leaf would cross the vanity path, drop the wide hinged option rather than expecting everyone to squeeze past it.
- Long shower: With the showerhead on the far wall and the entrance outside the active spray zone, a fixed panel can be practical.
- Narrow hall bathroom: Sliding glass often suits the circulation better, provided the remaining opening accommodates the intended user.
When comparing quotations, the budget advice from Western Bathroom Renovations is a useful companion for organizing the broader remodel scope. Keep the room alterations separate from enclosure preferences so a simpler glass choice doesn't conceal more expensive construction.
Doors for Wheelchair and Aging in Place
The following planning dimensions come from the U.S. Access Board's ADA standards: a standard roll-in shower needs a clear interior of at least 30 inches by 60 inches, measured at the center points of opposing sides, an entry at least 60 inches wide across the face, and a threshold no higher than one-half inch, or 13 mm.
Access limits that change the door
| Planning limit | Figure | What the door must do |
|---|---|---|
| Clear interior | At least 30 in by 60 in at center points | Glass cannot shrink the measured interior |
| Entry across the face | At least 60 in wide | A parked panel or return cannot narrow it |
| Threshold | 1/2 in (13 mm) maximum | Use a flush or truly low-profile transition |
| Open and closed position | Entry stays usable either way | Swing or stack must clear the transfer path |
These are standard roll-in planning limits, not proof that every curbless residential bathroom is ADA compliant. Removing a curb addresses a level change; it doesn't establish that the whole bathroom works for a wheelchair user.
Check what the door removes from the opening
Sliding glass often looks like the access choice because it doesn't swing into the approach. But a conventional bypass enclosure leaves an overlapping panel across part of its overall width. A nominally wide enclosure can therefore provide a much narrower usable entrance.
For wheelchair access, reject any sliding arrangement whose parked glass or track reduces the required clear face. A wider overall enclosure or a different configuration may be necessary.
A hinged or pivot leaf can work when its open position leaves both the entrance and adjacent clear floor available. Trace the entire swing on the floor with painter's tape, including the handle, rather than measuring only the closed door.
A fixed panel can suit a walker user if the remaining gap is generous and the showerhead doesn't spray through it. It isn't automatically suitable for a standard roll-in shower because there's no moving door.
Plan for the person using it
A wheelchair user needs an unobstructed approach and a place for the door to park outside the transfer route. Someone should be able to operate the door without backing into a vanity, toilet, or wall.
A household planning to age in place benefits from preserving that same freedom of movement before a mobility aid becomes necessary. A small raised track or a door blocking the only standing position can undermine an otherwise flush entrance.
For general maneuvering, the Access Board's accessibility guidance also identifies clear floor space of at least 30 by 48 inches. Record the finished entry width, available floor along the swing arc, and distance from the showerhead to the glass before shopping.
Measure the usable opening with the glass parked, not the wall-to-wall opening before installation.
These figures provide a baseline. The local residential building official may apply additional requirements, and the layout still needs to suit the individual user.
Glass Seals and Slope That Keep Water In
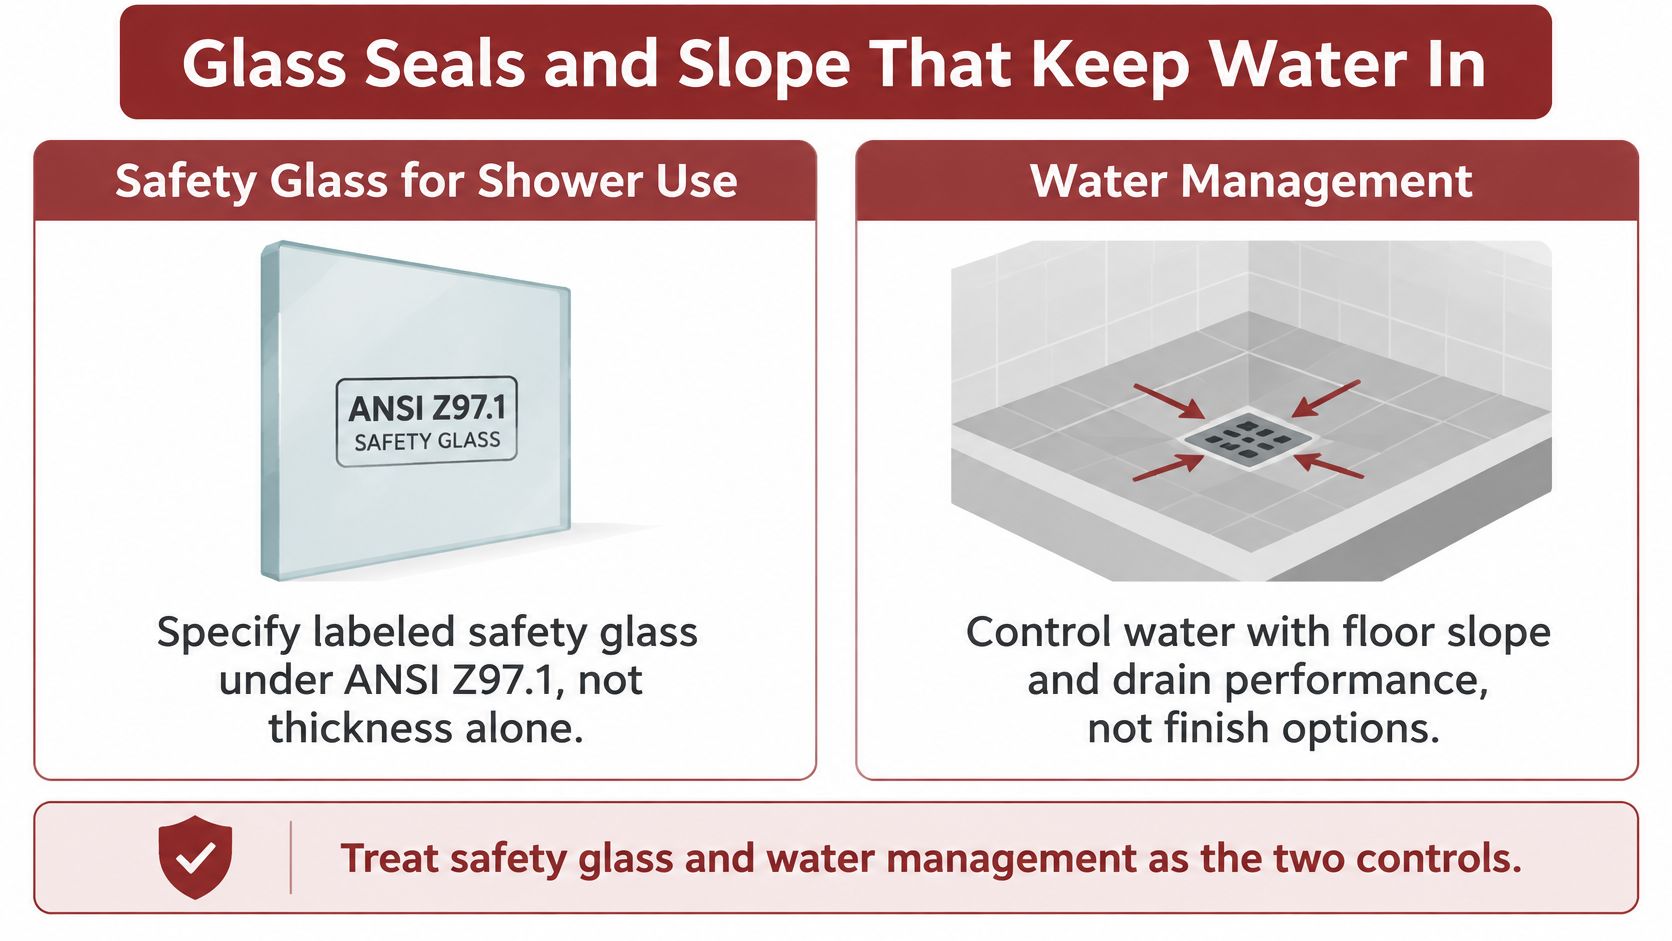
Specify labeled safety glass for shower use, not glass selected by thickness or appearance alone. The federal architectural-glazing regulations establish safety-testing requirements for covered glazing and identify ANSI Z97.1 as a recognized testing standard.
Tempered glass is common in shower enclosures. Laminated options can retain fragments after breakage, but the selected product must be appropriate for the enclosure and its hardware. Neither a clear appearance nor a substantial feel confirms that the assembly is correctly specified.
Treat glass safety and drainage as separate controls that both need attention.
Match the hardware to the panel
Hinges and pivots must be rated for the selected panel's weight and dimensions. The installer also needs suitable backing, compatible fasteners, and an attachment method that protects the waterproofing.
Don't compensate for a questionable attachment with extra sealant. Sealant manages designated joints; it doesn't replace structural support or make mismatched hardware safe.
For the wet floor, use this practical design checkpoint:
Approximately a quarter-inch of fall per foot toward the drain is a common shower-floor benchmark. If the existing floor sends water toward the entrance, treat the work as a floor redesign, not merely a door upgrade.
That benchmark isn't a quotation from the glazing regulation or a substitute for an approved drainage design. The shower's drainage slope also needs coordination with the flatter maneuvering areas outside it.
Make the seals agree with the floor
A full-height hinged or pivot door generally contains splash and warmth better than an open panel. It still needs a sweep that contacts the intended surface without dragging, folding over, or leaving a gap at the low corner.
Check the whole assembly:
- Slope and drain capacity: Water must reach the drain, and the drain must handle the shower's operating flow.
- Opening width and panel placement: The uncovered area should sit outside the main splash path.
- Seals and alignment: Meeting edges should close consistently without forcing the glass.
- Showerhead direction: Aim spray toward a protected wall or glass surface, not directly through the entrance.
A fixed panel needs more separation between the bathing position and the gap. Include water that bounces off a person's shoulders, not just the unobstructed showerhead stream.
For budgeting around these underlying works, the budget advice from Elite Bathroom Renovations Melbourne can help frame the distinction between visible finishes and the construction beneath them. It isn't a Southwest Michigan price benchmark.
This installation video offers another visual reference when discussing the assembly with an installer.
Finish with a controlled spray test after the enclosure is installed and sealants have cured. Run the head in normal use, then challenge the opening with controlled spray and inspect for standing water outside, splash beyond the panel, and drips beneath the sweep. Identify the route before deciding whether the correction belongs at the seal, glass, showerhead, or floor.
Floor Buildup Drain and Panel Layout
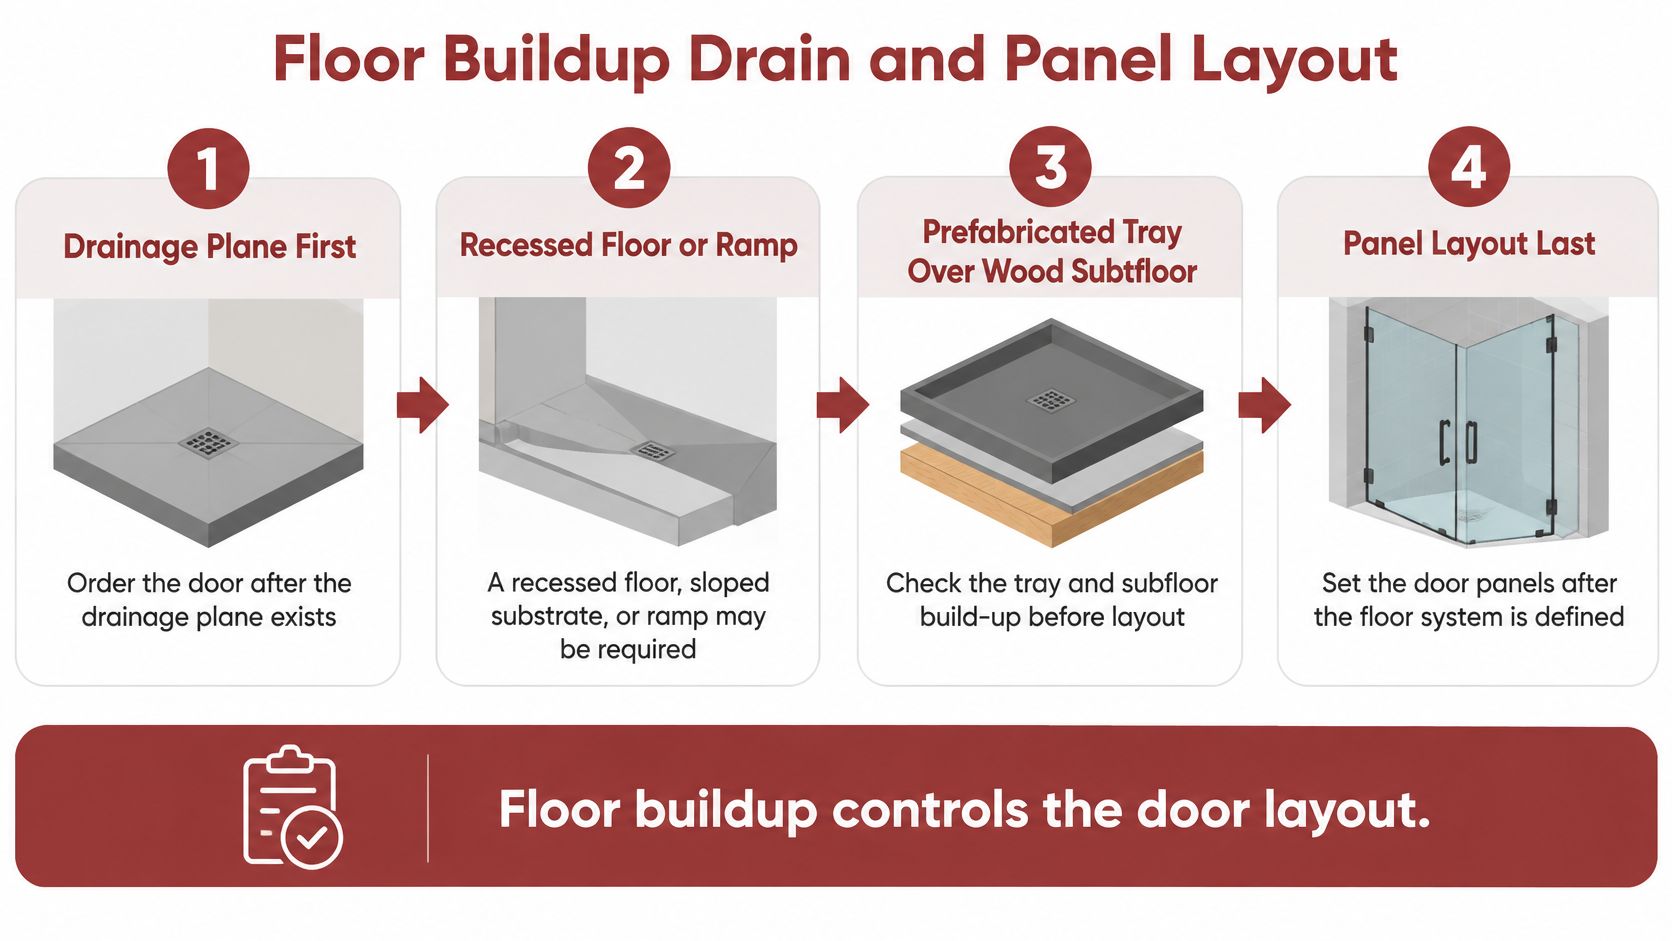
Set the floor and drainage layout before choosing the glass. A preliminary enclosure plan helps coordinate construction, but take final glass measurements only after the relevant finished surfaces are in place.
Curbless construction may require a recessed floor, sloped substrate, or ramp. For a prefabricated tray over a wood subfloor, Schluter's curbless installation detail describes outside buildup using 5/8-inch or 3/4-inch plywood or OSB, depending on the assembly. Floor elevations and drainage determine where a door or fixed panel can contain water.
Follow the construction sequence
Confirm structure and doorway conditions. Check joist direction, drain routing, subfloor condition, and available doorway height. Don't cut structural framing to make a selected tray fit.
Establish the recess or outside buildup. Raising the bathroom floor may resolve the shower transition but create a trip at the hall doorway. Draw finished elevations through both entrances before approving the assembly.
Choose the drain and slope direction. A point drain and a linear drain create different tile planes. Resolve those planes before setting the glass line.
Define the waterproofing reach beyond the active wet zone. Plan the membrane's termination and compatible connections at walls, corners, and penetrations. The edge should not be an improvised strip beneath the door.
Locate panels and seals on the drainage layout. Keep the receiving low side within the contained wet area. A sweep should not have to bridge an abrupt change in floor angle.
Test drainage and waterproofing at the appropriate construction stages. After installation, spray-test the finished enclosure before signing off the hardware.
Connect the drain to the glass line
Schluter's explanation of curbless drainage distinguishes a point drain, which needs slope from four directions, from a linear drain, which allows the floor to pitch primarily in one direction. The intersecting planes around a point drain can complicate large-format tile and create awkward transitions near a door.
A linear drain can sit along a wall or near the entry, but its location affects where the panel and sweep should land. Installing a linear shower drain involves construction decisions worth resolving before committing to a drain position.
Waterproofing must extend far enough to protect the surrounding floor, but the required reach varies by jurisdiction. Ask the local building official to confirm the required extent before installing the membrane, then coordinate that boundary with the drain and glass layout.
Benches, shelves, and window sills also need to pitch toward the drain. A correctly sloped main floor cannot prevent water from collecting on a flat sill or entering an inadequately detailed wall connection. A curbless shower door is a containment system, so its layout depends on the floor slope, drain, waterproofed reach, spray direction, and opening width before glass is chosen.
Cost and Maintenance Trade-Offs
A glass quote and a curbless conversion quote describe different purchases. Fixr estimated a curbless shower conversion at $750 to $3,000 in 2025, as reported by Boise Bath, but that range isn't a price for a custom frameless enclosure by itself or a complete local remodel proposal.
Use relative comparisons to narrow the glass options, then price the actual floor and enclosure together.
Relative cost and lifetime drivers by door
| Door type | Relative first cost | Lifetime cost driver |
|---|---|---|
| Frameless hinged | Highest | Hinge sag and full glass replacement if broken |
| Semi-frameless | Mid to high | Finish wear on exposed metal in hard water |
| Sliding bypass | Mid | Roller and track cleaning, roller replacement |
| Pivot | Mid to high | Pivot wear if the opening is out of plumb |
| Fixed panel | Lowest hardware | Extra waterproofing if spray escapes |
These are planning comparisons, not guaranteed rankings for every quotation. A large custom fixed panel can cost more than a modest standard door, and unusual openings can change fabrication and installation costs substantially.
Separate purchase price from ownership work
Frameless hinged glass carries substantial panel and hinge demands. If the leaf drops or begins contacting another surface, stop using it until the installer checks the attachment and alignment. Don't keep tightening hardware against glass without the manufacturer's procedure.
Semi-frameless construction adds exposed metal that needs cleaning, particularly where mineral deposits collect. Sliding doors usually demand the most routine attention around rollers, guides, and overlapping edges; accumulated soap and debris can interfere with movement.
Pivot hardware needs a correctly aligned opening. A door that must be forced into position puts unnecessary stress on its moving parts.
A fixed panel avoids most moving-hardware costs, but it can create the largest correction bill if insufficient coverage sends water beyond the prepared floor. Adding more glass later may also require revisiting the entry arrangement.
Build a complete scope
Keep these items together when comparing project proposals:
- Enclosure: Glass, rated hardware, sweeps, seals, and installation.
- Floor preparation: Recessing or buildup, structural coordination, and doorway transitions.
- Water management: Drain changes, waterproofing beyond the shower, and required testing.
- Tile work: Cuts that follow the slope, finished edges, and connections to adjacent surfaces.
Clean glass with products approved for its coating, and use a soft brush to clear guides and tracks. Abrasive pads can damage finishes, while aggressive cleaners may be incompatible with seals.
The cheapest panel on an unprepared floor can become the expensive option. A useful estimate captures the complete assembly, including work that won't be visible after the glass is installed.
Choose a Door and Estimate the Remodel
Choose a sliding bypass door when the room is tight, but only if the parked panels preserve the entry required for the intended user; standard overlapping glass isn't automatically suitable for a roll-in layout. Choose frameless or semi-frameless hinged glass when splash and warmth matter and the leaf has somewhere safe to park, or consider a pivot where the side-wall hinge location is unsuitable and the alternate supports can carry it. Choose a fixed panel only when a broad shower, protected opening, and showerhead aimed toward a wall make an uncovered entrance practical.
Prefer semi-frameless over frameless when supported alignment and a potentially lower glass price matter more than the bare-glass appearance. Ask for comparable scopes so differences in hardware, installation, and floor work aren't hidden behind the style labels.
Order the door from a designed, sloped, waterproofed floor plan, not from a glass photo.
Turn the shortlist into a project estimate
Write down the preferred enclosure and an acceptable alternative. Add the intended user's access needs, proposed drain location, existing doorway transition, and any uncertainty about the floor structure.
Put that scope into the Trademaster Construction Instant Pricing Tool for a ballpark bathroom remodeling estimate. Include the flush entry, drain changes, floor buildup, and glass together so the initial budget reflects the project rather than the enclosure alone.
Our tool provides instant online remodeling estimates for homeowners in Portage and the surrounding Kalamazoo area. Use the result as a starting point before a design conversation, not as authorization to order glass.
Before purchasing hardware, confirm the finished entry, slope direction, support locations, and full door swing on site. A layout that passes those checks gives the installer something buildable and gives the homeowner a shower that's easier to live with.
Trademaster Construction offers full design-build bathroom remodeling across Southwest Michigan, coordinating the floor, waterproofing, tile, and enclosure as a complete project. Visit us to discuss your curbless shower shortlist and turn your initial estimate into a customized plan, backed by our 5-year workmanship warranty and a prompt response if issues arise.

