
The most popular advice about custom tile installation is to choose a tile you love, then find someone to install it. That's backward. Start with the floor or wall assembly, the moisture exposure, and the preparation it needs. Those decisions determine whether your tile stays bonded, drains properly, and survives normal movement.
For homeowners in Portage, Kalamazoo, and nearby communities, the expensive surprises usually aren't decorative. They're a floor that needs flattening, a shower drain that sits too high, or a quote that leaves waterproofing undefined. Pay for the hidden work first, then choose a finish and layout that fit the remaining budget.
Tile Types and Where Each One Performs
Tile families by water absorption and best location
| Tile type | Water absorption | Best locations | Watch for |
|---|---|---|---|
| Porcelain | Check the published porcelain classification and absorption specification | Floors, showers, wet walls | Dense, heavy pieces need appropriate mortar, troweling, and substrate preparation |
| Glazed ceramic | Higher absorption in many bodies; check the grade | Backsplashes, dry walls, approved light-traffic floors | Wall tile isn't automatically approved for heavy traffic or wet floors |
| Natural stone (marble, travertine, slate) | Stone-specific; many products are absorbent | Approved shower walls with suitable care, feature walls | Acid sensitivity and sealing requirements differ by stone |
| Glass mosaic | Very low absorption through the glass face | Niches, accents, backsplashes | Substrate flaws and setting marks can show; sheets must sit flat |
| Cement tile | High absorption unless protected appropriately | Entries, decorative floors approved by the manufacturer | Needs sealing; color and pattern change from piece to piece |
Water absorption is the first screening question, not the complete approval test. Check the product's published absorption information alongside its wet-area and floor-use ratings. A tile can resist water yet have a finish that's unsuitable under wet feet.
The available choices are extensive. Grand View Research's ceramic-tile market overview describes applications across floors, walls, residential buildings, and commercial spaces. That breadth is useful, but it also means showroom neighbors aren't necessarily interchangeable products.
Compare actual samples rather than relying on screen colors.
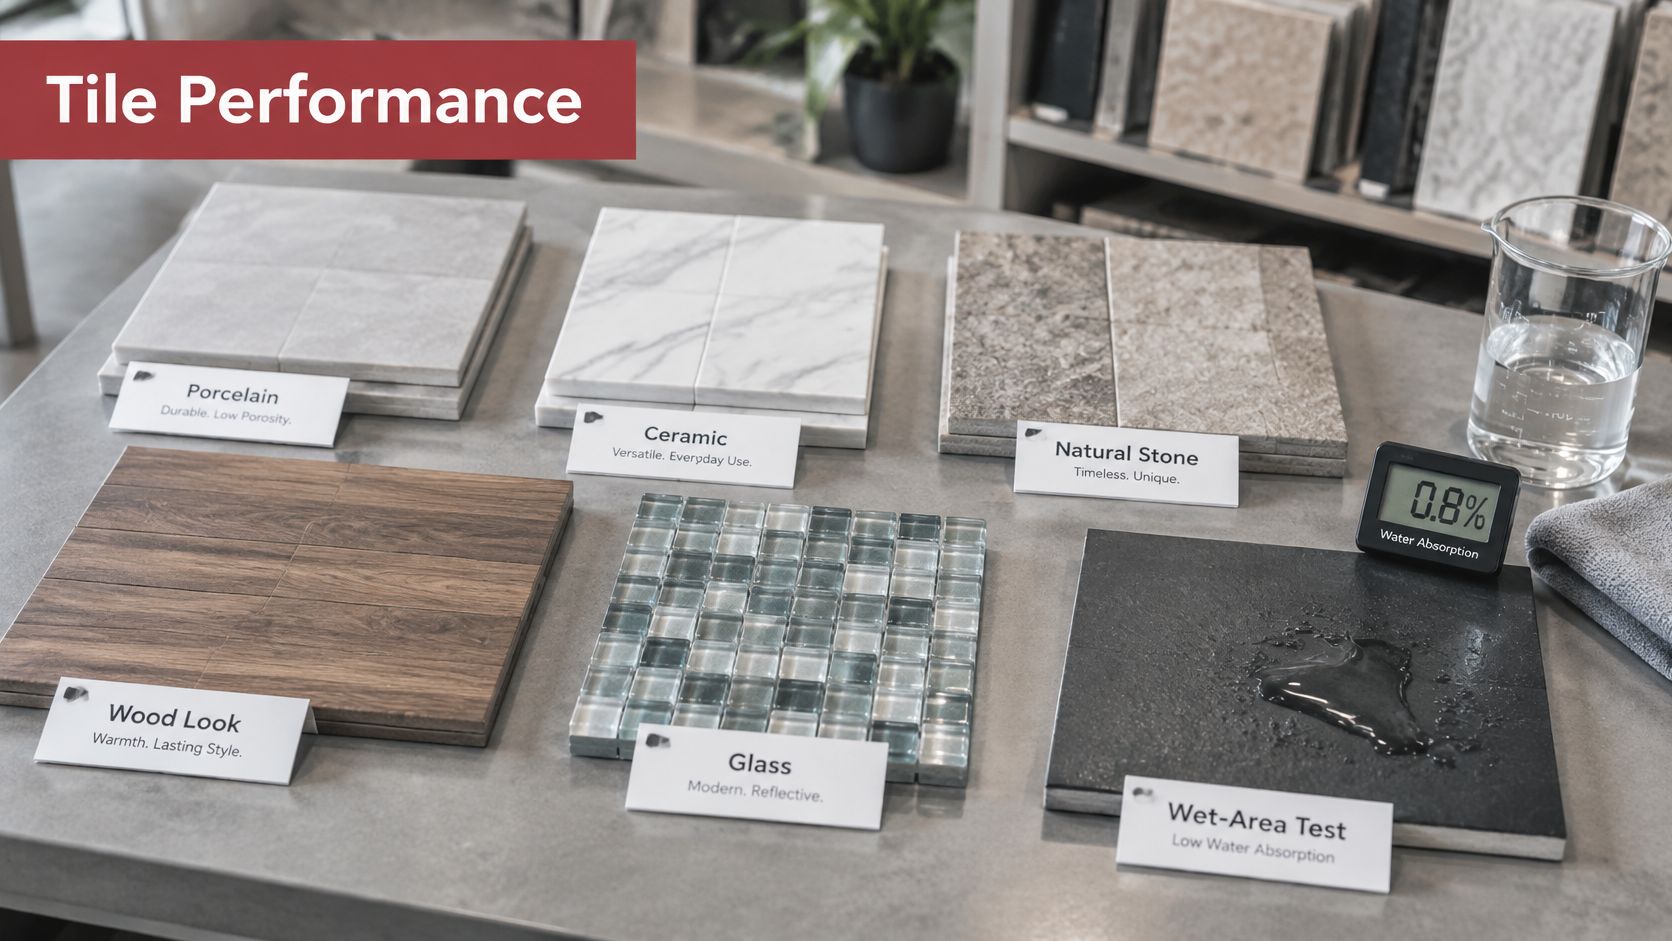
Match the material to the maintenance
Porcelain is a practical starting point for wet-area selection, provided the specific product is approved for the location. Glazed ceramic often makes more sense on a backsplash, where ease of cleaning matters more than floor traffic.
Stone and cement tile ask more of the homeowner. Sealing helps manage absorption, but it doesn't make acid-sensitive stone resistant to acidic cleaners. Glass offers depth and reflected light, yet exposes careless mortar application more readily than an opaque tile.
Before ordering:
- Read the specification sheet. Confirm absorption, intended location, and cleaning restrictions.
- Match the exposure. Consider wet feet, tracked-in grit, cooking residue, and household traffic.
- Test the sample in place. View it under the room's daylight and evening lighting.
Layout Patterns and Their Material Waste
Layout patterns and their typical waste allowance
| Layout | Typical waste allowance | Labor effect |
|---|---|---|
| Straight grid | Calculate perimeter cuts, breakage, and retained repair stock | Usually simplest; exposes alignment and wall errors |
| Running bond (brick) | Calculate offset cuts and reusable offcuts | Starting position and permitted offset matter |
| Diagonal | Allow for angled perimeter cuts throughout the room | More measuring and angled cutting |
| Herringbone | Calculate from a scaled layout with border cuts | Repeated alignment checks and precision cuts |
| Chevron | Include unusable angled ends and replacement pieces | Angles must meet consistently |
| Basketweave | Count complete pattern repeats and edge infill | Mixed sizes require careful sequencing |
A waste allowance is an ordering calculation, not a universal percentage. Room shape, tile dimensions, pattern orientation, and whether offcuts can be reused all change the quantity. Ask for a layout-based takeoff rather than accepting the same allowance for every room.
Straight grid gives the installer a clear reference, but long grout lines make crooked walls obvious. Running bond interrupts those lines, although it won't correct uneven tile edges or an unsuitable offset. Diagonal layouts redirect the eye across the room and create more demanding perimeter work.
Herringbone and chevron deserve a dry layout before installation. A small alignment error can become conspicuous across repeated joints. Basketweave works well when the selected sizes fit the intended repeat, including the grout joints.
Center the view, not just the room
Measure the longest useful reference wall, establish a centerline, and dry-lay tiles toward opposing edges. Then adjust the starting position to avoid narrow slivers at doorways, shower entries, and other prominent boundaries.
Ordering rule: Approve the pattern and edge cuts before buying the full tile quantity.
Geometric centering isn't always visual centering. A vanity, island, or doorway may deserve priority over a wall that furniture will hide. In a small room with an intricate pattern, budget for careful cutting and setup, not merely additional tile.
How to Prepare a Flat, Bonded Substrate
Custom tile is only as good as what sits beneath it. Large-format tile is particularly unforgiving, because a rigid piece can't follow a hollow or hump without creating bonding and alignment problems.
Allowable substrate variation by tile size
| Tile size | Variation over 10 ft | Variation over a short span |
|---|---|---|
| At least one edge 15 in or longer | 1/8 in | 1/16 in over 24 in |
| All edges shorter than 15 in | 1/4 in | 1/16 in over 12 in |
These limits are identified in Stone World's explanation of ANSI substrate requirements: tile with an edge 15 inches or longer requires no more than 1/8 inch variation over 10 feet and 1/16 inch over 24 inches, while smaller tile allows 1/4 inch over 10 feet and 1/16 inch over 12 inches.
Use this preparation sequence before setting begins.
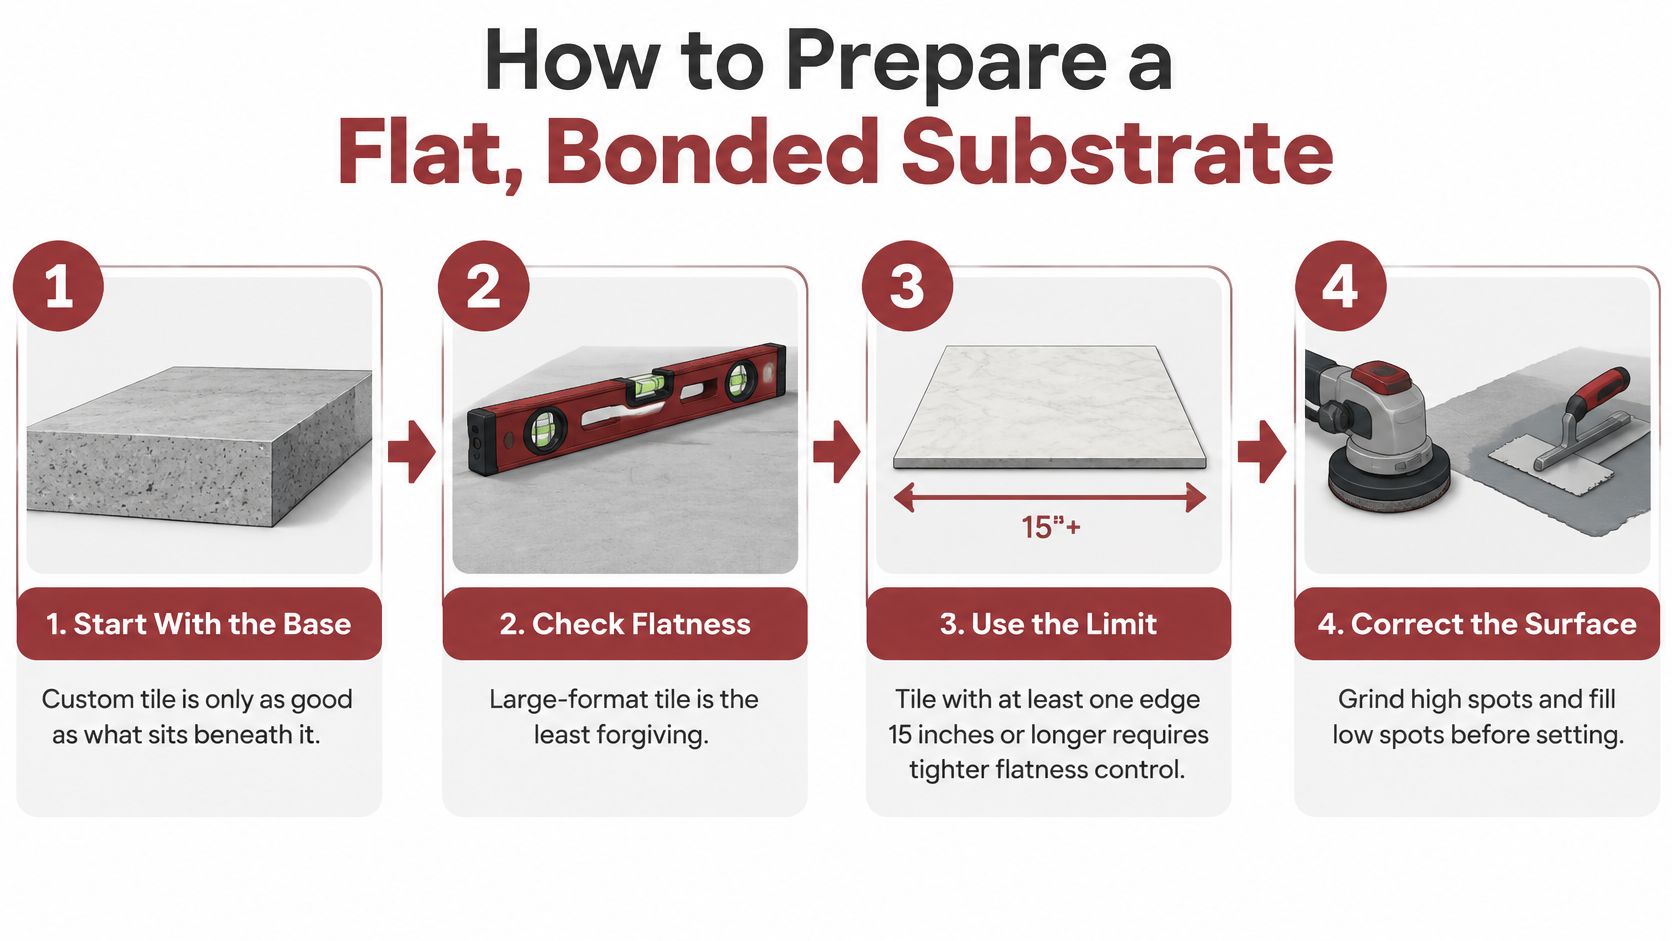
Prepare first, then prove the bond
Confirm structural suitability. Check the subfloor, fastening, damage, and support. A flat but flexing floor still needs correction; adding backer board isn't a substitute for adequate structure.
Measure with a long straightedge. Sweep it across the installation area in several directions and mark gaps and high spots. Don't confuse level with flat. A consistently sloping floor can be flat, while a level-looking floor can contain abrupt humps.
Correct the surface. Grind suitable high spots and fill low areas with a compatible patching or leveling product. Don't plan to make substantial corrections while setting tile.
Prepare for adhesion. Remove contaminants and unstable adhesive, then use the primer or surface treatment required by the chosen products. For demolition planning, Canes Cleaners' subfloor-safe removal guide offers a useful starting point. Identify suspect old materials before disturbing them.
Apply mortar for the required coverage. Stone World's installation guidance identifies at least 95% coverage in wet and exterior areas and 80% in dry interiors. Comb consistent directional ridges and move the tile across them to collapse the mortar.
Lift tiles to verify. Inspect the backs early and as conditions change. A large trowel alone doesn't prove coverage; adjust technique when ridges remain uncollapsed.
The ANSI installation standards overview distinguishes installation practices from material-performance requirements. Both matter: approved mortar can't compensate for poor preparation.
This installation video provides additional visual context for the work.
Ask any bidding contractor: Who verifies flatness before installation, and what measured result will be recorded?
Waterproofing and Movement Joints That Prevent Failure
Grout joints aren't waterproof. A shower needs a continuous water-management assembly beneath the tile, not a promise that premium grout or sealer will stop infiltration.
Custom Building Products' shower waterproofing guidance describes bonded membranes immediately beneath the setting mortar and identifies ANSI A118.10 for membranes used in recognized TCNA shower methods. The important purchase is the compatible assembly, including its drain connection, seams, corners, and penetrations.
The cross-section makes the distinction between the finish and the water barrier easier to see.
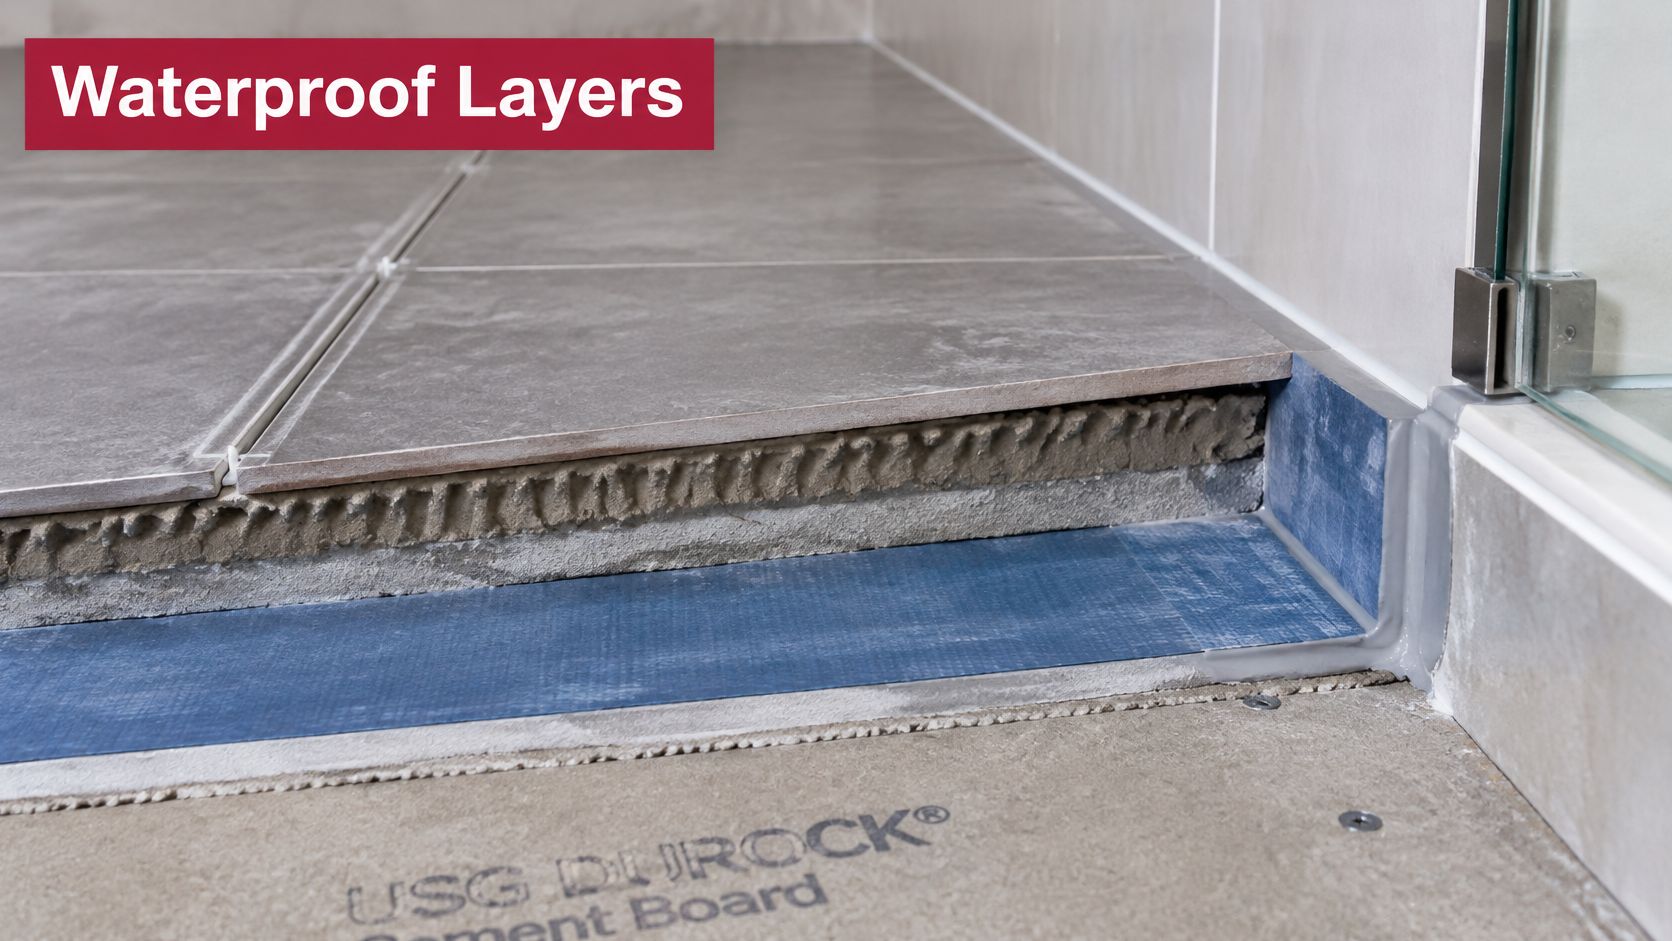
Build one compatible waterproofing assembly
Choose a membrane system and use its specified reinforcing, sealants, and drain details. With sheet membranes, pay attention to seams and overlaps. With liquid-applied products, verify the required application thickness rather than judging coverage by color.
Treat niches, benches, curbs, and pipe openings as water-control details before they become tile details. Mixing unrelated components can leave compatibility and warranty questions unresolved, even when every package says it's suitable for wet areas.
Flood-test the receptor before covering it. Agree on the procedure, required curing, and applicable inspection requirements, then record the result and photograph the assembly. Tile shouldn't conceal an unverified drain connection.
Leave room for movement
Tile and its supporting materials don't move identically. The TCNA's movement-accommodation guidance explains that even a small interior installation needs provision for expansion and contraction; a concealed perimeter gap may be sufficient in a small dry room.
For larger installations, Construction Specifier's review of tile movement-joint standards identifies typical interior spacing of 20 to 25 feet in each direction, reduced to 8 to 12 feet with direct sunlight or substantial moisture. It also explains that underlying concrete control joints must continue through the assembly and that the tile joint shouldn't be narrower than the substrate joint.
A movement joint filled solid with grout is no longer doing the job it was designed to do.
Keep designated joints flexible with the specified sealant or movement profile. For later care of exposed shower caulk, home care tips from Aquastar Cleaning Services provide a useful maintenance companion, not a substitute for concealed waterproofing.
Before signing, get written answers:
- Membrane: Which system and drain connection are included?
- Testing: How will the flood test be performed and documented?
- Movement: Where will flexible joints be located?
- Warranty: Which installation or product exclusions apply?
Planning a Curbless or Roll-In Shower
A curbless shower's main challenge is fitting usable entry space, drainage, and floor slope into the existing structure. Accessibility needs and aging household members are common reasons to consider a curbless or low-curb design, but removing the curb alone does not make a shower accessible.
Start by mapping the entry, drain, and surrounding bathroom floor.
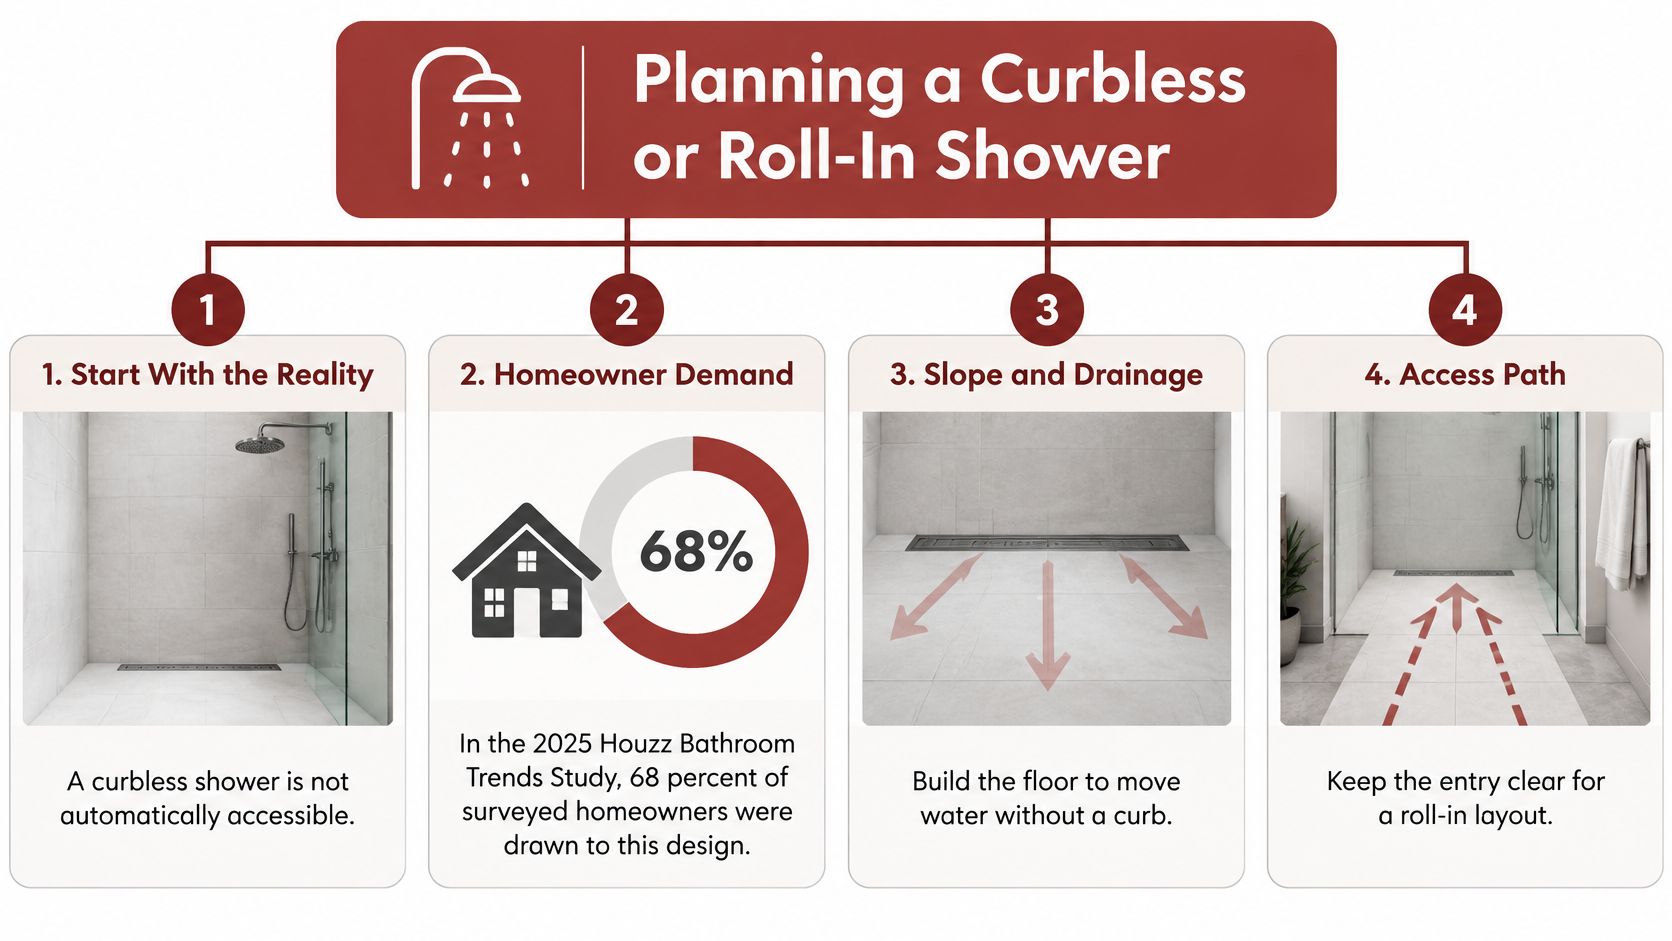
Work backward from the drain
The City of San Diego curbless-shower guide gives a typical finished slope of approximately 1/8 to 3/16 inch per foot, or roughly 1/2 to 3/4 inch of fall over a 4-foot run. Treat this as planning guidance from that jurisdiction, then confirm the requirements for a Southwest Michigan project.
The floor assembly must accommodate the tile, mortar, drain height, and transitions. A linear drain can simplify the slope geometry, but it still needs enough elevation difference for water to reach it.
If the space below the finished floor is limited, assess a recessed assembly, an engineered mortar bed, or a ramped entry. On an existing slab, check whether the drain can be relocated or recessed before committing to a flush threshold. Cutting structural members to solve a finish-height conflict can create a more serious problem than a small threshold.
Design for the person using it
The U.S. Access Board's ADA standards specify a standard roll-in compartment at least 30 inches wide by 60 inches deep, measured at the center points of opposing sides, with a 60-inch-wide entry. These dimensions offer a reference, not a complete accessibility specification. Determine separately whether the standards apply to the home and the intended use.
Resolve the main dimensions in this order:
- Drain elevation: Establish the connection and available structural depth.
- Waterproofing plane: Keep drainage continuous beneath the finish.
- Finished floor: Coordinate shower, bathroom, and doorway elevations.
- Entry condition: Set the maximum lip and keep the approach clear.
Small-format tile can follow changes in slope more readily than large pieces. Plan grab-bar blocking before closing the walls, and check the actual approach and turning needs of the person using the shower. Let those needs set the geometry; choose the finish around them.
What Drives Your Custom Tile Budget
The tile price isn't the project price. An affordable tile can still require extensive preparation, while an expensive tile installed over a suitable base may involve fewer hidden corrections. Compare the installed scope, not just the material's shelf price.
Custom tile cost drivers and the budget line they affect
| Cost driver | Typical effect | Budget line |
|---|---|---|
| Tile material | Sets the per-square-foot purchase price; large format adds handling | Material |
| Substrate correction | Patching or grinding to meet flatness limits | Preparation labor |
| Waterproofing system | Membrane, reinforcing, drain integration, and flood test | Shower labor and materials |
| Layout pattern | Additional cutting, setup, and ordering allowance | Material and labor |
| Accessibility framing | Recessed floors, grab-bar blocking, and drain changes | Framing and drain |
| Movement joints and trim | Flexible joints, profiles, and transitions | Finish details |
A useful estimate separates those categories instead of hiding everything under tile installation. That lets you distinguish an upgrade you can decline from preparation the assembly requires.
For an early planning baseline, use Trademaster Construction's instant pricing tool for a ballpark kitchen, bathroom, basement, or tile-project estimate in Portage and the surrounding Kalamazoo area. Bring the same room-by-room scope to each contractor so the proposals address comparable work.
Read the exclusions before the total
Check whether the quote includes surface correction, the selected membrane, testing, the drain connection, edge profiles, and the ordering allowance for your approved layout. Ask how concealed damage will be documented and priced if demolition reveals it.
Allowances deserve particular attention. A preparation allowance isn't a guarantee that every floor condition is included. The agreement should explain what happens when the actual work exceeds the assumed scope, including approval before additional work proceeds.
Budget check: A missing preparation line isn't a saving until someone confirms that preparation isn't needed.
Ask for separate lines covering:
- Tile material: Product, quantity, and purchase cost per square foot.
- Preparation labor: Included corrections and the basis for additional work.
- Waterproofing: Membrane, reinforcing, drain detail, and flood test.
- Layout allowance: Cutting waste, pattern setup, and retained repair stock.
- Finish details: Profiles, sealants, transitions, and disposal.
Don't assume the lowest bid is incomplete. Make the contractor demonstrate what it includes. A clearly defined lower price is useful; an unexplained lower price leaves you carrying the uncertainty.
Maintenance That Protects Your Tile Work
Maintenance protects the exposed parts of the installation and helps you notice trouble before it becomes harder to repair. It doesn't replace the concealed waterproofing, and fresh caulk can't correct a failed receptor.
Use a simple checklist:
Clean gently. Choose a pH-neutral cleaner approved for the tile and grout. Avoid acidic products on sensitive stone and abrasive pads on vulnerable finishes.
Confirm sealing requirements. Reseal natural stone, cement tile, and grout only where their product instructions call for it. Not every grout needs sealer, and excess sealer can leave residue.
Inspect flexible joints. Replace silicone that cracks, separates, or pulls away at designated corners and transitions. Don't cover failing sealant with another thin smear.
Keep drainage open. Remove hair and debris, and watch for persistent puddles after use. A blocked drain and an incorrectly sloped floor need different remedies.
Check seasonal changes. Inspect through the first winter and summer for new cracks, loose edges, and changes in sound underfoot. A hollow sound alone doesn't establish failure.
Keep the installation record. Save product names, batch information, photographs, test records, and care instructions together.
Read warning signs carefully
A crack following a joint can indicate movement. A spreading stain may indicate moisture or contamination, while a loose tile warrants investigation of the bond. Photograph changes before cleaning or attempting repairs.
For porcelain cleaning routines, floor cleaning guidance for hotel managers from Renue Systems Four Points offers useful context, although your installed product's care instructions take priority.
Our 5-year workmanship warranty addresses workmanship under its written terms, and we respond promptly if issues arise. We also assist with coordinating manufacturer warranty services. Keep the original documentation and contact us before a repair removes evidence needed to evaluate a claim.
Decide Between DIY and a Professional Crew
DIY the manageable finish work; hire out changes to water control, drainage, framing, or substrate performance. Judge the task rather than labeling an entire room easy or difficult. A dry backsplash and a roll-in shower carry very different consequences when something goes wrong.
A straightforward kitchen backsplash can be a reasonable homeowner project. You still need a sound surface, a deliberate layout, safe cutting equipment, and patience around outlets and exposed edges. Start with a tile that cuts predictably rather than a difficult glass mosaic or fragile specialty piece.
Sort the work by consequence
| Task | Practical decision |
|---|---|
| Simple dry-area backsplash | Reasonable DIY work with appropriate preparation and tools |
| Small dry floor on a verified suitable base | Possible DIY work if structural suitability and flatness are established |
| Routine cleaning and approved sealing | Usually homeowner maintenance |
| Shower membrane and receptor testing | Professional work for most homeowners |
| Curbless slope and drain integration | Requires coordinated design and installation |
| Large-format floor needing substantial correction | Hire an installer equipped to evaluate and correct the base |
| Natural stone or specialty grout | Consider professional handling and product-specific expertise |
The boundary isn't whether you can operate a wet saw. It's whether you can verify the assembly before covering it, recognize an unsuitable condition, and accept responsibility for correcting it.
Our process includes scheduling, material procurement, subcontractor coordination, permitting, and inspections. Skilled project managers and experienced artisans handle bathroom projects from concept to completion. That coordination matters when plumbing, framing, waterproofing, and finish work depend on one another.
Write down the scope room by room, including what stays and what changes. Use the instant pricing tool for an initial estimate, then schedule a consultation to confirm feasibility and preparation before ordering tile.
Trademaster Construction offers custom tile installation and bathroom remodeling for existing homes across Southwest Michigan. Visit Trademaster Construction to discuss your layout, preparation needs, and shower details, then build a plan that accounts for the work behind the tile as carefully as the finish you'll see.

