
You've collected kitchen ideas, saved tile photos, and asked for contractor estimates. But the bids don't describe quite the same work: one includes design, another prices construction from your plans, and a third leaves fixtures as allowances. If you're in Portage or Kalamazoo, it's natural to wonder whether you're comparing prices or comparing different projects.
That's why the design build process matters before you choose cabinet fronts or paint colors. It organizes design and construction as one coordinated sequence, with clear points for you to set the scope, review costs, and approve decisions. The finishes still matter, but so does knowing who checks that the layout, budget, materials, and construction plan fit together.
What Homeowners Actually Experience With Design Build
A familiar starting point: three bids on the kitchen, a Pinterest board full of inspiration, and no easy way to tell whether the contractors have priced the same scope. One estimate may assume the existing layout stays in place. Another may include moving plumbing. A third might not identify what level of cabinets or countertops its number covers.
The delivery model shapes how those gaps get addressed. In a design-build remodel, the team develops the design with construction realities in view. A proposed island, for example, isn't just a shape on a mood board. The team needs to check circulation, cabinetry, electrical needs, and how the change affects the project's price and schedule before it becomes a construction decision.
A useful first question: What exactly is included in this estimate, and which decisions could still change its price?
In the early planning conversations, you'll describe how the room works today, what frustrates you, and what you want to change. The team can turn those priorities into a defined scope and identify open questions, such as whether a wall can move or whether a bathroom's existing plumbing locations should remain.
Your part isn't to arrive with a finished plan. It's to explain what matters, be candid about your budget, and make decisions when the team presents clear options. Design-build is less about hiring a company that does two jobs and more about agreeing on a sequence of decisions with one team responsible for coordinating them.
The Design Build Model in Plain Language
In design-build, one firm or coordinated team holds responsibility for both design and construction under one contract. For the homeowner, that means the people developing the drawings and the people planning the work are part of the same delivery structure. The Federal Highway Administration describes design-build as combining design and construction under one contract, in contrast with design-bid-build, where those phases are procured separately (FHWA's design-build overview).
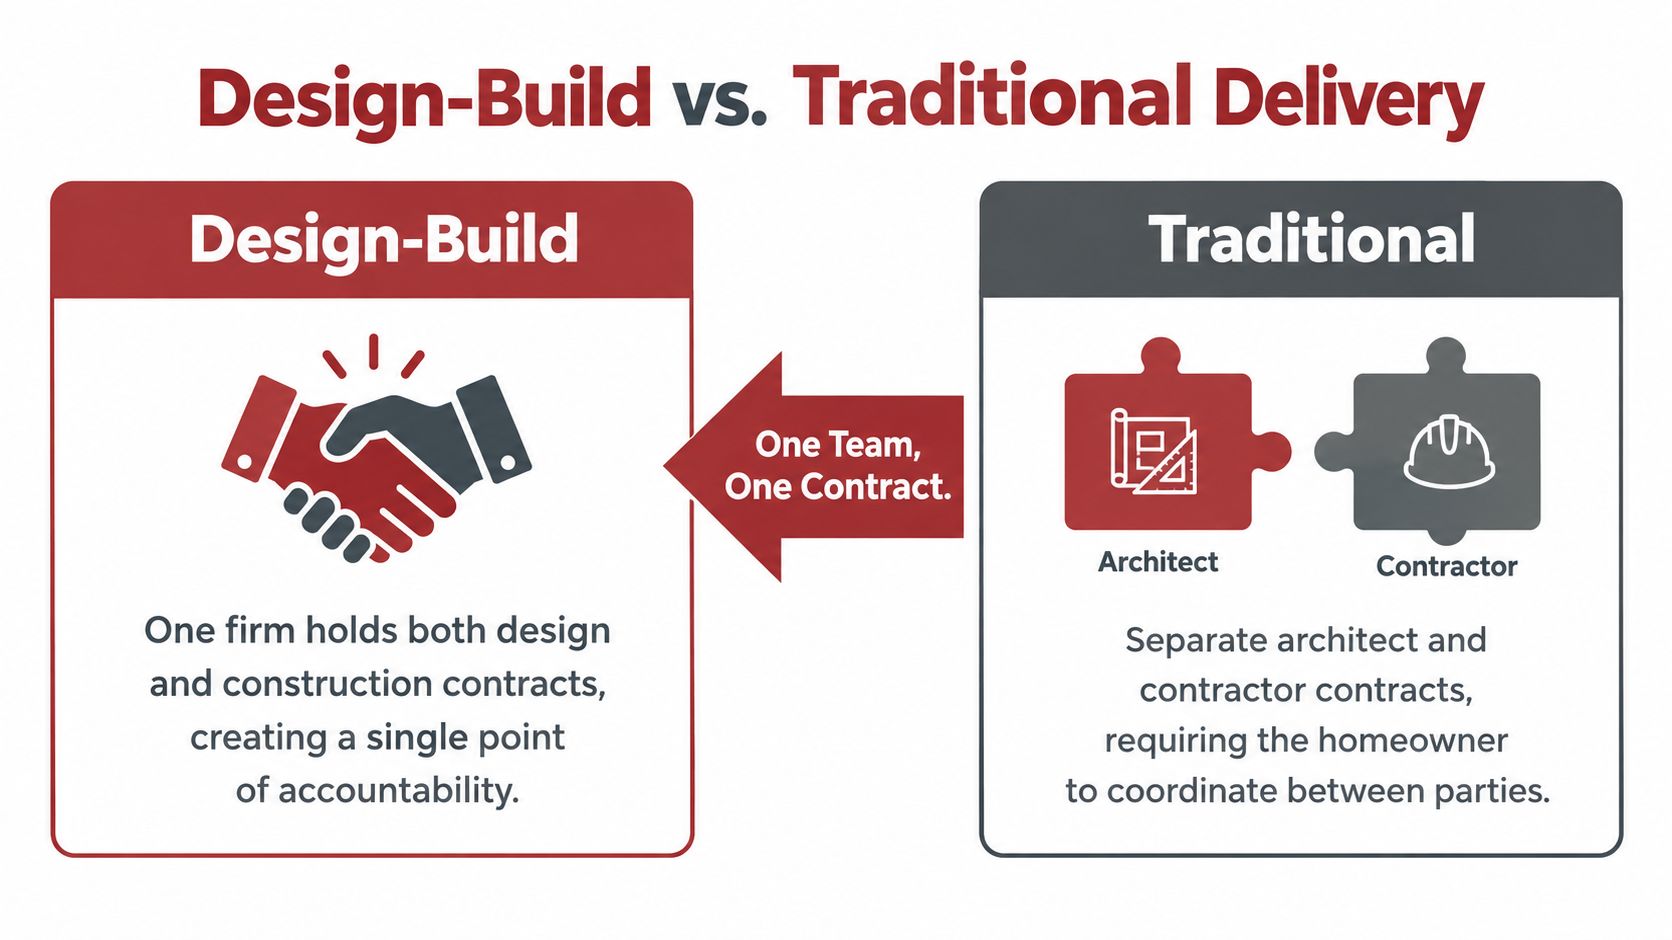
With design-build, the designer and builder can review a proposed change together while the drawings are developing. If you want to relocate a shower, for instance, the team can consider the layout alongside plumbing routes, waterproofing, material choices, and cost. You still approve the direction. The difference is that design and construction questions can be handled within one coordinated process rather than passed between separately contracted firms.
In design-bid-build, the homeowner typically hires a designer, completes drawings, and then seeks construction bids. That method can suit a project with a well-defined design, but it puts more weight on the handoff: the builder prices and executes plans prepared outside the construction contract. If an assumption proves wrong after work begins, the parties may need to resolve how the design, price, and construction scope relate.
The plain-language version is simple: design-build gives you one coordinated team and one point of contractual responsibility for the project from design through construction. It doesn't mean every decision is made for you or every surprise disappears. It means the team's process should make responsibilities and decision points easier to follow.
The Five Phases of a Home Remodel Design Build Process
A home remodel moves through a sequence of approvals. The names may differ between firms, but you should know what the team needs from you at each stage and what document or decision comes next.
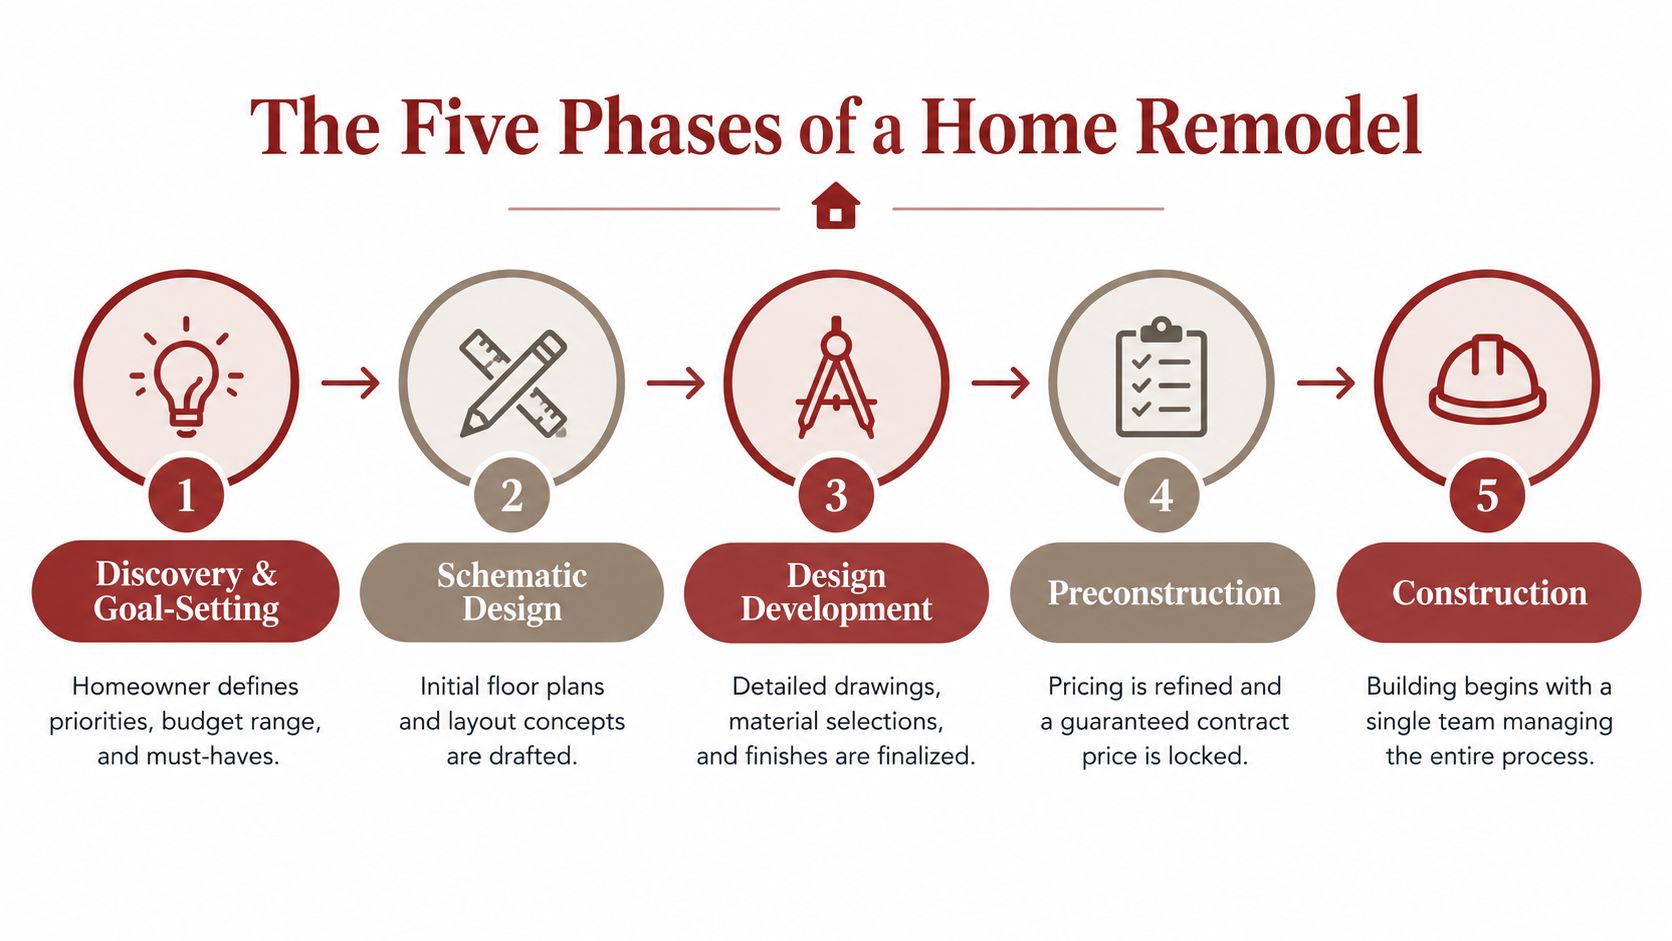
Discovery and goal-setting. You explain what isn't working, what you want the remodeled space to do, and what you're comfortable investing. The team evaluates the existing home and develops initial scope assumptions. You may approve a design agreement that sets out the planning work. Ask what's included in that agreement and what remains undecided.
Schematic design. The designer turns your priorities into early layouts. For a kitchen, you might compare keeping the sink in place with moving it to an island. You're reviewing the overall arrangement, not signing off on every fixture. Ask how each option affects scope and what needs further investigation.
Design development. The layout becomes more detailed. You work through materials, fixtures, finishes, and specifications, while the team checks how design choices fit together. Your selections list and drawings should become specific enough to support more dependable pricing. If you want to explore how coordinated choices can support a smooth finish phase, see these efficient interior finishing strategies.
Preconstruction. The team reviews the written scope, allowances, exclusions, and remaining unknowns, then refines the price and schedule. You approve the construction documents and contract only after you understand what's included, what's not, and how changes are handled. Ask which selections must be finalized before work starts.
Construction. The project manager coordinates the work and keeps you informed about progress, decisions, and issues that need your attention. Before construction, ask for a schedule with separate milestones for permitting, procurement, demolition, rough-ins, inspections, and completion.
The following video offers another look at how the process can be organized:
At each phase, ask what you're approving and whether that approval changes the project's cost, scope, or schedule. That habit helps you stay involved without trying to manage every trade yourself.
Who Does What on a Design Build Remodel
You may meet several people from the same firm, and each should have a clear responsibility. The designer helps translate your priorities into a practical layout and documented selections. The project manager coordinates the project's scope, budget, schedule, and communication. On site, a lead carpenter or superintendent oversees the daily work and coordinates trade sequencing.
Specialty trades carry out work within their areas, such as plumbing, electrical, tile, or heating and ventilation. They may not attend every planning meeting, but their requirements can affect decisions well before installation. For example, a lighting plan needs to work with the ceiling and electrical layout, not just the look you want.
| Role | When They Join | What They Own | Homeowner Decision They Trigger |
|---|---|---|---|
| Designer | During discovery and design | Layouts, design details, and selections coordination | Approve the plan, materials, and finishes |
| Project manager | During planning and through project delivery | Budget tracking, schedule coordination, and communication | Confirm priorities, approvals, and timing |
| Lead carpenter or superintendent | As construction planning develops and on site | Field coordination, work sequencing, and day-to-day site activity | Respond to site questions or review a proposed adjustment |
| Specialty trades | During technical planning and at relevant construction stages | Trade-specific installation and technical requirements | Confirm choices that affect their work, such as fixture or tile details |
| Homeowner | Throughout the project | Priorities, scope approvals, selections, and final decisions | Make timely choices and approve documented changes |
The homeowner's role is important, but it isn't to relay messages between the electrician, designer, and carpenter. Expect the project manager to explain which decisions need your attention and by when. If you're unsure who should answer a question, ask the team to name the person responsible for that decision.
A reliable handoff starts with a clear question: “What do you need me to approve, and what will that approval affect?” That keeps discussion tied to a decision rather than a string of disconnected updates.
Realistic Timelines and Where Budgets Move
An integrated process can help a project move more efficiently, but research benchmarks aren't promises about a particular kitchen or bathroom. A study of 212 U.S. projects found that design-build delivery from design through completion was 102% faster than design-bid-build, with 3.8% less cost growth and 36% faster construction (DBIA's summary of the project-delivery research). Those findings cover a range of projects, not a guaranteed schedule for a Southwest Michigan home remodel.
For your project, timing depends on the scope and on decisions the team still needs. A bathroom with a settled layout differs from a basement remodel that requires more planning for walls, mechanical systems, and finishes. Permitting, material availability, concealed conditions, and late selection changes can also affect the schedule. Ask for a project-specific plan rather than relying on a generic duration shown in an infographic or estimate.
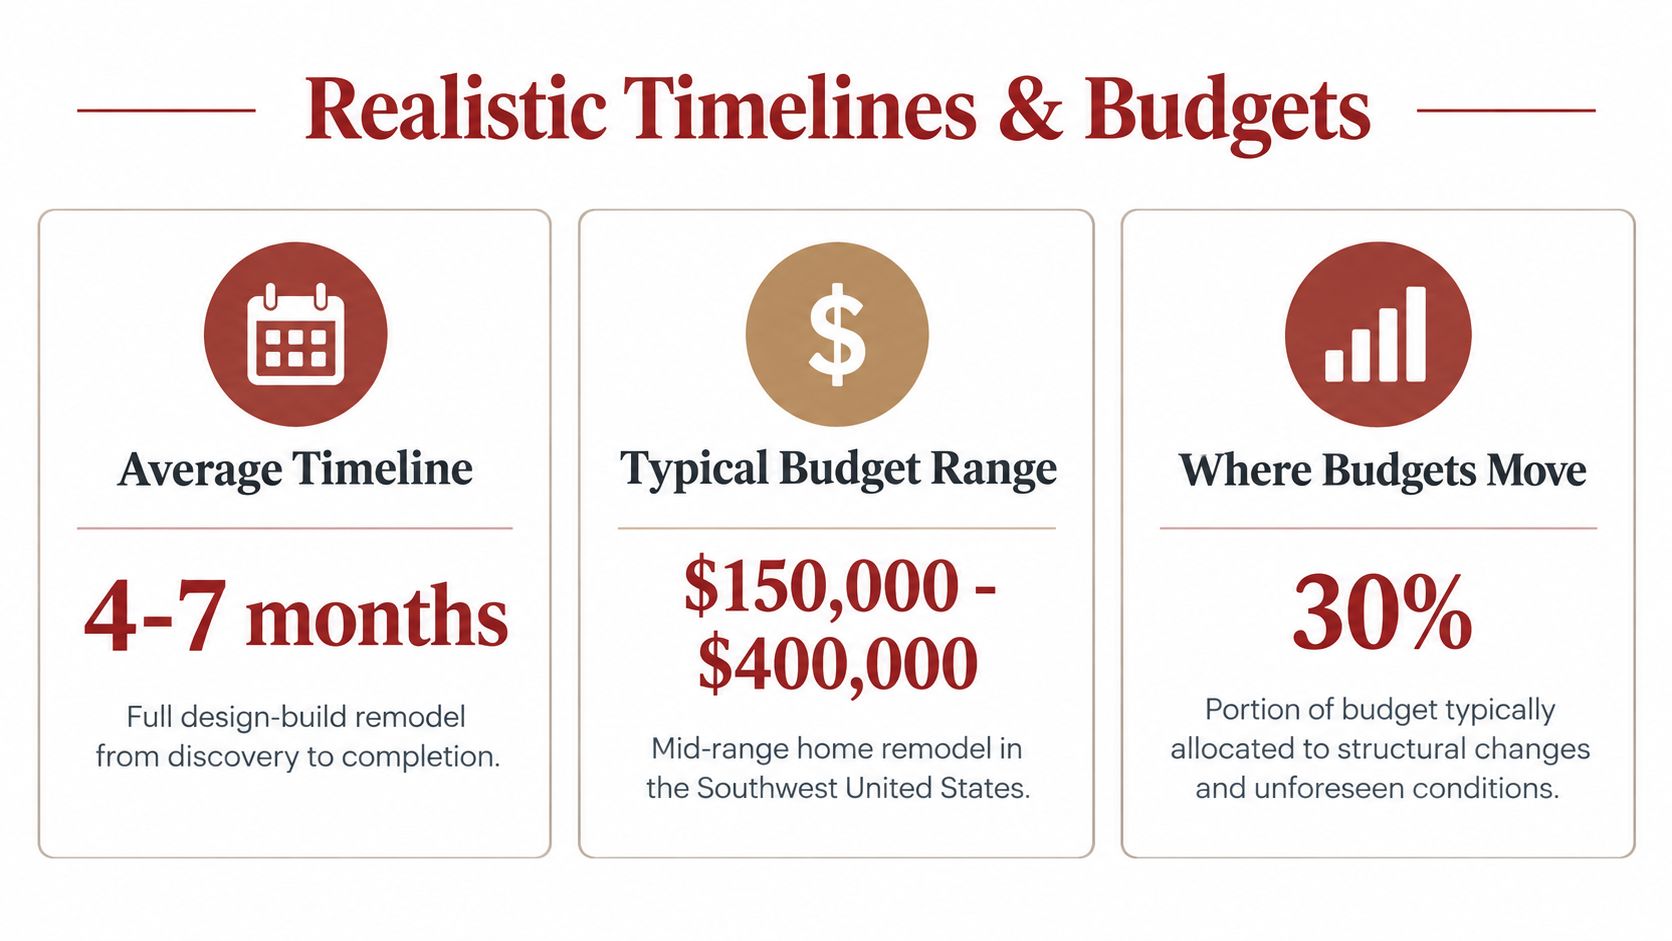
Your budget can move when the scope changes or when a selection costs more than its allowance. It can also move if the team uncovers a condition behind a wall or below a floor that couldn't be confirmed in advance. A 15% to 20% contingency reserve is recommended in renovation-budget guidance for unknown conditions and incidental expenses; research materials and finishes before finalizing the budget as well (First Citizens' renovation-budget guidance).
A schedule is useful when it shows what must happen next, not just an expected finish date.
For a more dependable plan, ask the project manager to show when selections, procurement, inspections, and construction milestones are expected. Then ask which owner decisions could delay the next step. That gives you practical control over the things you can influence without pretending every site condition is predictable.
How Pricing Becomes Trustworthy Before Construction Starts
An early estimate is a starting point, not automatically a construction price. The number becomes more useful as the scope is defined, material choices are documented, and the team identifies what remains unknown. Design-build doesn't erase budget uncertainty. It gives the team and homeowner a shared process for making uncertainty visible.

Before signing a construction contract, review these items with the team:
- Scope assumptions: Which rooms, surfaces, systems, and tasks are included?
- Allowances: What amount has been assigned to fixtures or finishes that aren't selected yet?
- Selections: Which products have you chosen, and could their availability affect the plan?
- Exclusions: What work or products aren't part of the price?
- Contingency: What reserve is set aside for concealed conditions and incidental costs?
- Change-order rules: How will the team document a requested change, its cost, and its schedule effect?
Ask how the team will handle a site discovery. If demolition reveals a condition that changes the planned work, you should know who documents it, who provides pricing, and when you'll approve the adjustment. Don't treat an allowance as a confirmed product choice, or a rough estimate as a final price.
For early planning, Trademaster Construction's instant pricing tool can help you establish a ballpark before you refine the project with selections and a site review. If you're evaluating how estimating information is organized, Exayard construction estimating software offers another reference point for thinking about detailed cost development. The key is to use an initial number to guide questions, then rely on a documented scope and written pricing terms before construction begins.
Planning for Accessibility From Day One
Accessibility isn't just a product decision made after the bathroom layout is settled. A curbless shower, for example, can affect drainage, waterproofing, floor transitions, and the surrounding layout. Wider doorways, useful clearances, lighting, and reachable storage also need to be considered while plans are developing, not improvised after finishes are installed.
In 2025, 56% of professional U.S. remodelers reported completing aging-in-place modifications. Among those projects, common features included grab bars (87%), curbless showers (78%), higher toilets (71%), and wider doorways (52%) (HousingWire's coverage of the NAHB remodeler survey). These figures describe reported remodeling work, not a recommendation that every home needs each feature.
Think of accessibility as universal design: choices that can make a room easier to use for an older family member, a guest, a child, or someone recovering from an injury. During design, discuss whether the shower needs a curbless entry, where structural backing might be needed for future supports, and whether the doorway, lighting, and storage suit the people using the room.
The design-build advantage here is coordination. The team can review clearances, structure, drainage, waterproofing, maintenance access, and finishes as connected parts of the same plan. For homeowners weighing the project's practical and financial side, this resource on funding options for home modifications may help inform early planning.
Your Next Step in the Design Build Process
You're the project's chief decision-maker, scope approver, and final judge of selections. Before construction starts, focus on three decisions: lock the scope, confirm the selections or allowances, and review the schedule and its decision deadlines. Those approvals give the team a clearer basis for pricing and sequencing the work.
If you're still at the budgeting stage, start with a ballpark estimate and use it to shape your questions about scope and finishes. The instant pricing tool is a practical first step before you schedule a discovery conversation. Bring your priorities, any inspiration you've gathered, and the questions you have about what's included.
Design-build isn't a guarantee that a remodel will have no surprises. It's a way to organize responsibility and decisions so you can see what's known, what remains open, and what needs your approval before work moves forward.
Trademaster Construction works with Southwest Michigan homeowners on kitchen, bathroom, basement, and custom tile remodels, guiding projects from design consultation and scope planning through construction. If you're considering a remodel in Portage, Kalamazoo, or a nearby community, visit Trademaster Construction to explore your next step.

