
A small guest bathroom can feel either thoughtful and polished or cramped and improvised. Visitors notice the difference in the first few seconds, especially when the room has poor lighting, nowhere to set toiletries, a cold floor, or lingering humidity.
The strongest guest bathroom remodel ideas combine one or two visual focal points with practical improvements. A rainfall showerhead can create a memorable experience, but it works better alongside reliable ventilation and a thermostatic valve. A statement tile wall looks impressive, but it needs durable grout, sensible cleaning requirements, and a layout that doesn't make the room feel busy.
This guide covers 10 guest bathroom remodel ideas organized around the complete guest experience, including comfort, visual impact, usability, durability, moisture control, accessibility, and budget planning. Match the scope to your existing layout, plumbing locations, electrical capacity, comfort goals, and available budget rather than copying a look that doesn't suit the room.
Trademaster Construction serves homeowners in Portage, Kalamazoo, and surrounding Southwest Michigan communities, helping clients move from early concepts through design and construction. Use the ideas below as a practical planning guide, not a one-size-fits-all prescription.
1. Create a spa-like shower with a rainfall showerhead
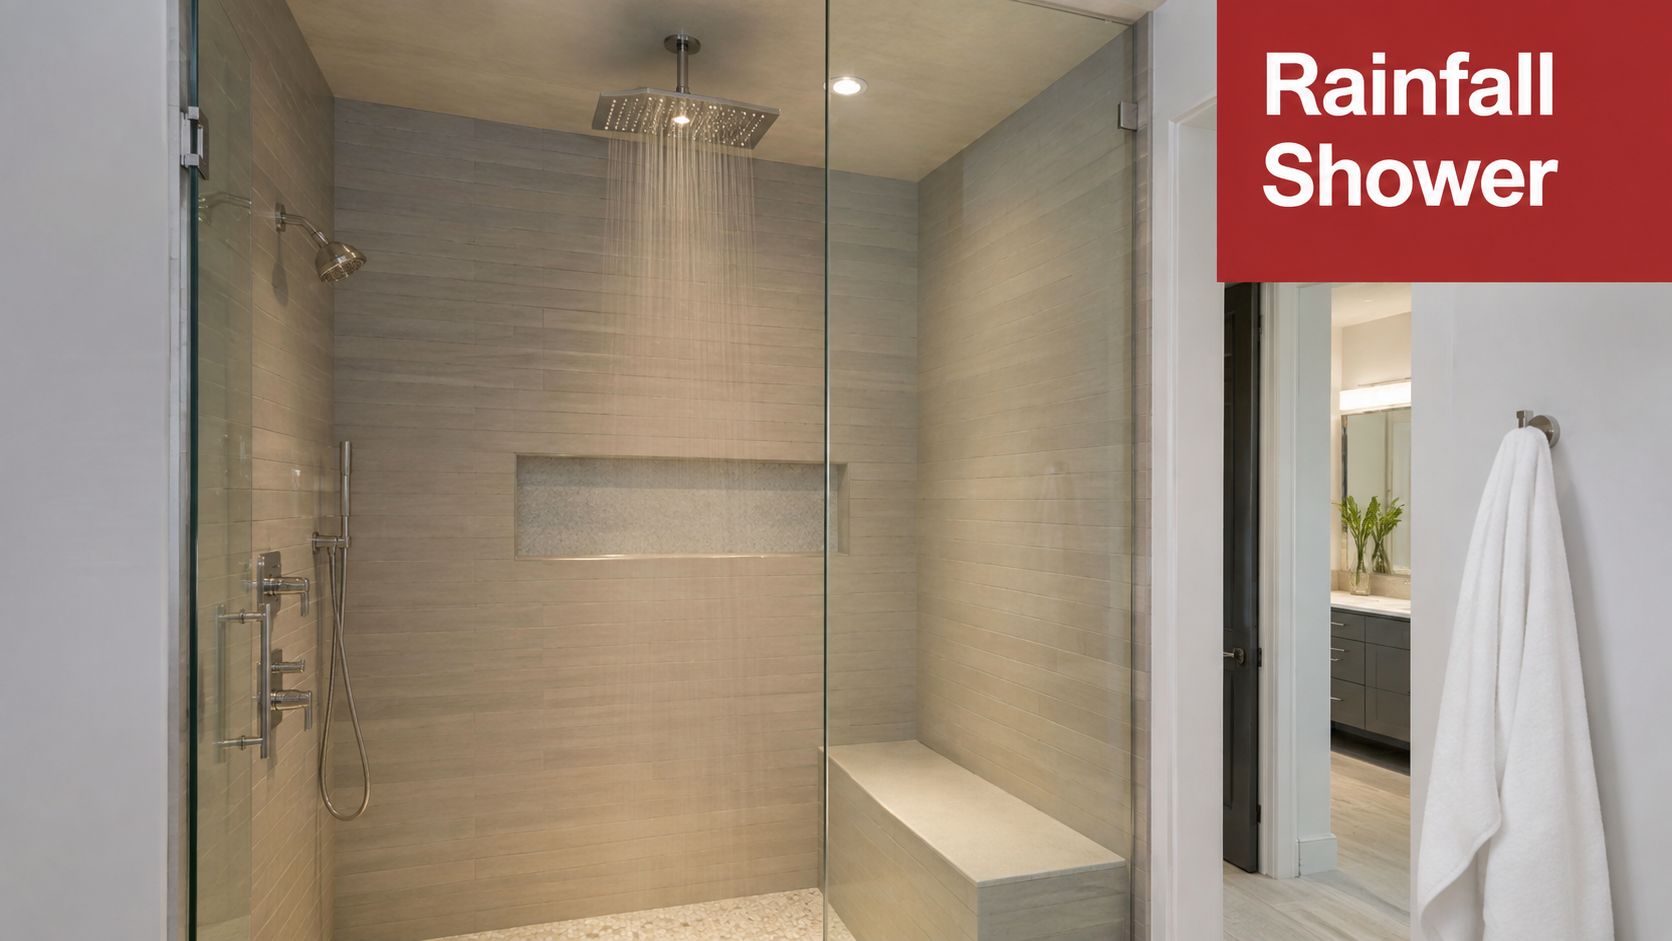
A rainfall showerhead can turn an ordinary guest bath into a more relaxing retreat, but the fixture should be selected as part of the complete shower system. Its broad spray pattern feels immersive and comfortable, especially when paired with a handheld showerhead that gives guests more control.
The plumbing deserves attention before the tile is ordered. A contractor should confirm that the existing supply lines, valve, and water pressure can support the selected system. A thermostatic valve is useful because it helps maintain a consistent water temperature when another fixture is used elsewhere in the home.
Pair luxury with humidity control
A rainfall head adds comfort, but it also puts moisture management at the center of the design. Pair it with a properly ducted exhaust fan, water-resistant wall construction, and finishes that coordinate with the vanity, mirror, and hardware.
- Choose one primary feature: A rainfall head, accent tile, or frameless glass panel is usually enough to establish the focal point.
- Add a handheld option: It improves flexibility for children, older relatives, and guests with different shower preferences.
- Use a built-in niche: A recessed shelf keeps bottles off the floor and makes the shower feel more finished.
- Select compatible finishes: Mixing polished chrome, matte black, and brass without a clear plan can make a compact room feel disjointed.
The best result feels luxurious without becoming difficult to operate or maintain. In a smaller guest bath, a well-planned shower system usually creates more impact than adding multiple body jets that complicate plumbing and cleaning.
2. Open up the room with a floating vanity
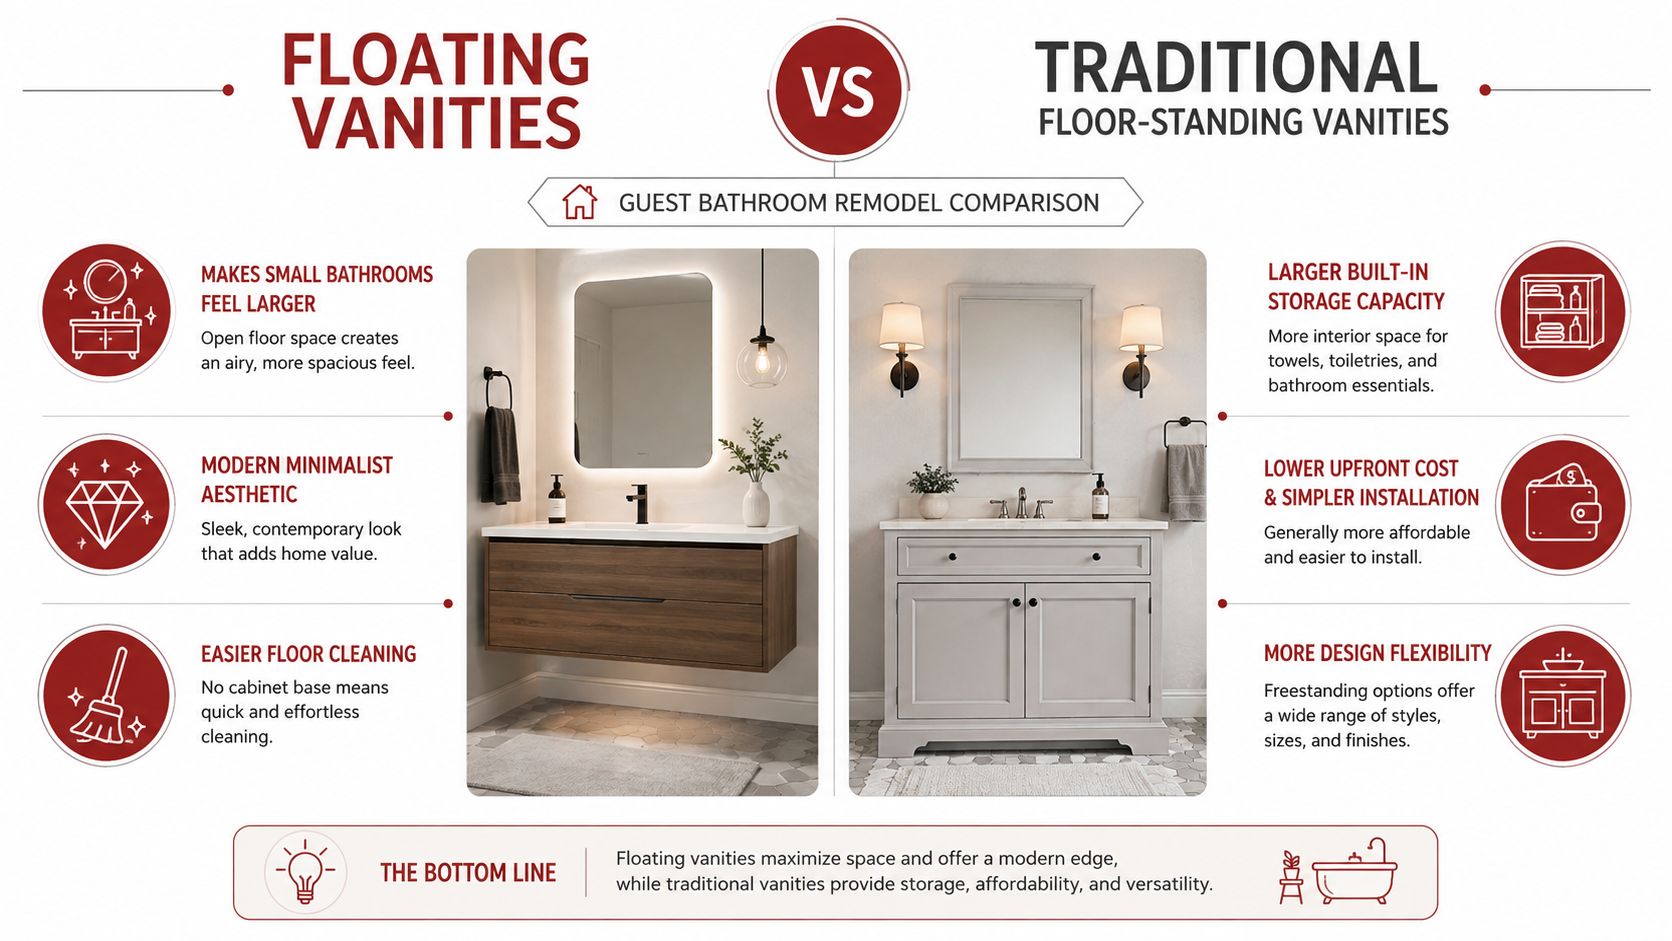
A floating vanity changes the visual weight of a small bathroom immediately. Because the cabinet sits off the floor, the continuous flooring beneath it makes the room appear less crowded, while the open area improves access for cleaning.
Wall-mounted construction also creates opportunities for practical upgrades. Under-vanity lighting can provide a soft evening glow, while a wall-mounted faucet keeps the countertop easier to wipe down. The vanity should still provide enough concealed storage for spare toiletries, cleaning supplies, and guest essentials.
Get the structure and proportions right
Floating cabinetry isn't attached to drywall and left to carry the load. The wall needs suitable blocking or another engineered support method, and the installer must coordinate that support with the plumbing rough-in.
Choose the vanity width according to the wall, door swing, toilet location, and required clearance. A cabinet that looks appropriately sized in a showroom can overwhelm a narrow guest bath once the mirror, sconces, and countertop are installed.
Practical rule: Preserve visual breathing room, but don't sacrifice the storage guests actually need.
Light oak, white, and other restrained finishes can help a compact room feel brighter, but dark cabinetry can work when the lighting is layered well. The most successful combination usually includes a proportionate mirror, a simple countertop, and hardware that repeats another finish in the room.
3. Use a curbless shower for style and accessibility
A curbless shower removes the step-over barrier between the bathroom floor and shower floor. That creates a clean, continuous appearance, but its more important benefit is easier circulation for children, older relatives, wheelchair users, and guests with limited mobility.
Accessibility is becoming a mainstream remodeling consideration. The 2025 U.S. Houzz Bathroom Trends Study reports that 68% of U.S. renovators considered special needs in their projects, up 4 percentage points year over year. Aging household members were the top priority in safety-focused renovations. A guest bathroom designed for current and future needs can still look refined rather than institutional.
Plan the waterproofing before the appearance
The floor must be recessed or framed correctly so the shower can drain without a raised threshold. Accessibility guidance identifies a maximum shower floor slope of 1:48, or 1/4 inch per foot, toward the drain, as described in this accessible shower remodeling guide.
A transfer shower commonly uses at least 36 inches by 36 inches, while a roll-in layout is often specified at 30 inches by 60 inches, according to ADA-based curbless shower guidance. That guidance also discusses grab bars designed to support 250 pounds, mounting them 33 to 36 inches above the floor, and positioning controls approximately 38 to 48 inches high.
Use slip-resistant flooring, a linear drain where appropriate, a partial glass panel, and reinforced walls for future grab bars. These details require professional waterproofing and layout coordination because a beautiful curbless shower won't perform well if the drainage plane or membrane is compromised.
A short visual walkthrough can help homeowners understand how a curbless shower changes circulation and floor continuity.
4. Make one wall memorable with custom tile
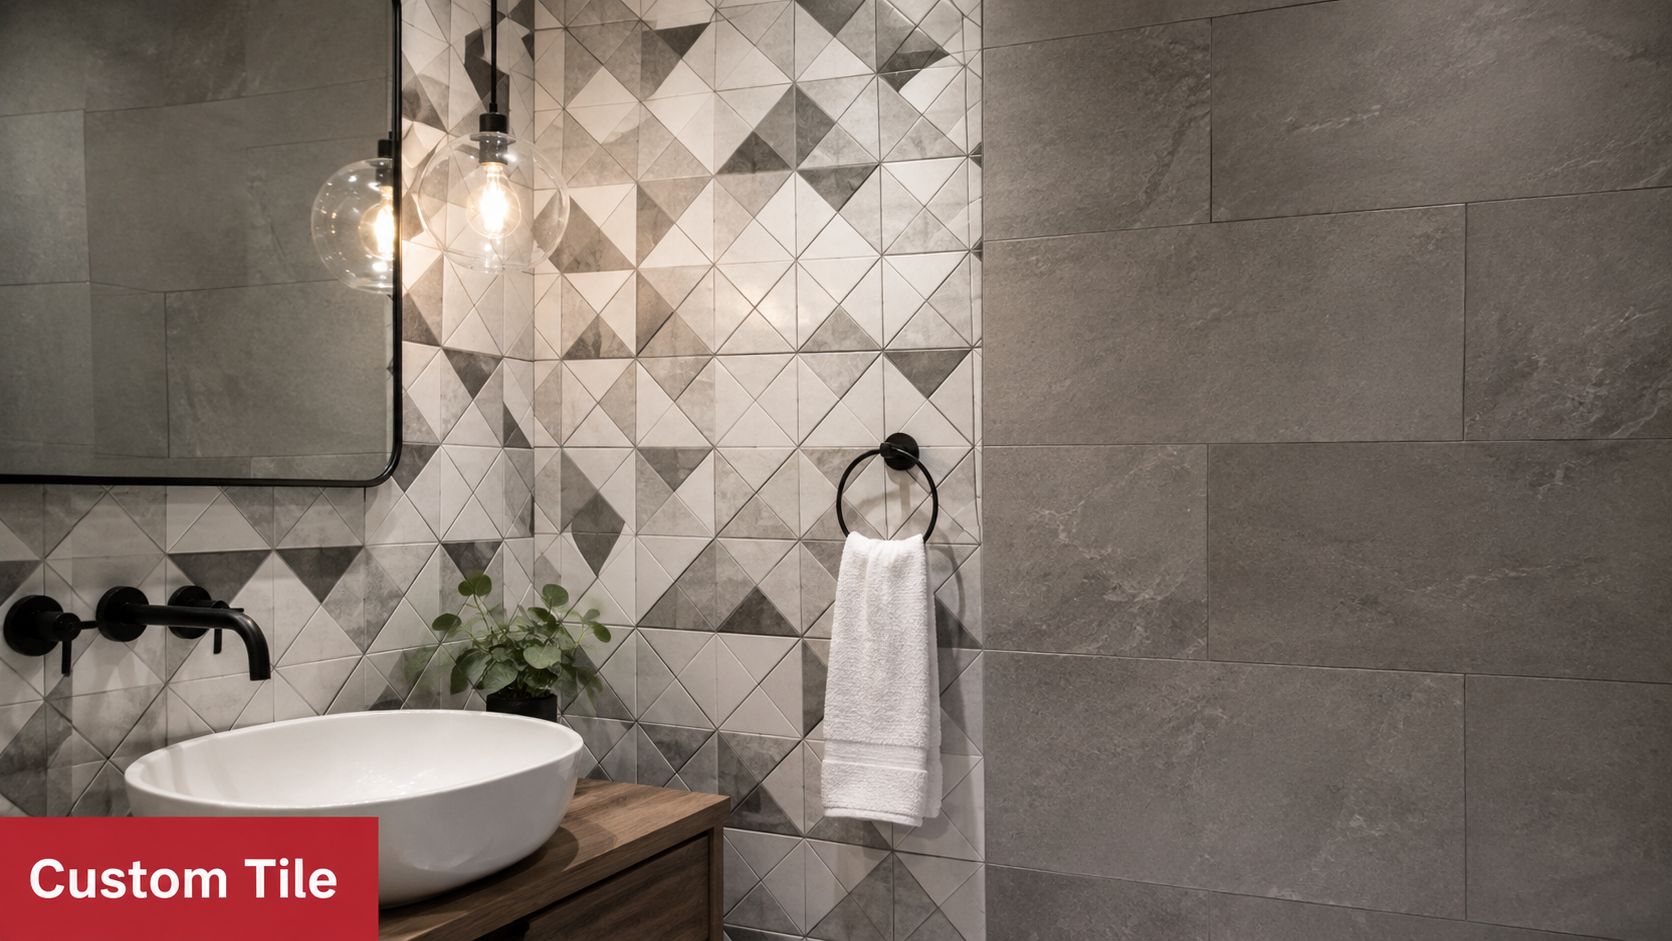
A guest bathroom doesn't need bold tile on every surface. A single statement wall behind the vanity or shower can establish personality while the remaining surfaces stay calm and easy to maintain.
Geometric porcelain, large-format matte tile, textured subway tile, Moroccan-inspired zellige, and linear mosaics can all work. The selection should respond to the room's scale and lighting. A small space with limited daylight may benefit from tonal variation and texture rather than a high-contrast pattern that visually fragments the walls.
Treat installation as part of the design
Pattern placement matters as much as the tile itself. The installer should dry-lay the design, center key lines on the vanity or shower, and plan cuts around niches, corners, outlets, and plumbing trim. Randomly ending a pattern at the edge of a mirror can make an expensive material look accidental.
Choose grout and sealants based on the tile and exposure. Highly textured surfaces can collect residue, while very light grout may require more frequent cleaning. If you're comparing durable countertop and surface materials elsewhere in the home, this guide on why choose quartz for kitchens offers useful context about maintenance-oriented material selection.
- Use contrast deliberately: A darker grout can emphasize geometry, while a similar tone creates a quieter surface.
- Repeat one finish: Carrying a tile color into the vanity, mirror frame, or hardware creates cohesion.
- Limit competing focal points: A statement wall works best when the mirror and accessories support it rather than compete with it.
- Protect the wet zone: Use materials rated for bathroom exposure and install them over an appropriate waterproofing system.
5. Warm the floor with radiant heat
Southwest Michigan winters make cold tile especially uncomfortable. Radiant heating adds warmth under porcelain or ceramic tile, improving the first impression when guests step out of the shower.
Plan the system before the floor is tiled. The heating layout must account for the toilet flange, vanity footprint, floor penetrations, and finished flooring. Keep it on a separate thermostat so the bathroom floor does not run whenever the rest of the home calls for heat.
Plan comfort into the floor assembly
A stable, flat substrate supports more even heating and reduces installation problems. Insulation below the system can direct warmth upward, while timer controls limit operation when the bathroom is vacant.
Tile transfers heat effectively and handles bathroom moisture well, making it a practical finish for this upgrade. Radiant heat still requires electrical coordination and adds installation cost, so it fits a planned renovation better than a light cosmetic refresh.
Coordinate the floor with the guest experience:
- Set dedicated controls: Adjust floor temperature separately from the main thermostat.
- Map fixtures first: Keep heating elements away from areas where future drilling or anchoring could damage them.
- Verify compatibility: Confirm that the tile, underlayment, and heating system work together as one assembly.
- Protect against moisture: Maintain effective ventilation. Warm flooring improves comfort, but it does not replace exhaust.
For a Southwest Michigan remodel, compare the added comfort with the electrical work, floor height, and project budget before choosing the system. Planning these details alongside the shower and vanity prevents a pleasant feature from creating conflicts during installation.
6. Layer lighting for comfort and function
Lighting determines whether a guest bathroom feels calm and flattering or harsh and unfinished. One ceiling fixture rarely provides enough control. A better plan combines ambient illumination, task lighting at the vanity, and accent lighting that highlights tile, shelving, or architectural details.
Place vanity lights on both sides of the mirror when possible, so the face receives more even illumination. A fixture above the mirror can supplement that arrangement, but it often creates shadows under the eyes and chin when used alone. Dimmers let the room shift from bright grooming light to a softer evening setting.
Coordinate electrical work early
Lighting plans affect switch locations, junction boxes, wiring routes, mirror dimensions, and wall framing. Wet-area fixtures must be properly rated and installed according to applicable electrical requirements. A qualified lighting installation electrician can help coordinate fixture placement and controls with the broader remodeling plan.
Use warm white light where a relaxed atmosphere matters, but verify that the color rendering works for grooming and makeup. Frosted or diffused shades reduce glare, while under-vanity LED lighting can add depth without consuming visual space.
The practical test is simple. A guest should be able to find the toilet, use the mirror comfortably, read a product label, and move through the room at night without turning on an overly bright fixture.
7. Anchor the vanity with a statement mirror
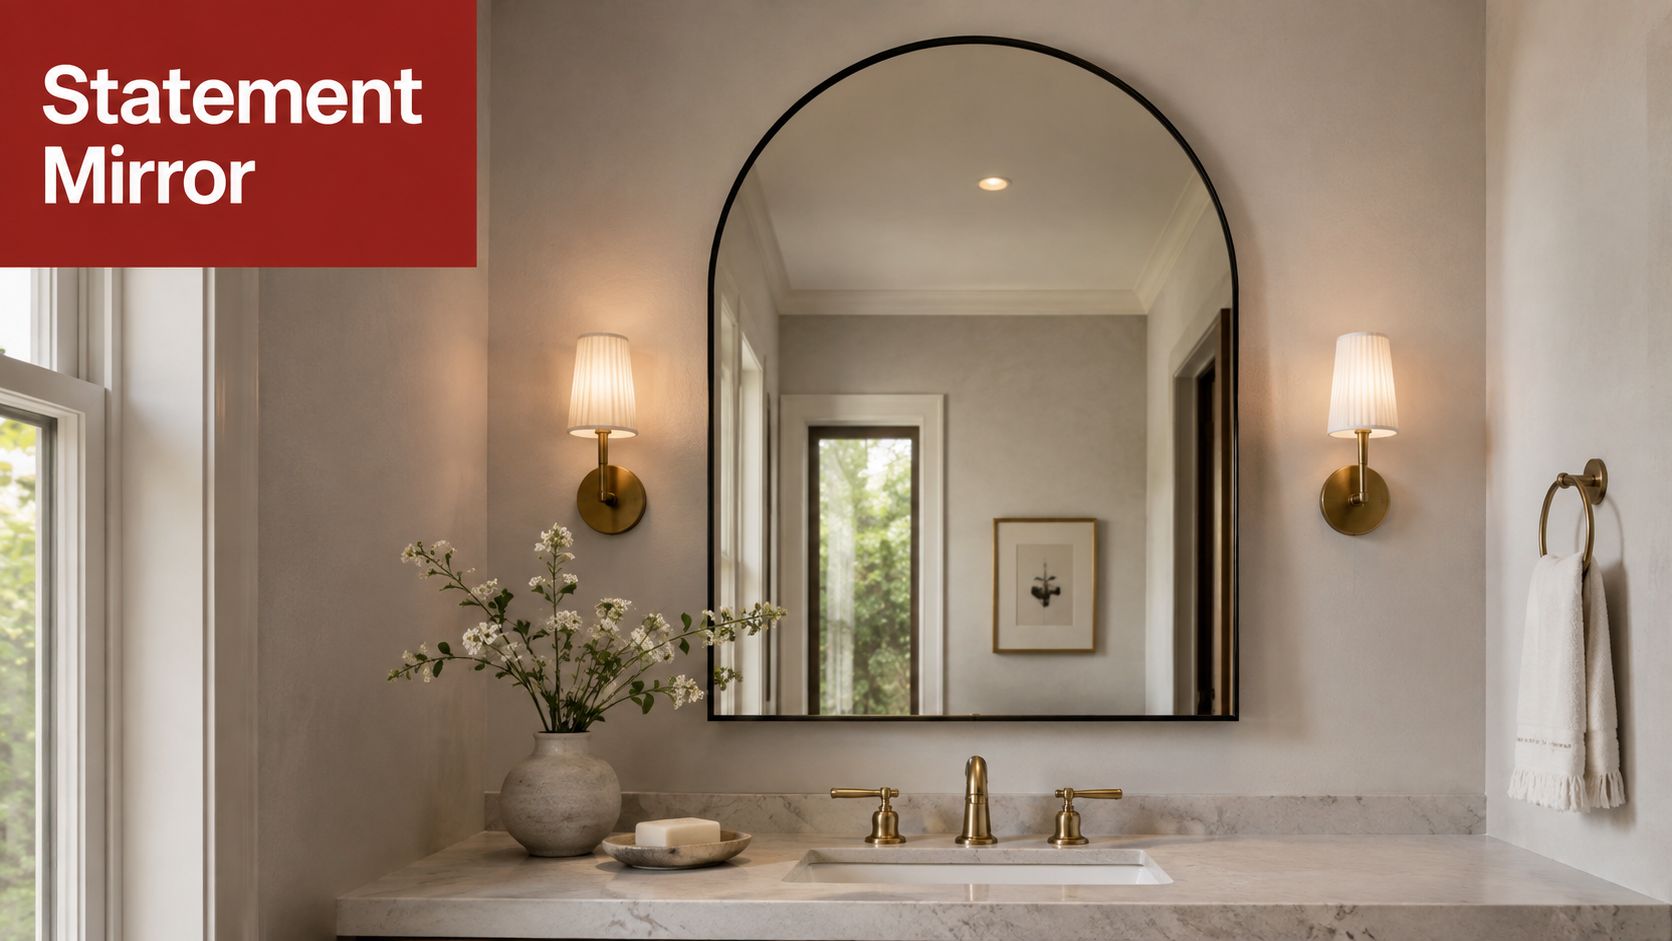
A guest may notice the mirror before the faucet or tile. An arched, round, oversized, or black-framed design can establish the room's visual direction while making a compact bathroom feel brighter and more open. Choose the shape and finish alongside the vanity, not after it.
Keep proportions in view. A narrow mirror over a wide cabinet looks undersized, while an oversized frame can crowd sconces, outlets, medicine cabinets, or the door swing. Confirm wall width, fixture clearances, and mounting height before ordering a custom piece.
Make the reflection work for the room
Set the mirror to reflect the room's strongest feature, such as a tile wall, pendant, or styled shelf. A direct view of an exposed toilet or crowded storage area weakens the experience. Near a frequently used shower, an anti-fog treatment can keep the mirror usable between cleanings.
The wall condition determines the mounting method. Heavy framed mirrors need appropriate anchors and careful placement, especially where tile, plumbing, or limited stud access complicates installation. Resolve those conditions before the finish work is complete.
Build the surrounding vanity area for guests, not just for photographs:
- Repeat the metal finish: Match the mirror frame with the faucet, sconces, or cabinet pulls for a connected look.
- Protect counter space: Leave room for toiletries, since excessive décor becomes an obstacle.
- Use a small tray: It can group soap, tissues, or a guest hand towel without spreading items across the countertop.
- Check the reflection: Position the mirror to make the room feel larger and reinforce its main design feature.
A well-sized mirror contributes to comfort, visual impact, and daily usability at the same time.
8. Build storage around the guest routine
Guests shouldn't have to open every cabinet to find a hand towel or search behind personal items for spare toilet paper. A polished guest bath provides obvious, accessible storage while keeping less attractive supplies hidden.
Use a combination of recessed medicine storage, vanity drawers, open shelving, a shower niche, and hooks near the door. In a narrow room, vertical storage can add capacity without consuming walking space. A shallow shelf above the toilet or beside the mirror may be more useful than a deep cabinet that makes the room feel tight.
Separate display storage from service storage
Open shelves should hold items guests can identify quickly, such as folded towels, soap, or a small basket. Keep cleaning products, backup paper goods, and extra toiletries in closed cabinetry. This separation keeps the room visually calm and reduces the temptation to over-style every surface.
Plan storage before the final fixture locations are fixed. A niche that collides with plumbing, a shelf that blocks the mirror, or a cabinet that interferes with the door can force expensive changes later.
Choose moisture-resistant materials and finishes, especially for shelving near the shower. Decorative baskets can conceal small items, but they shouldn't obstruct outlets, ventilation paths, or accessibility clearances.
Guests experience good storage as convenience, not decoration. Put essentials where someone can find them without asking.
9. Add water-efficient fixtures without losing comfort
A guest bath gets used intermittently, but inefficient fixtures still waste water over the life of the room. Modern low-flow toilets, faucets, and showerheads can support practical performance while reducing unnecessary consumption.
Look for EPA WaterSense-labeled products when the specifications suit the household. The label provides a useful starting point, but fixture selection still requires attention to pressure, spray quality, flush performance, replacement parts, and local availability.
Prioritize the fixtures guests touch
A faucet replacement can change the room's appearance without moving plumbing. A new toilet can improve cleanliness and performance, while a water-efficient showerhead can complement a larger shower upgrade. These choices are especially useful when the layout works and the homeowner wants to avoid structural changes.
Don't select a fixture solely because its efficiency rating looks attractive. A showerhead that feels weak or a faucet with awkward controls won't create a better guest experience. Test the product where possible, confirm the rough-in requirements, and make sure the finish coordinates with the mirror, lighting, and hardware.
For Southwest Michigan homeowners, it also makes sense to check local utility programs before purchasing. Rebates vary, so confirm current eligibility rather than assuming every efficient fixture qualifies.
Sustainability can extend beyond plumbing. Durable tile, repairable fixtures, long-lasting LED lighting, and cabinetry with a finish that can be cleaned easily may create more practical value than trend-driven materials that need early replacement.
10. Control moisture with better ventilation
A guest bathroom can look finished while moisture shortens the life of its materials. Effective ventilation removes humid air, limits condensation and odors, and helps protect grout, paint, cabinetry, and wall assemblies. For guests, a quiet fan is more comfortable and less likely to be ignored.
The IRC bathroom exhaust guidance summarized by Fantech identifies minimum local exhaust capacity of 50 cubic feet per minute for intermittent operation or 20 cubic feet per minute for continuous operation. The Home Ventilating Institute recommends 1 CFM per square foot for bathrooms up to 100 square feet. Use local code, room layout, and the duct route to choose the final fan.
Keep the exhaust path outdoors
Run the duct directly outside with sealed joints and insulation where needed. An attic termination transfers moisture into the building rather than removing it, increasing the risk of condensation and damage. A humidity sensor or run-time delay can keep the fan operating after guests finish showering.
Fan placement also affects performance. Position it near the shower while considering the supply-air path, then provide an accessible service point for maintenance. Southwest Michigan homeowners should confirm the exterior termination details during planning, especially when the remodel includes new ceiling finishes or a difficult duct route.
- Check the duct route: A short, practical route with sealed connections usually moves air more effectively.
- Use automatic controls: Humidity sensing helps compensate when guests forget the fan.
- Coordinate with lighting: A shared control may be convenient, while a separate switch gives guests more choice.
- Maintain the cover: Clean the grille regularly because dust buildup restricts airflow.
Pair ventilation with moisture-resistant finishes and realistic operating controls. That combination protects the visual investment and supports a more comfortable guest experience.
10 Guest Bathroom Remodel Ideas: Quick Comparison
| Remodel Option | Implementation Complexity 🔄 | Resource Requirements ⚡ | Expected Outcomes 📊 | Ideal Use Cases 💡 | Key Advantages ⭐ |
|---|---|---|---|---|---|
| Spa-Like Shower Upgrades with Rainfall Showerheads | Moderate, often straightforward but may need plumbing mods | Showerhead/system, adequate pressure, possible valve work; $300–$1,200 installed | Resort-like feel; improved guest satisfaction; moderate home value uplift | Quick luxury upgrade for guest baths wanting spa feel | High perceived luxury with water-efficient options |
| Floating Vanities for Modern, Open Feel | Moderate–High, wall reinforcement and professional mounting required | Reinforced framing, plumbing adjustments, $800–$3,500 installed | Visually larger space; easier floor cleaning; contemporary aesthetic | Small bathrooms seeking modernization and cleaner lines | Space-enhancing modern look that increases perceived value |
| Curbless/Walk-In Showers for Accessibility and Style | High, precise waterproofing, slope, and drain expertise required | Skilled labor, waterproofing, linear/recessed drain; $2,500–$6,000+ | Seamless, accessible shower; high value and universal design appeal | Aging-in-place, mobility needs, high-end guest baths | Barrier-free access and sleek, modern appearance |
| Custom Tile Work and Statement Walls | High, detailed layout and specialist installation | Specialty tiles, skilled installers, longer lead times; $1,500–$8,000+ | Strong visual impact; unique, long-lasting finish; high perceived value | Feature walls, focal points in luxury remodels | Fully customizable aesthetics and durable installation |
| Heated Tile Floors and Radiant Heat Systems | High, subfloor prep and electrical/hydronic installation | Electric or hydronic system, thermostat, possible electrical upgrade; $2,000–$5,500 | Exceptional comfort, efficient heat distribution, winter comfort | Cold-climate homes or high-end comfort-focused baths | Luxury comfort with energy-efficient heating benefits |
| Luxury Lighting Design with Layered Lighting | Moderate, design planning plus some electrical work | Multiple fixtures, dimmers, LED tech; wiring work; $800–$3,000+ | Dramatic ambiance, improved task performance, perceived luxury | Any remodel needing high visual ROI and better functionality | Big visual impact for moderate cost; energy-efficient LEDs |
| Statement Mirrors and Vanity Styling | Low–Moderate, secure mounting and possible custom sizing | Mirror cost and hardware, $300–$2,000+ | Instant focal point; expands visual space and improves light | Quick aesthetic upgrade or finishing touch in most baths | High impact-to-cost ratio; enhances lighting and space |
| Storage Solutions and Vanity Organization | Low–Moderate, planning and carpenter/cabinet work | Shelving, niches, organizers; carpentry or prefabricated units; $500–$3,000+ | Reduced clutter, improved usability, cleaner appearance | Small guest baths or hosts prioritizing convenience | Functional upgrade that improves guest experience |
| Water-Efficient Fixtures and Sustainable Design | Low, mostly fixture replacement; minor plumbing possible | Low-flow toilets/faucets/showerheads; $1,200–$3,500 overall | Lower water use and utility bills; eco-friendly appeal; rebates possible | Eco-conscious homeowners or projects seeking rebates | Long-term savings and reduced environmental impact |
| Ventilation Upgrades and Moisture Management | Low–Moderate, fan selection and duct routing matter | High-CFM fan, humidity sensor, ductwork; $400–$1,500 | Better air quality, reduced mold risk, longer finish life | Humid climates, older homes, or remodels addressing moisture | Protects other upgrades and improves comfort and durability |
Turn your guest bathroom plan into a clear budget
A successful guest bathroom remodel starts with the work that protects the room. Address ventilation, waterproofing, drainage, electrical safety, and accessibility before spending heavily on decorative tile or designer hardware. A statement mirror can't compensate for a shower that leaks, and a rainfall showerhead won't feel luxurious if the exhaust system leaves the room damp.
Budget planning should reflect the actual scope rather than a single national average. Recent industry summaries place typical bathroom remodel costs anywhere from about $10,000 to $30,000, with published averages around $16,500 and broader estimates reaching roughly $26,138 for a midrange remodel, depending on finishes, layout changes, and project complexity, as summarized by the bathroom remodeling cost guide. HIRI's 2025 Project Decision Study reported average bathroom-remodel spending of $12,061 and median spending of $7,800, according to its bathroom remodeling trends report. These figures aren't a quote for your room. They show why plumbing changes, waterproofing, electrical work, tile complexity, and finish selections need to be discussed together.
A recent 2025 U.S. homeowner survey found that 50% exceeded their planned bathroom renovation budget, with unexpected costs identified as a major challenge, according to survey coverage of bathroom remodeling trends and budgets. Build a realistic allowance for concealed conditions, substrate repairs, fixture changes, delivery issues, and finish upgrades before construction begins.
Prioritize the upgrades that compound well
Start with the room's layout and infrastructure. If the plumbing locations are sound, you may be able to direct more of the budget toward a custom tile wall, statement mirror, better lighting, or a floating vanity. If the shower floor needs rebuilding for a curbless design, waterproofing and drainage will take priority over cosmetic additions.
Review every selection for compatibility before ordering:
- Fixture rough-ins: Confirm faucet, valve, toilet, and drain requirements.
- Wall structure: Plan blocking for floating vanities, grab bars, shelves, and heavy mirrors.
- Electrical capacity: Coordinate heated floors, lighted mirrors, dimmers, and exhaust fans.
- Maintenance: Check grout, tile texture, glass, hardware, and cabinet finishes for cleaning demands.
- Circulation: Verify door swing, shower entry, vanity depth, and accessibility clearances.
Southwest Michigan homeowners can use Trademaster Construction's instant pricing tool for a ballpark estimate before scheduling a detailed conversation. Bring that starting point to a planning discussion about layout, materials, tile patterns, ventilation, and construction sequencing.
The strongest guest bathroom remodel balances memorable design with dependable everyday performance. Choose a focal point, then support it with storage, comfortable lighting, water efficiency, accessible circulation, durable surfaces, and moisture control. If you're ready to price your ideas, use the instant tool first, then contact the team with the room dimensions, photos, and priorities you want to discuss.
Trademaster Construction helps Southwest Michigan homeowners plan guest bathroom renovations, custom tile installations, accessible showers, and practical fixture upgrades from concept through construction. Visit Trademaster Construction to review remodeling resources, explore project inspiration, and start a conversation about a guest bathroom that looks polished and performs reliably.

