
You're usually deep into the fun part of a remodel when cabinet hardware suddenly becomes a real decision. The cabinets are chosen. The tile is set. The paint color finally looks right in the room. Then someone asks, “Do you want knobs, pulls, cup pulls, bar handles, brass, black, chrome, or something else?”
That's the moment many homeowners realize hardware isn't a throwaway detail. It's the piece you touch every day, and it can either sharpen the whole room or make it feel slightly off. A beautiful kitchen can still feel awkward if the drawer pulls are too small, slippery, hard to grip, or out of scale with the cabinetry.
A lot of advice on how to choose cabinet hardware stops at style. That's only half the job. The right choice also needs to fit the cabinet size, the way the room is used, and the people using it. That matters even more for homeowners planning to stay in their home long term and want a space that remains comfortable as needs change.
The Finishing Touch That Defines Your Space
A near-finished kitchen often looks complete from across the room, but it doesn't feel complete until the hardware goes on. Once the handles and knobs are installed, the cabinets stop looking like shop drawings and start feeling like part of a lived-in home.
That's why people get stuck here. Hardware looks small, but it carries a lot of visual weight. It also affects comfort beyond initial expectations. A cabinet pull that looks perfect in a showroom can feel sharp, cramped, or undersized once it's in daily use.
Why this decision feels harder than it should
Homeowners usually narrow the big-ticket items first. Cabinet door style, countertop edge, faucet finish, backsplash tile. Hardware comes later, when decision fatigue is already setting in. Then you're staring at pages of options that all look similar until they don't.
A useful way to simplify the process is to treat hardware like the room's finishing detail, not an isolated product. If you're still weighing whether to refresh existing cabinetry or make broader changes, these Houston homeowner's cabinet upgrade options offer a practical way to think through the bigger picture before locking in the final accessories.
Practical rule: If the cabinets are the structure of the room, the hardware is the handshake. It needs to look right and feel right.
What separates a good choice from a frustrating one
The best hardware choices usually hold up in four areas:
- Style fit: The shape and finish should support the cabinet design, not fight it.
- Scale: A pull that's too short or a knob that's too small can make a large vanity or wide drawer look unfinished.
- Function: Good hardware should be easy to grab with wet hands, full hands, or stiff fingers.
- Budget discipline: Small pieces add up fast when you multiply them across an entire kitchen or bathroom.
When those four pieces line up, the room feels intentional. When one of them gets ignored, the problem shows up every day.
Matching Hardware Style and Finish to Your Home
A polished pull can still feel wrong the minute you touch it. I see that happen when homeowners choose hardware that matches the faucet but ignores the cabinet style, the age of the house, or how the room gets used every day.
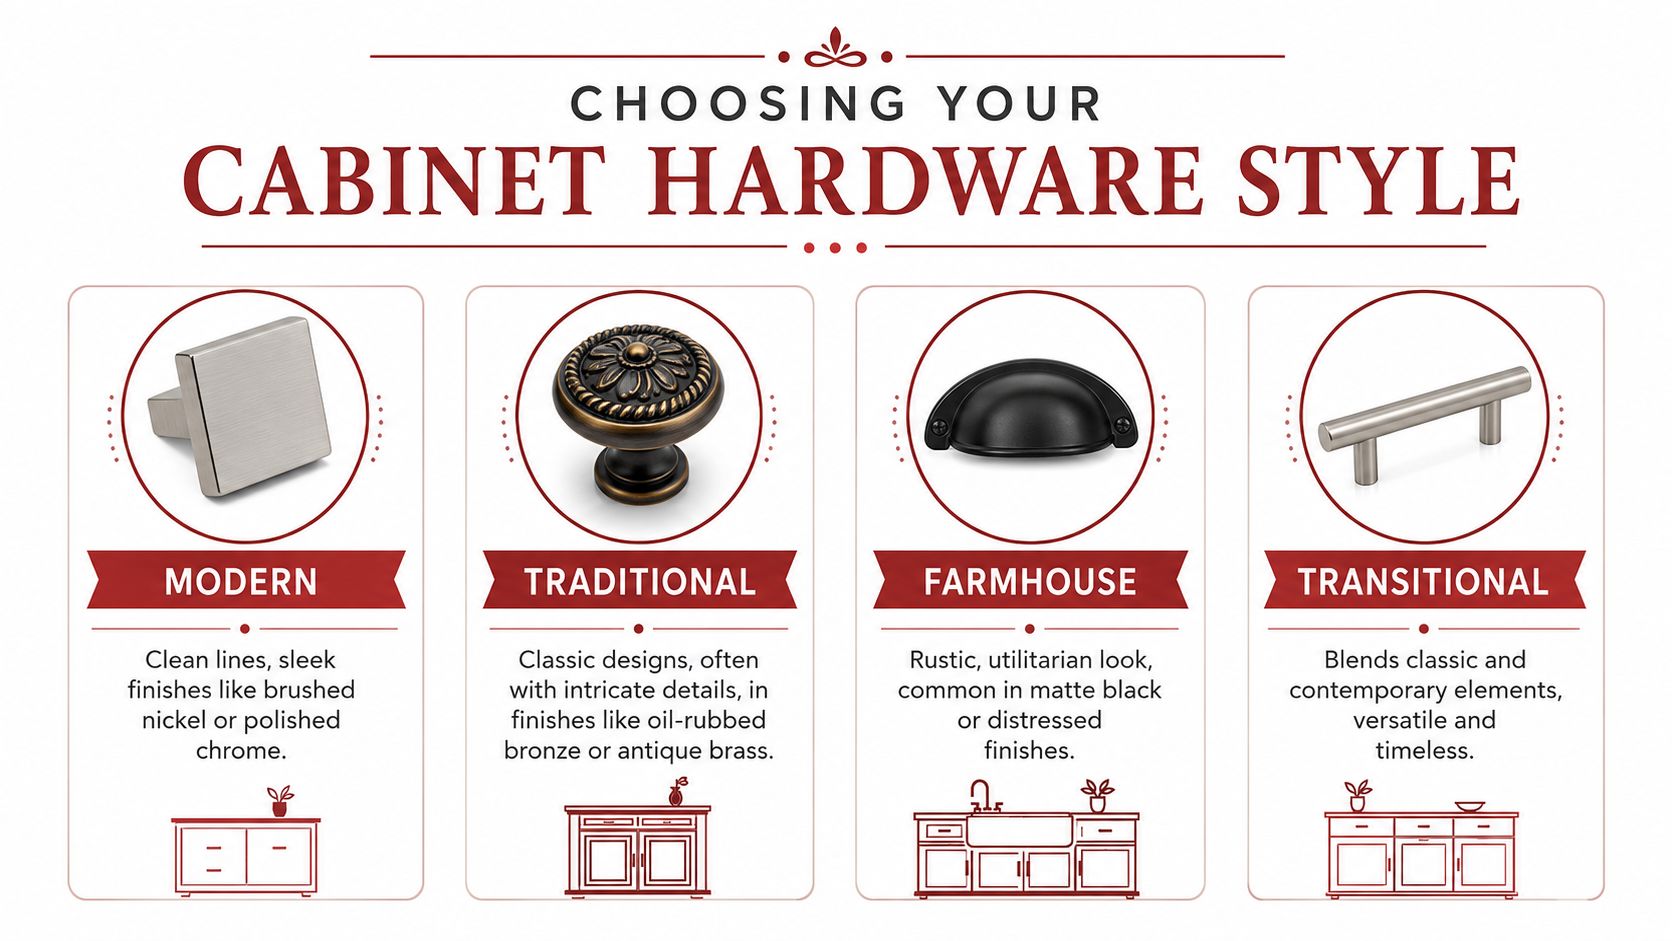
Start with the cabinet style
The cabinet door should set the direction. Slab and flat-front doors usually look best with simple hardware that keeps the lines clean. Raised-panel and shaker-style cabinets can carry more visual detail, but the hardware still needs restraint or the whole run starts to feel busy.
If you're comparing cabinet styles before you settle on hardware, this piece on expert kitchen cabinet style advice is useful because overlay and inset cabinetry often change what looks proportionate and natural.
Here's the rule we use on projects. Match the hardware to the cabinet's character first, then confirm it also fits the rest of the room.
| Style | Hardware that usually works | What often looks wrong |
|---|---|---|
| Modern | Slim bar pulls, edge pulls, square knobs, low-profile shapes | Ornate knobs, decorative backplates, heavily curved profiles |
| Traditional | Rounded knobs, classic cup pulls, pieces with some detail | Extra-long minimalist pulls that feel too severe |
| Farmhouse | Bin pulls, straightforward handles, matte or aged finishes | Mirror-polished hardware that reads too formal |
| Transitional | Simple pulls with softened edges, understated knobs | Very rustic ironwork or highly decorative pieces |
Mixed metals can work, but they need a reason. If the lighting is black, the faucet is brushed nickel, and the hardware is brass, one of those choices has to act as the accent rather than all three competing for attention.
Finish affects upkeep and day-to-day comfort
Finish is partly about color, but maintenance is what usually decides whether homeowners stay happy with the choice. The National Kitchen and Bath Association notes in its kitchen planning guidelines that kitchens should be planned around safe, efficient use, and that principle applies to hardware finishes too. In practice, polished surfaces show fingerprints faster, darker finishes can reveal wear on edges, and living finishes change as they're handled.
That change is not always a drawback. Unlacquered brass, bronze, and copper can develop a worn-in look that suits older homes or clients who want character instead of uniformity. Homeowners who want the hardware to look the same in year five as it did on install day usually do better with a protected finish such as brushed nickel, satin brass, or powder-coated black.
Aging-in-place clients should pay attention here. Finishes with a little texture and lower reflectivity are often easier to see and use than high-gloss pieces, especially under uneven lighting or for anyone with reduced vision. Hardware also needs enough contrast against the cabinet color to stand out at a glance. A matte black pull on a black stained vanity may look sharp in a photo, but it can be harder to spot and grab in daily use.
Keep style decisions honest
Good-looking hardware still has to earn its place.
A delicate knob may suit a traditional door, but it is a poor choice for someone opening heavy drawers with arthritis or limited grip strength. A long, easy-to-wrap pull often looks cleaner and works better. That trade-off matters more than matching a trend.
The best finish and style choices usually come from narrowing the field this way:
- Match the cabinet first. Let the door style lead.
- Check the room's other metals second. Faucet, lighting, and appliances should feel coordinated, not identical.
- Choose a finish you can live with. Patina, fingerprints, and wear patterns bother some homeowners more than others.
- Give visibility some weight. Contrast helps children, guests, and aging homeowners use the space more comfortably.
Hardware should look like it belongs in the house. It should also be easy to see, easy to grip, and easy to keep looking respectable. That combination is what holds up.
Getting the Size and Scale Just Right
Most hardware mistakes come down to scale. Homeowners pick something attractive, hold it up to a drawer front, and still aren't sure if it's right. A sizing rule then helps.
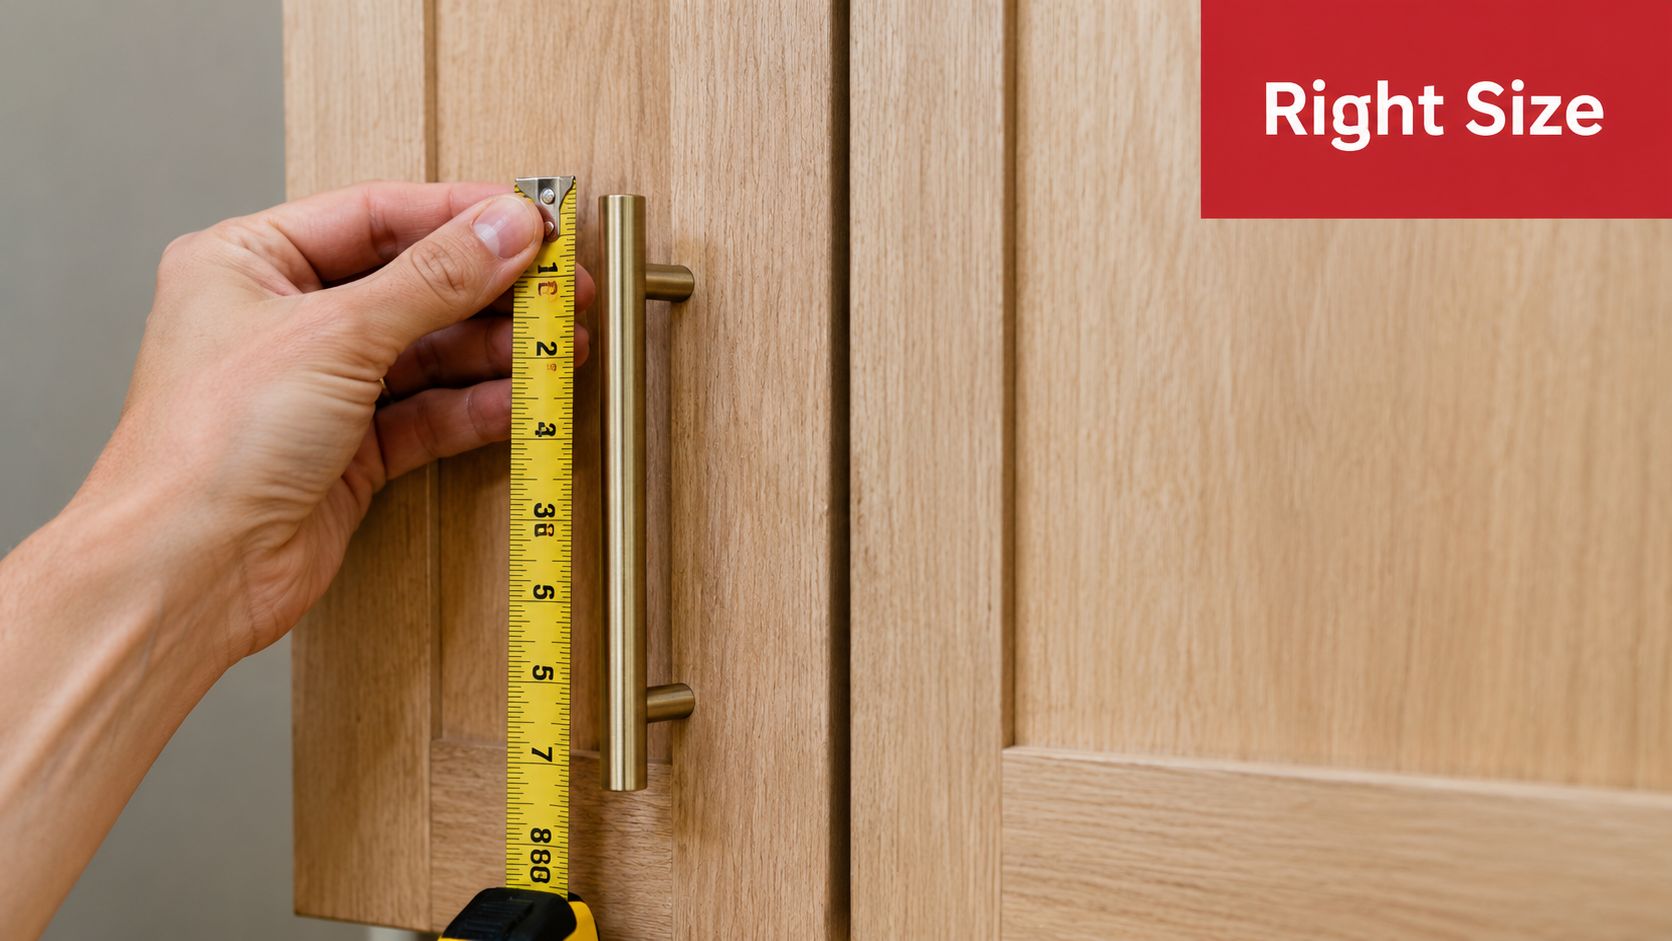
Use the one-third rule first
A solid starting point is the one-third rule. Pull lengths should be approximately one-third of the cabinet door or drawer width for visual balance, as outlined in Rocky Mountain Hardware's sizing guide. That proportion usually feels right because the hardware takes up enough space to look intentional without overwhelming the face of the cabinet.
That rule gets more useful when you pair it with actual drawer sizes:
- Small drawers: Drawers measuring 12 inches or less typically use pulls 3 to 4 inches long.
- Medium drawers: Drawers from 12–30 inches usually work best with pulls 4–8 inches long.
- Large drawers: Drawers spanning 30 to 48 inches generally need pulls longer than 8 inches or multiple knobs.
Those numbers remove a lot of guesswork. If a wide vanity drawer is getting a tiny pull just because it looked nice on the sample board, it's probably going to feel undersized once installed.
When two pieces of hardware make more sense
For large drawers, symmetry and grip both matter. A single small knob in the center can technically work, but it often looks underpowered and can feel awkward when the drawer is loaded. On wider fronts, longer pulls or multiple touch points usually create a more stable, intentional result.
A lot of modern projects also push beyond the classic one-third proportion and use longer pulls for a cleaner look. That can work well, but only if the hardware still feels scaled to the door and doesn't collide visually with rails, stiles, or adjacent elements.
Here's a quick visual check before you buy a full set:
- Measure the drawer front width.
- Apply the one-third rule as your baseline.
- Tape the pull size onto the cabinet face. Painter's tape works well for this.
- Step back and test reach. Open the drawer as if your hands are wet, full, or tired.
This walkthrough helps if you want to see cabinet hardware measuring in action:
Don't forget center-to-center measurement
Replacement projects have one extra trap. If you're swapping old pulls for new ones, the critical number isn't overall pull length. It's the center-to-center distance, sometimes called the pole spread. That's the measurement from the center of one screw hole to the center of the other.
Get that wrong, and a simple refresh turns into patching and drilling. Before ordering anything, remove one existing pull, measure carefully, and verify that the new hardware matches the current hole spacing.
A pull can be the perfect style and still be the wrong choice if it doesn't fit the holes you already have.
Prioritizing Functionality and Everyday Use
A cabinet can look perfect on day one and still frustrate you every day after that. I see this most often when homeowners choose hardware from a photo, then realize later that the knobs are hard to grip with wet hands, or the pulls sit too tight to the door for swollen knuckles or aging joints.
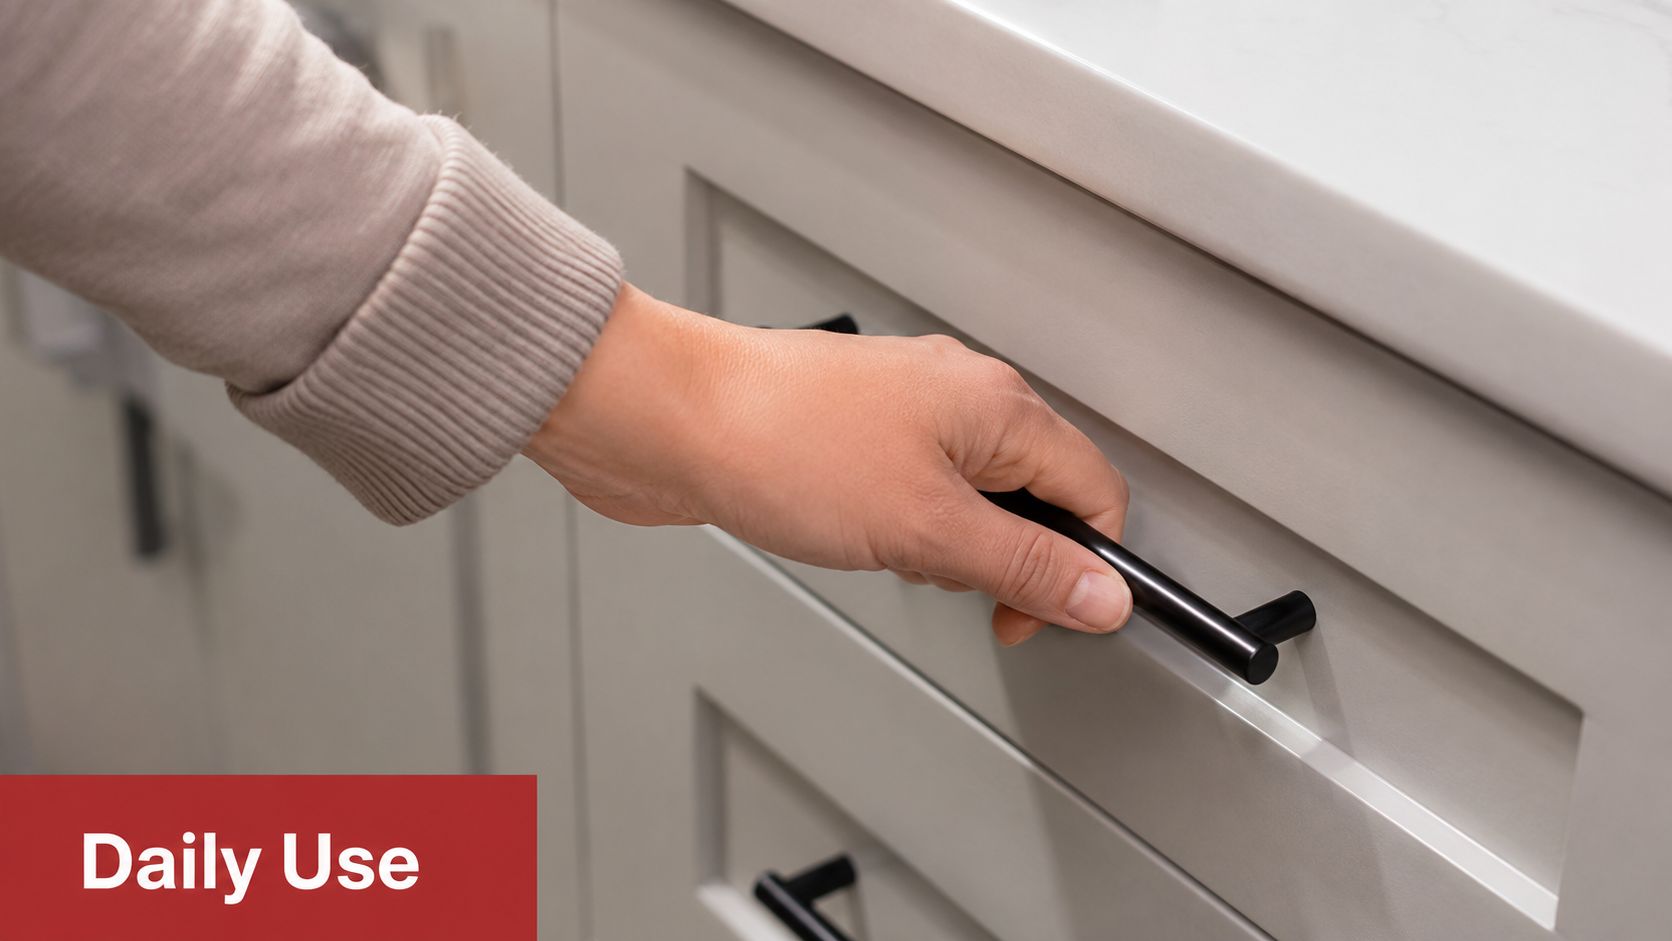
Why ergonomics deserve more attention
Good hardware needs to work under real conditions. That means early mornings, damp hands at the sink, heavy prep days, and the normal changes that come with arthritis, reduced grip strength, or limited finger mobility.
The National Kitchen and Bath Association's aging-in-place guidance supports choices that reduce strain and improve ease of use, especially in kitchens and baths where cabinets are opened constantly. In practice, that usually points homeowners toward pulls instead of small knobs, along with enough finger clearance to get a secure grip.
That recommendation holds up on job sites. A small round knob can be fine on a decorative cabinet or a lightly used powder room vanity. In a hardworking kitchen, it often asks too much from the fingertips.
Better choices for aging in place
Homeowners planning to stay in their homes long term should treat cabinet hardware as part of daily accessibility, not just the finish schedule. The best choices usually share a few traits:
- Bar pulls: Easier to grab with a full hand, not just pinched fingers.
- C-shaped pulls: A practical option if you want a softer look without giving up grip comfort.
- Adequate back clearance: If fingers cannot slide behind the pull easily, the style will get old fast.
- Rounded edges: More comfortable during repeated use and less likely to feel sharp on sore hands.
- Consistent placement and orientation: Doors and drawers should open with a predictable motion throughout the room.
Aging-in-place design does not have to look medical or institutional. It's about removing small daily frustrations before they limit how comfortably someone can use the space.
What tends to cause problems
The pieces that disappoint are usually the ones that looked best on a sample board. Very slim pulls can feel insecure in the hand. Decorative knobs with tight profiles leave little room for fingers. Hardware with aggressive texture or deep ridges can also collect grease and grime in a kitchen, which means more cleaning and less comfort.
Projection matters too. A pull that sticks out too far can catch belt loops or sleeves, especially on narrow walkways or near appliance runs. A pull with too little projection creates the opposite problem and forces you to hook your fingertips into a cramped space.
Choose hardware for the day your hands are tired, stiff, or wet. That test tells you more than the showroom display ever will.
If the room will serve someone with arthritis, reduced grip strength, or mobility concerns, pulls are usually the safer long-term choice.
Setting a Budget and Testing Your Choices
A hardware budget can go sideways late in a project. A client picks a pull they like at $18 each, then we count 28 drawers and doors in the kitchen, 6 in the mudroom, and a vanity in the bath. What looked modest on a sample card suddenly becomes a line item worth paying attention to.
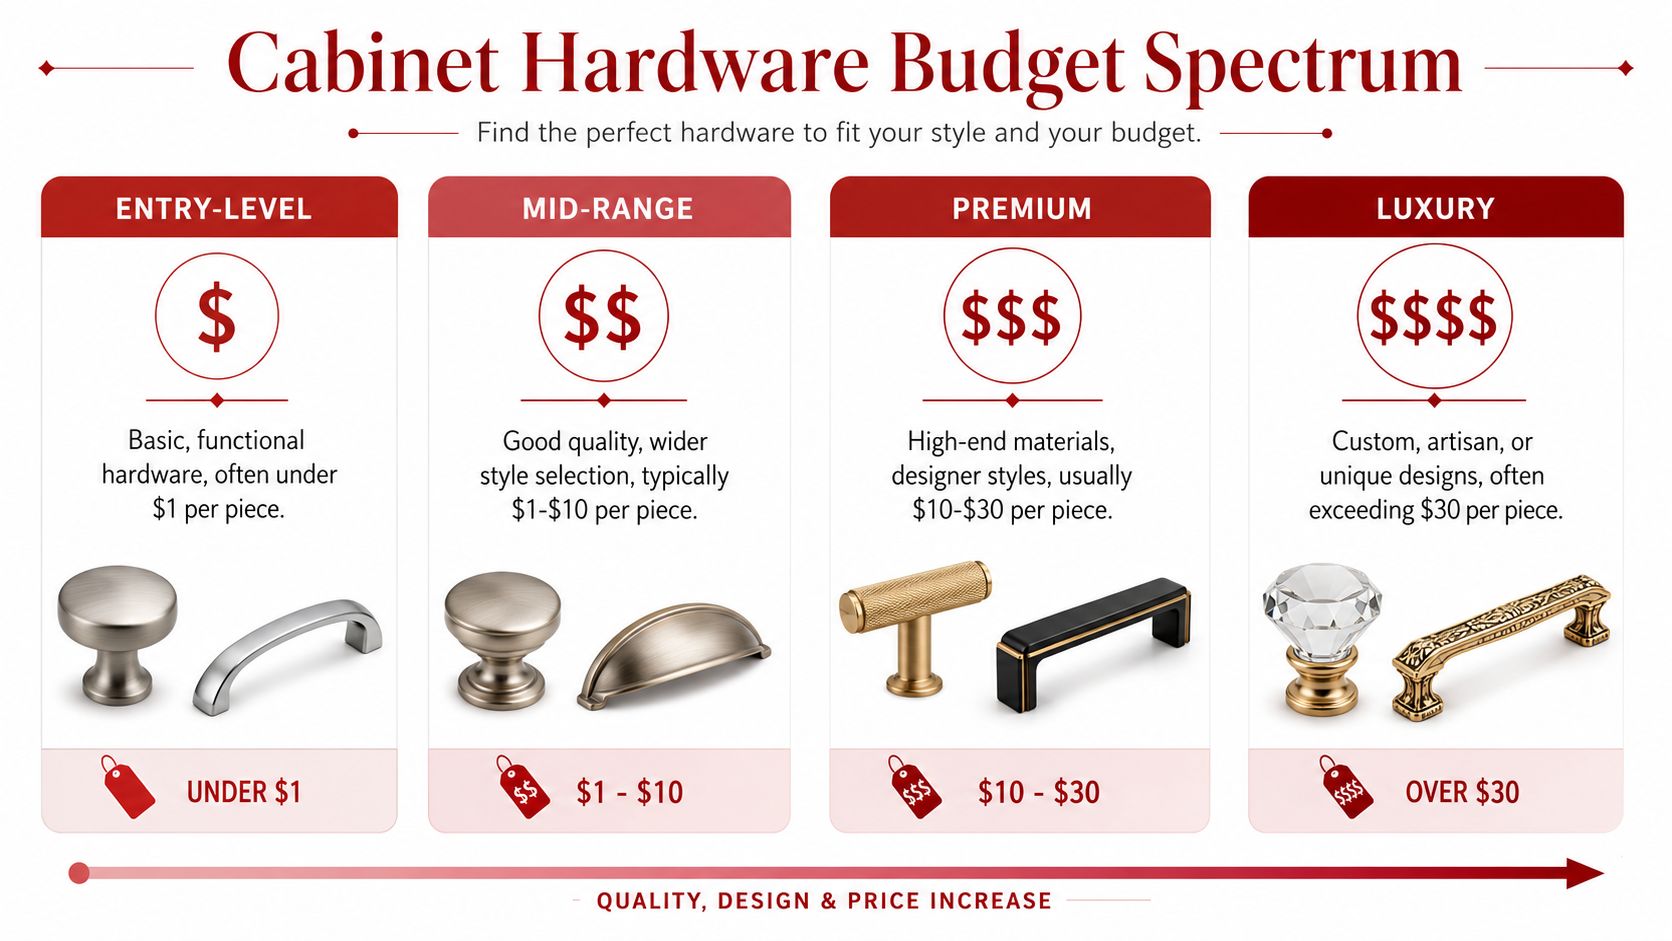
Budgeting hardware starts with count, then use, then finish.
The count sets the total faster than homeowners expect, but the smarter question is where better hardware will earn its keep. Kitchen drawers, pantry doors, and primary bath vanities get touched constantly. Secondary baths, laundry rooms, or built-ins often give you more room to save without feeling like a downgrade.
For aging-in-place planning, I usually advise clients not to trim the budget first on the pieces they touch every day. A pull that is easier to grasp, easier to clean, and less frustrating with stiff hands will matter long after the exact shade of brass stops feeling new.
A simple budgeting framework helps:
| Question | Why it matters |
|---|---|
| How many pieces are in the full count? | The total project cost depends more on quantity than the price of one knob or pull |
| Which cabinets get daily use? | High-use areas are usually the best place to spend more for comfort and durability |
| Do the finishes match across brands? | Similar finish names can still look different once installed under real lighting |
Material also affects value. Solid brass, stainless steel, and well-made plated pieces can all work, but they do not wear the same way over time. If the home is being updated for long-term use, I would rather see a client buy fewer premium pieces in high-contact areas than overspend on decorative hardware everywhere.
Before placing a full order, test one sample on the actual cabinet. The Top Knobs hardware guide recommends confirming pull measurements carefully before purchase, and that same caution applies to comfort and finish. On site, a sample answers the questions that a showroom display cannot.
Check four things:
- Grip comfort: Open a heavy drawer with dry hands, wet hands, and one hand carrying something.
- Finish under your lighting: Daylight, under-cabinet lights, and evening bulbs can all shift the color.
- Cleaning reality: Grooves, ridges, and sharp inside corners collect grime faster in kitchens and baths.
- Household fit: If someone in the home has arthritis or reduced grip strength, test the hardware with that person, not just with the strongest hand in the house.
For vanity projects, Western Bathroom Renovations' guide is also a useful reminder that hardware decisions should be made alongside the cabinet and installation plan, not after everything else has been ordered.
To get a clearer picture of total remodeling costs beyond the hardware itself, from cabinetry to tile and countertops, it helps to use a planning tool early. You can use the instant pricing tool for a ballpark remodel estimate while you're sorting through product choices and budget priorities.
Installation and Bringing Your Vision to Life
A hardware choice can be right on paper and still disappoint once it is on the cabinet. I see that happen when the style is good, but the installation leaves pulls drifting from one drawer to the next or places a knob where it looks tidy yet feels awkward in daily use.
Placement needs to satisfy two jobs at once. It has to look consistent across the room, and it has to land where the hand naturally reaches. That second part matters even more in aging-in-place remodels, where small decisions about reach, grip, and wrist position affect comfort every day.
On most projects, upper door hardware sits near the lower corner on the latch side, lower door hardware sits near the upper corner on the latch side, and drawer pulls center on the drawer front unless the drawer is unusually wide or part of a stacked bank that needs a different visual rhythm. Exact placement depends on door style, rail width, overlay, and the size of the hardware you chose. A shaker door, for example, gives you a visual reference point that a slab front does not, so the margin for sloppy placement is smaller than many homeowners expect.
DIY can work if you control the layout
A jig helps. So does a full mockup on the actual cabinets before the first hole is drilled.
Tape the hardware in place, step back, and open every door and drawer. Check the tall pantry. Check the trash pullout. Check the vanity drawers when someone is standing close to the sink. In homes where arthritis, reduced grip strength, or limited shoulder mobility are part of the planning conversation, this is the moment to confirm that the hardware location supports an easy pull instead of forcing a pinch or wrist twist.
One bad hole is repairable. Twenty matching bad holes turn into an expensive correction.
When professional installation earns its keep
Professional installation pays off when the room has long cabinet runs, mixed drawer heights, appliance panels, or inset cabinetry where alignment is unforgiving. The work is less about fastening the hardware and more about keeping the whole composition orderly. Consistent reveals, matched heights, and clean sightlines are what make the finished kitchen or bath feel settled.
If your project includes a vanity update, this practical Western Bathroom Renovations' guide is a good reminder that installation quality affects how the entire bathroom reads, not just whether the piece is technically in place.
A good result usually follows this order:
- Confirm placement on one sample door and one sample drawer
- Test reach and grip with the people who will use the space
- Use a jig or template for repeatable hole placement
- Install in a consistent sequence across the full cabinet run
- Make final adjustments before every screw is fully tightened
That process protects both the look and the function of the room. The best cabinet hardware does not call attention to itself after installation. It feels natural, works with less effort, and supports the way the space will be used for years.

