
You've spent weeks saving kitchen photos, comparing cabinet colors, and debating whether the island should be larger. Then the contractor asks a more consequential question: What exactly is changing, what can you spend, and when can the work legally begin? Many homeowners discover too late that their appliances aren't available, their layout needs approval, or their daily routine has no workable backup.
Learning how to prepare for a kitchen remodel means planning more than finishes. You're coordinating scope, money, design, permits, materials, contractors, and the practical reality of living without your kitchen. A thoughtful preparation process won't eliminate every surprise, but it can keep budget drift and schedule slippage from controlling the project.
What Preparing for a Kitchen Remodel Really Means
A homeowner in the middle of a kitchen gut renovation often has the same regret: the demolition started before the important decisions were finished. The backsplash was chosen, but the cabinet order wasn't complete. The couple had discussed moving the sink, but nobody had confirmed whether the new plumbing arrangement or electrical plan could pass inspection. Their appliances were still “under consideration,” even though the rough-ins depended on their final specifications.
That situation is avoidable. Preparation starts before design selections and continues until the site is ready for demolition. Kitchen projects commonly require a long planning window. A 2026 Houzz study reported an average of 9.5 months of planning and 5.8 months of construction for kitchen projects. A separate Houzz study cited 9.6 months of planning and 5.1 months of building in 2024. In practical terms, homeowners often spend well over a year moving from first ideas to a finished kitchen.

The eight preparation streams
Run these decisions in parallel rather than treating them as isolated tasks:
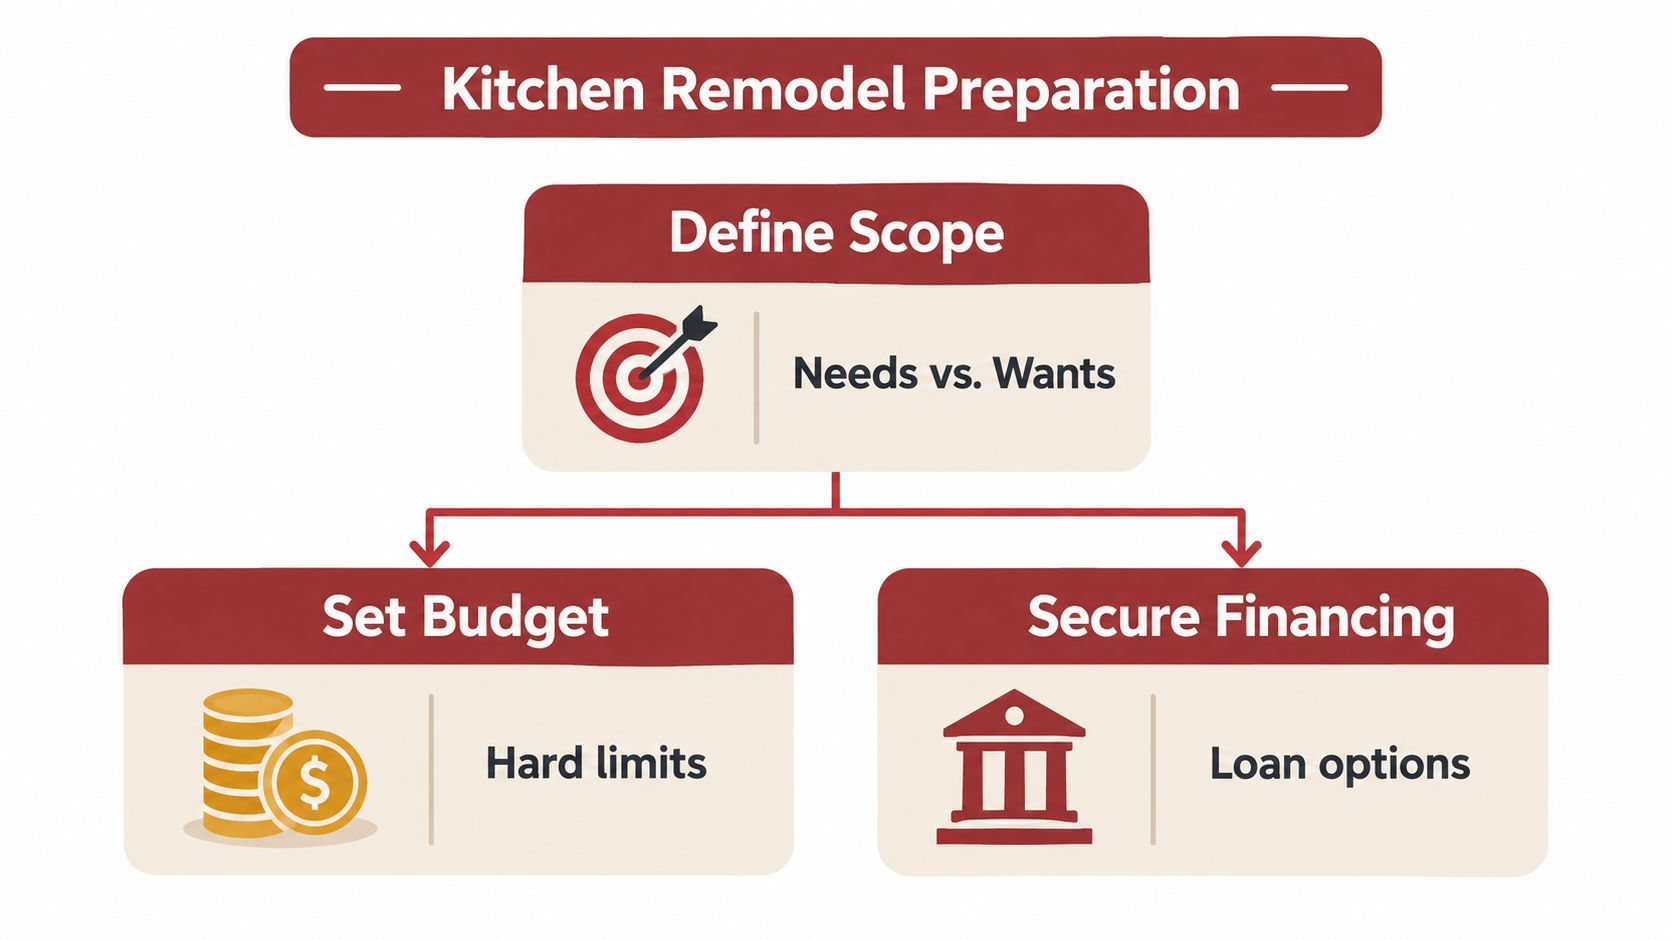
- Scope: Decide whether you're refreshing surfaces, changing part of the layout, or completing a full gut renovation.
- Budget: Set a working range, not just an ideal number.
- Financing: Confirm how deposits, progress payments, and material purchases will be funded.
- Design: Resolve layout, storage, lighting, plumbing, electrical, ventilation, and finishes.
- Contractor selection: Compare qualifications, communication, references, and bids.
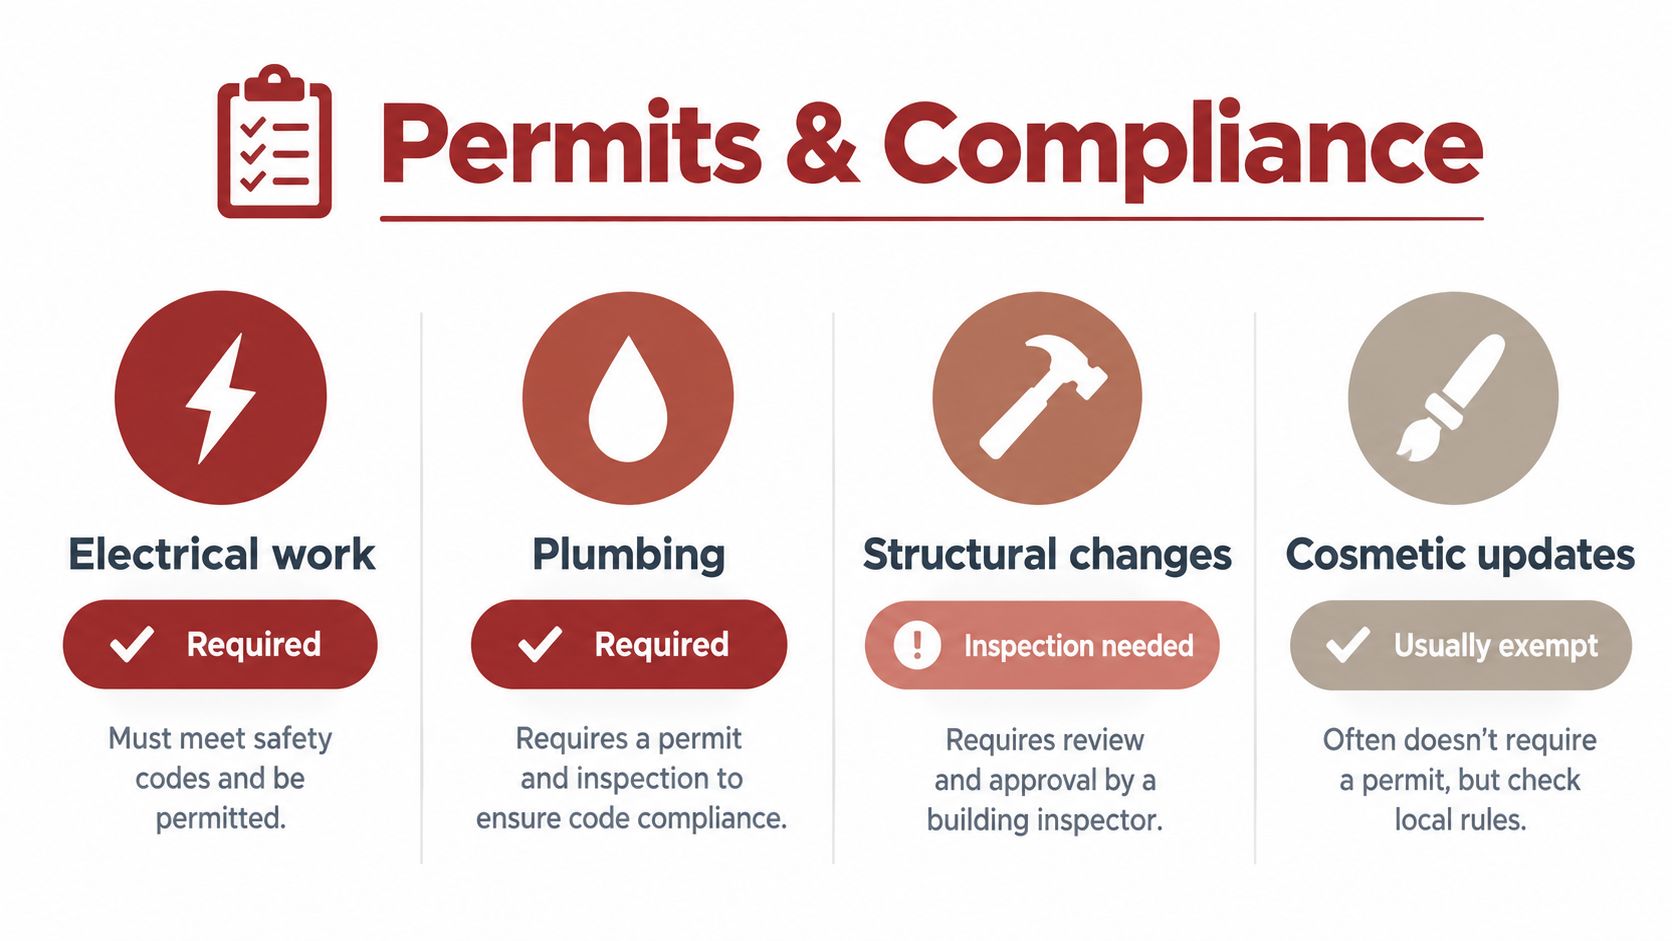
- Permits: Confirm which approvals and inspections apply before demolition.
- Procurement: Order cabinets and coordinate appliances, countertops, tile, and fixtures.
- Daily life: Create a temporary kitchen, protect the home, and plan for children, pets, meals, and dust.
The order matters, but these streams overlap. You can explore finishes while the scope is being defined, but you shouldn't approve a final cabinet design before the layout, appliance specifications, and budget have been reconciled.
Practical rule: If a decision affects a wall, utility, cabinet dimension, or delivery date, make it before demolition day.
Locking Down Scope and Budget Before Anything Else
Start with the work, not the color palette. A cosmetic refresh may leave the layout, plumbing, electrical, cabinets, and flooring largely intact. A partial remodel might replace cabinets and counters while preserving the room's footprint. A full gut renovation can involve structural changes, new utilities, new flooring, custom cabinetry, and extensive coordination.
Each option changes the cost, schedule, permit needs, and level of disruption. Write down the intended scope in plain language before meeting contractors. “Update the kitchen” is too vague. “Keep the exterior walls, relocate the sink, replace cabinets and countertops, upgrade lighting, and install new flooring” gives everyone a workable starting point.
Four decisions to settle early
Scope comes first. Separate what must change from what would be attractive. If the existing layout works, keeping it may free money for better cabinets, durable counters, or improved lighting. If the layout causes daily frustration, spending heavily on finishes without correcting it usually produces an expensive version of the same problem.
Budget follows scope. Houzz benchmark data reported a major remodel at about $29,400 for a small kitchen under 201 square feet and about $42,400 for a large kitchen over 201 square feet in the referenced cost study. The Houzz kitchen remodeling cost survey also notes that project size and decision time can vary substantially.
Timeline needs a target and flexibility. Choose the season and household dates you're trying to protect, then identify which events can move. A fixed holiday deadline is risky if cabinets, appliances, or permits aren't already aligned.
Must-haves need a boundary. Make two lists. The first contains functional requirements such as storage, ventilation, accessibility, or a better work path. The second contains upgrades that can be postponed if the estimate climbs.
The budget should also be stress-tested against the current market. A 2025 Houzz remodeling trends report reported a median kitchen remodel spend of $60,000 in 2025, up from $55,000 the prior year, and noted that the top 10% of large-kitchen major remodels reached at least $200,000. Those figures don't predict your quote, but they do show why a modest-looking wish list can drift toward premium pricing.
Building a Realistic Cost Estimate With Contingency
A useful estimate doesn't only show a project total. It explains which decisions create that total and which items could change after the walls are open. Cabinets usually dominate the budget, while plumbing and electrical changes add labor and coordination. Countertops, appliances, flooring, lighting, ventilation, and finish work can each become significant line items depending on the specification.
A University of South Alabama summary of renovation data reported that median kitchen spending rose 20% to $24,000 in 2023. The same renovation statistics summary also references 2025 to 2026 cost guides placing kitchen remodels around $14,589 to $41,559, with an average near $26,945 and cabinets accounting for nearly 30% of the total budget. Use these figures as benchmarks, not promises. Your footprint, labor market, product choices, and structural conditions will change the result.
A working estimate
| Category | Share of Budget | Typical Range |
|---|---|---|
| Cabinets | Nearly 30% | Varies by stock, semi-custom, or custom specification |
| Plumbing and electrical | Variable | Driven by relocation, code updates, and labor |
| Countertops | Variable | Driven by material, edge detail, and fabrication |
| Appliances | Variable | Driven by brand, size, and required utility connections |
| Flooring, lighting, tile, and finish work | Variable | Driven by area, material, and installation complexity |
| Contingency reserve | 10% to 20% | Held separately from the contract amount |
The table is intentionally a planning framework rather than a quote. A contractor should turn it into an itemized proposal with allowances, exclusions, and change-order terms.
Protecting the number
Set aside a 10% to 20% contingency reserve before you commit the entire budget. A kitchen remodeling hidden-fee guide describes this reserve as protection against hidden damage, unexpected conditions, and change orders. Keep it separate from the contract amount so it doesn't become permission to upgrade finishes.
Survey data adds another reason to plan conservatively. A home renovation trends report found that 53% of contractor-hired homeowners went over budget and 46% experienced significant delays. The same source reported that 63% of homeowners expected product or material cost concerns in 2026, while more than 9 in 10 expected some form of challenge.
Your working number should therefore contain three layers:
- Contract amount: The defined work, materials, labor, allowances, and agreed payment schedule.
- Contingency: The protected reserve for concealed damage, substitutions, and approved changes.
- Soft costs: Temporary meals, storage, delivery fees, extra cleaning, and other household expenses.
Before design work expands, compare your estimate with a quick instant kitchen remodeling price estimate. A ballpark figure won't replace a site visit, but it can reveal whether your wish list belongs in a cosmetic refresh, a partial remodel, or a larger renovation conversation.
Handling Permits, Inspections, and Compliance Early
Permits are easy to ignore when the project begins with cabinets and paint. They become impossible to ignore when a wall is opened, a gas line is moved, or an inspector asks for documentation after demolition has already exposed unapproved work.
Permit requirements depend on the scope and local jurisdiction. Plumbing, electrical, gas, structural, and ventilation changes commonly require review, while a basic cosmetic refresh may not. The New York City Department of Buildings kitchen and bathroom renovation guidance states that plans and permits may be needed for renovations and that work permits apply to most construction projects. Local rules in Southwest Michigan may differ, so use that principle as a prompt to contact the relevant building department, not as a substitute for local confirmation.
Make the call before scheduling demo
Have these details ready:
- A plain-language description of the work.
- Existing and proposed floor plans.
- Cabinet and appliance layouts.
- Structural drawings, if walls or openings change.
- Plumbing, electrical, gas, and ventilation changes.
- Contractor information and project address.
Ask which permits apply, who will pull them, what inspections are required, and whether the contractor or homeowner is responsible for scheduling each visit. Get the answer in writing.
Demo day should follow permit confirmation, not precede it.
Rough inspections typically occur after utilities are installed but before walls are closed. Final inspections happen after the work is complete. Your contract should identify who coordinates both, what happens if an inspection fails, and whether the project schedule includes time for corrections.
Check the surrounding obligations
Call your homeowner's insurance carrier before work begins. Ask whether the renovation affects coverage, whether documentation is required, and how the contractor's insurance should be verified. If your property is governed by an HOA, review rules for construction hours, exterior changes, dumpsters, deliveries, and temporary protection.
A permit isn't just paperwork. It creates a sequence. The inspector needs to see certain work before insulation, drywall, cabinets, or finishes conceal it. Build that sequence into the schedule so an approval requirement doesn't turn a normal installation day into a stop-work delay.
Choosing the Right Contractor and Reading the Bids
A contractor's review score is only a starting point. The useful comparison is between the way each contractor defines the work, handles uncertainty, communicates changes, and manages subcontractors.
You can find a remodeler through personal referrals, competitive bidding, or a design-build firm. A referral gives you firsthand information about communication and workmanship, but the project may not match your own scope or budget. Competitive bidding can expose pricing differences, but bids are only comparable when every contractor is pricing the same drawings, specifications, allowances, and exclusions. A design-build firm keeps design and construction under one process, which can simplify responsibility, though you still need to understand how selections, revisions, and costs are controlled.

Make competing bids comparable
Read each proposal line by line. Normalize the items that often hide differences:
- Allowances: Confirm the assumed cabinet, appliance, fixture, tile, and countertop amounts.
- Exclusions: Ask what isn't included, such as painting, flooring removal, permits, cleanup, or utility upgrades.
- Payment schedule: Match deposits and progress payments to defined milestones.
- Change orders: Check how pricing, approvals, and schedule effects are documented.
- Completion date: Look for a realistic target and a process for handling delays.
- Responsibilities: Identify who orders materials, coordinates inspections, and protects finished surfaces.
A low bid may omit work that another contractor included. Ask each finalist to walk through the proposal in the kitchen, point to the affected areas, and explain what happens if concealed conditions appear.
Questions that expose process quality
Ask who will be your day-to-day contact, who supervises subcontractors, and how often you'll receive updates. Request references from completed projects, including work finished more than six months ago. Ask those homeowners whether the final scope matched the contract, how changes were handled, and whether the contractor protected the rest of the home.
Red flags include a large upfront deposit, vague scope language, no clear completion target, pressure to sign immediately, and reluctance to provide references. You should also be cautious when a contractor avoids discussing permits or treats allowances as final prices.
Trademaster Construction presents one example of a clear path from concept through construction, with kitchen remodeling guidance and a pricing tool that helps homeowners form an initial budget before a consultation. Whether you choose that approach or another contractor, insist on a written scope and a communication process you understand.
A short project conversation can also help you judge how clearly a contractor explains decisions. This kitchen remodeling planning video can provide additional context while you compare approaches.
Sequencing Selections So Lead Times Do Not Stall the Build
A kitchen remodel can lose momentum when selections are made in the wrong order. Cabinets determine many dimensions, appliances influence electrical and ventilation rough-ins, and countertops depend on the installed cabinet layout. Treating every finish as an equal, independent choice creates avoidable pauses.
Start with the decisions that control the room
Finalize the layout and cabinet specification. Confirm wall locations, island dimensions, appliance openings, fillers, panels, drawer configurations, hardware locations, and finished heights. Cabinet orders commonly run 4 to 5 weeks for some lines and 10 to 12 weeks for custom or color-matched orders, according to a kitchen renovation timeline guide. Don't approve the order until you've reviewed the final drawings and specifications.
Lock appliances next. The refrigerator, range, cooktop, wall oven, dishwasher, and hood affect opening sizes, outlet locations, gas connections, ventilation, and clearances. A substitution after rough-in can force rework.
Choose countertops after cabinet details are stable. Material availability, edge profiles, sink type, and overhangs should match the approved cabinet plan.
Select tile and plumbing fixtures. Tile affects transitions, backsplash heights, grout decisions, and installation sequencing. Fixtures need to match rough-in requirements.
Finish with hardware and small accessories. Handles, knobs, organizers, lighting accents, and decorative details matter, but they shouldn't delay decisions that control construction.
A typical full remodel is described in one remodel timeline guide as taking 6 to 9 months overall, including 1 to 3 months for planning and design, 1 to 2 months for ordering and logistics, 2 to 4 weeks for demolition and rough construction, and 4 to 8 weeks for finishing and installation. Those phases overlap, but the logic is useful. Planning and ordering should happen before the crew needs the materials.
Don't schedule demolition just because the calendar feels convenient. Schedule it when the layout is approved, permits are confirmed, cabinets are ordered, appliances are accounted for, and the contractor has a documented plan for deliveries and substitutions.
Planning Your Temporary Kitchen and Daily Life
A Portage family of four can get through a kitchen remodel with less disruption when daily routines are planned before the cabinets come out. In this example, two pets need protection from open work areas, while a teenager needs a packed lunch each school day. The temporary setup does not need to function like a full kitchen. It does need dependable space for coffee, reheating food, washing dishes, storing essentials, and keeping dust away from the rest of the house.
Choose the station near a water source and outside the work zone. A laundry room, mudroom, dining area, or basement section may work better than a hallway. Use a microwave, hot plate, air fryer, coffee maker, and compact refrigerator only after confirming that the circuit can handle the load. Several high-draw appliances on one circuit can trip breakers or create a safety problem, so ask the contractor or electrician before connecting them.
Design the household routine
Keep only the equipment and supplies the household will use regularly. Place a limited set of plates, utensils, pans, shelf-stable foods, lunch containers, and cleaning products in labeled bins. Keep coffee supplies and school items within reach without requiring anyone to cross the construction boundary.
A bathroom or laundry sink can handle dishwashing, but assign a daily routine so dishes do not pile up. Wipe the temporary counter often, seal food, and keep pet bowls away from tools, debris, and building materials. Confirm how the crew will secure tools, materials, and access routes when the workday ends. If anyone works from home, decide in advance which rooms remain quiet and how workers will enter the house.
Dust control also needs a physical plan. Zip walls, floor protection, sealed doorways, and a defined worker path can limit debris in occupied rooms. Move fragile or valuable items from adjoining spaces, cover furniture, and choose a delivery staging area before materials arrive. Keep pets in a closed, secure area during demolition and deliveries. Near completion, these post-construction cleanup essentials can help organize the cleaning that follows installation.
Plan for disruption beyond the contractor's first projected finish date. Demolition and rough construction can take 2 to 4 weeks, and meals, pet care, work-from-home arrangements, laundry, and school routines may need backup plans while the kitchen is unavailable. Cabinet damage, inspection corrections, a late appliance, or a needed material substitution can extend the outage even when the original schedule looked reasonable.
Pre-demo checklist
- Define scope: Record what stays, what changes, and what gets removed.
- Set a budget band: Separate required work from upgrades and confirm financing.
- Build contingency: Hold back 10% to 20% outside the contract amount.
- Confirm permits: Ask the local building department which approvals and inspections apply.
- Shortlist contractors: Compare complete scopes, allowances, exclusions, references, and payment schedules.
- Finalize layout: Approve cabinet drawings, appliance openings, utilities, lighting, and ventilation.
- Order cabinets: Confirm lead time, delivery inspection, storage, and responsibility for damage.
- Lock appliances: Use actual specifications for rough-ins and verify substitutions in writing.
- Set up the temporary kitchen: Plan cooking, dishes, storage, pets, children, and dust control.
- Run a pre-demo walk-through: Photograph existing conditions, confirm protection, review access, and verify permit status.
Before committing to design work or a contractor agreement, generate a realistic ballpark estimate. Use the instant pricing tool to test whether the intended scope fits the budget, then replace that early estimate with a site-specific proposal.
Preparation cannot remove every delay. It can prevent avoidable household stress, expose scope growth earlier, and give the family a workable plan for the weeks when the kitchen is out of service.
Trademaster Construction helps Southwest Michigan homeowners plan kitchen remodels from initial scope and pricing through design, construction, and finish work. Visit Trademaster Construction to review the process, estimate a project, and discuss a kitchen suited to the home and budget.

