
A damp, musty basement isn't just an annoyance—it's a clear warning sign about the health of your home. Before you even think about how to waterproof basement walls, you first have to play detective and figure out where the water is actually coming from. Just slapping a coat of paint over a damp spot is like putting a bandage on a broken arm; it ignores the real problem.
Diagnosing Your Wet Basement Problem
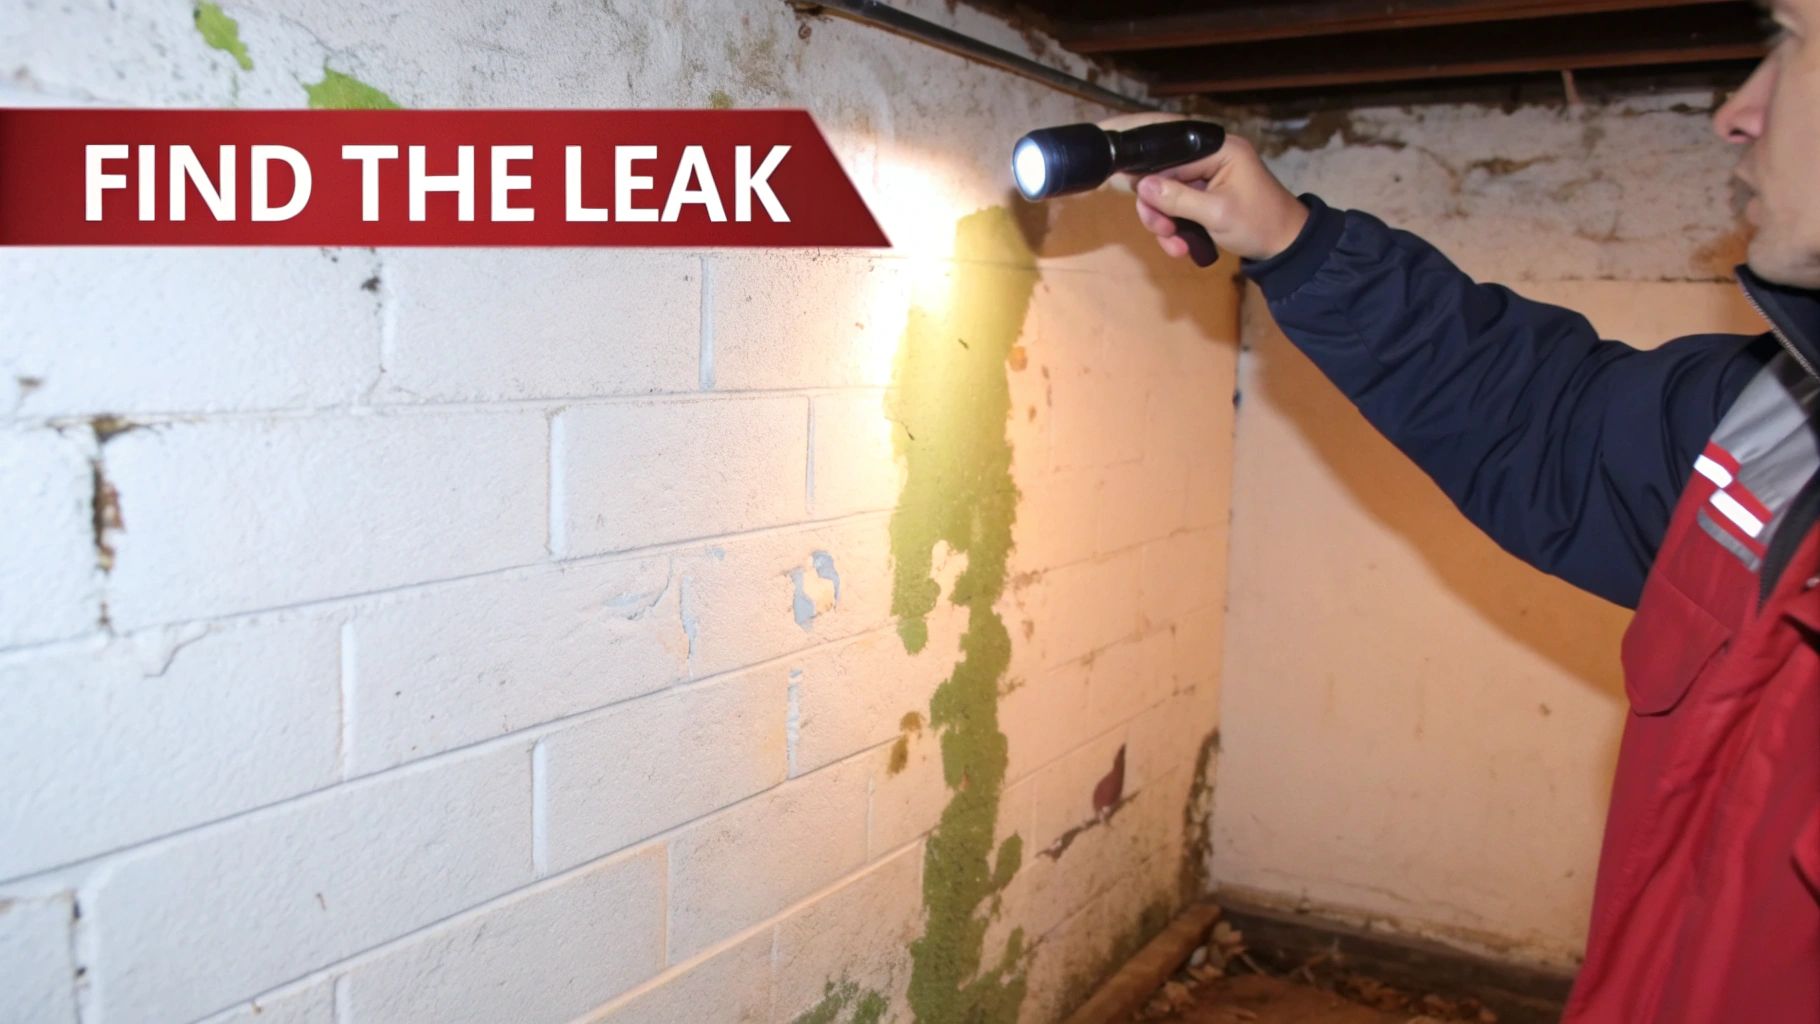
A truly successful waterproofing job always starts with a good, hard look at the situation. Water is relentless, and it has a few favorite ways of getting into your home. Pinpointing these entry points is the critical first step toward a lasting fix. Here in Southwest Michigan, we see the culprits change with the seasons, from the heavy rains of spring to the fast-thawing snow of late winter.
Dealing with basement moisture is a battle more and more homeowners are facing. It's a big deal—the global market for basement waterproofing was valued at USD 9.8 billion in 2024 and is expected to keep climbing. This isn't just a niche repair anymore; protecting a home's foundation is now rightly seen as a crucial investment.
Tracing the Source of Water Intrusion
To find the right solution, you have to know what you're up against. Most basement water issues boil down to one of three main problems.
- Hydrostatic Pressure: This is the heavyweight champion of basement water problems. When the soil around your foundation gets saturated with water, it creates an incredible amount of pressure. This force can push water right through tiny pores in the concrete, through joints, and into any cracks it can find.
- Exterior Drainage Failures: Think of this as an uninvited flood. Clogged gutters, downspouts dumping water right next to your foundation, or a yard that slopes toward your house are all recipes for disaster. They oversaturate the soil, which in turn leads to that nasty hydrostatic pressure.
- Interior Condensation: Sometimes, the water isn't coming from the outside at all. When warm, humid air—common in a Michigan summer—hits your cool basement walls, it creates condensation. This "sweating" can make walls feel damp and create that classic musty smell, often getting mistaken for a leak.
Before you can fix the problem, you have to know why your basement is wet. If you can't find an obvious source, you might be dealing with a hidden leak. In those tricky cases, professional water leak detection services can be a lifesaver, pinpointing the exact entry point so you're not just guessing.
Common Basement Water Issues and Their Causes
To help you connect the dots, we've put together this quick reference table. See if any of these symptoms look familiar.
| Symptom You See | Common Cause | Your First Step |
|---|---|---|
| Puddles on the floor | A crack in the foundation floor or a leaking cove joint (where floor meets wall) | Inspect the floor and wall-floor joint for visible cracks or gaps. |
| Damp spots halfway up the wall | Hydrostatic pressure forcing water through porous concrete | Check your gutters, downspouts, and the grading of your yard. |
| Water stains under windows | Leaking window wells that are clogged or poorly drained | Clear out any debris from the window well and check its drainage. |
| Musty smell and damp air | High humidity and interior condensation | Run a dehumidifier and check for proper ventilation. |
| Chalky white powder on walls | Efflorescence, indicating water is seeping through the concrete | Look for the source of the moisture on the other side of the wall. |
This table is a starting point, but every home is different. A thorough inspection is always the best way to get a complete picture of what's going on.
Key Signs to Look For
Your basement will give you clues about what’s wrong. You just need to know how to read them. Grab a powerful flashlight and get ready to inspect your walls and floors for these classic telltale signs.
Pro Tip: The absolute best time to do your inspection is during or right after a heavy rainstorm. That’s when active leaks show themselves, and you can often see exactly where water is coming in.
Keep an eye out for efflorescence—a chalky, white, and sometimes crystalline deposit on the concrete. This happens when water seeps through the wall and then evaporates, leaving mineral salts behind. It's a dead giveaway that water is migrating through your foundation. Also, look for peeling or bubbling paint, dark water stains, and of course, any visible mold or mildew.
And don't forget the simplest tool you have: your nose. That persistent, earthy, musty smell is a sure sign of excess moisture, even if you can’t see a single drop of water.
Essential Repairs Before You Waterproof
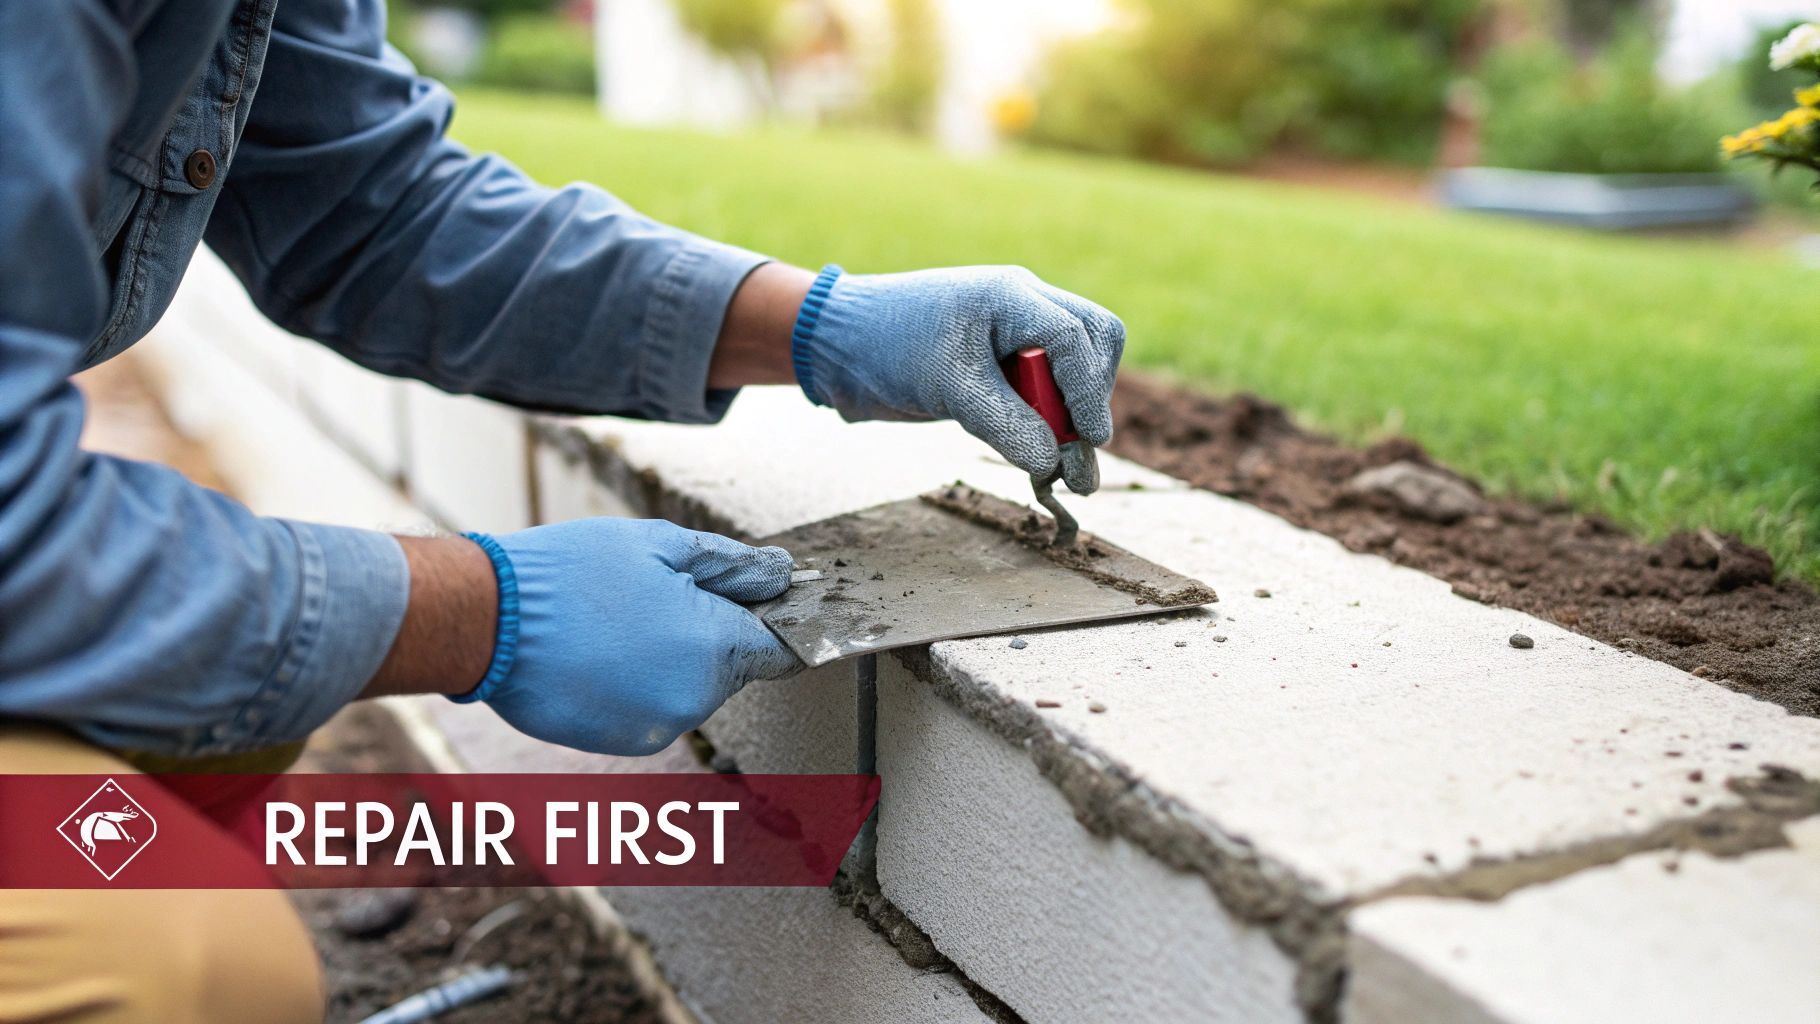
Jumping straight to applying a waterproof coating is a classic mistake. Think of it like trying to paint over rust on a car—you’re just hiding the problem, not fixing it. Before you can even think about sealing your basement, you have to create a clean, solid, and stable surface. This prep work isn’t glamorous, but it’s the absolute foundation of a dry basement.
If you try to waterproof a compromised wall, you'll trap moisture behind the new coating. It won't be long before you see peeling, bubbling, and a mess that's even worse than what you started with. You've got to fix the root causes first.
Addressing Cracks in Your Foundation
Your first task is to play detective and inspect every inch of your foundation for cracks. It's important to know what you're looking at because not all cracks are the same.
- Hairline Vertical Cracks: These are pretty common and usually just a sign of the concrete curing or minor settling. They need to be sealed, but they typically don't point to a major structural issue.
- Wider Vertical or Diagonal Cracks: If you can slide a coin into a crack, that's a sign of ongoing pressure or settlement. These need a more robust repair and a closer look.
- Horizontal Cracks or Bowed Walls: This is a serious red flag. Horizontal cracks are almost always caused by immense hydrostatic pressure from the soil outside. This isn't just a leak; it's a structural problem that demands an immediate professional assessment from an expert like us at Trademaster Construction.
For the small stuff, you can often use a polyurethane or epoxy injection kit to create a strong, flexible seal. But for anything bigger, bringing in a pro is the only safe bet.
Prepping the Wall Surface
With any major cracks or structural issues handled by a professional, it's time to get the walls ready. This step is all about making sure your waterproofing products can actually stick and form a lasting barrier. A pristine surface is non-negotiable.
First, clear everything off the walls. Scrape away any old, flaking paint, get rid of loose mortar, and tackle that chalky white powder known as efflorescence. A wire brush and a bit of elbow grease are your best friends here. For stubborn efflorescence, a little diluted vinegar can work wonders to dissolve the mineral deposits.
Next, get the walls completely clean. You need to remove all dust, dirt, and grime. You can use a power washer for this, but a good scrub with a stiff brush and a concrete-safe cleaner also does the trick. Just make sure you let the walls dry completely before doing anything else.
Patching any leftover holes or divots is crucial. Hydraulic cement is fantastic for this job because it actually expands as it cures, creating a watertight plug so effective it can stop active, trickling leaks. Just be sure to follow the product's instructions to the letter for a permanent fix.
Managing Exterior Water Sources
Finally, it's time for a walk around the outside of your house. So many basement water problems actually start at the surface. Fixing these exterior issues can take a huge amount of pressure off your foundation walls and is a key part of learning how to waterproof basement walls effectively.
Start with your gutters and downspouts. Are they clogged with leaves and debris? More importantly, where do the downspouts end? They should extend at least four to six feet away from your foundation. If they're dumping water right next to the house, you're basically giving your foundation a constant shower.
Next, look at the grading—the slope of the soil around your home. The ground should slope gently away from the foundation, ideally dropping about six inches over the first ten feet. If your yard slopes toward the house, you’ll likely need to bring in some soil to build it up and redirect that surface water. You’d be surprised how many "basement" problems can be solved right here in the yard.
Interior Waterproofing: Sealing From the Inside
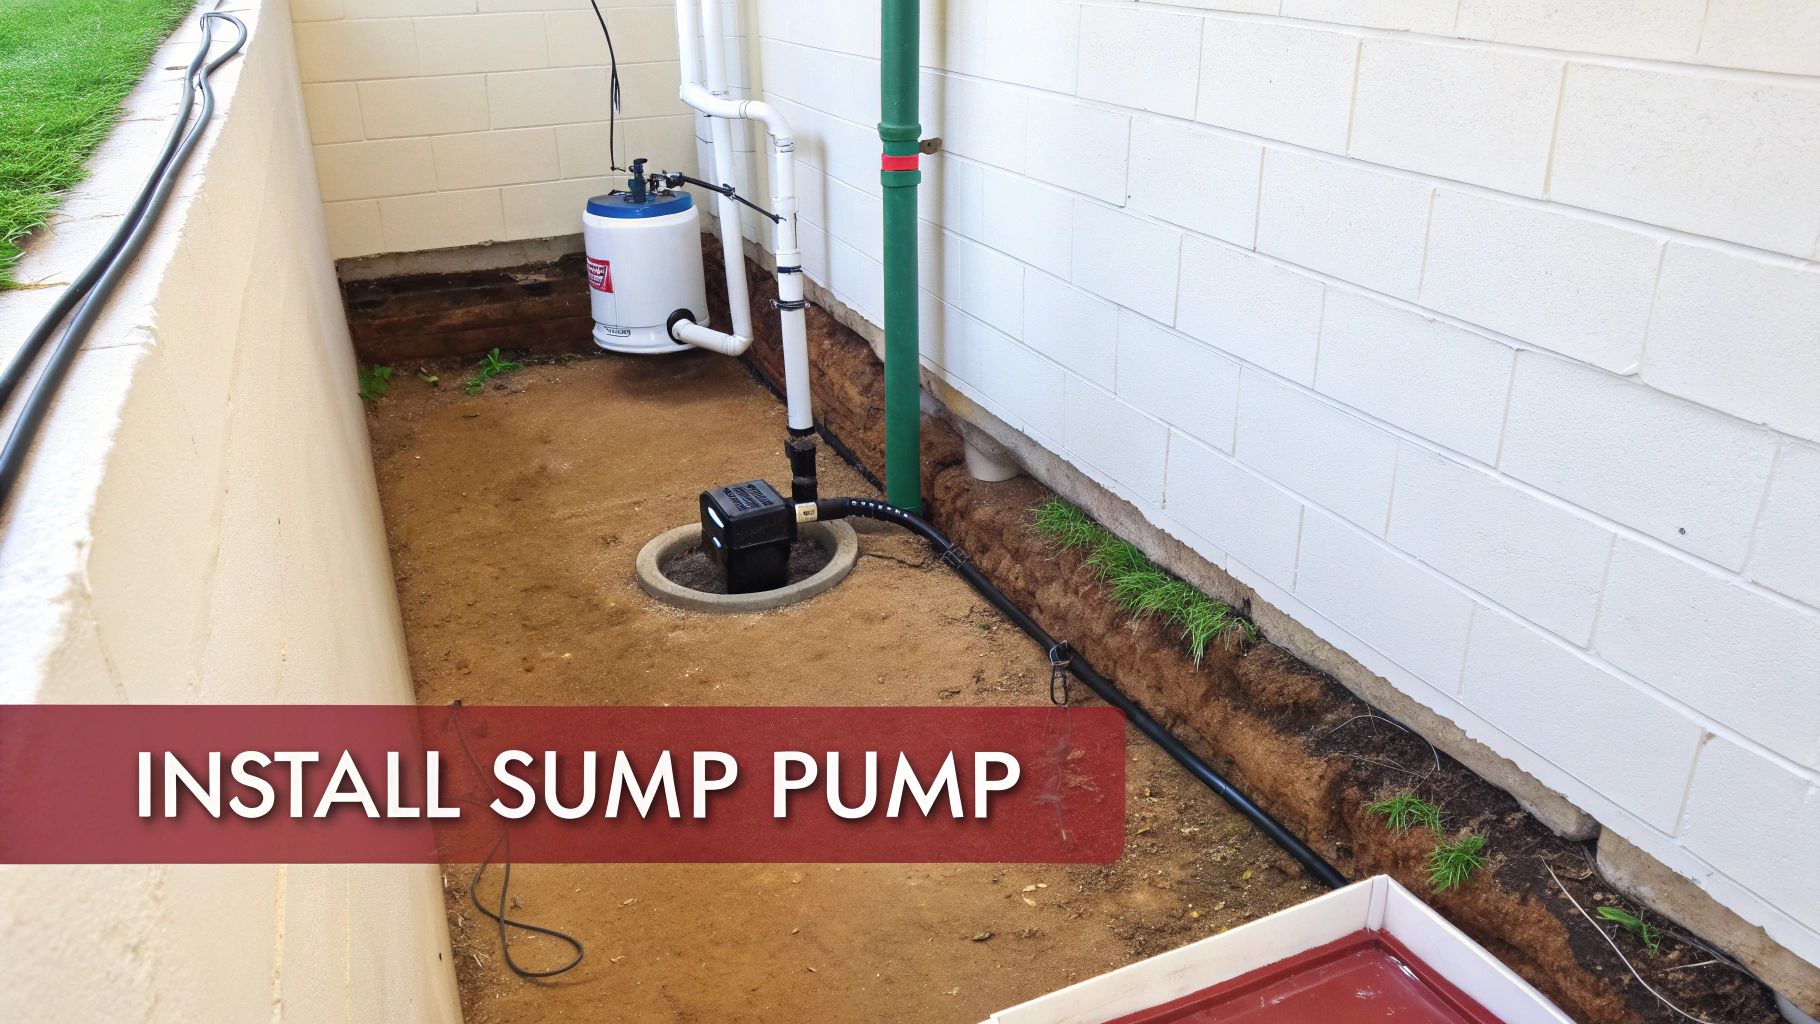
When excavating around your foundation just isn't in the cards, you can still get a bone-dry basement by working from the inside. This approach is all about managing water that finds its way through the foundation walls, redirecting it before it ever becomes a problem. It's often less disruptive and more budget-friendly than a full exterior dig.
The trick is to view interior waterproofing as a complete system, not just a single product. It could be as straightforward as a heavy-duty sealant or as comprehensive as a full-perimeter drain. What your home needs really boils down to how much water you're dealing with.
Choosing the Right Waterproof Coatings
The first line of defense many people consider is a waterproof coating applied right onto the interior basement walls. But let's be clear: not all "waterproof" paints are created equal. The product you pick makes all the difference.
These coatings have become incredibly popular. The market was valued at a staggering USD 3.86 billion in 2024 and is expected to climb to USD 7.28 billion by 2033. That tells you a lot about how many homeowners are relying on them. You can dive into the full report on basement waterproofing coating market trends to see the data for yourself.
Here's a breakdown of the two main players:
- Acrylic-Based Waterproof Paint: Think of this as a super-thick paint. It creates a film on the surface that can stop minor dampness from seeping through porous concrete. It's a solid choice for fighting general humidity or that musty basement smell, but it will fail against active leaks or real water pressure.
- Cementitious Sealants: This is the heavy-hitter. It's a cement-based powder you mix into a thick slurry. When you apply it, it actually seeps into the concrete's pores, creating a tough, permanent bond that becomes part of the wall itself. This stuff can stand up to serious water pressure and is what you need for walls that are damp to the touch or show white, chalky efflorescence.
For a cementitious sealant to be effective, the wall surface has to be perfectly clean. Any leftover paint, dirt, or efflorescence will kill its ability to bond, making the whole effort pointless. That meticulous prep work we talked about earlier isn't just a suggestion—it's essential.
A simple way to think about it: acrylic paint is a raincoat for a light drizzle, while a cementitious sealant is a deep-sea diving suit built for intense pressure.
Advanced Interior Drainage Systems
If your basement has water actively seeping in—especially where the wall meets the floor—no amount of paint or sealant will hold it back for long. Hydrostatic pressure will always win that fight. For these situations, you need a system that doesn't just block water but actively manages it.
This is where an interior drainage system, sometimes called an interior French drain or drain tile, becomes the gold standard.
The process involves carefully cutting out a small channel in the concrete floor around the entire basement perimeter. We dig a trench, lay down a bed of gravel, and place a perforated drain pipe inside. This pipe acts as a collector, capturing any water that seeps through the walls or up from below the slab and funneling it to one spot.
The Sump Pump: Your System's Heartbeat
That collection spot is the sump pit, which holds the most important piece of the puzzle: the sump pump.
A sump pump is a submersible pump that sits inside the pit. As water from the drainage system fills the pit, it lifts a float switch. When the water hits a set level, the switch kicks the pump on, and it forcefully ejects the water up and out of your basement through a discharge line, sending it far from your foundation.
Getting the right pump is critical for the system to work when you need it most.
- Pump Horsepower: A 1/3 horsepower pump is plenty for most homes in our area. If you have a particularly deep basement or experience unusually heavy water flow, stepping up to a 1/2 horsepower model gives you that extra oomph and peace of mind.
- Airtight Lid: A secure, airtight lid on the sump pit is a must. It stops moisture from evaporating back into your basement air, keeps out debris that could clog the pump, and makes the whole system much quieter.
- Battery Backup: We know how Southwest Michigan storms can knock out the power. A battery backup system isn't a luxury; it's a necessity. If the power goes out during a downpour, the backup pump kicks on automatically, keeping your basement dry during the most vulnerable time. A pump without a backup is just an accident waiting to happen.
When you combine an interior drainage channel with a robust sump pump system, you create a solution that truly solves the problem. It doesn't just put up a barrier; it actively collects, removes, and relieves the water pressure against your foundation for a permanently dry basement.
Exterior Waterproofing: The Ultimate Barrier
If you want to stop water before it even has a chance to touch your foundation, you have to work from the outside. That’s the whole idea behind exterior waterproofing. Think of it less as managing a problem and more as preventing it entirely by creating a powerful, impermeable shield around your home.
This is the most complete and long-lasting protection you can get. It involves excavating the soil all the way around your foundation to get to the source of the problem. It’s a big job, no doubt, but for those in Southwest Michigan who face relentless water intrusion, an exterior system is often the final, definitive answer.
The Realities of the Excavation Process
First things first, let's talk about the digging. Excavating around your foundation is a serious undertaking and absolutely a job for a professional crew with heavy equipment. We carefully dig a trench around the entire perimeter of your home, going all the way down to the footings—the concrete base that your foundation rests on.
I won't lie, it's disruptive. Your landscaping, flower beds, and maybe even a walkway will have to be temporarily removed. But it's a critical step. It’s the only way to get full access to the exterior walls, which we then power wash and prep for the new waterproofing membrane.
Modern Waterproofing Membranes: A Seamless Shield
With the foundation walls clean and ready, the real magic happens. We apply a continuous barrier that simply won't let water through. There are a couple of go-to materials we rely on for this.
- Self-Adhering Sheet Membranes: Imagine a giant, super-sticky, heavy-duty roll of rubberized asphalt. We apply this directly to the foundation walls, where it bonds permanently. It creates a thick, uniform shield that’s fantastic at sealing off and bridging small cracks.
- Liquid-Applied Coatings: Another excellent choice is a polymer-based liquid membrane. We spray or roll this on, and it cures into a flexible, seamless, rubber-like barrier. The biggest plus here is that it creates one solid coating with no seams, which is perfect for covering uneven concrete or walls with lots of pipes coming through.
The effectiveness of these modern materials is no secret. Below-grade waterproofing has become a massive industry, hitting USD 1.5 billion in 2024. Projections show it climbing to USD 1.9 billion by 2030, driven by how well these advanced membranes work. You can dig deeper into the data by checking out this industry research on below-grade waterproofing solutions.
Installing an Exterior Footer Drain
Applying a membrane is just one part of the equation. To truly eliminate the pressure from groundwater, you also need to give that water an easy way out. That's where an exterior footer drain (sometimes called a French drain) is essential.
An exterior waterproofing system is about both blocking and redirecting water. The membrane acts as the shield, while the footer drain provides the release valve, ensuring that water never builds up against your foundation walls in the first place.
After the membrane is on, we install a perforated drain pipe in a bed of clean gravel right at the base of the foundation. This pipe acts like a magnet for groundwater, collecting it before it can push against your walls. From there, the water flows away from your house through gravity or is directed to a sump pump.
Weighing the Investment
Let's be direct: exterior waterproofing is a major construction project. It costs more and is more disruptive than any interior system. Your yard will look like a worksite for a few days.
But the payoff is unparalleled peace of mind. You’re building a defense system that’s meant to last for the life of your home. If you're planning to stay put for the long haul or are finishing your basement into a beautiful living space, this investment provides a level of security that interior methods just can't match. Knowing what the process entails helps you have a straight-up conversation with a contractor to decide if this ultimate barrier is the right move for your home.
DIY Project Or Time To Hire A Pro?
Figuring out whether to tackle a damp basement yourself or call in the cavalry is a huge decision. It's the classic "time vs. money vs. sanity" equation. Make the right call, and you'll save yourself a world of frustration. But get it wrong? You could waste weekends and end up making a small problem a whole lot bigger.
The good news is that not every puddle or damp spot requires a full-scale professional response. Some of the most effective first steps are well within the reach of a motivated homeowner.
When To Roll Up Your Sleeves (The DIY Fixes)
If you're dealing with minor moisture, a little elbow grease and a trip to the hardware store can go a long way. These are the jobs I'd tell any handy homeowner to try first.
- Painting on a Sealant: Got that chalky white powder (efflorescence) on your walls or just a general clammy feeling? A good quality cement-based waterproof sealant can work wonders. The prep work is key—you have to clean the wall thoroughly—but the application is basically like painting with a very thick, gritty paint.
- Patching Small Cracks: Hairline cracks from the house settling are common. You can seal these up tight with a polyurethane or epoxy injection kit. They’re surprisingly user-friendly and create a strong, lasting seal.
- Fixing Your Grading and Gutters: This is huge, and it's all outside work. Seriously, clean your gutters. Add extenders to your downspouts so water dumps at least six feet away from your foundation. Look at the soil around your house—is it sloping away from the walls? If not, build it up. These simple fixes solve a surprising number of water issues.
Red Flags: When to Call A Pro, No Questions Asked
Some problems are more than just a nuisance; they're warning signs of serious trouble. This is where you put the tools down and pick up the phone to call an expert like Trademaster Construction. Trying to DIY these can risk the structural integrity of your home.
I’ve seen it happen: a failed DIY repair on a serious water problem doesn't just mean you do the job twice. It often means the second job is ten times bigger and more expensive because the original issue was allowed to cause more damage.
Call a professional immediately if you see any of these:
- Big Cracks or Any Horizontal Cracks: If a crack is wide enough to stick a quarter in, that’s a problem. If you see any crack running horizontally across your wall, that's a five-alarm fire. It's a classic sign of intense pressure from the soil pushing against your foundation.
- Walls That Are Bowing or Leaning: Stand back and look down the length of your basement walls. Do they look flat, or are they curving inward? A bowed wall is a clear indicator of extreme external pressure and is on the path to structural failure. This is an emergency.
- You Need a Full Drainage System: If the solution involves jackhammering your concrete floor to install a drain tile system or bringing in an excavator for the exterior, it’s not a DIY job. These are complex systems that have to be engineered and installed perfectly to work.
Professionals have a process for diagnosing these deeper issues, often leading to a decision between an interior or a more intensive exterior approach.
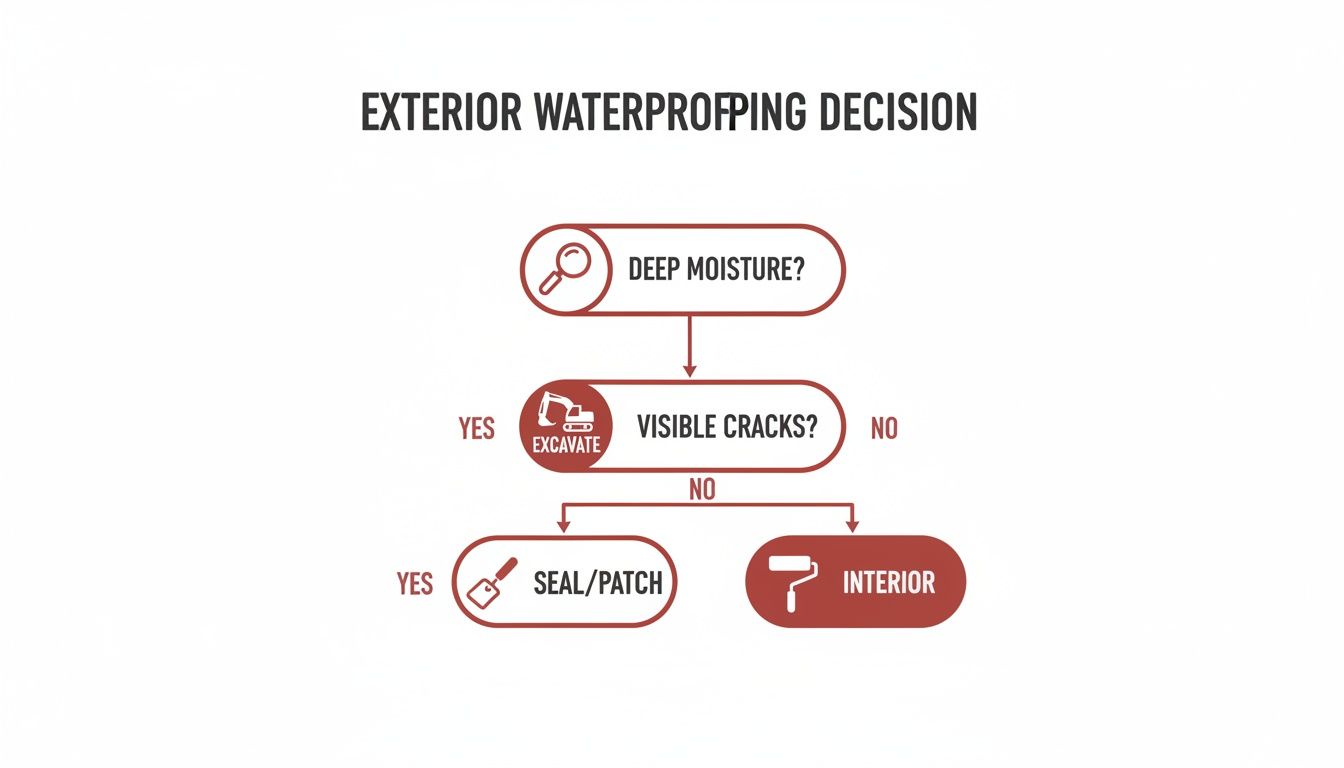
From years of experience, I can tell you that significant water pressure coming from deep, saturated soil almost always points to one thing: you have to dig. An exterior waterproofing solution is the only way to truly stop that kind of pressure at its source.
Answering Your Basement Waterproofing Questions
When you’re staring at a damp basement wall, you’ve got questions. We get it. Here in Southwest Michigan, we’ve heard just about all of them. Every home is a little different, and what worked for your neighbor might not be the right fix for you.
Let’s cut through the noise and get you some straight answers to the most common questions we hear from homeowners just like you.
What’s the Real Cost to Waterproof a Basement in Michigan?
This is always the first question, and the honest-to-goodness answer is: it depends. The price tag is tied directly to how much water you’re dealing with and which method will actually solve the problem for good.
- A DIY Approach: If you're just fighting a bit of dampness, you might get away with spending $200 to $500 on high-quality sealants and the right prep materials.
- An Interior System: For active leaks and persistent water, a professionally installed interior drain tile and sump pump is the most common solution. You can expect this to run anywhere from $3,000 to $10,000, based on the size of your basement.
- The Full Exterior Fix: This is the big one—digging all the way down to the foundation footing to wrap it in a waterproof membrane. It's the most thorough solution, and the cost reflects that, typically ranging from $10,000 to $20,000 or more.
At Trademaster Construction, we don't believe in surprises. You’ll always get a detailed, itemized estimate from us before we start. We want you to see exactly where your money is going so you can make the best call for your home.
Can I Just Use Waterproofing Paint and Call It a Day?
We wish it were that simple! Think of waterproof paint as a good raincoat for a light drizzle, not a submarine for a flood. It’s great for blocking general dampness and humidity that seeps through the concrete.
But it stands no chance against hydrostatic pressure—that’s the force of groundwater actively pushing against your foundation. If you have real leaks, that water will simply push the paint right off the wall, leaving you with bubbles and peels. It’s best used as a finishing touch after the root cause, like foundation cracks or drainage issues, has been properly fixed.
How Long Does This Stuff Actually Last?
The lifespan of any waterproofing job comes down to two things: the quality of the materials and the skill of the installation. A quick patch job will give you a temporary breather, but a professional system is built to last.
| Waterproofing Method | Typical Lifespan | What It Depends On |
|---|---|---|
| DIY Waterproof Paint | 2-5 years | How well you prepped the surface and how much water pressure it's fighting. |
| Interior Drainage System | 20+ years | Requires simple upkeep, like making sure your sump pump works each year. |
| Exterior Membrane System | Lifetime of the Foundation | This is the most durable fix, as it’s buried and protected from the elements. |
The bottom line is that a professionally installed interior drain or exterior membrane is a true investment in your home. With a little maintenance, these systems are designed to give you lasting peace of mind.
Can I Finish My Basement Right After It's Waterproofed?
Yes, you absolutely should! In fact, waterproofing is the critical first step you must take before any finishing project. It makes zero sense to put thousands of dollars into new walls, floors, and furniture only to have it all ruined by a leak.
Once a proper waterproofing system is in, and the space has had time to dry out completely, you have a blank canvas. You can move forward with your renovation plans knowing your investment is protected from moisture, mold, and future water damage. It’s the only way to build a healthy, comfortable living space that adds real value to your home.
Ready to turn that damp, musty basement into a dry, useful part of your home? The team at Trademaster Construction has the hands-on experience to figure out exactly what’s going on and implement a solution that lasts.

