
A gutted bathroom in Southwest Michigan looks simple until you're standing in it with two tile samples, a tape measure, and plastic sheeting flapping at an open window in February. The room is stripped back to studs, the subfloor is exposed, and the first real question isn't color or pattern. It's whether the floor is stiff enough, flat enough, and sloped enough to hold tile without turning into a future leak or a cracked grout problem.
That's the part most homeowners don't get told early enough. Tile installation in bathroom work succeeds or fails long before the first row goes down, because structure, waterproofing, and slope decide what the finish can be. In practice, a hall bath often lives somewhere between a busy weekend and a couple of weeks of stop-and-start work, depending on the condition of the framing, the shower, and how much of the plumbing gets opened up.
Starting With a Real Bathroom, Not a Tile Catalog
The first mistake is shopping for tile before the room has been judged as a structure. A bathroom can look ready for a clean white subway tile and still be a bad candidate for it if the joists bounce, the subfloor dips, or the shower area can't be waterproofed correctly. On jobs in Southwest Michigan, the weather adds another layer, because cold crawl spaces and damp lower levels can push moisture into an unconditioned floor system if the build-up below the tile isn't handled properly.
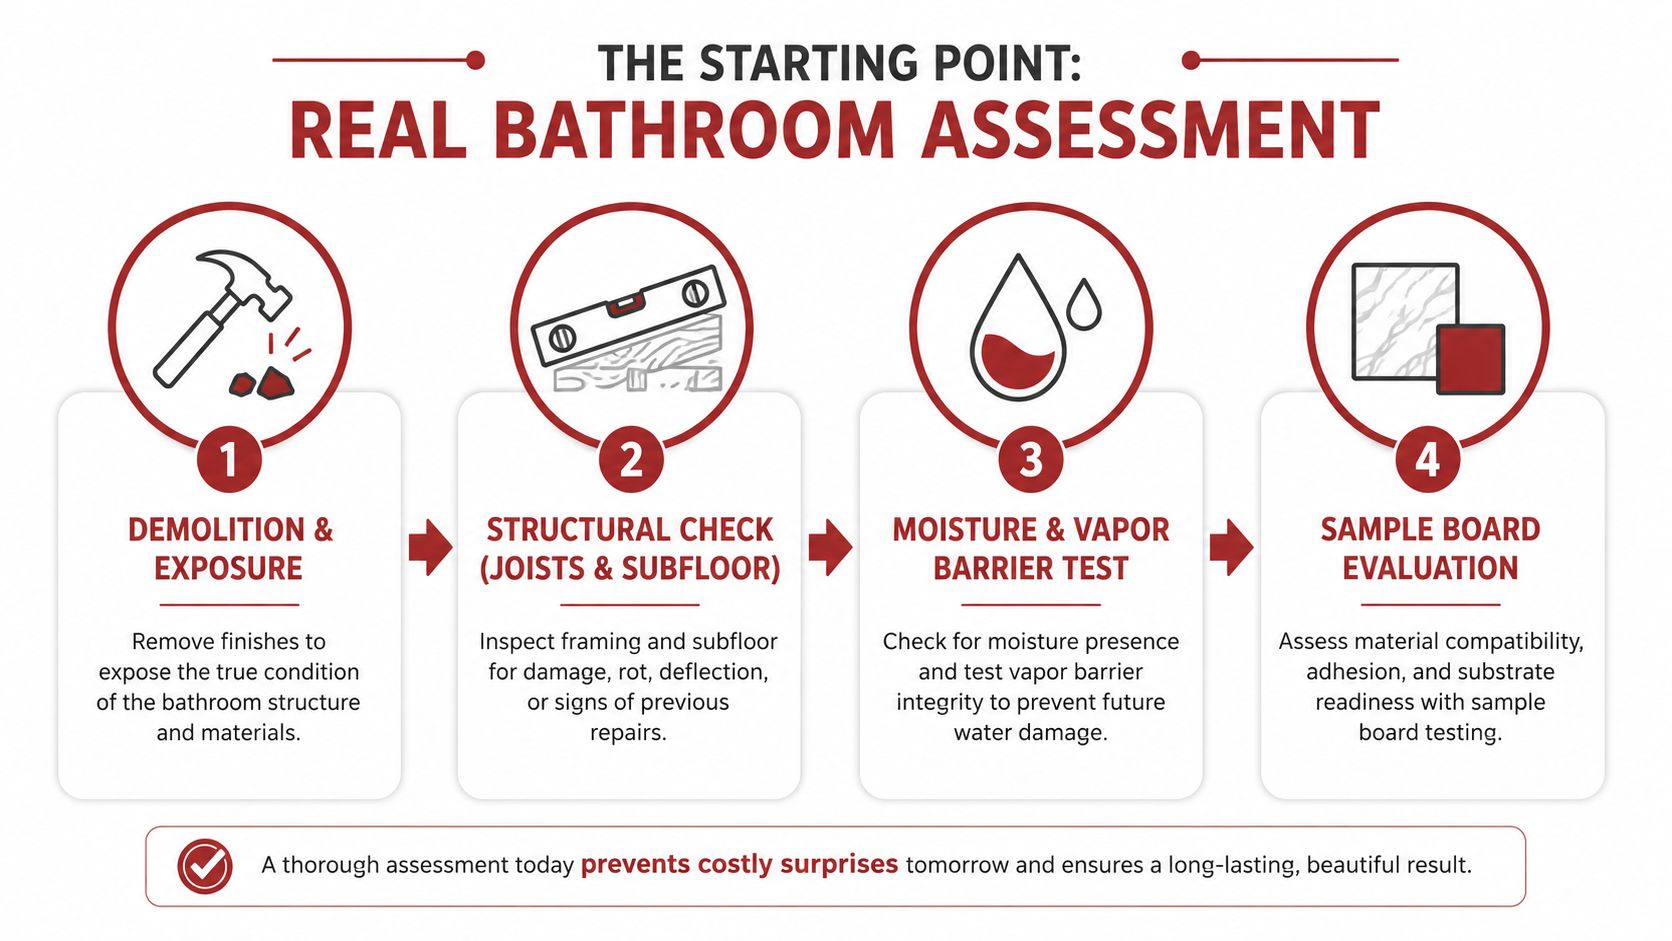
Start with the bones of the room
Before a setter thinks about grout color, the framing and substrate need a straight answer. The right sequence is simple in principle, even if it's messy in the field. Demo, structural check, moisture check, then sample boards and layout decisions.
Practical rule: if the floor and walls can't pass the structural and moisture check, the tile choice is secondary.
That's why good tradespeople often include a carpenter, plumber, electrician, and tile setter in the same conversation. A decent bathroom plan respects what each trade touches. If the framing needs repair, the drain location is wrong, or the wall plane is out of square, the tile layer will just be hiding a bad decision under an expensive finish.
Match the material to the room, not the mood board
Ceramic and porcelain have stayed foundational because bathrooms need washable, moisture-resistant wall finishes, a point that lines up with the long history of tile in sanitary rooms and the rise of subway tile as a durable, easy-to-clean standard in early urban bathrooms, as described in this history of bathroom tile. That history matters less as trivia and more as a reminder that bathrooms reward materials that survive water, cleaning, and daily wear.
Natural stone can look beautiful, but it changes the labor equation. It often needs more careful handling, tighter sequencing, and sealing. A homeowner walking through a demo'd bathroom with one tile board in each hand should be asking a simpler question first, “What does this room allow?” not “What looks best in a showroom?”
Planning, Measuring, and Setting a Realistic Budget
The cleanest budget starts with a plain sketch and a tape measure, not a showroom quote. Measure every wall and floor face that will get tile, then break the room into rectangles and subtract the obvious openings. In real baths, waste comes from corners, plumbing penetrations, diagonal layouts, and the odd wall that isn't square, so a little extra material is normal rather than wasteful.
A layout sketch helps catch the money traps early. I like to mark the toilet flange, vanity edge, shower curb or opening, and any niche or plumbing chase before ordering anything. If the cuts around those points look awkward on paper, they'll look worse in the room.
Where the budget shifts fastest
Tile category is only part of the bill. The price moves more when a homeowner chooses large-format tile, a curbless shower, heated floors, or a more complex drain assembly, because each one changes labor time and the level of prep underneath. A simple tub surround and a recessed, waterproofed shower are two very different bids even if both use porcelain.
| 2026 Bathroom Tile Cost Ranges in Southwest Michigan | ||
|---|---|---|
| Material Category | DIY Materials (per sq ft) | Installed by Pro (per sq ft) |
| Ceramic tile | Varies by product | Varies by scope |
| Porcelain tile | Varies by product | Varies by scope |
| Natural stone | Varies by product | Varies by scope |
| Waterproofing membrane and trim | Varies by system | Varies by system |
| Setting materials and grout | Varies by brand | Varies by system |
For budgeting and planning, the most useful move is to compare a few versions of the same room before you buy. The instant pricing tool is handy for stress-testing those scenarios while tile choices are still flexible, especially when material prices or scope changes are still in play.
Budget checkpoint: confirm square footage, waste allowance, lead times, drain type, and whether your township wants a permit before you order. That keeps the job from stalling after demo.
If you're narrowing down options, also ask whether trim profiles, niche shelves, and floor heat are included in the quote or treated as extras. Those small lines can swing a project more than the tile itself.
Substrate, Waterproofing, and the Slope You Cannot Skip
Tile does not forgive a weak foundation. For floor tile, the structure should meet L/360 deflection, and natural stone needs L/720. Flatness matters too, because once the tile is down, the installer can't “pull” a bowed floor into shape with thinset and hope it holds.
Build the base for the room you actually have
On walls, the choice between cement board and foam panels comes down to how much moisture management and straightening the room needs. Cement board is tough and familiar. Foam panels can be cleaner to waterproof and easier to keep flat, but they cost more and still need proper fastening and seam treatment.
The shower pan is where a lot of DIY projects fail. Water that gets through grout or around penetrations needs a path out, which is why the shower floor needs a 1/4 inch per foot slope to the drain. A pre-slope under the waterproof layer is not a nice-to-have in a real wet area, it's the difference between a system that sheds water and one that traps it.
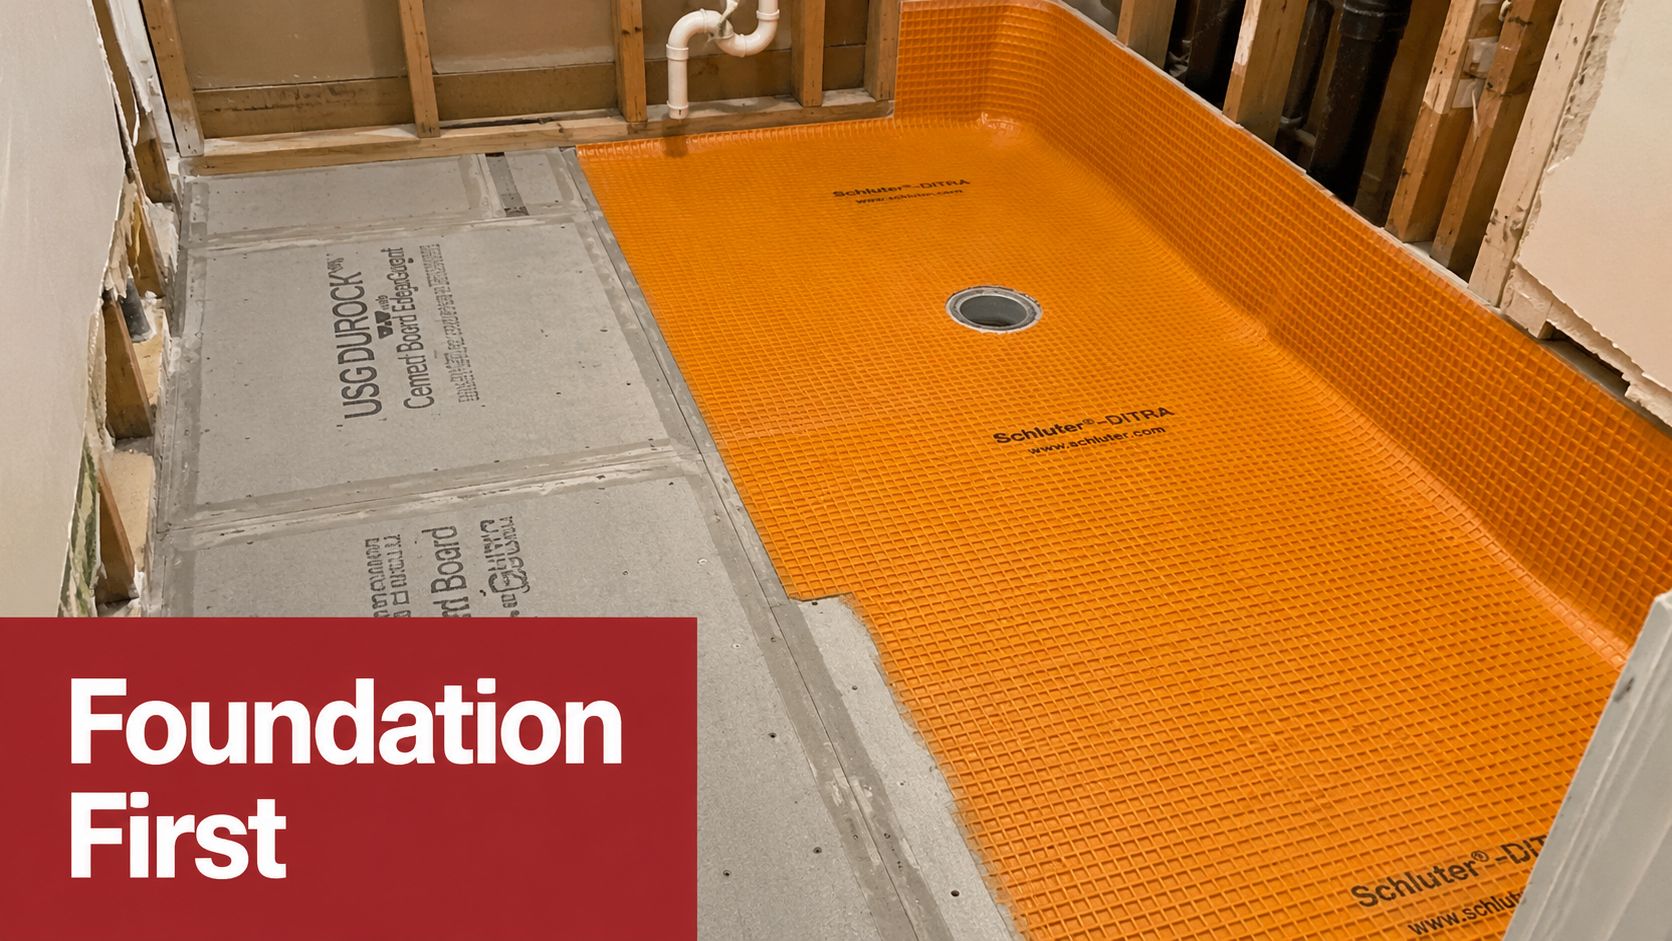
Waterproofing is where callbacks begin
A bonded waterproof membrane that meets ANSI A118.10 is the right benchmark for wet areas. Sheet systems and liquid-applied systems both work when installed correctly, and both fail when corners, seams, niches, and pipe penetrations are treated casually. Painter's plastic or a vague “moisture barrier” is not a waterproofing system.
If you want to compare labor styles and finish choices with a broader contractor view, find a licensed tiler in Melbourne is a useful example of how experienced installers frame wet-area work around substrate and waterproofing instead of just pattern and finish.
Southwest Michigan adds one more issue. Older homes and unconditioned crawl spaces can move moisture into the framing below a bathroom floor, especially when ventilation is weak. Before tile goes up, that moisture source needs to be addressed with the right underfloor conditions, or you're building a finished room on a damp base.
From Layout Lines to a Finished Grout Joint
Good tile work feels calm because every stage sets up the next one. The first line should come off the most visible wall, tub edge, or shower opening, not off whatever side is easiest that morning. Once that line is true, the dry layout tells you where the cuts land, and that's where you learn whether the room will have clean corners or ugly slivers at the doorway.
The best-looking bath usually comes from the most boring first hour on site.
Set the line, then protect it
A thin-set choice should follow the tile and substrate, not habit. Porcelain and larger tiles usually need a mortar that can support the piece without sagging, and large-format tile often needs back-buttering so the tile bed reaches the required contact. For wet-area floors, the target is 95% mortar contact, with particular attention to corners and edges.
The rhythm matters more than speed. A setter who keeps joint width consistent with spacers or leveling clips, checks the plane often, and cuts around niches and penetrations carefully will usually end up with a cleaner room than someone who moves fast and fixes later. That's true whether the tile is a small ceramic wall field or a larger porcelain floor.
Grout, wash, and finish details
Grout choice should fit the joint width and the tile. British guidance tied to BS 5385 says ceramic tile grout joints should generally not be less than 3 mm wide, should not exceed tile thickness as a general rule, and should be at least 6 mm deep where practicable, with larger tiles calling for wider joints. The exact product matters less than using it in the right place and then washing it before haze becomes a problem.
For a practical walk-through of how a shower retile sequence comes together, retile a shower with Home Pro's Remodeling is a useful reference point for sequencing and finish work. The process only looks simple after the prep has already been done correctly.
When to DIY and When to Bring in a Pro
Start with the room, not the tile. A straightforward tub surround, a small floor with simple cuts, or a basic wall pattern can be a sensible DIY project if the substrate is already flat, the layout is square, and the bathroom can stay out of use long enough for the work to set properly. In that kind of setup, a careful homeowner can do clean work.
The job changes fast once the details get complicated.
Curbless showers need the floor depression, slope, waterproofing layer, and drain work to all land correctly together. Second-story bathrooms call for the same caution, because a mistake there can end up below the bathroom, not just inside it. In Southwest Michigan, seasonal movement and moisture swings also matter, so a quote should reflect whether the installer is planning for those conditions instead of treating every room the same.
Large-format panels and natural stone are another line where many owners should pause. Panels need tight lippage control and careful handling. Stone adds extra work on sealing, cut quality, and color matching. If the room calls for flood testing, exact drain setting, or detailed waterproofing checks, hiring out usually costs less than fixing a failed installation later.
A good pro quote spells out the work clearly. Look for line items that cover prep, waterproofing system, thin-set, grout, caulk, trim, drain work, and cleanup. If those pieces are missing from the bid, ask for them in writing before you compare price.
Ask practical questions before you sign. Who is doing the work on site, the owner, a crew, or a subcontractor. What tile systems do they use on wet areas. How do they handle layout, movement joints, and transitions at the doorway. A contractor who answers directly and explains the sequence usually has done this work enough times to know where jobs go wrong.
One more check helps on Southwest Michigan jobs. Ask whether the bid accounts for delivery timing, cold-weather storage, and any delays that could affect thin-set or grout handling. A contractor who plans for those realities is usually quoting the actual job, not a generic square-foot number.
Common Mistakes That Cost Homeowners Most
The biggest repair bills usually start with a shortcut before tile ever goes on the wall. In a Southwest Michigan bath, a shower that is not built for wet, cold, and seasonal movement may look fine at first, then show staining, swelling, or a soft corner after regular use. Once that happens, the fix usually means opening the wall or floor back up.
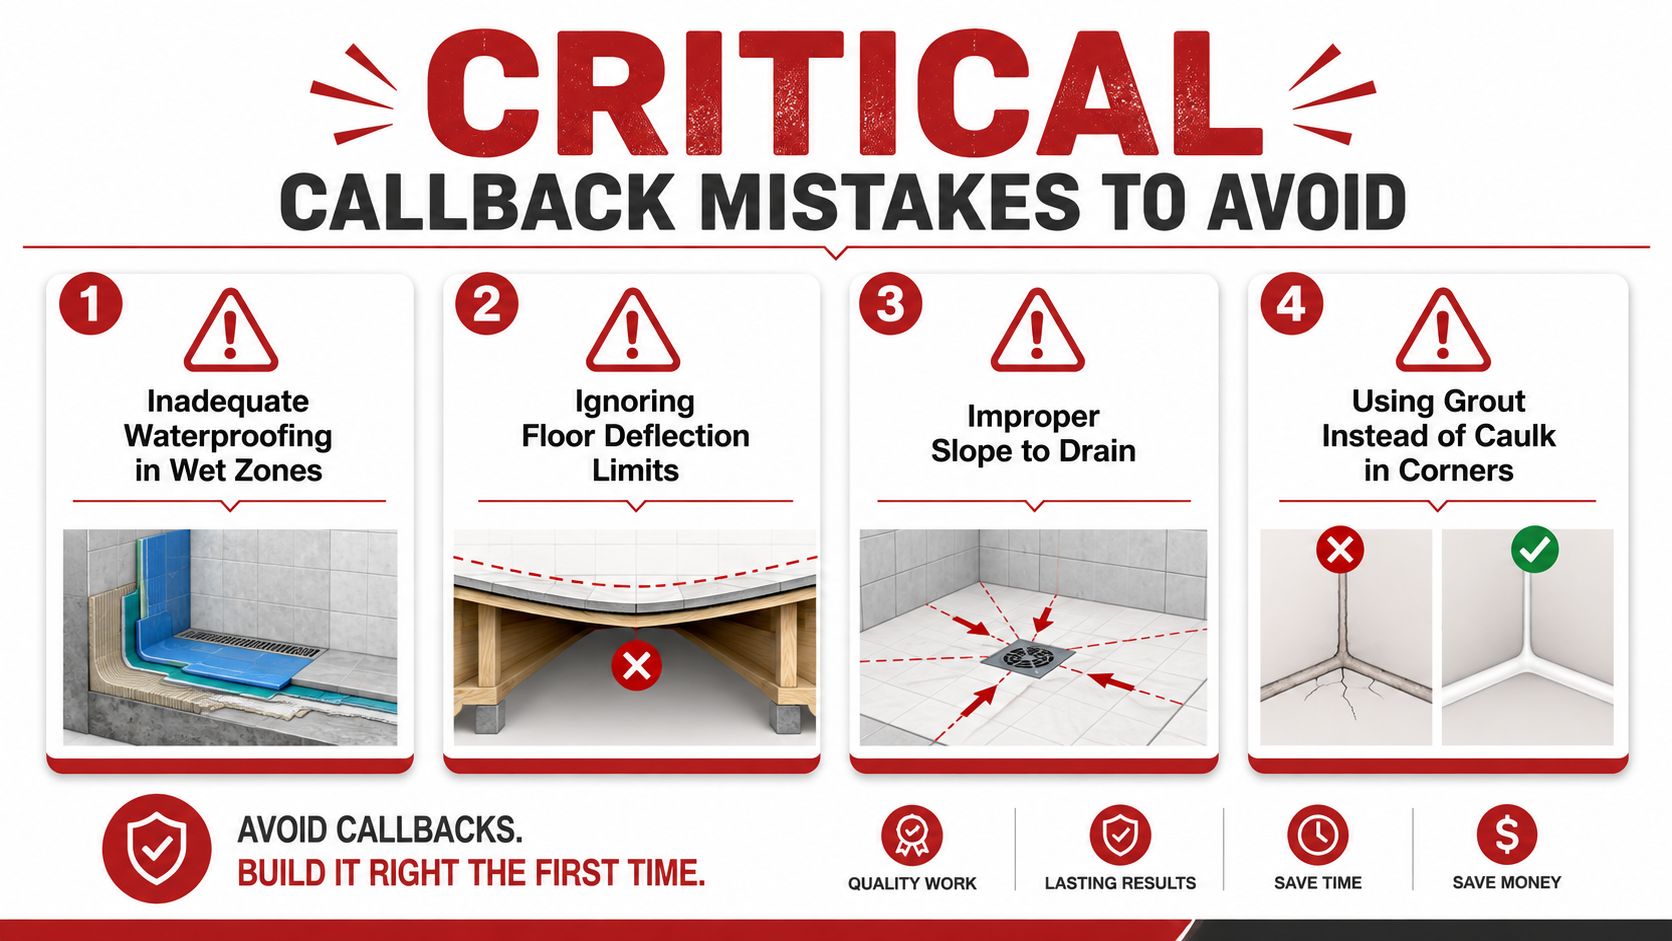
The callback mistakes I see most
The first miss is choosing the wrong setting materials for the tile and the substrate. Porcelain and large-format pieces need the right thin-set and a flat, stable base, or the bond can fail later as hollow spots, loose edges, or cracked grout. Older homes in this part of Michigan add another risk, because a floor that moves too much under load can break a good install from underneath.
Layout problems are just as expensive. Sliver cuts at a doorway or tub edge make the room look improvised, and grouted corners turn a movement joint into a crack point. Rushing the cure time causes its own damage, whether the floor is walked on too soon or a shower is put into service before the mortar has set.
If the corners are grouted, the slope looks wrong, or the pan was built without proper waterproofing, the work deserves a hard look.
The clean fix is straightforward. Start with a solid substrate, build the slope correctly, keep changes of plane flexible, and give each layer the time it needs to cure. That sequence takes more care up front, but it keeps the bathroom dry and the tile where it belongs.
Caring for Tile After the Last Sponge Wipe
A good install still needs a normal maintenance plan. Grout should be sealed if the product calls for it, cleaners should be pH-neutral, and tub and shower transitions need fresh silicone when the caulk starts to separate. In homes with hard water, which is common enough in Southwest Michigan well-water setups, regular wipe-downs matter because spots build faster than people expect.
Keep the finish from wearing out early
Abrasive cleaners are the enemy of both glass-look porcelain and stone. They dull the surface, scratch the sheen, and turn routine cleaning into surface damage. Routine wipe-downs handle daily residue, but periodic deep cleaning is where mineral deposits and soap film come off without grinding the finish down.
Caulk deserves its own calendar. At tub and shower changes of plane, replacing silicone every 3 to 5 years keeps water from sneaking behind the backer board. That small maintenance habit costs far less over the life of a bathroom than waiting until the grout cracks, the joint opens, and the wall starts to move.
If you're still refining scope, materials, or quantity, lock the plan before ordering and photograph the substrate layers before the walls get closed in. Then use the instant pricing tool to finalize the material count with the actual room dimensions, not a guess from the showroom.
Trademaster Construction handles bathroom remodeling and custom tile work for homeowners who want the room built to last, not just finished fast. If you're planning a shower, floor, or full bath update in Southwest Michigan, visit Trademaster Construction to explore your options and start the conversation with a team that works from structure through final tile.

