
You switch on the ceiling lights, set a cutting board on the counter, and start dicing an onion. Your shadow falls straight across the board. You lean left, the shadow follows. The room looks bright enough when you're standing in the middle of it, and it goes dark exactly where your hands are working. That gap between "the kitchen looks bright" and "I can see what I'm cutting" is the whole reason under cabinet lighting exists, and it's the reason a fancier ceiling fixture won't solve it.
Under cabinet lighting in a kitchen is a task-lighting problem first and a decoration decision second. Get the light onto the work surface without bouncing it into anyone's eyes, and the room reads better at night, the counters look cleaner, and you stop chopping by feel. Get it wrong and you've spent money on a strip that lights the tile and mirrors every diode in a polished countertop.
Which Under Cabinet Lighting Type Fits Your Kitchen
An under cabinet fixture is a light mounted to the underside of the upper cabinets that throws direct light onto the countertop. The geometry is what makes it work. Stand at a perimeter counter and your head and shoulders sit between the ceiling fixture and the cutting board, so the board is in shadow no matter how many recessed cans the ceiling has. Mount a source a foot above the work, between you and the wall, and the shadow disappears.
The efficiency case is already settled. The ENERGY STAR LED renovation guide treats under cabinet lighting as direct illumination for kitchen work surfaces and notes that LED fixtures use a small fraction of the electricity consumed by halogen or xenon bulbs while lasting substantially longer; it puts certified LED bulbs and fixtures at 70% to 90% less energy than standard lighting. What still separates a good installation from a bad one is the shape of the light on the counter.
Under cabinet lighting types compared
| Fixture type | Light on the counter | Install effort | Best for |
|---|---|---|---|
| LED tape with aluminum channel and diffuser | Continuous and even when diffused | Moderate | Curved edges and full-length runs |
| Linear bar fixture | Even along the full length | Moderate, hardwired or plug-in | Main prep-zone task light |
| Puck or spot light | Bright pools with dark gaps | Low | Small kitchens or spot fixes |
| Plug-in bar or puck | Varies by model | Very low | Rentals and temporary upgrades |
LED tape is a flexible circuit strip with diodes every inch or less, cut at marked intervals and pressed into a slim aluminum extrusion under a frosted lens. The channel does three jobs at once. It pulls heat off the diodes so they last, it keeps the run dead straight, and with a diffuser it blends the individual points into one line. Tape gives you the most flexible layout of the four, into corners, around a curve, the full length of a run. Without the channel and diffuser, it looks like a row of bright dots, and on a glossy counter it reflects as exactly that.
Linear bars are rigid factory fixtures in set lengths, often with the driver built in and linkable end to end. They're the default for a main prep zone because the lens spreads light across the whole bar and installation is straightforward. Buy a bar that fills most of the cabinet width. A bar several inches shorter than the cabinet leaves a visible dim patch at each end.
Pucks throw a cone each. Space them a couple of feet apart and you get scallops of bright and dark across the backsplash, which is fine inside a glass cabinet and poor over a cutting board. Plug-in bars and pucks skip the electrician entirely, at the cost of a visible cord and one occupied receptacle.
This category is bigger than it looks. In 2007 the U.S. Department of Energy estimated that approximately 53 million kitchen under-cabinet lighting systems were installed nationwide, consuming about 2.84 terawatt-hours of electricity a year. The same analysis found LED systems produced no significant savings at that point, because adoption was still thin. The opportunity in your kitchen isn't the technology. It's the old fixture already screwed to the cabinet.
Rule of thumb: for a full remodel, run linear bars or a diffused channel strip the length of every cabinet. For a budget fix in a small kitchen, pucks work if you space them close enough that the pools merge.
Where to Mount Fixtures for Even Countertop Light
Mount linear fixtures toward the front half of the cabinet underside, not tight against the backsplash. That single decision does more for the counter than any spec on the box. A fixture pushed to the wall throws a hot band up the tile, leaves the front edge of the counter dim, and shows every bump in the backsplash. Move it forward and the beam lands on the working zone, while the cabinet face and a light rail hide the hardware from anyone sitting at the table.
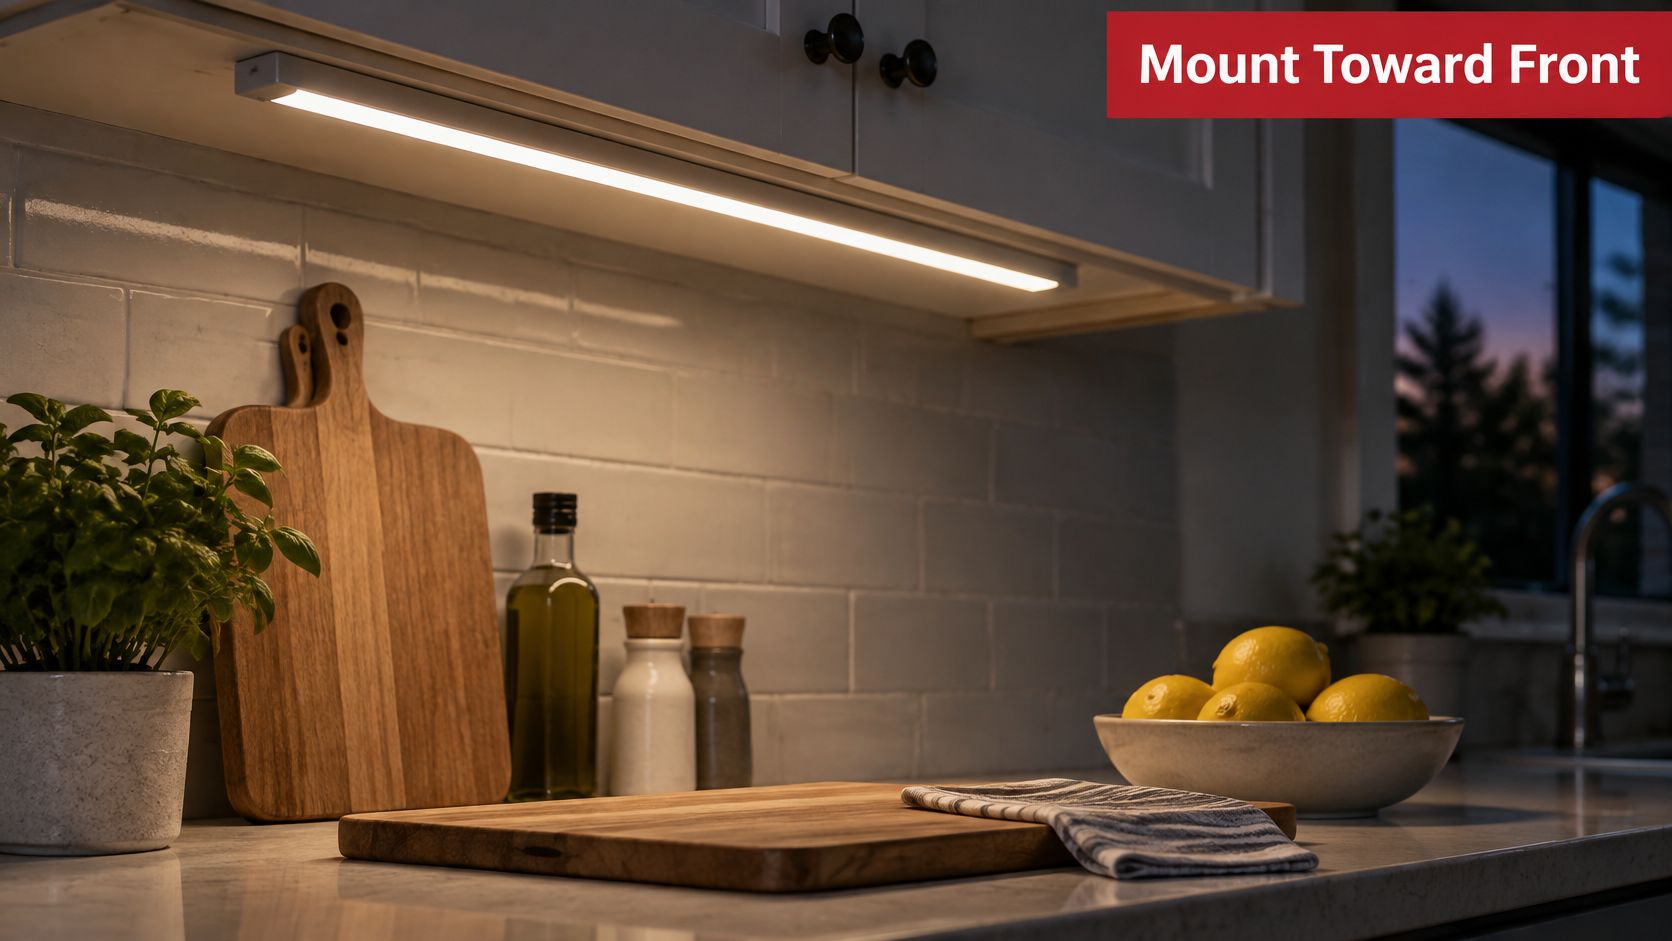
The IES residential lighting guidance makes the same point from the design side. General kitchen lighting provides only some countertop illumination, so work areas need their own source, and placement drives reflected glare, especially on glossy counters. It also notes that a continuous linear fixture or closely spaced modules gives more uniform light than widely separated pucks, which is the difference between a wash of light and a scalloped pattern of bright and dark bands.
Why the front half matters most at the sink and cooktop
Shadowing is worst where your body blocks the light, and that's the sink, the cooktop and the main prep stretch. A fixture centered over the middle of a 24-inch-deep counter leaves the front few inches, where you work, slightly dimmer. A fixture at the back leaves that zone in the dark. The same logic applies to a counter that dead-ends into a wall: light the whole run, not just the obvious prep spot, so the backsplash reads evenly and the corner isn't a cave.
Glare is a separate problem from brightness
On polished stone, glossy tile or a lacquered cabinet front, an exposed point source reflects straight back into your eye. A diffused lens spreads the luminance and kills the concentrated reflection. Test the actual countertop material under the actual fixture, not a matte showroom sample, because dark or highly reflective surfaces read completely differently once installed.
Tape a strip in place and look at the counter at night before you drill anything. Two minutes of that test beats an hour of reading spec sheets.
A worked layout
Take a 36-inch run of counter between a wall and the range, with a sink around the corner. Center one bar or channel over the prep counter, then add a second short run above the sink. That second light is the one people skip, and it's the one that removes the shadow your body casts while you're rinsing vegetables. Keep the two runs on the same circuit and dimmer so they behave as one layer.
Run a three-point check before you commit. First, distance from the backsplash, which should put the fixture near the front edge rather than the wall. Second, lens type, diffused rather than bare diodes if the counter has any sheen. Third, spacing, continuous or closely set so there are no gaps to read as stripes on the tile.
Choosing Color Temperature and Brightness for Each Task
Start with how the kitchen gets used, because that decides the number. A kitchen that cooks hard at 6pm on a Tuesday and turns into the family room at 9pm needs two different light levels, not one compromise setting. A kitchen that's mostly daylight prep and a coffee maker needs less.
The color question has a defensible default. A U.S. Department of Energy residential under cabinet lighting assessment reported that LED fixtures delivered equivalent or greater light output per linear foot than the traditional fixtures tested, and identified 3000K or lower as a typical residential kitchen color temperature with a warmer appearance. That warmth flatters wood cabinetry and painted whites without yellowing them much.
Color temperature by kitchen task
| Color temperature | Feel | Best use |
|---|---|---|
| 2700K | Warm and relaxed | Evening scenes after dinner |
| 3000K | Warm white, common residential choice | Everyday kitchen with wood cabinetry |
| 4000K | Neutral and crisp | Prep, reading labels, mixed use |
| 5000K to 6500K | Cool daylight | Detailed tasks and short bright prep sessions |
More lumens is not automatically better
Brightness advice usually stops at a number. Placement, diffusion, cabinet depth and countertop reflectivity decide whether the light reaches the work surface or shines into your eyes, and a white quartz counter under an overdriven strip is uncomfortable to stand at. Research on residential lighting and occupant comfort found that higher light intensity can increase glare and energy consumption, while higher color temperature can affect occupants physiologically and psychologically; the same work found that relying on daylight rather than constant electric lighting can cut primary energy consumption by 40%.
That's the trade-off most installation guides never mention. They treat color temperature as taste and brightness as preference, when both change how the room feels at 9pm.
A kitchen lit at 4000K and full output after dinner reads as a workshop. Same fixtures at 20% and 2700K read as a living room.
A two-scene plan beats one fixed setting
Specify dimmable fixtures, and if the budget allows, tunable ones. Use the brighter, cooler end for food prep and label reading, then drop to a low, warm setting once the dishes are done. Tunable systems covering 2700K to 6500K are technically easy to buy now; the useful skill is knowing which two or three settings you'll use, not owning the full range.
Three questions settle the choice. Does anyone cook after dark, which sets your task level. Is the kitchen open to a seating or dining area, which sets your evening ceiling. And is there a serious daylight source during the day, which lets you run less electric light at midday.
When we scope a kitchen, the first conversation is about how the current kitchen is used and where frustrations or limitations show up, and lighting belongs in that conversation rather than in a finish-selection meeting later. A homeowner who says "I can't see what I'm doing at the stove" has already told you where the task light goes.
Reading Specs That Matter on the Label
Buy from the spec sheet, not the picture on the box. The ENERGY STAR luminaire specification defines an under cabinet luminaire as a fixture installed below an upper cabinet to direct light onto a countertop or desk, and it requires continuous dimming from 100% down to 20% of rated output. It also requires testing and reporting of watts, lumens, chromaticity, correlated color temperature and color-rendering index, with a minimum color-quality benchmark of Ra/CRI 80 and R9 greater than zero.
Spec targets for kitchen under cabinet fixtures
| Spec | Target to look for | Why it matters |
|---|---|---|
| CRI | 80 or higher | Accurate color of food and cabinetry |
| R9 | Greater than zero | Accurate reds, a common gap in cheap LEDs |
| CCT | Stated on label and stable | Consistent white across the run |
| Dimming range | Down to 20% of rated output | Useful evening level |
| Lumens per foot or per fixture | Stated by manufacturer | Compare brightness across run lengths |
| Dimmer compatibility | Approved for the LED driver | Prevents flicker, buzzing and early failure |
Why wattage misleads
A fixture drawing fewer watts may deliver less light. Compare delivered lumens and lumens per watt, and check whether the lumens figure is per foot or per fixture, because a 12-inch bar and a 48-inch bar quote very different totals. For a kitchen, a fixture in the high 80s CRI or better with positive R9 preserves the look of food, wood cabinetry and warm countertops in a way a cheap source of identical brightness never will. Tomatoes and cherry cabinets are the giveaway.
Match the dimmer to the driver before you order
A strip is only dimmable if its driver is, and the wall dimmer has to be approved for that driver. Get it wrong and you get flicker, buzzing, a dimming range that stops at half, or a driver that fails in a year. Buy the dimmer and driver as a pair the driver maker lists as compatible, and write both model numbers inside a cabinet door.
Buying checklist: request the spec sheet, confirm CRI and R9, confirm dimming down to 20%, and confirm the exact dimmer model before anything ships. The 20% floor is what gives you a real evening level without swapping fixtures.
Energy Use, Dimming and Controls Explained
The running-cost case was measured a long time ago and hasn't reversed. A Pacific Northwest National Laboratory demonstration published in 2008 measured a residential LED under cabinet fixture drawing 10 watts against a halogen fixture at 60 watts on its low setting and 105 watts on high, an 83% reduction against the low setting and about 90% against the high one. Those numbers come from a PNNL demonstration assessment of LED residential lighting, and the same work notes LED sources can reach efficacies of 150 lumens per watt or more in specialized applications while integrating with dimming and occupancy controls. Ten watts against a hundred and five, run for two hours a night, is a line item that pays back for a decade.
Three control paths and how each one fails
A wall dimmer matched to the driver is the most reliable option and needs no hub, no app and no network. It works during a power cut the moment the power returns.
A smart plug or hub adds scenes and scheduling. It also adds a dependency: when the hub loses its network, your task light becomes a conversation piece. Keep the driver on a switched circuit regardless.
Voice control through a smart speaker is useful with raw chicken on your hands. It's also the first thing to fail in an internet outage, so never make it the only switch.
The market has moved toward connected control. A Pac Lights lighting compliance guide reports that 90% of U.S. households used LED bulbs, that 63% used mostly LED lighting by 2024, and that approximately 14 million households used smart speakers to control lighting. That trend makes compatibility, local manual override, privacy and failure recovery real buying criteria rather than footnotes.
The smartest system isn't automatically the best system. A dimmable, serviceable install with a physical wall switch will outlast three generations of apps.
Plan for reach, not just for looks
If anyone in the house is aging in place, or the remodel includes wheelchair access, put the switch where it can be reached from a seated position, at the entry to the kitchen rather than behind a peninsula. Confirm that the dimmed evening level still lights the counter without glaring into a seated user's eyes. Then write down the dimmer and driver model numbers and tape them inside a cabinet. Future-you, or the next owner, will need them.
Planning Wiring and Code Checks Before Install
Current National Electrical Code guidance extends GFCI protection to qualifying cord-and-plug-connected equipment in kitchens, not only countertop receptacles, and the NEC overview of GFCI and AFCI requirements notes that the expanded rule can include equipment such as range, refrigerator, disposal and microwave receptacles. Under cabinet lighting has to be coordinated with the circuit and the connection method during remodeling. A licensed electrician confirms the local code that applies to you and whether the installation ends up hardwired or cord-connected.
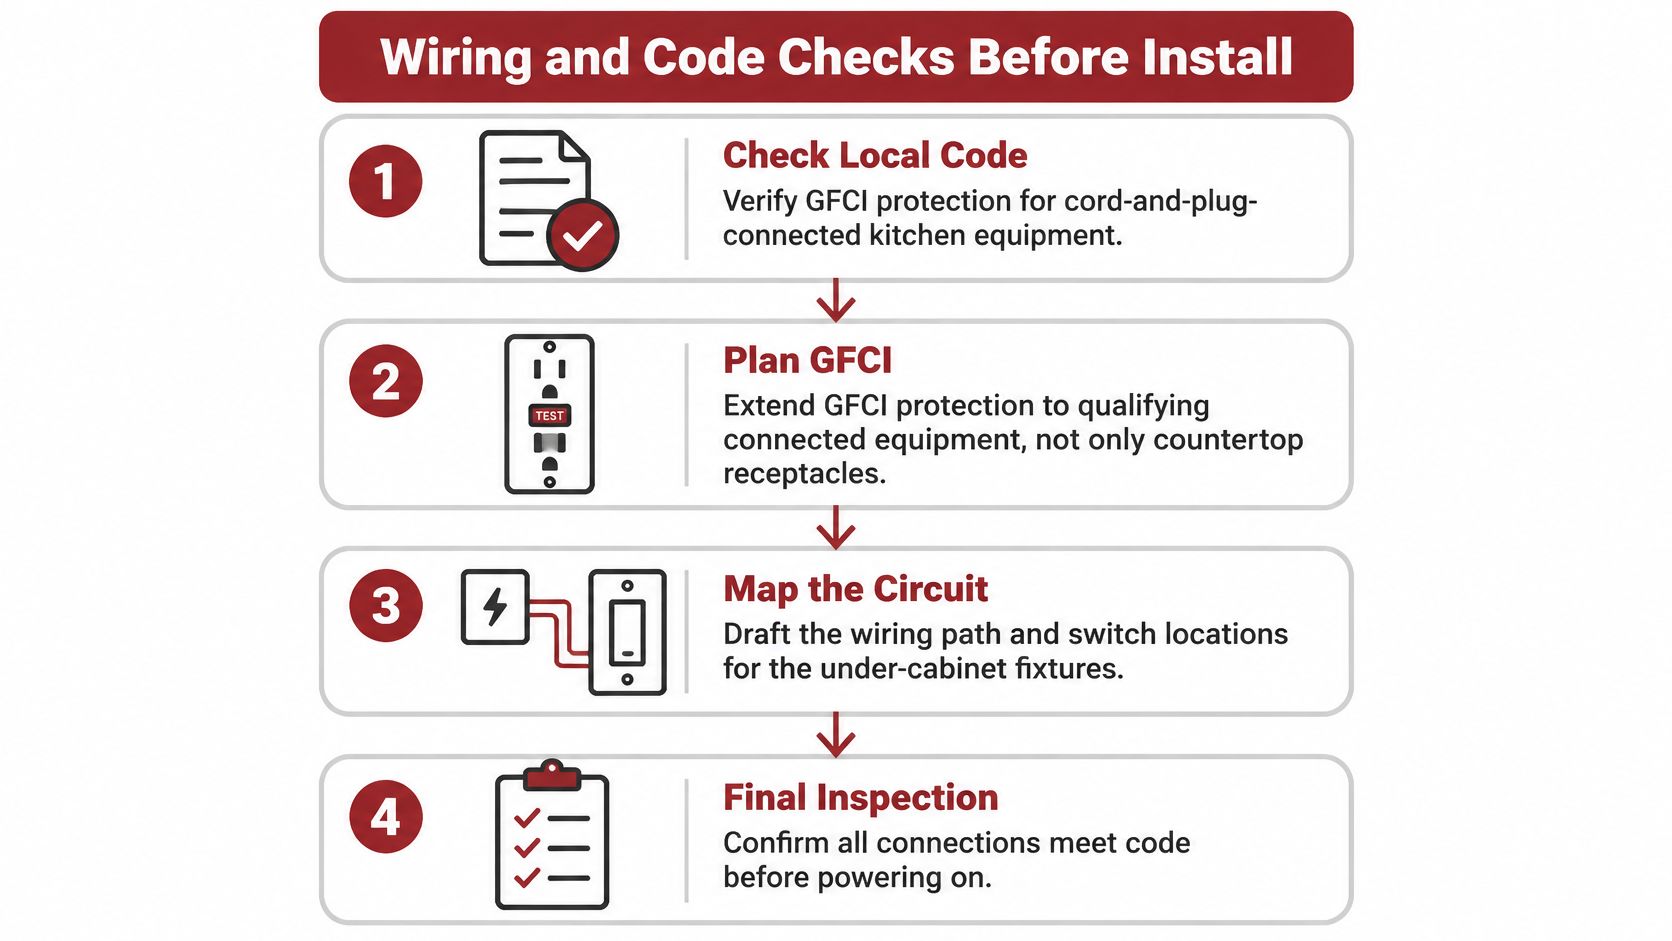
Here's the order that keeps the job out of the drywall stage.
- Map the existing circuits and outlets near the cabinets. Note which receptacle the microwave or disposal uses, because that affects what the electrician can share.
- Choose hardwired or plug-in and write down which option needs a new box. Hardwired needs a feed and a switch leg. Plug-in needs an accessible receptacle and somewhere to hide a cord.
- Confirm GFCI scope and permit requirements with a licensed electrician and your local building department before the wall opens.
- Plan an accessible junction box and driver location in an upper cabinet or a reachable panel. Drivers generate heat and are the part most likely to fail first, so an inaccessible one turns a ten-dollar part into a carpentry job.
- Route low-voltage wiring and ventilate the driver. Leave it room to breathe rather than sealing it behind a screwed-on filler.
- Schedule the rough-in before the countertops and backsplash go on. Late changes mean cutting finished stone or fishing wire behind tile.
Treat the rough-in as a fixed step in the schedule, not a finishing task your installer squeezes in at the end. A standard kitchen remodel typically runs eight to twelve weeks depending on scope, and the lighting feed has to be in the wall in the first week or two of that window. If you want to see how the electrical side of a job like this gets priced line by line, Exayard's electrical estimating software shows the takeoff structure contractors work from, which is a useful reality check when a quote looks unusually thin or unusually fat.
What a good plan looks like on paper is short and specific. A circuit map naming which breaker feeds the lights. A fixture layout with mounting distance from the cabinet front edge and the length of each run. The dimmer model. The driver location, written as "inside cabinet left of sink, behind the adjustable shelf". Hand that to the electrician and the installer and nobody guesses.
Plan Your Lighting Budget and Next Step
Pull the decisions into one page before you talk to anyone about money.
- Fixture type and length for every cabinet run, measured, not estimated.
- Mounting position, with the front-half rule applied and the light rail depth checked against the fixture height.
- Color temperature range for the room, matched to the ceiling fixtures.
- Spec targets from the label, CRI, R9, CCT stability and the dimming floor.
- Dimmer compatibility confirmed against the driver before ordering.
- Electrical plan, including the connection method, the GFCI scope and where the driver lives.
Cost comes from four lines, not one. Fixtures, which is usually the smallest number. Controls, meaning dimmers, drivers and any tunable hardware. Electrician time for new circuits, boxes or a permit. And surface work, because reaching the wiring can mean opening a wall behind the backsplash or cutting into a cabinet.
That last line is why timing decides your budget. Adding lighting while the layout is still being drawn is cheap. Retrofitting a hardwired system after the stone is set and the tile is grouted is expensive, and the difference isn't the fixture.
For a ballpark before you commit, run your numbers through the instant pricing tool so you're negotiating from a range instead of a guess, then bring the result to a design consultation as a starting point. A Custom Kitchen Redesign changes the look and function of the kitchen, from a new layout to appliance upgrades and kitchen storage solutions, and the pricing tool gives an instant online remodeling estimate for kitchen remodeling, bathroom remodeling, basement finishing and tile projects in Portage and the surrounding Kalamazoo area. Bring the checklist and the spec sheet with you.
Trademaster Construction plans kitchen lighting as part of the whole remodel, not as an accessory added after the cabinets are hung, which means the rough-in, the driver location and the switch height get decided while the walls are still open. We work with homeowners across Portage, Kalamazoo and the surrounding communities on kitchen upgrades where the counter is lit for cooking, and on accessible layouts where the switch is reachable and the evening level doesn't glare. Visit Trademaster Construction to see completed kitchens and start a conversation about yours.

